Hi, I’m Lisa Storms and I’m excited to be a guest at Ucreate today!
I have a crafting blog called … wait for it … Lisa Storms [lisastorms.typepad.com]. Pretty creative, right? It’s a mix of crafting from parties, kids crafts, holidays, scrapbooking, cards, home decor, school lunches, sewing, to anything else I can make happier with some glue and a sequin or two. Or fifty. I like to keep it happy and simple, and I love a good pun or anything ridiculously cheesy.
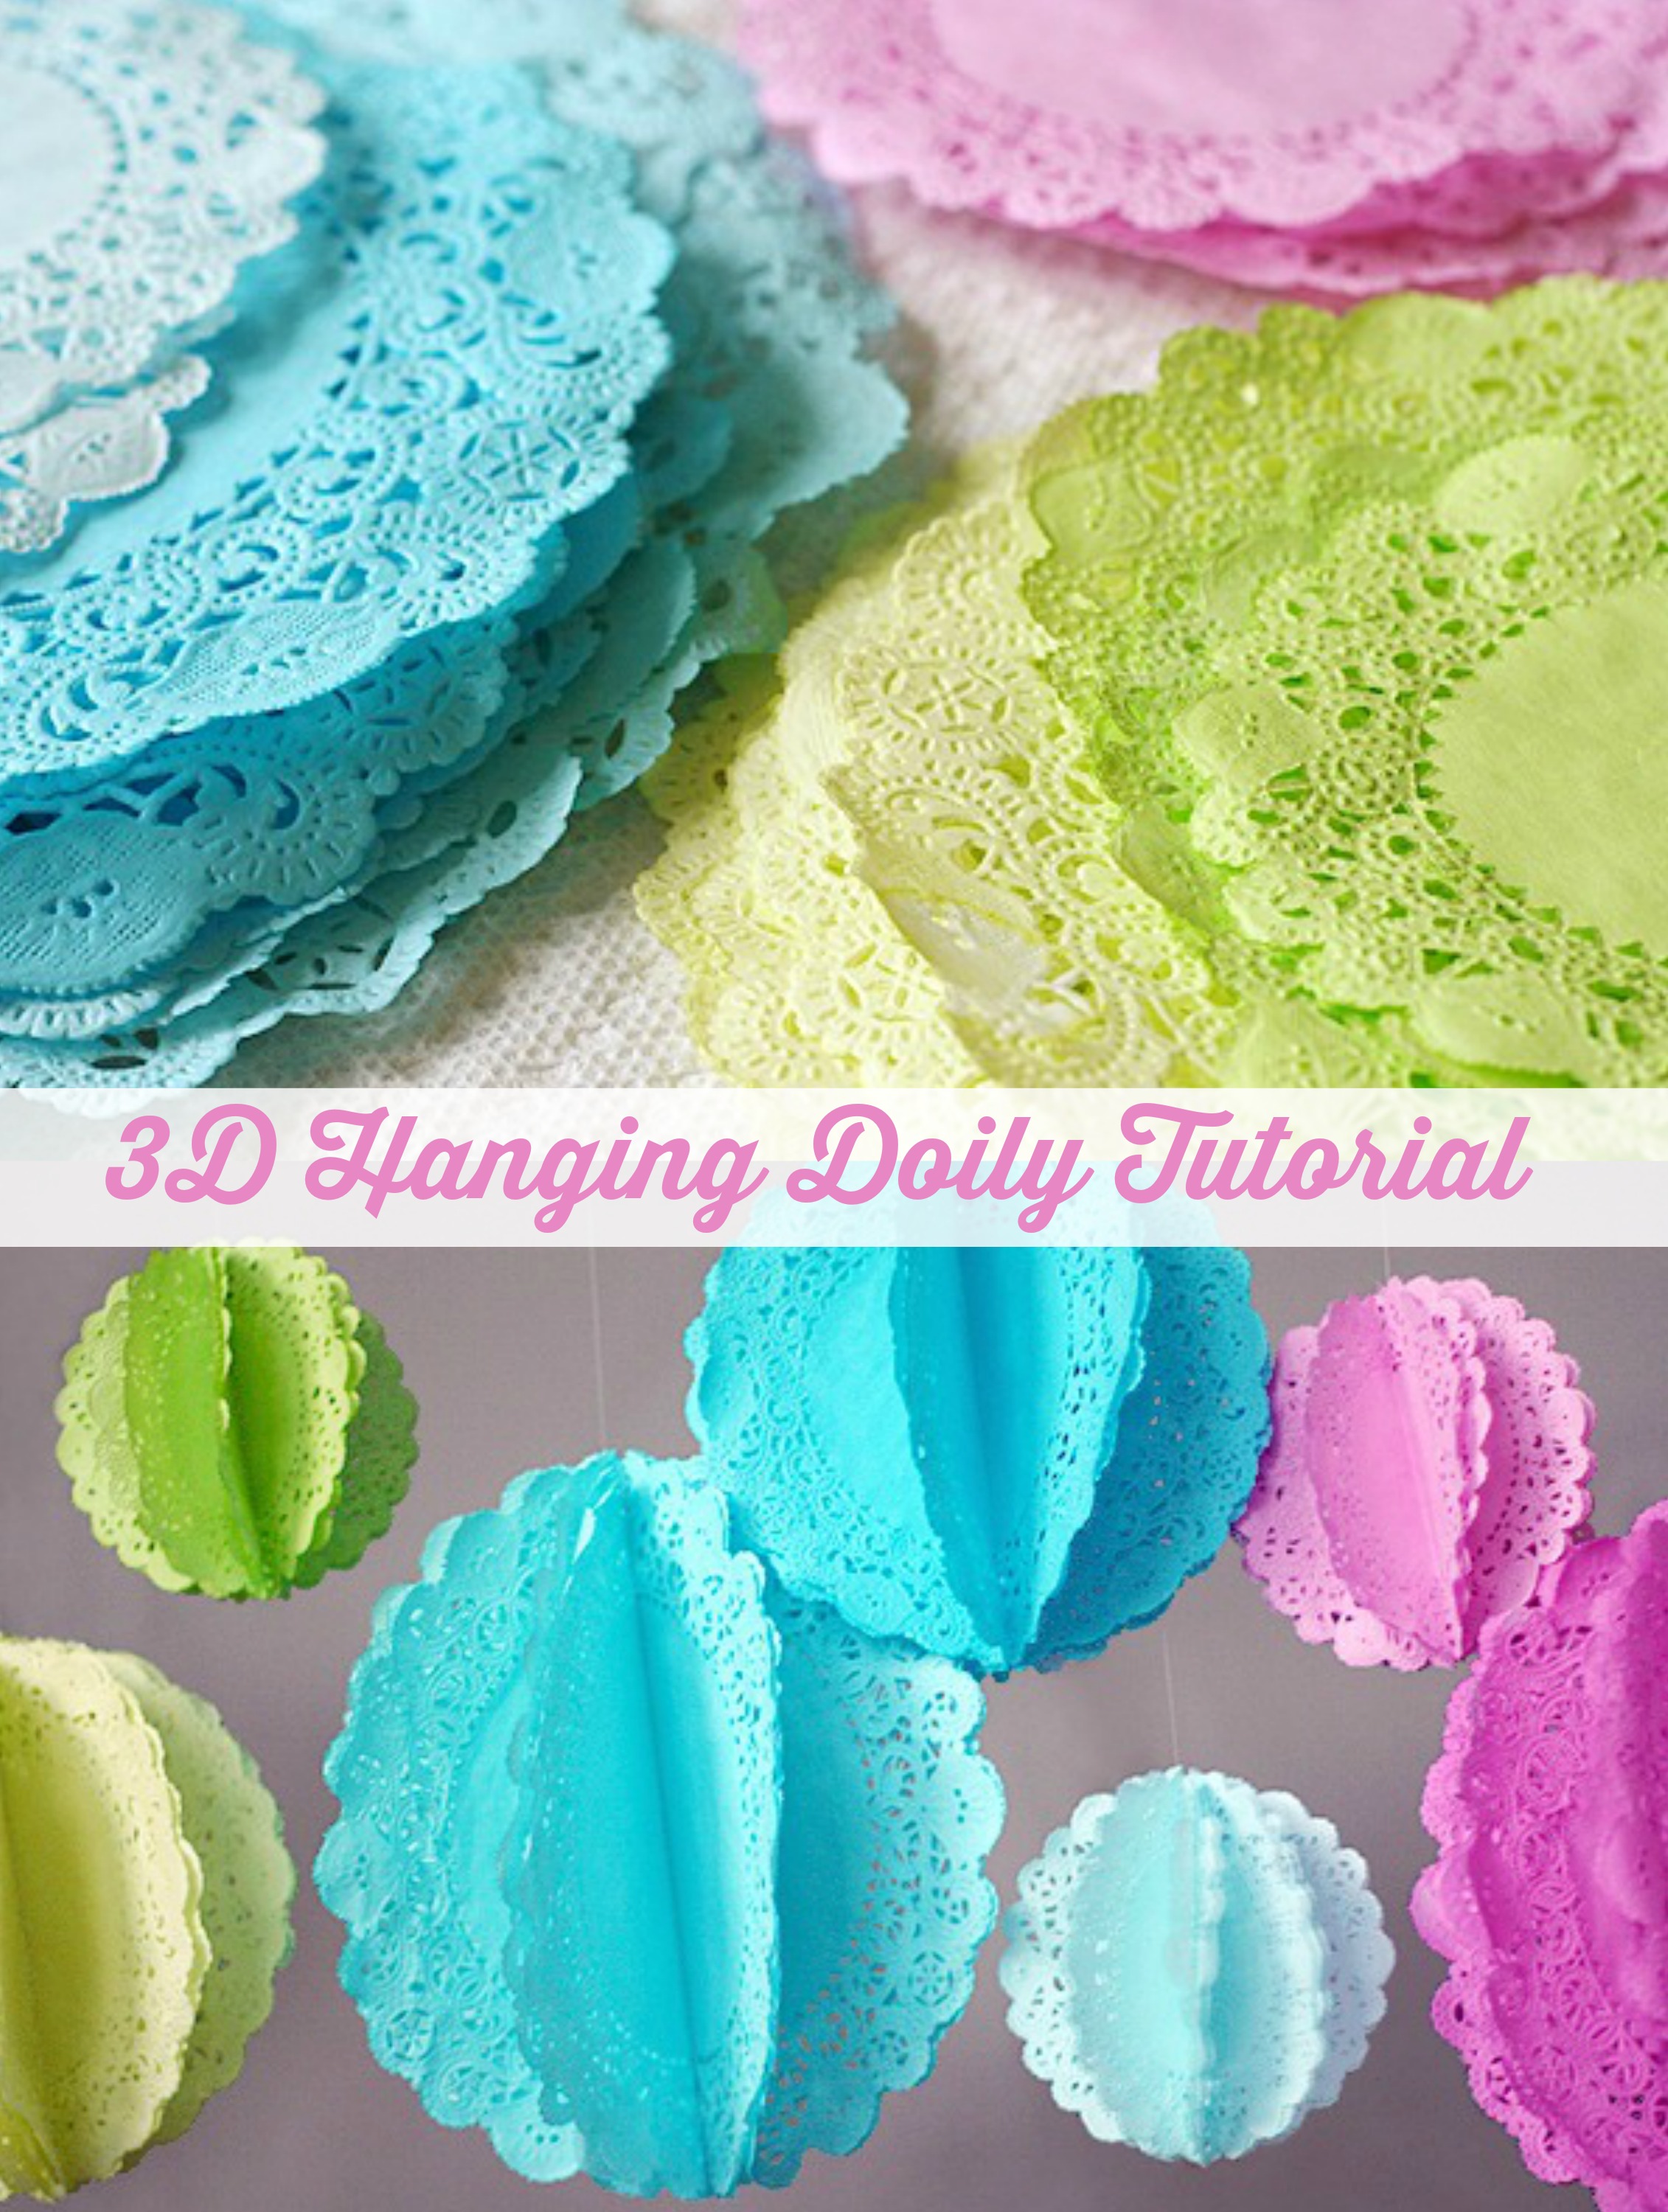
I love parties. I love color and texture. And I really love things hanging at parties with color and texture. I’ve been making 3D doily balls forever but recently thought I’d try making them in different colors. So today I wanted to share a tutorial on making these versatile decorations. And best of all you can use them again and again as they easily store flat.

I purchased paper doilies (Wilton) at the craft store in three different sizes. I figured eight doilies per ball minimum. To dye them, I used food coloring I had on hand … a set called Neon (McCormick) which includes purple, green, pink and blue. Add a thin layer of water to the bottom of a flat dish big enough to fit your largest doily. Add several squirts of food coloring to the water and mix. It will be much darker than the final dyed color. Drop in a doily (you can do more than one at a time with the smaller ones if you work quickly). You’ll want to wear a pair of gloves to avoid very scary looking fingers.

Leave it in for only 10 seconds and carefully remove onto paper towels. Cover with another paper towel and press to remove excess water and lay flat on a clean paper towel to dry. They dry pretty quickly. Just make sure they are flat before they dry.
Once I dyed a set of eight, I added more dye to the same dish to intensify the color to dye a different sized set of eight. And again for another set before changing out fresh water for a new color.

Once dry, fold each doily in half and glue back sides together in a stack with a glue stick. Glue the front and back flaps together to form a 3D circle. Fan out each flap evenly and tie on a string or thread to hang using the holes in the doily (or punch your own hole if you need something bigger). I used transparent nylon (Coats & Clark) so the balls would appear to be “floating”.

And that’s about it. Hang them up to enjoy and then collapse them flat to store for future use. They are easy, inexpensive, and most importantly happy =).

Thanks for letting me play here today, and be sure to stop by my blog [lisastorms.typepad.com] for more of my ramblings and excessive use of smilies =).
thanks for sharing….these are tooo cute & I, personally, love your excessive use of smilies : )
so pretty..thanks for the tutorial
Thanks for sharing this ti with us. I was getteing crazy trying to find these colored doilies here in Brazil. You saved my birthday!
This is perfect for a shower i’m doing this Friday. I am waiting for them to dry now. I can’t wait to see how they turn out! Thanks for the inspiration!
What a super cute idea!!!
Thank you for sharing, this is awesome.