Hi!
I’m Heidi from Sew Craft Create. I have two sweet, little girlies and a serious addiction to all things crafty!
I am so excited to be here today and today I am teaching you how to make zipper rosettes!

What you need:
Zippers {any color, any size}
needle & thread
*hard interfacing
*hot glue gun
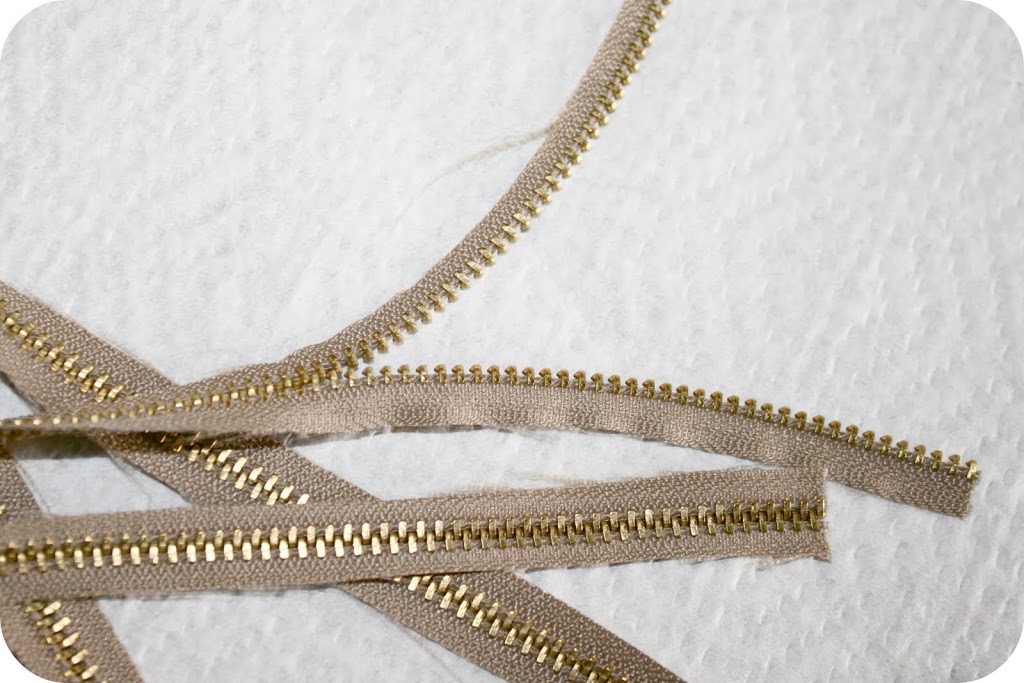
Step One:
Cut entire length of zipper, leaving just over a 1/4 inch on either side.
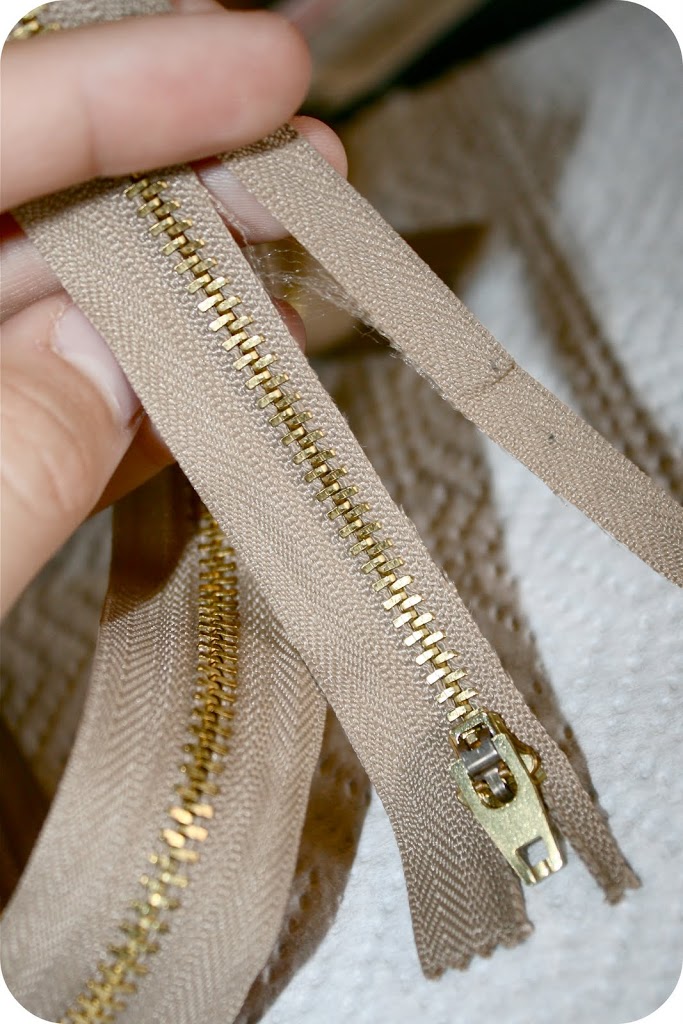
Step Two:
Cut ends off zipper.
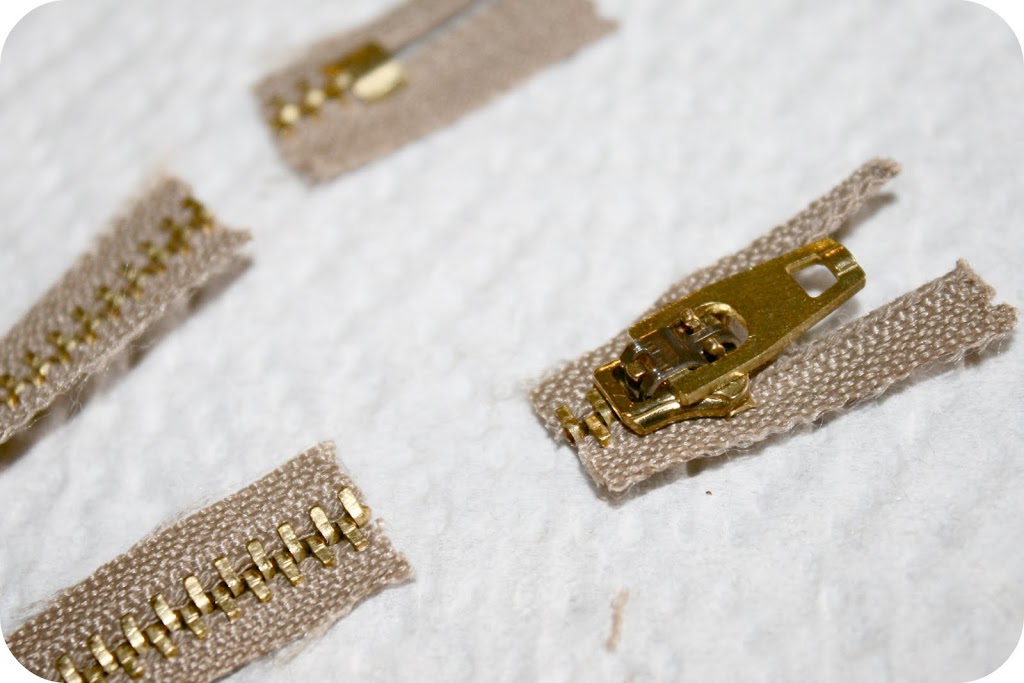
Step Three:
Separate zipper.
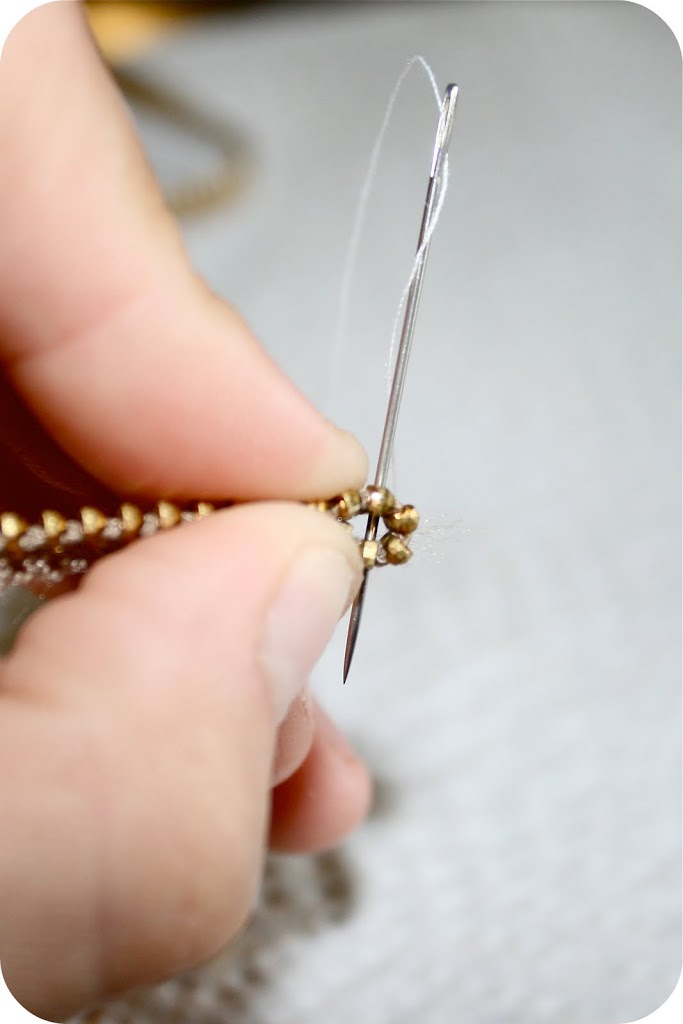
Step Four:
Fold 1/4 inch of the zipper onto itself. Stitch through material {left from step one} a few times to secure it.

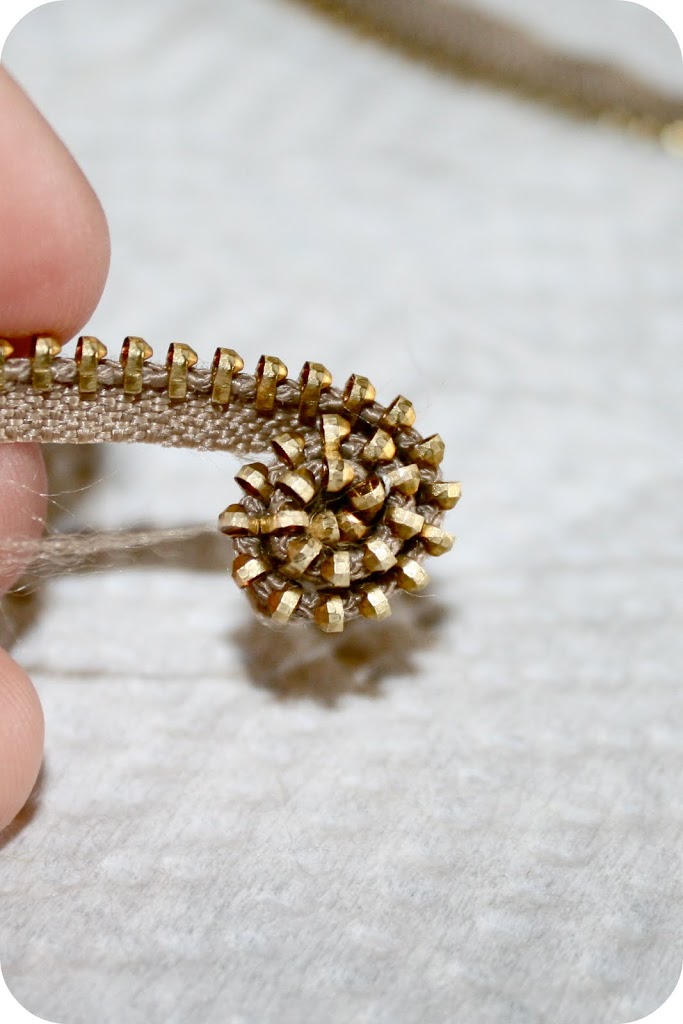
Step Five:
Wrap & stitch (same way) until you have 3 rows.
Step Six:
Insert needle through two rows (the new row and the row directly beneath it).
Insert it from back of the rosette.

Then insert needle from front to back.
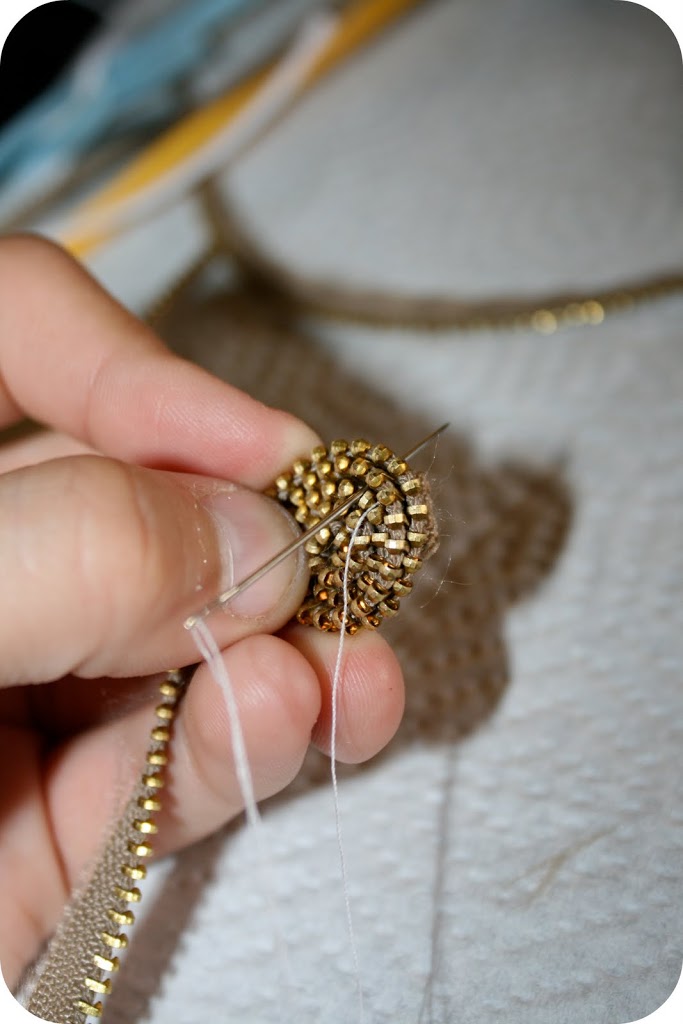
Keep wrapping and repeat step six every 1/8 inch until done.
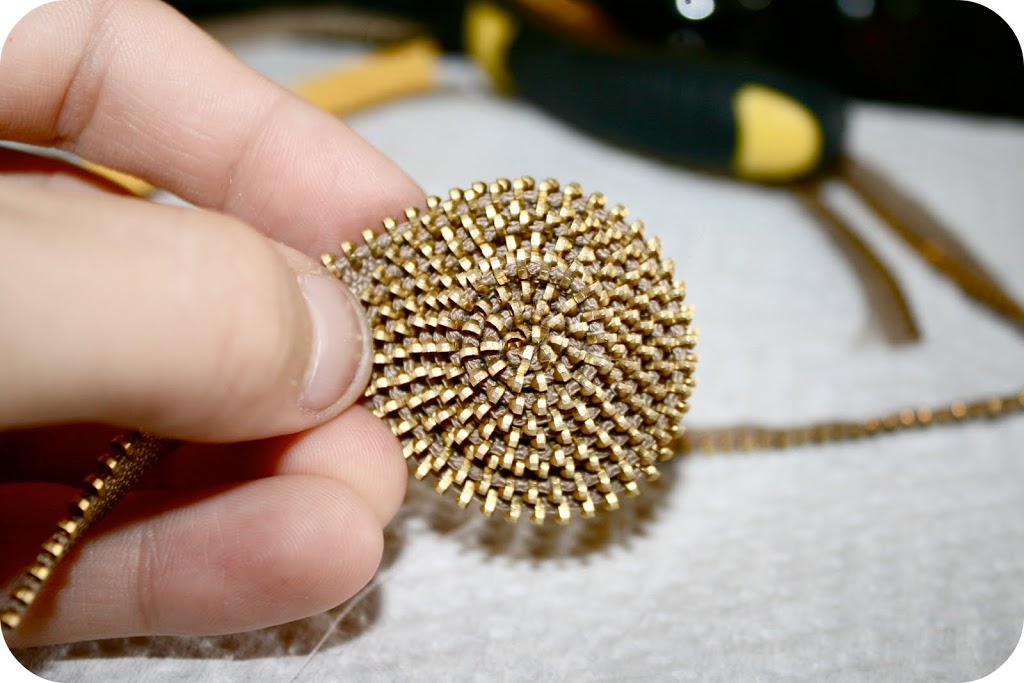
Step Seven:
Once zipper is desired size, cut off remainder. Stitch several times to secure it.
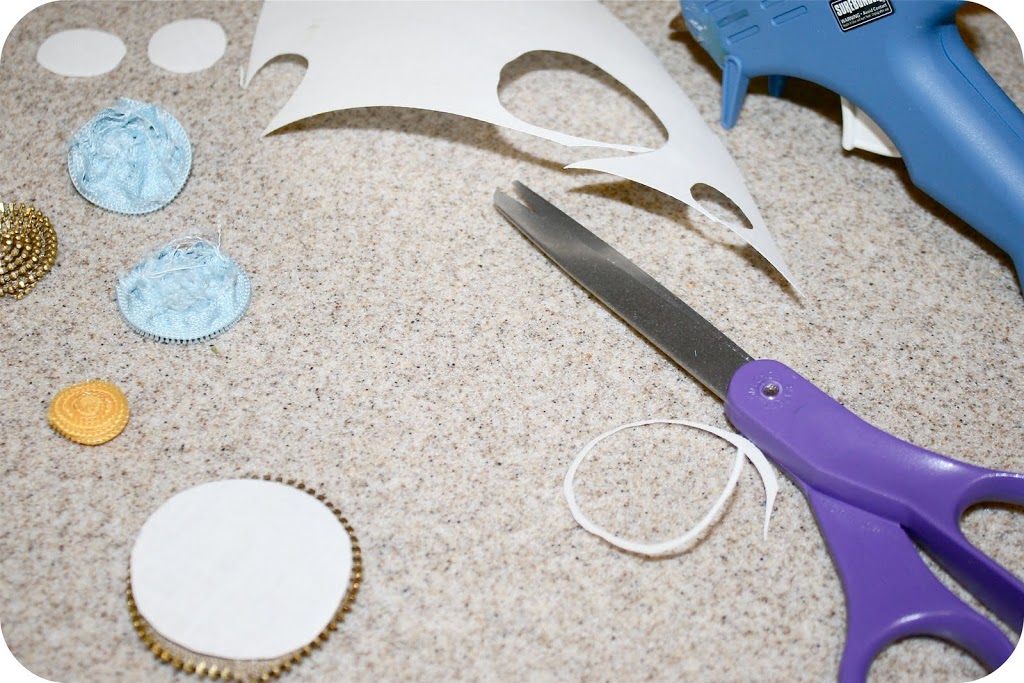
*Step Eight:
Attaching to hard surface: Cut extra-heavyweight interfacing to fit rosettes. Hot glue to back of rosette.
Attaching to soft surface (i.e., fabric): Skip step eight and sew directly onto fabric.
All done!
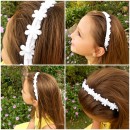
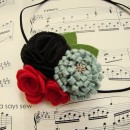
Attach to anything!
Shoes, bracelets, headbands, earrings, necklaces, frames, the possibilities are endless!


so cute! I love made by heidi!
That headband is SO vintage and CUTE!!
So unique and beautiful!
The gold one almost looks like it could be vintage, which I like.
How cute and creative! I’m especially loving that headband.
Those are amazing! Way to repurpose!!!
I love these!! Thanks for the tutorial:) I need to start looking for some zippers!
Oh my gosh, I had to scroll through this a few times to believe that those beautiful flowers were made from zips. This is incredible 😀
It is beautiful and unique. Thanks for sharing! 🙂
I love it! Those look so cool!
What a creative idea! Thanks!
These are amazing. Thanks for the tutorial!
These are awesome, I’ve got some shoes I want to liven up with a few rosettes now! I included them in my friday favorites this week. Have a wonderful weekend!
What a great way to use up those broken zippers.
Insanely creative idea!!!! You rock.
bellissimo ,veramente originali grazie del tutorial.Ciao mariella
so unique…luv it. i’m always looking for things that others won’t have. might have to seriously think about making these!
Gorgeous. I think silver and gold colour are great for this creation. Thank you for inspiration!
Adorei a idéia! Obrigada. Visite alegroartes. Bjos, leíse.
love the shoes!
The gold one looks really beautiful
Looks great! I’ll definitely try it!!!
Really cool! Thanks for sharing!
This is wonderful. I have just ordered 50 zips from ebay so that i can try my hand at making these. xxxx
These look easy and fun! I want to make one and use it as a pendant for a necklace. Thanks for the idea.
thank you for the tutorial it is easy to follow and elegant at the same time I know my daughter and granddaughters will love this. can’t wait start making it.
thank you for sharring with us.