Hi! My name is Amy and I am really excited to be a guest blogger here at U Create. Thanks Kari! You can normally find me at The Idea Room. I am a stay at home mother of five and I love to create things. I use naptime, evening and sometimes the early morning hours to work on my projects.
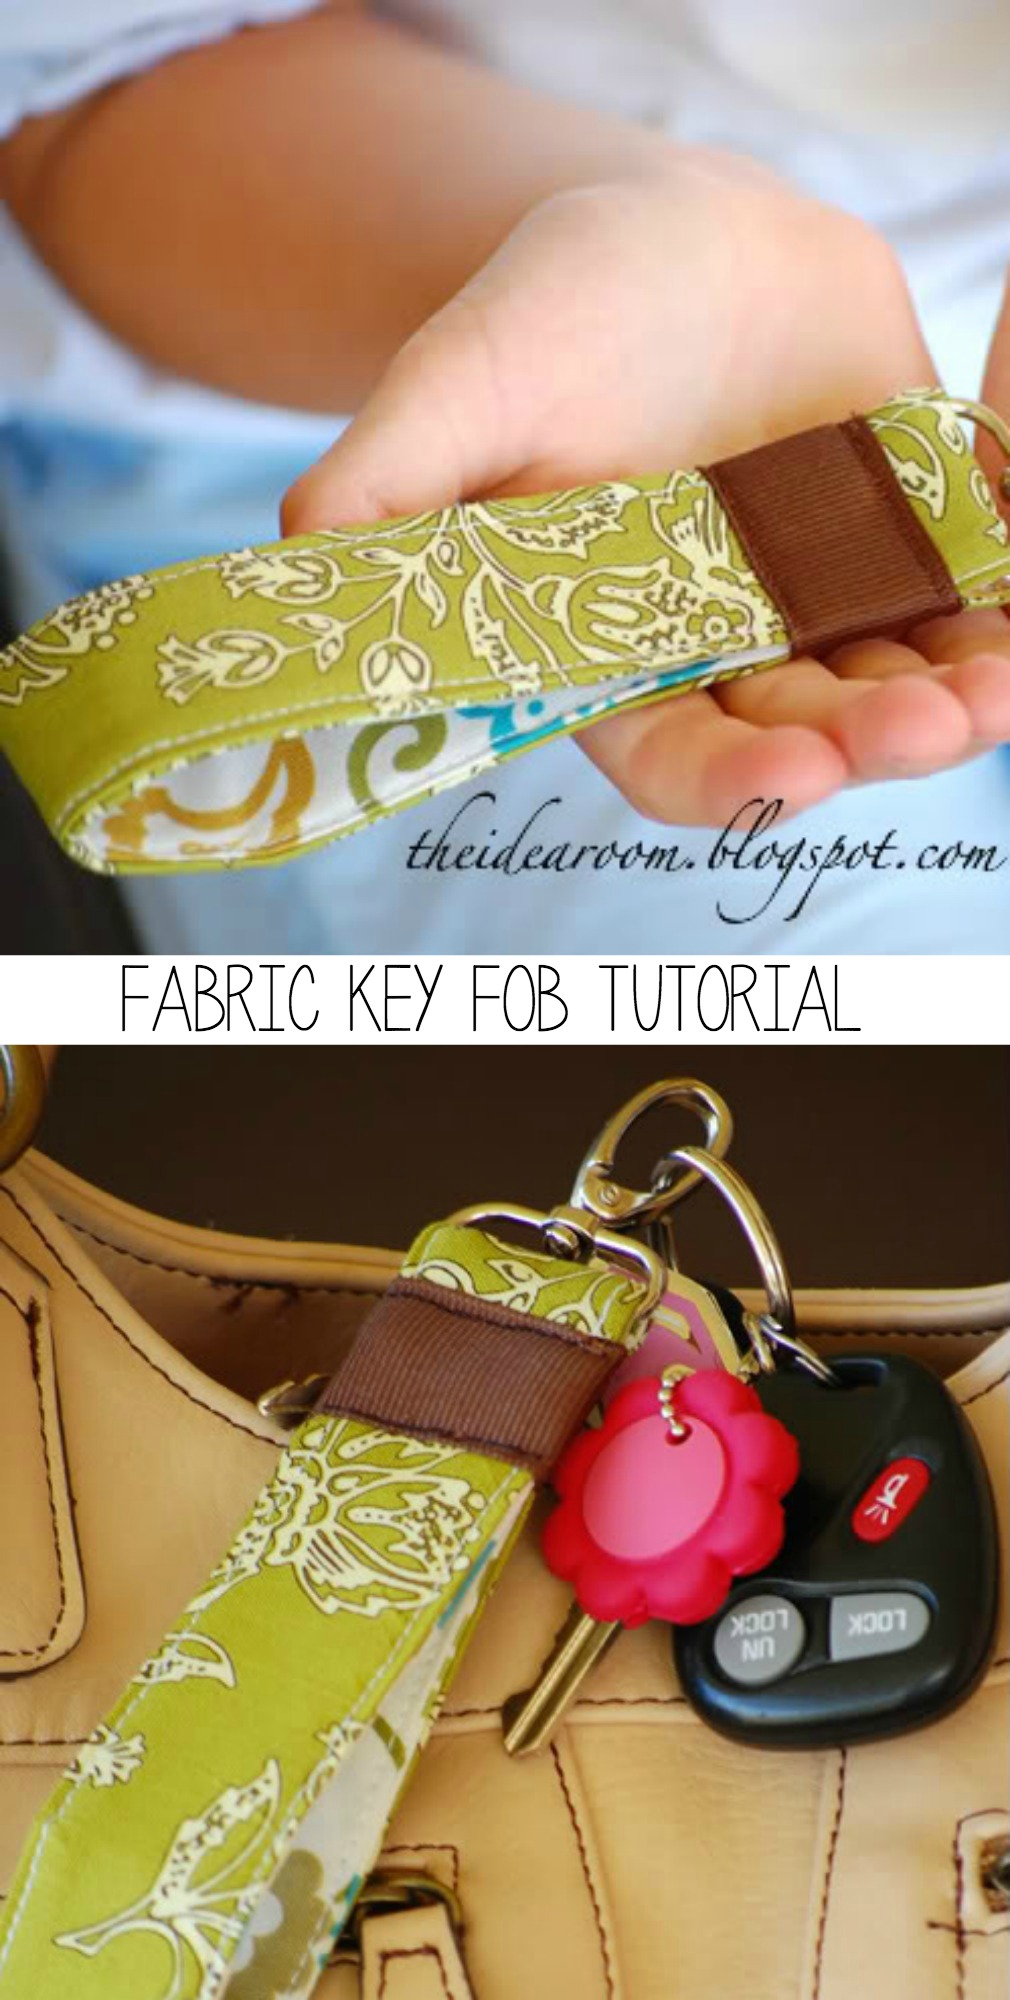
Today I am going to show you how to make your own fashionable key chains. These are great because they can be worn on your wrist while juggling kids and groceries and they make digging through your diaper bag or purse to find your elusive keys a thing of the past. Let’s get started.
Fabric Keychain Tutorial
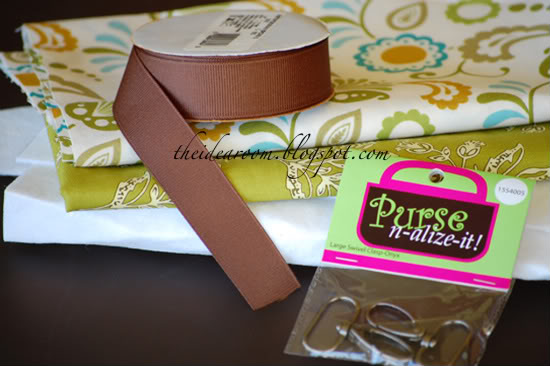
Supplies:
- 2 coordinating fabrics
- 1 strip of fusible interfacing (I used Pellon 809 DecorBond)
- 1 purse strap clip (I found mine at JoAnn’s Crafts)
- 4 inches ribbon (mine was 7/8 inch width)
- matching thread
First, cut your fabric so that you have a strip of each material that measures 2.75 (2 and 3/4) inches by 11 inches. Cut 1 strip of your fusible interfacing to measure 1 inch by 10.5 inches.
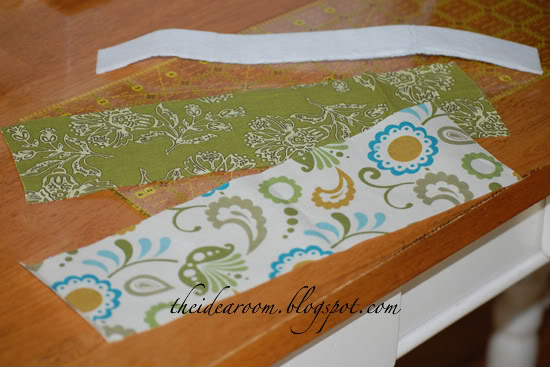
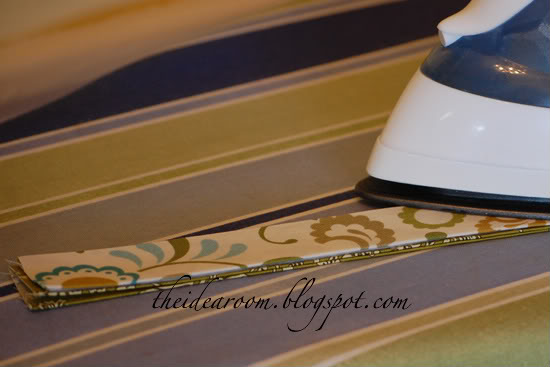
Iron both strips of coordinating fabrics a 1/4 of an inch down both sides with the right-side of the fabric facedown on your ironing board.
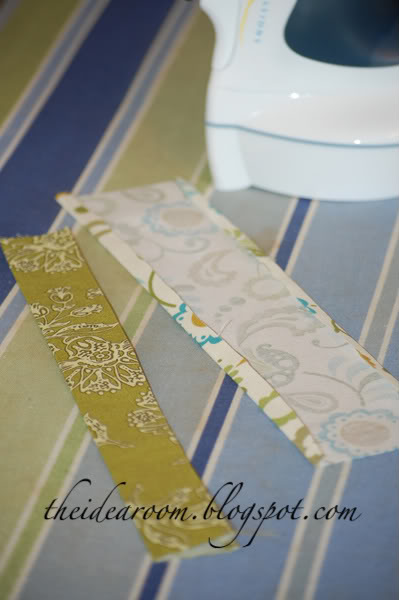
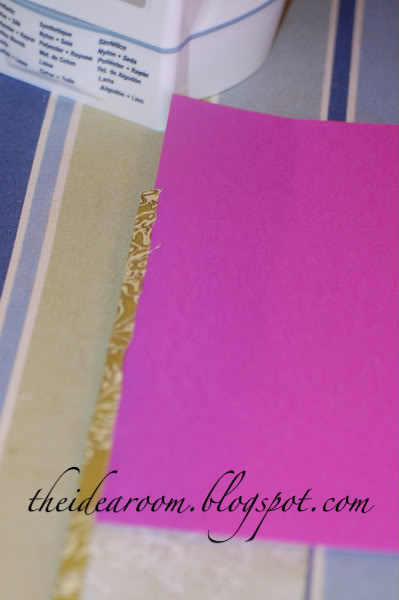
I use a peice of cardstock paper to fold the material over to give me a nice even hem line.
When both fabrics have been ironed, fold the material in half length-wise and iron. Be careful to match the edges up nicely.
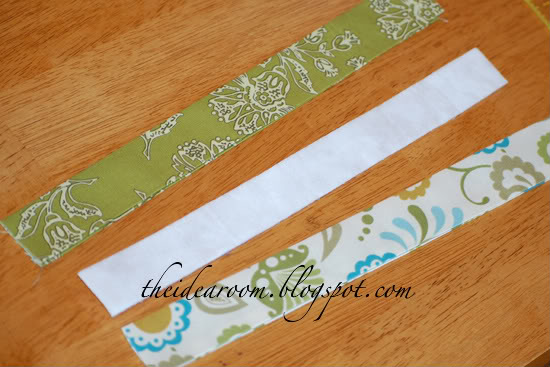
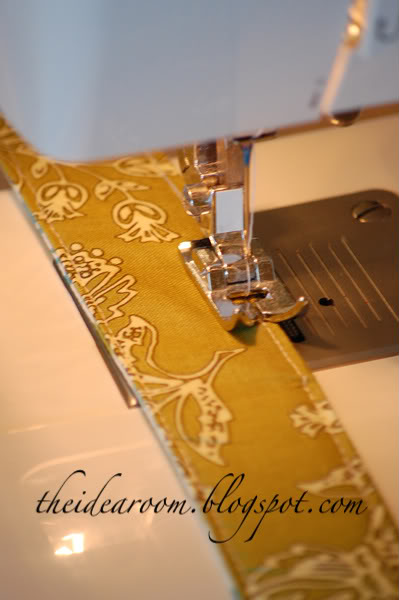
Take your strip of fusible interfacing and place it evenly between your two coordinating fabrics. I make sure the folds of each ironed fabric are on opposite sides.
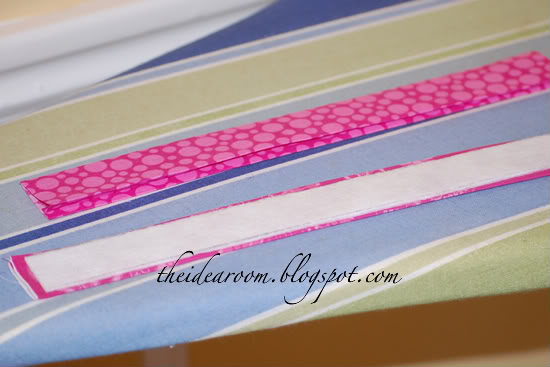
Iron these together. This will temporarily fuse the top and bottom materials together so they are easier to sew, and will make your key chain a little sturdier.
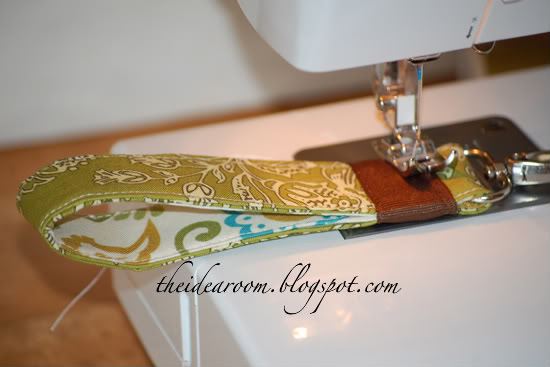
Now sew along both edges of the key chain. I sewed mine fairly close to the edge which was about an 1/8 inch seam.
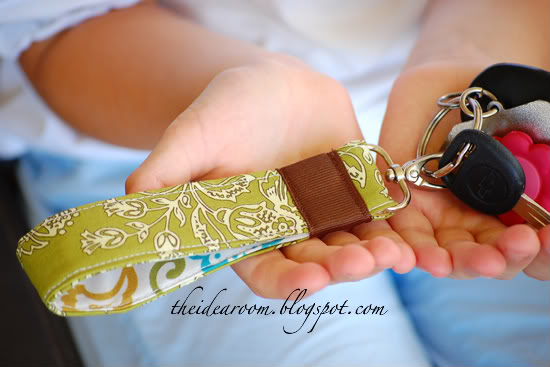
Now, take your purse clip and slide it onto the key chain. Be sure that the clip is on top of the material you want to be on the outside of your key chain. Place the two raw edges so that one is overlapping the other one about 1/4 of an inch (or to the fusible interfacing).
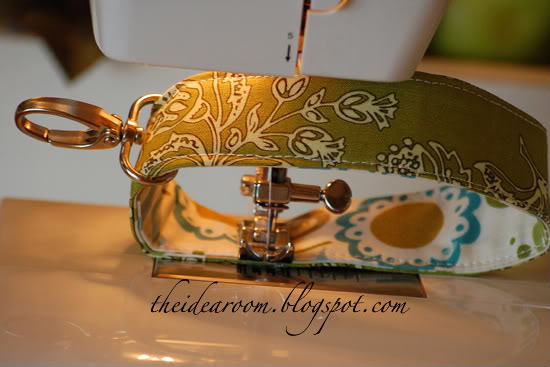
Sew these together using a zig-zag stitch several times back and forth so that it does not come apart.
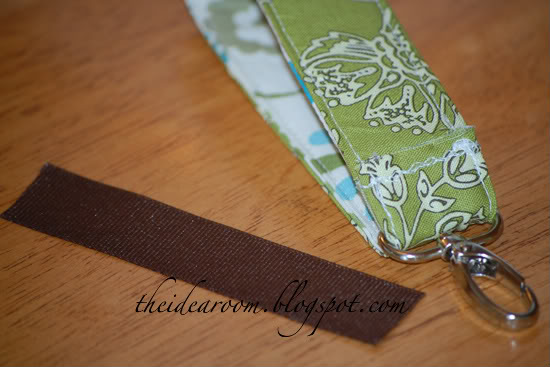
Take your strip of 4 inch ribbon and burn the edges with a lighter or a match to seal it so they do not unravel. Do this very carefully! Move the purse clip around the key chain until the seam is about 1/4 to 1/2 an inch above the clip. Take the ribbon and wrap it around the area where the two ends have been sewn together. Tuck both ends of the ribbon to the inside of the key chain.
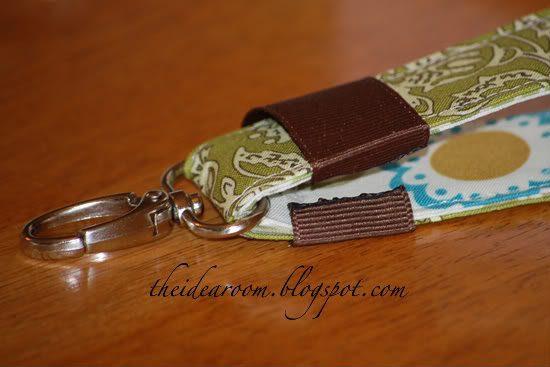
Pin in place and sew the top and bottom of the ribbon. I changed my thread color so it matched the ribbon and was less noticeable. Remember to reinforce your seam. I went over it twice so it will hold up.
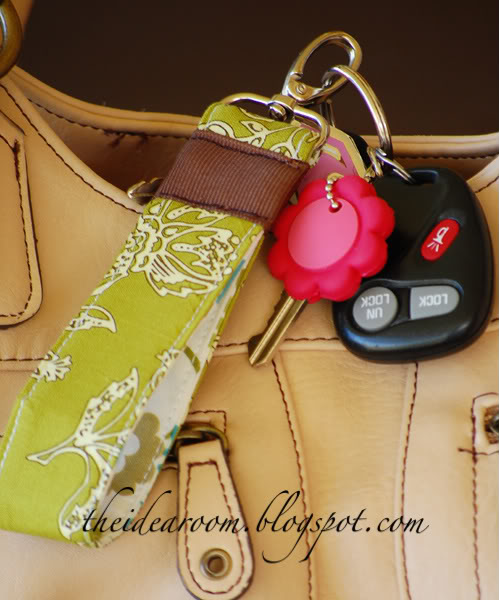
And there you have it…a cute and functional key chain. Thanks again Kari!


SO, SO, CUTE! This will definitely be going on my “to-do” list!! Thanks!!
Love it!
These are great! I’ve made the ones with different key attachments, and the hardware doesn’t stand up. This way would totally fix the problem!!
Thanks!
Very cool! thanks for sharing!
Amy, this tutorial and photos are simply amazing!! Thank you so much for sharing this with Ucreate.
So cute! Thank you for the tutorial!
I love this idea. I am going to try to make one during naptime today!
Love This – thank you for sharing how to create this. These will be great holiday gifts !!!
Awesome idea, and easy too. Oh darn, I have to go to Jo Ann’s again. 🙂
SUCH a well done tutorial. I can’t wait to make these for stocking stuffers!
Cute, cute! I’m definitely thinking back to school teacher gifts here!
Just stoped by from the Idea Room. I’m so embarrassed that this is my first time here. Can’t wait to look around.
Awesome!! These would make great gifts!
Posted a link to your tutorial on Craft Gossip Sewing:
http://sewing.craftgossip.com/tutorial-fabric-keychains/2009/08/14/
–Anne
Thank you for this tutorial!! I’ve been seeing these all over & knew they had to be pretty simple to make, all I needed was these step-by-step instructions.
I love that! I am so making that one right now!
-Stephanie
somewhatsimple.blogspot.com
just finish my first one, how cool are these. I do think (its just my opinon) if you made them about 15-16 inches long- you could slid thme onto your wrist for those who dont have diaper bags or purses. Sometimes I just pack a wallet.
I love these and plan to make them for everyone I know for birthday and stocking stuffers.
Thany you a million>>>>>>>>>
smillerinidaho
Thanks so much for the great fabric key chain tutorial. I made one this morning and your directions were just perfect, I had no trouble at all. Now I want to make a few more since they are so cute and easy. I might make them a bit bigger since I want to make one for a guy. I gave my first one to my daugher and now will have to make one for me, great way to use up scraps too. Love it!! Thanks again. Terri
This is AWESOME! I added it to my to-do list on my blog. 🙂
craftrookie.blogspot.com
THank you for sharing this. This is going on my ‘handmade Christmas gifts list’ this year. And gives me an excuse to buy fat quarters.
I love you for that!
This tutorial and photos are simply amazing!!!!!This is going on my ‘handmade Christmas gifts list’ this year…. thanks for sharing…
—
Reenee
Get the best FREE offers on the Best Home security Systems
This is the easiest tutorial yet. Can’t wait to try it and make them for Christmas!!
I made one of these (to the best of my new crafters ability). I just love it! Thank you for sharing, I posted it on my blog!
http://sewcuriousity.blogspot.com/2009/11/my-first-sewing-project-with-my-sewing.html
I made one. I had to change up how I did it a bit. It was a bit too much fabric for me to try and sew through without it bunching up weird. Anyway, here it is. I love it!
http://bigbadwool.blogspot.com/2010/02/finally-i-will-be-able-to-find-my-keys.html
I made one. I had to change up how I did it a bit. It was a bit too much fabric for me to try and sew through without it bunching up weird. Anyway, here it is. I love it!
http://bigbadwool.blogspot.com/2010/02/finally-i-will-be-able-to-find-my-keys.html
Just made one of these and ooohhhhh….they are sooo cute (and easy too!). I love this tutorial! I’m going to make a bunch for teachers appreciation, b-day gifts, Girl Scout leaders and to give to friends. Excellent idea and economical for gift giving too. I might try making a few just a tad longer so that they can be worn on your wrist, that’s my only suggestion. 🙂
THANK YOU for the tutorial!!
Yay! I finally made this project after dreaming about it for weeks. Here is mine:
http://falling-apples.blogspot.com/2010/05/another-use-for-chicken-fabric.html
Thanks for sharing such a fun idea!
love it!