


Sharpen your scissors by cutting sand paper.
Place a little bit of Vaseline to the end of your glue gun to get rid of those long glue strings.
Soak your paint brushes in fabric softener or hair conditioner for 10 min…cleans right off!

Recycle large plastic lids by using them for a painter’s palette or cutting them up for stencils.

Need to create a large pattern? Use newspapers!
Keeping a magnet close by makes picking up those sewing pins a cinch!
Use cereal boxes for sewing templates.
Break up some styrofoam to create snow for craft projects.
Keep those cardboard boxes! Cut & cover with patterned paper to make a mini album, cover with art paper and use as a canvas, and I always use them to eliminate a mess while spray painting!

Use cereal boxes as fabric bolts.
Use a metal knitting needle to hot glue something…saves the fingers from burns!
Give life to old tape by microwaving for about 10 seconds!
Re-use old containers such as Pringles chip tubes to store pipe cleaners or paint brushes.

Turn a King size pillow into TWO throw pillows {by The 36th Avenue}
Get rid of stray threads by using a bristle brush.
Paint popsicle sticks with your home paint colors…carry in your purse to match colors easily!
Cover craft tables with cheap, dollar store tablecloths for easy clean-up!


oooooh i am going to try to sharpen my own scissors! thanks for the tips!
Thank you for the tips, great ideas. I think my tip would be to re use old containers such as Pringles chips tube or Clorox wipes container for storage of paint brushes or other art utensils.
Awesome tip! Yes, those Pringles cans sure come in handy!
I had no idea that sand paper sharpens scissors… wow… I’ll give it a go.
My biggest tip is to never throw away any material. All scraps can be made into something else no matter how small.
I agree Rebecca! So many fabric scrap projects to make!
I also use wax paper to lubricate my scissors.
Empty Pringles Cans are great for Pipe Cleaners because they don’t fall out the other end. 😉
Love this tip Kendra!
great tips!!! I use a couple of those but some are new to me so thanks!!
Ooooo. I’m going to try the sandpaper idea. Thanks!
Jana
Excellent Tips!
I use so many of these! I’m glad you posted them.
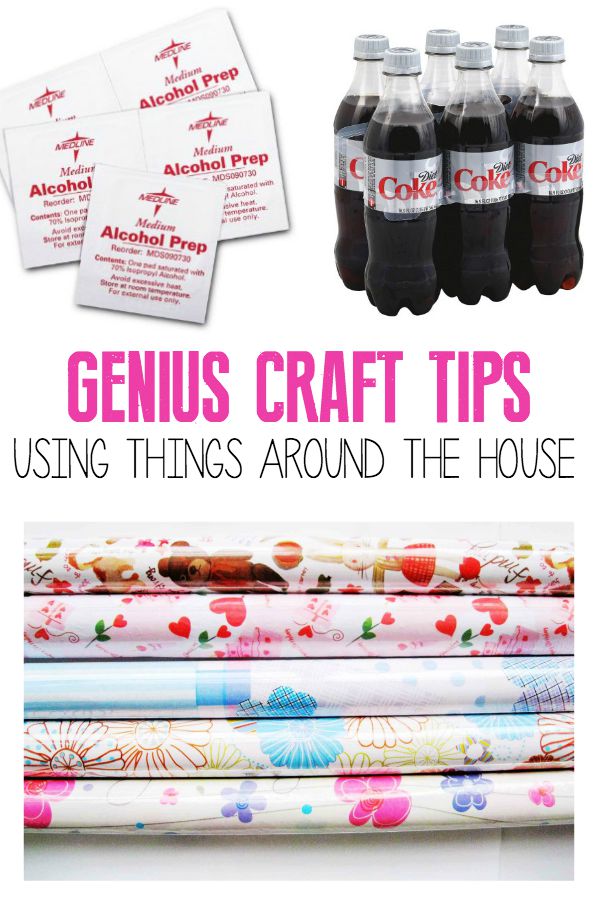
– When cutting adhesive strips (ie. Tacky Tape) scissors get gummy, don’t wash them with water – they’ll rust, so, I use alcohol swabs or pour some on a q-tip.
– GooGone will take crayon off walls.
– Small ponies or elastic bands can be wrapped around spools of ribbon or tulle.
– For tutus, cut a rectangle of cardboard the length you want your finished strips. Wrap your entire length of tulle (I use the ones from the wedding aisle) and secure with a rubber band at each end. Cut along one of the wrapped edges – you now have all 6 feet of tulle cut to the perfect length for a tutu! Saves SO much time.
Whitney,
I hate when my scissors get gummy…thank you!
Goo Gone cleans crayon marks?! Good to know!
I LOVE the tutu idea! That could be used for ribbon, too. It seems like I do the flowers for every wedding I know about, so I will DEFINITELY be using that one to cut the ribbon streamers!
I use a plastic divided plate for my craft paints and mod-podge puddles. If I have any extra mod-podge I mix it into the paint sections… when it’s dry it all peels right off.
What a great idea…thanks for sharing!
I’ll have to sharpen my scissors, that’s a new tip for me!
Mine would be to use old cereal boxes (or any food box that’s cardboard) to cut out patterns. I use it for quilt blocks all the time. It’s usually thicker than card stock and it doesn’t cost you anything extra.
I don’t think I’ll throw cereal boxes away anymore!!
Great tips!
The glue gun tip is really going to come in handy! Love it!!
These are really great tips! Thank you for sharing them. Almost all the these are new to me – especially the scissor sharpening. Nice! I love being able to re-use things.
You rock, Kari!
Thanks, these will be so helpful. I guess now I need to clean the craft room so that I can use these tips on a project:)
LOVE all the tips! Thanks Kari 🙂
great tips!
old muffin tins are great to hold paints for small children
empty toilet paper rolls:
make great bases for pin cushions, or create ‘rain sticks’ with beans and rice in them or cut a slit and they’ll hold fairy lights or garland without it tangling,
Yes! Gotta love muffin tins and cardboard rolls!
Fabulous ideas! Here are a couple more:
Re-use prescription bottles for tiny craft goods-needles, beads,jewelry parts etc.
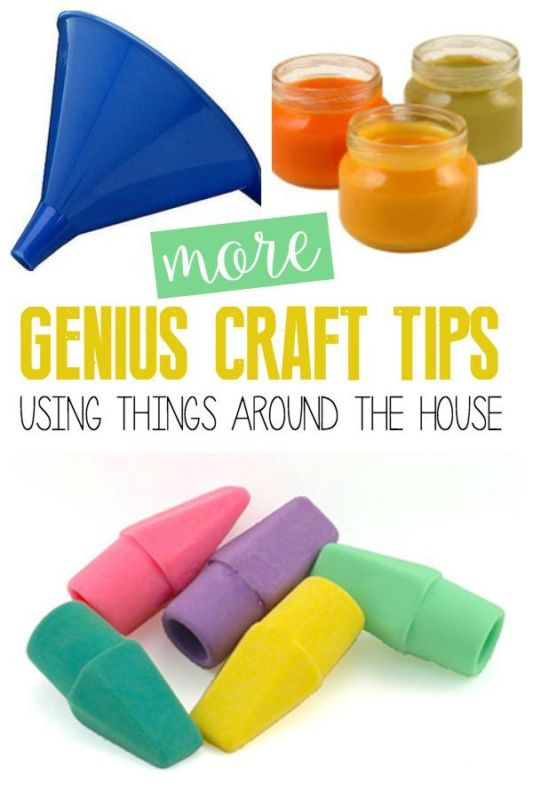
Whenever you paint a room, put a small amount of the leftover paint in a small, airtight jar (baby-food jar etc) and store it somewhere in that room-then you can instantly paint over nicks or scuffs on the wall when they happen!
Make sandpaper last 3x as long by putting duct tape on the back of it. Makes it stronger!
Tiny “scrunchies” or ponytail holders are great for keeping bobbin/spool thread from unwinding when not in use.
Empty dental floss containers (and empty pill bottles)make great little emergency sewing kit containers. Put in a needle, a small cardboard square with some plain black,white, and tan thread wrapped around it, a couple of safety pins and put one in your purse, your car, your diaper bag.
Quin, I LOVE all of these ideas! I would never think to put duct tape on the back of sandpaper! awesome.
I love the floss container-as-travel sewing kit idea submitted by Quin!
I used an “Ice Cubed” gum container, but with the same basic idea as Quin’s, to make a mini-sewing kit for my purse. I also included a seam ripper to use to cut the threads when needed.
I use prescription bottles to hold bent, broken or dull needles and pins. Then when it fills up I can toss in the trash and not worry about them tearing a hole in the bag or getting stuck while carrying out the trash.
These are great tips! I’m totally doing the vaseline on the tip of my glue gun. Those strings drive me crazy!
Here’s one more tip:
Punching through sandpaper will also sharpen old punches. Punching through waxed paper will lubricate them when they get a little sticky.
Thanks for the tips on old punches…great ideas I will definitely try!
Also use tin foil to resharpen your punches.
Thank you for these great ideas! I linked to your tips in today’s scrapbook news at http://exm.nr/9mDE4U 🙂
Thanks! I’ve never heard of sharpening scissors with sandpaper…what a great idea!
LOVE THESE!!! New to the crafting world and these helped TONS! The glue gun one especially! I dip my exacto knife in Vaseline. Helps to cut through my contact paper.
Really? Vaseline is so useful for so many things!!
That was great! Now for my tips:
If you drink sodas from 2 liter bottles, cut the bottom off and use it for small amounts of paint.
I have steel (exterior) doors in my house, and one of them is in the room where my crafts are. I use magnets to stick up large sheets of paper, pattern pieces, etc. I even made a keychain with a magnet inside, so I stick my keys directly to the door and never have trouble finding them.
I hot-glued some golf tees to a board to store thread spools. (I actually had to go buy a bag of golf tees to do this, we don’t golf.)
Someone gave me a mattress pad for a double bed. It was practically brand new, but we don’t have a double in the house. I’ve been cutting it up a little along, and using it for stuffing things, so I don’t have to go out and buy a bag of fiberfill.
I have a chain hanging on a hook from the ceiling, then a few “S” hooks hanging from that. I use handled paper bags to store things in, so I can just hang the handles on the hooks. Vertical storage!
I keep a funnel with my beading supplies in order to easily pour the beads back into small plastic baggies.
Other great containers to repurpose: Business card boxes, spice tins, lids from cases of paper make great drawer-type storage.
I have a broken baby gate I can’t wait to hang from the ceiling in my craft room (horizontally) and I’m going to attach more “S” hooks to hang things like scissors from. Like a pot rack, but for tools! I would think a wire cooling rack would work great, too!
Hang up an over the door shoe rack (the kind with clear pockets) to store just about anything. Ours is on the bathroom door with hair brushes, cotton balls, etc. inside it.
I have a small, weak magnet stuck to my sewing machine to hold a threaded needle for when I need to hand-sew something.
When you need to hand-sew something, if your thread keeps tangling, get a bar of soap and run the thread across it, holding it down with your finger. The thread won’t tangle anymore, and it’ll wash out easily.
Wow Samantha!
Thank you so much for taking the time to post these!
Golf tees? What a genius idea!
Soap for tangled thread? Gotta try it!
Thanks again for sharing!
We always kept a chunk of beeswax with our sewing kit to run thread over it so it won’t fray. Makes it easier to thread the needle.
Hi all,
my tip is for painting murals on the wall. If you don’t feel comfortable just directly painting your design without drawing it on the wall first, instead of using a pencil to draw with I use white chalkboard chalk, it wipes right off after your paint is dry!!
Great tip!! Love that.
I also use paper grocery sacks (cut open) for making my patterns!
Me too, that is why I usually never ask for the plastic bags at the grocery store!
I use left over Christmas wrapping paper.
Also good for larger patterns: wrapping paper!
Looove the prescription bottles for needle storage, thanks!
I always have leftover Christmas wrap…great idea! Thanks for sharing.
Love the lid-for-stencil idea! Already I’m thinking about what I can make stencils for!
I’ve used the sandpaper trick with scissors and it works great. The new coffee containers with snap on lids and handles are perfect for storing water when a sink is not nearby. They don’t tip over like jars and they have a lid. I also use these when painting a room or furniture…great for holding paint while you’re on a ladder or step stool and easy to close up when you take a break.
I use large cans for so many things, too. So great to have on hand!
i sharpen my punches by punching foil.
i found that trick out in line at a michaels… they specifically said not to use sandpaper.
not sure if scissors would be the same
I’ve never tried that! Seems like it would be a lot easier to punch through the foil, too.
Use the flexible plastic cutting boards to make those little flat plastic holders for embroidery floss. I use them for short pieces of scrapbooking ribbon. You can get them at the dollar store and I was able to cut out about 30 of them from one board!
Such a great way to save a buck! Thanks!
I’ve used tin foil for sharpening my scissors but will try the sandpaper now. Thanks for the hot glue gun tip too.
I have accidentally came across the sandpaper idea a couple years ago when I was using my cutting board to cut smaller squares. My cutter was actually sharper! Now whenever I want to cut my sandpaper, I use my dullest scissors or a lower section of my cutting board and give a little sharpening!
So many great tips! Thanks!
Freezer paper works great for patterns, no pins required. iron it to your material and after cutting it peels right off.
Thanks Annette…great tip!
I use parchment paper for patterns but they aren’t long-lasting. Tic Tac containers are just about the perfect size for needles. A small command hook stuck to the sewing machine can hold your scissors or even eyeglasses. Also, I found it so frustrating to move from the machine side of the table to the clean side where I cut fabric, make patterns, trim threads, cut out fabrics etc, to find the scissors would always be on the opposite side so I bought another pair of inexpensive scissors. The plastic zip bags that comforters and such are sold in make good fabric holders.
Storing needles in Tic Tac containers…LOVE this!
Great Tips… I use the phone book pages for my scrappy blocks.. I got that from thefilminthefridge. I also use caps from spray starch, or pledge for my paints. thanks for sharing..
Never, ever would I think to save those lids for paint. Thank you!
Great list!! I always save my nice cardboard too 🙂
And I hear that you can put glue sticks in the freezer until you are ready to use them – supposed to eliminate the strings too, haven’t tried it yet though 🙂
Brie @ Breezy Pink Daisies
I keep mine in the freezer because I heard it made them last longer. There are still strings: (
Oh really Brie?
I’ll have to give this a shot!! Thanks.
New tips to try Thank you.
Here are mine
Use polystyrene pizza packaging for contact printing (draw into it with a biro) roll on printing ink or acrylic paint and print.
I use readymixed paints for my classes they are poured into trays with six small tubs for different colours instead of pouring them away at the end of class these are sealed in a giant tuperwear container.
Glue sticks can be revitalised if you sit them in water to rehydrate.
Best tip though is to have seperate containers for everything all clearly marked so it is organised then it is an art material not a plie of rubbish.
I also store scraps of tissue paper/ metalic paper and coloured papers in seperate clear plastic portfolios.
Hazel thanks so much for the great tips!!
Wow I have never heard of the vaseline on the glue gun trick! I use mine all the time and HATE that string! I will have to see just how well this works! 🙂 Thanks for sharing this list!
Helen
Blue Eyed Beauty Blog
A new “tool” I just discovered this week…I had just finished using all the address labels on an 8.5×11 sheet and needed a scratch paper to put tape runner on small pieces. It worked so great, the tape/glue doesn’t stick to the label paper and leave a sticky mess.
Don’t you love when you accidentally discover an idea that works!! Love this…thanks for sharing Joyce!
Wax or parchment paper would work for this as well!
Wax paper or parchment paper work for this as well.
Not sure if it’s been said, but when pinning fabric together or hand sewing, stick pins into a bar of soap, will make it easier or brings new life to old over used pins. I actually use a bar of soap as a pin cushion 😉 that’s my silly tip
Kristi,
I’ve never heard of that! Thanks so much for sharing!
for years I ran diaper pins through my hair (I’m old!) to amke them easily slide through cloth diapers. I now run pins and needles the same way to glide through fabric.
I’ve done the pin through my hair thing too. Its the oil on your scalp that makes pins, needles work better.
Loved the post! Very well organized and simple to read! Have a few more tips that have worked for me.
Soak paint old paint brushes in a bit of Murphy Oil overnight and they are like new.
Invest in an expensive paint brush, wash it each time and really take care of it. It is work it in long run. You get a much better result when painting.
WD-40 to loosen really tight screws (spay a little on head and wait a few minutes and screws will just unscrew with no problem.
Use lightweight photo adhesive to keep stencils in place and not bleed.
Make own awesome chalk paint with Recipe from http://www.craftingchicks.com one cup of your choice paint to 2 tablespoons of unsanded grout. Make sure you dissolve grout in a bit of warm water before adding to paint and stir. It works great!
I need to try the Murphys Oil tip…I hate when I ruin my nice brushes! Thanks Angela!
You can also soak dried up paint brushes in vinegar. I’d been using the Murphy’s before until I heard about the vinegar (much cheaper). I leave brushes out way too often!!!
Use cereal boxes to make photo mats. They can be custom cut to highlight your photos. Use pretty paper or fabric to cover them before framing.
This one sounds weird, but it works. If interrupted while painting, stash your brushes and rollers in plastic bags. Secure brush bristles in baggies with a rubber band and do likewise for the roller. Stash in the ‘fridge until you can return to job at hand. I’ve had to leave them for several days and they’re still good to go. I hate washing them out until the job is done because I always end up with water dripping into the paint.
Thanks for all the great tips here, especially the Vaseline and hot glue gun tip. Gotta go try it out.
Such an inexpensive way to make photo mats! I love these tips…thank you for stopping by!
Love the scissor sharpening tip!
Great post! I enjoyed all the tips (and the commenter tips too) .
Here are my tips:
I save the bars of soap when they are too small to hold when wet. They are perfect for marking dark fabric. And it washes right out.
I reuse tissue paper for my patterns. (Reused from gifts) when ready to use just iron out the wrinkles and trace pattern.
I never thought to hang on to my tissue paper. THANKS!
I agree, these reader tips are awesome!
The plastic lid tip??? Wow. Made me squeal a little. lol And the king size pillow? Now I wish I had ALL those pillows back.
Thanks so much. The creative energy is flowing. 🙂
both of my boys are on a cocktail of meds so pill bottles are abundant. I use them to store paper punches from scraps that seem to small to use for much else. This makes it easy to grab when I am making a card. I also use them for buttons or beads.
I re-purpose cereal boxes into magazine holders or paper holders. Just cut down one of the narrow sides and the wider 2 at an angle, cover with contact paper, scrapbook paper, wrapping paper, or fabric.
I cut down clorox wipe containers and cut a hole into them to become phone charger cord keepers.
I have an old grate hanging above my craft area that has pants hangers on it which I use to store my washi tape and spools of ribbon.
When my boys are not willing to let go of their favorite t-shirts (even though it no longer fits them) I cut off the arms and the neck area and sew the sides up, stuff it and they now have a pillow.
I wash out the pudding cups that have the covers and use them to store buttons, lrg beads, embellishments.
Okay Heidi these are such great tips!! I’m blown away with the many ways people use cereal boxes…magazine holders?! Awesome.
Thanks for so many great ideas!
we also repurpose toilet paper and paper towel cardboard rolls to candy gift containers. Cover them with some kind of paper, fold one end in a little insert candy and fold other end in. they work great for Christmas, Easter, birthday take home favors.
Heidi
I used to do this with toilet rolls till someone told me, every time you flush the toilet the spray causes microscopic germs to fly up into the air and be redistributed onto anything in the vicinity of the bathroom. You could be risking people getting E. Coli, influenza or staph among the many germs that can be spread easily.
So now I use them in the garden to grow seedlings or pop in the compost.
That really gave me something to think about. But I use wrapped candy when I did this.
I’ve never heard of using sandpaper to sharpen scissors, when I told my husband he said, he used sandpaper to sharpen the paper cutter when he was a teacher!
save the foam trays from veggies and use as a paint palette. I have even asked the butcher for a few and they gave me about a dozen. Come in handy.
I drink a lot of canned soda so I end up with a lot of 12 and 24 pack cardboard boxes. I have found them useful when wrapping odd-shaped gifts (i.e. stuffed animals, figurines, and anything with sharp angles)
I also cut the end off a 12 pack to use as a mini catch all, for scraps of fabric, strings, and ribbons.
Also, for a cheap source of cloth, bed sheets.
Flat Sheet: Twin 66″x96″ or 1yd 2ft 6in x 2yd 2ft, Full 81″x96″or 2yd 9in x 2yd 2ft, Queen 90″x102″ or 2yd 1ft 6in x 2yd 2ft 6in, King 108″x102″ or 3yd x 2yd 2ft 6in.
A lot of times you can buy twin sheets for under $5 in a variety of colors.
Thanks for all the great tips…. I need to go make something creative NOW !! 🙂
The latest brainstorm I had was using the pole from a floor lamp that no longer worked to slip my ribbons onto.. The weighted bottom is perfect and it’s portable.
I never throw away glass jars, wash them out and used them to hold your supplies. I used mine to store beads and left over yarn.
I loooooove recycling and saving money where I can so I am always trying to find new uses for old things.
– I use Crystalight containers for storing pencils, pens, brushes etc.
– I’ve used large margarine tubs to make a pliers and tools holder. Take a quarter (or large coin) with a sharpie or marker, draw circles all around the edge of the lid (about 1/2 inch in), then cut out holes with a pair of scissors. Use the smaller holes to hold your pliers. Also, in the center of the lid cut a large circle. Hot glue a small jar or can in this hole. You can store other tools, pens etc.
– I use old cleaning wipe containers to hold my yarn when I am knitting or crocheting.
– I use plastic supermarket bags for the small garbage cans in my bathrooms and bedrooms. I empty tissue boxes to store the bags in each room.
– I can’t help myself and MUST buy lazy susan (usually found at the Goodwill store). I use recycled glass jars on the lazy susan to store craft supplies and tools. I also use lazy susans in my pantry for storing cans, spices, etc.
– It is much easier to remove labels from glass jars if you soak them in hot water. Usually they peel right off after soaking but if you are left with some stick stuff from the label, most of it will wash right off with a little soap. If not, just any oil on hand to remove it.
– Use baking soda on plants. This will prevent fungus and other diseases and thus, help your plants grow stronger.
Ok…those are all the things I can think of at this late hour. Hope they are helpful =)
A turn about used for cooking utensils makes a great organizer for craft supplies. Markers, rulers, pencils, scissors, bone folders, etc…
Baby food jars can be used for all sorts of things: bead storage, extra paint for touch ups, party favors, etc…
You can dress up extra cardboard boxes with duct tape, scrapbook paper, fabric or whatever you prefer and use them for storage/organizers
I love to save the little trays that come with ‘lean cuisine’ type entree’s. They’re great as paint trays (with natural dividers) and also for holding beads and other small things when crafting. Also: I love to use the back of desk calendars. I have access to lots of them at the end of every year. I tear them off the back of the calendar and use them for all sorts of things, like as a placemat underneath a craft I’m working on or I cut it up to use for making books or mats or whatever.
I collect the ‘entree’ trays from ‘lean cuisine’ and other frozen meals. Those trays are fabulous paint trays and also work wonderfully to hold other small craft items (like beads). I also like to use the back cardboard from ‘desk calendars’ for a crafting ‘placemat’ to keep my crafting area tidy or I cut it up and make books or mats or whatever. At the end of the year you can get them for free or cheap depending on the business.
2 more tips…cut aluminum foil with your punches and it helps sharpen them. You can also use sand paper. The second one is to use contact paper (comes in great patterns) on your crafting table/surface and it will protect your space until it gets too nasty and you can easily remove it and replace.
I love the contact paper idea! The cheapy stuff from the dollar store would be perfect just for that use, doesnt seem to stick down for any length of time as actual shelf paper! As far as the glue gun trick goes, I have never had a problem with strings when I work with my glue gun as I always just touch the nozzle down and slightly “wipe” (for lack of a better term) on whatever I am glueing, this has always workd for me and no strings ever!
Many of your tips are familiar to me. Here are a “few” more:
***I use an old, wall-size entertainment unit for organizing. Where the large area for the TV is, I place extension rods. I placed craft supplies in various sizes of zip close baggies and clipped them to pant hangers. The pant hanger were free for the asking at my local Kmart. The larger bags are on top, smaller bags in middle, medium bags on bottom. Finding what I need is as simple as flipping through the bags.
***My local Dollar Paradise has a ton of kitchen glass storage containers. I use the tall noodle ones for my pipe cleaners.
***When on sale, I buy the lunch meat that comes in the plastic, lidded container. The meat inside is sealed in plastic, so no worry of cross-contamination. These container stack so easily on the shelf.
***I love the Parmesan cheese containers! So many uses, such as hot glue sticks, buttons, thread spools, elastic, lace…
***My instant coffee, Taster’s Choice, comes in a plastic flip-lid container. While the container can be used, what I do is take the plastic lid liner out…it is a flat, thick piece of brown plastic and use it for…a lot! If you have soaked something gunked up, it makes a great scraper. Want to smooth something out? Perfectly fits your hand and has some flexibility. I keep a stash handy.
***I have clear plastic vinegar jugs, yes, I use a lot of vinegar, from the bathroom to the garden, to keep yarn fresh and available. I simple cut a hole in the upper part of the jug, drop a piece of string down through the pouring hole, taping it to the outside of the jug, drop my yarn through the cut hole, no need to put into a ball if you are in a rush, and hang onto one end of the yarn. Tie the yarn end onto the string, and pull yarn up through pouring hole. Take the string off of the yarn, screw the cap on the vinegar jug, and store anywhere. Just pull the yarn up through the pouring hole as you use it.
***Be careful when using food storage containers for any reason. I know all-too-well about cross contamination. A minuscule amount on your hands, and you rub your eye, touch a food product, even the baby’s pacifier…the chance of the bacteria living long enough might be slim, but I will never take that chance again. Better to take an extra minute to give the container a quick soak in bleach than to take a chance.
And I am not done yet! I just hit my character limit…see Part Two…Susie, Port Huron Michigan
Part Two…Yeh, I know, sometimes I just rattle on and on and on….
***Be careful when using food storage containers for any reason. I know all-too-well about cross contamination. A minuscule amount on your hands, and you rub your eye, touch a food product, even the baby’s pacifier…the chance of the bacteria living long enough might be slim, but I will never take that chance again. Better to take an extra minute to give the container a quick soak in bleach than to take a chance.
***I love vintage cookie tins. So pretty, so colorful. I use them for magnets, magnet projects in process, organizing all the pill bottles of supplies, etc.
***I iron freezer paper onto felt, then mark the pattern onto the paper for easier cutting. I wash and dry felt for that bunched up look for my puppets.
***I take clean cereal boxes and cut them down to a similar height, but keep them tall. I glue them together, add staples for good measure, roll my scrapbook paper, and stand in the boxes. I can see at a glance what I have and the paper stays perfect, no dog ears! I cut toilet paper rolls into rings to hold thicker paper and fabric rolls. I cut toilet paper rolls and notch them for rolling scraps of yarn, elastic, lace, and write the length on the toilet paper roll. A snap hair clip holds the end secure without leaving a mark.
***I have cut packaging boxes down and put the huge dollar store thumbtacks on each corner for legs to make a stackable drying rack, or for keeping an unfinished project portable for storage. Place the large chunk thumb tacks in a bit from the corner. One can be place in the middle as well.
***I save old pillows and re-use the stuffing. I save old shower curtains for drop cloths and making a work apron.
***Styro meat trays, well cleaned, make great stencils and stamps for kids. Egg cartons make great craft and paint trays. I even place glue in one of the egg cups.
***Stick on cup hooks and alligator binder clips make an easy, quick way to organize and keep your work surface clean. I clip the alligator to each item I will need for a project, then flip the clip and hang it on a hook. As I need something, I take it down and use it, when I am done, I hang it back up.
***Don’t be afraid to keep an eye on what your friends toss in their recycler! Some of that stuff still has purpose! Re-Use!
And this takes you only half-way through my craft room!!!
Blessing to You and Yours, Susie, Port Huron, Michigan
Wow Susie I would love to see your craft room and making puppets!! That sounds interesting.
Please explain about the metal knitting needle for hot gluing. I can’t figure that one out. Thanks!
It’s an extra finger—used to hold whatever you are gluing down so your own finger doesn’t get burned.
I use the bags that camp chairs come in to store rolls of wrapping paper. Use a counter top paper towel holder for extra rolls of TP in the bathroom.
I use pencil top erasers to replace the lids on glue bottles. I fold plastic bags like folding the flag. These triangles fit many more into a small space (empty tissue box).
Love these tips Beth! Thanks for sharing!
Awesome tips. Some of them are smack-my-head “why didn’t I think of that” ones. Will definitely use some of these. Thanks!
I use the toilet paper cardboard(or if it’s winter and I don’t have any, I cut down the paper towel ones) and stuff them with dryer lint. You can use them for fire starters and they are so much cheaper than the store bought ones. I like the recycling and making trash useful.
Great idea Dawn! Thanks for sharing!
Such amazingly useful tips! Love them! And really appreciate the posting of them.
I know that the one tip I find myself using a lot is soaking paint brushes in Murphy Oil Soap to clean them. However, I was wondering (because I’m still not exactly sure), is it better to soak them in pure, just straight Oil Soap, or in Oil Soap diluted with a bit of water?
I use the Pringles containers for storage – covering them in old wallpaper or decorated paper first.
Use the lids and old greetings cards to make new cards. Move lid around the card to find a position that you like and draw around the lid. Cut inside your drawn line (you might have to trim a little to make it fit inside the lid properly) glue picture in place. Decorate the outer edge as desired.