Hi friends! I can’t tell you how excited I am to be a creative guest on Ucreate today! I’ve been bubbling with excitement for weeks and have been scheming over what project would be Ucreate-worthy. I hope this one fits the bill…!
First of all, I’m Autie and my friend Jen and I blog over at iCandy handmade.
I’m a busy mom of 2 cute little kids and during nap time and bed time, I love to work on projects! I like to make things for my kids and for my home, and share them with you on our growing blog. I hope you’ll hop on over to iCandy and see all the fun things that we’ve been up to, and hopefully you’ll be inspired to do some of the projects yourself! After all, if we can do them, so can you!
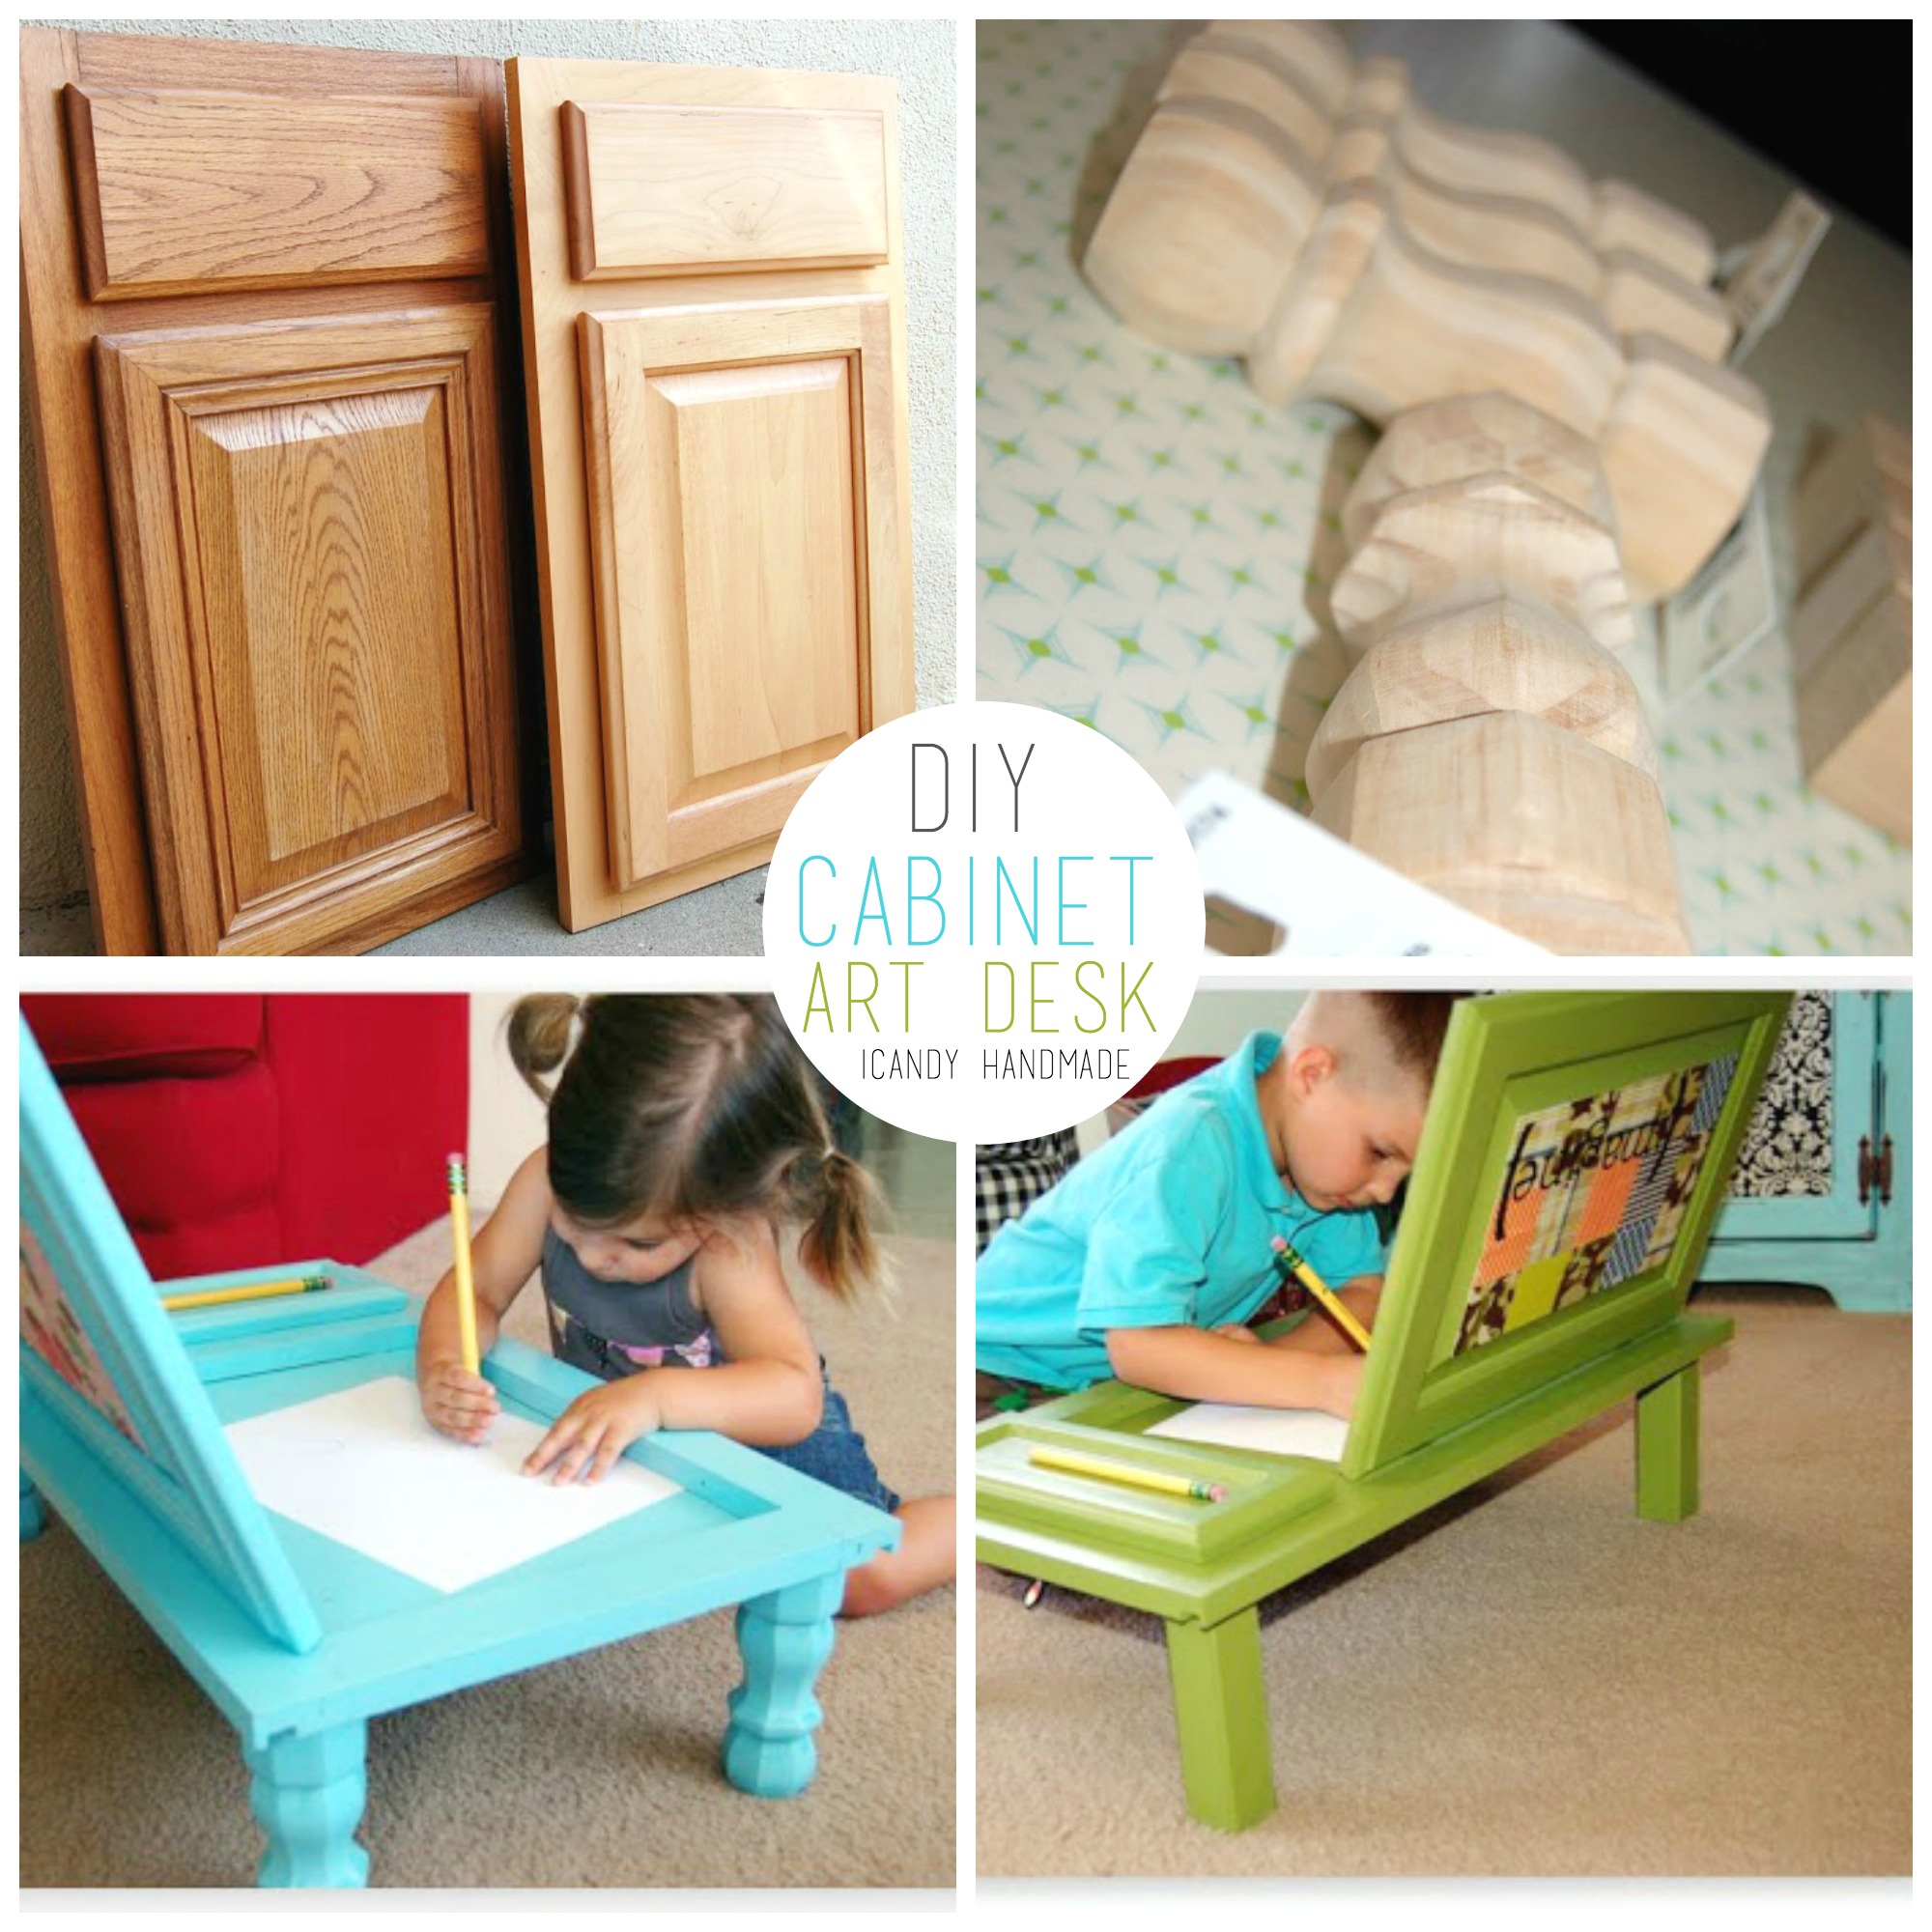
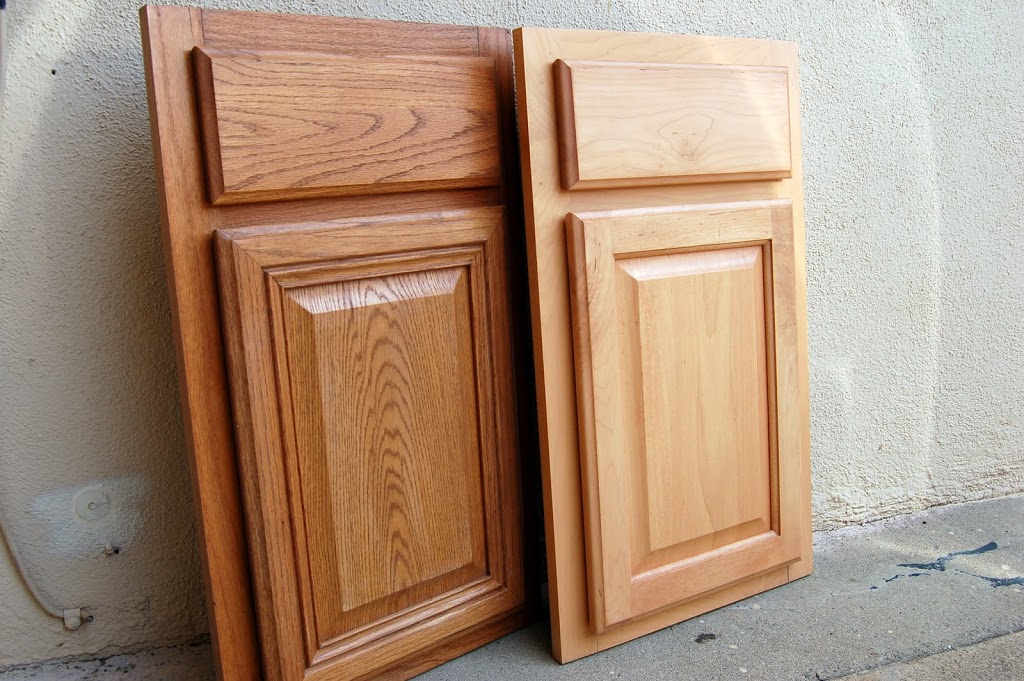
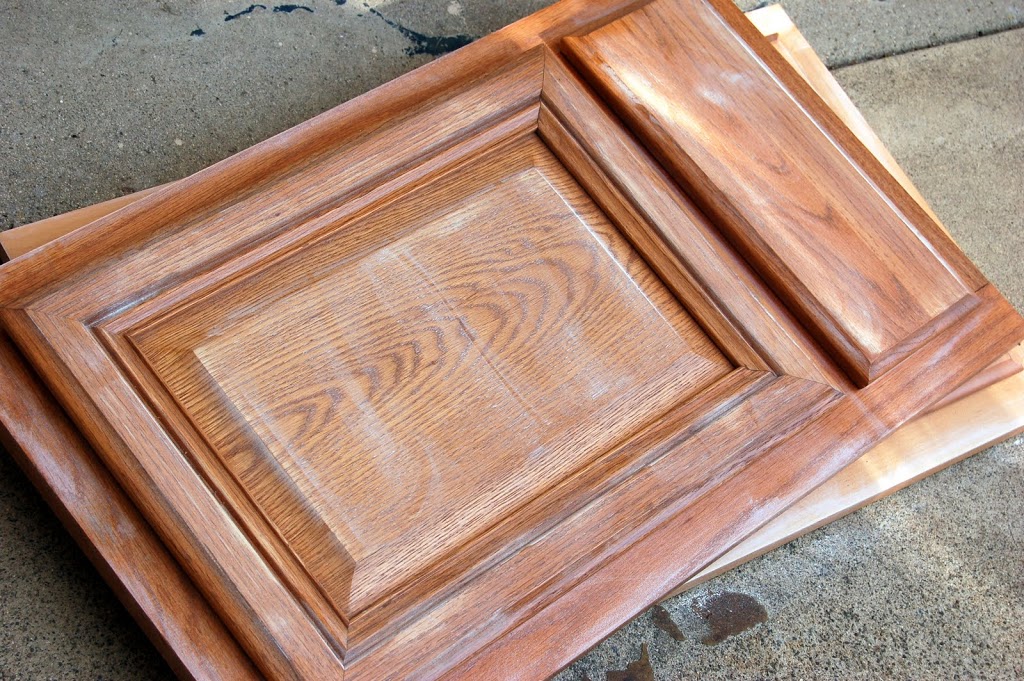
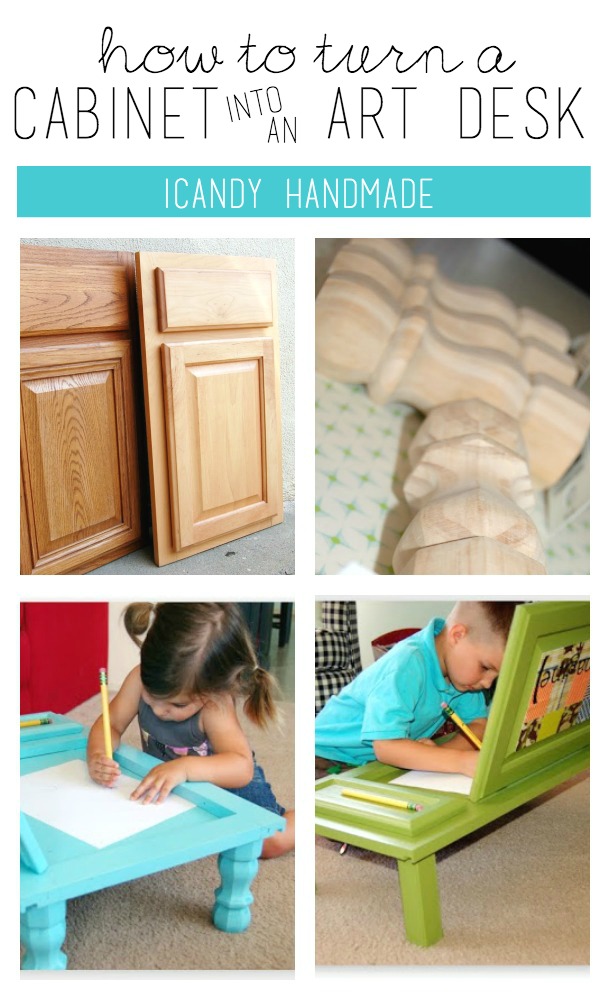
The project that I thought I’d share with you today started out with these. My Father-in-law owns a restoration company in Phoenix and often times has cupboard door styles or carpet squares that have been discontinued, and he no longer uses. My original plans for these sort of vanished, but since I had them in my garage, I was determined to find something unique to do with them.
The drawer does not open, but the cupboard door does…and it leaves about an inch of space to keep something in it…like art masterpieces of a few sheets of homework paper…hmmmm
I bounced some ideas off of Jen, and this is what I came up with…I give you the
Cupboard Door into Art Desk Tutorial
I made one for each of my littles, and so far, they’re totally diggin’ it!
If you want to know what I did, here’s a quick run-down on what I did:
First things first, I had to sand the suckers down to give the paint something to stick to.
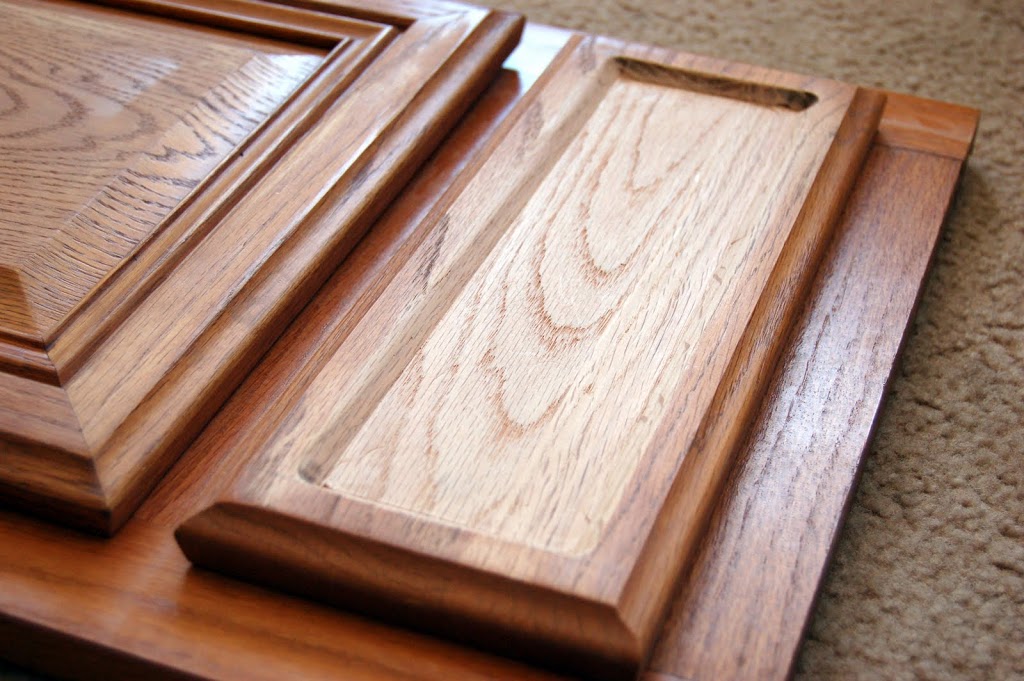
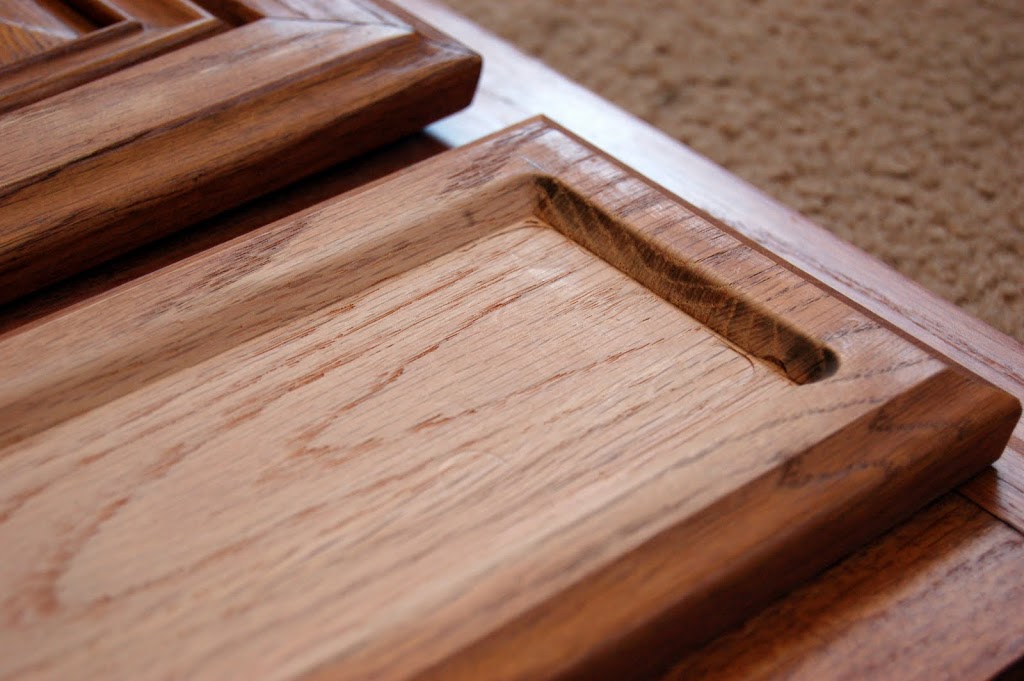
I wanted to use the drawer as a supply holder. I bounced back and forth between routing out a groove in it to hold several pencils, or drilling a few large holes to hold cups of different supplies like crayons and markers. The fact that I don’t have a router was the only reason I was leaning in the other directions, but the promise of homemade donuts convinced my neighbor to help me with this part.
We used a plain router to dig out the middle and then an edger to work on the sides. My neighbor is awesome!
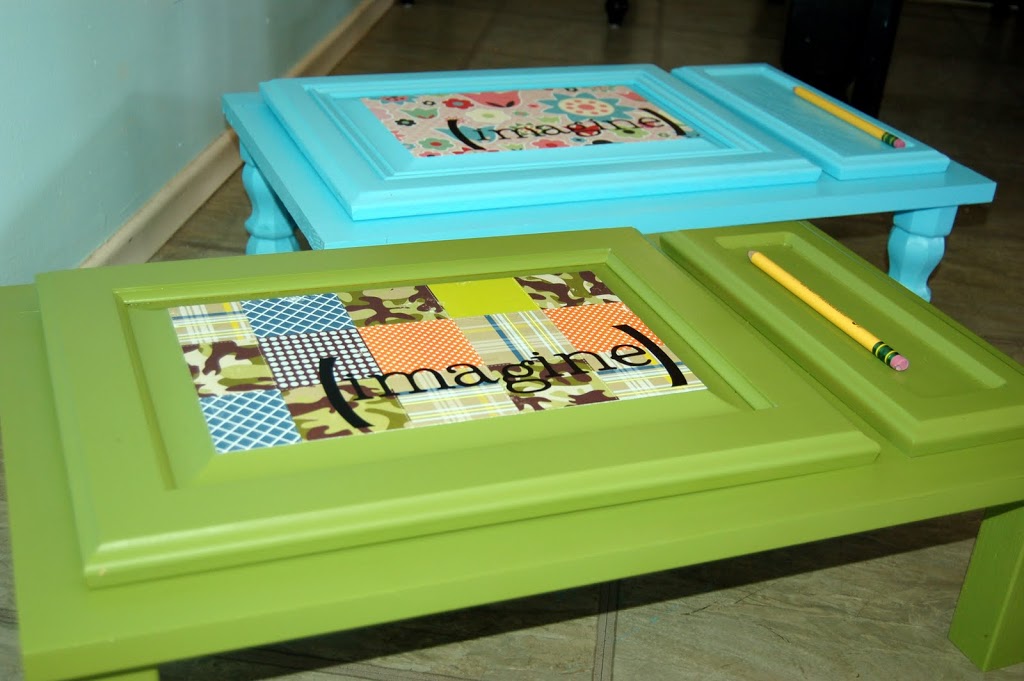
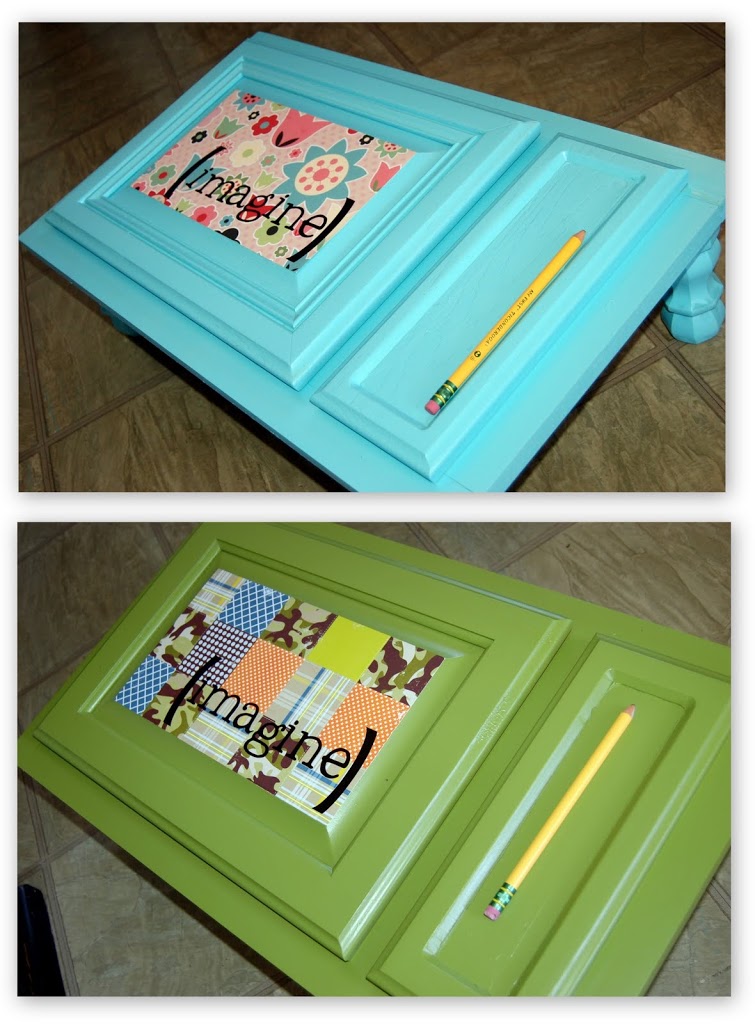
Next I spray-painted each piece…
{I used Rustoleum’s 2x Spray paint, Aqua in Satin for the turquoise one, and Eden in Satin for the green one.}
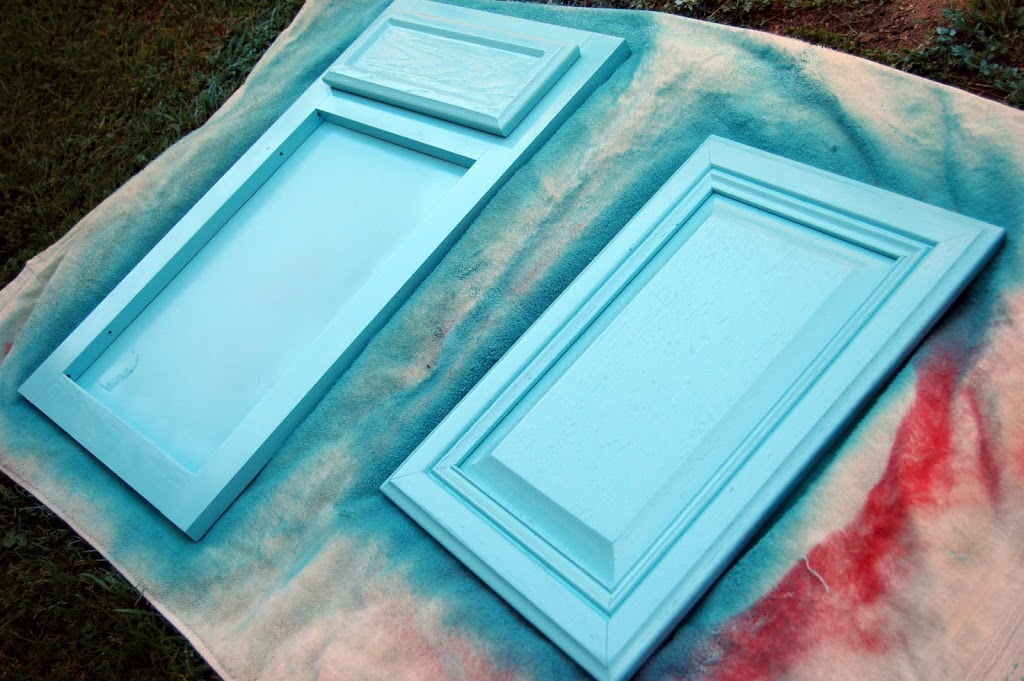
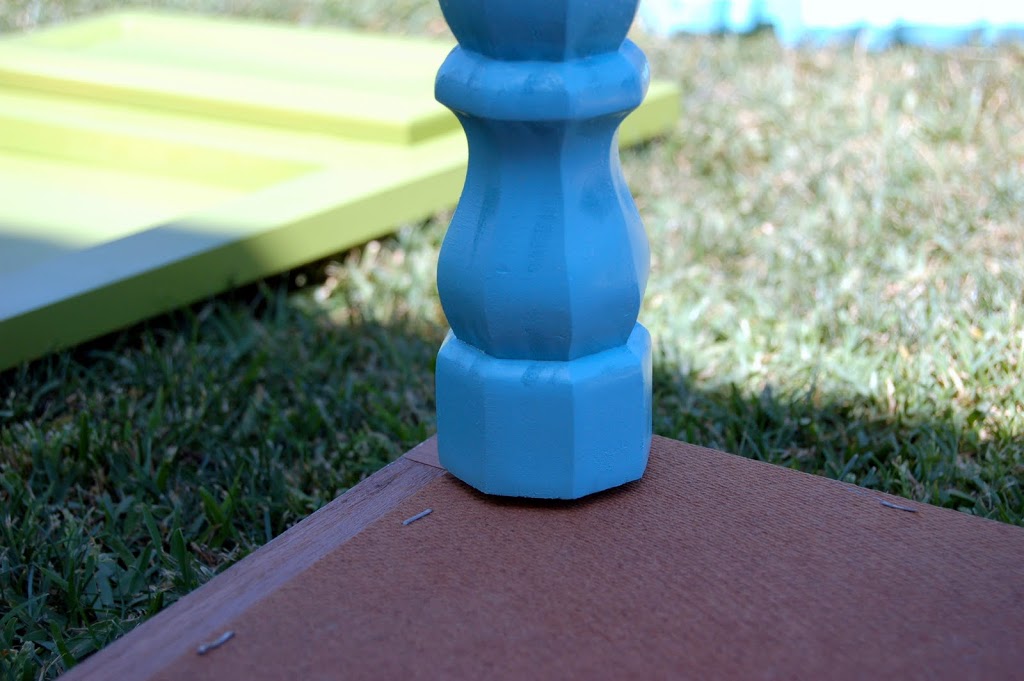
…including the legs which I got at Home Depot for a little less than $3 each
they came with a little screw in the end, which I thought was perfect…as I’d just drill a little hole in each corner, and glue them in with liquid nails.
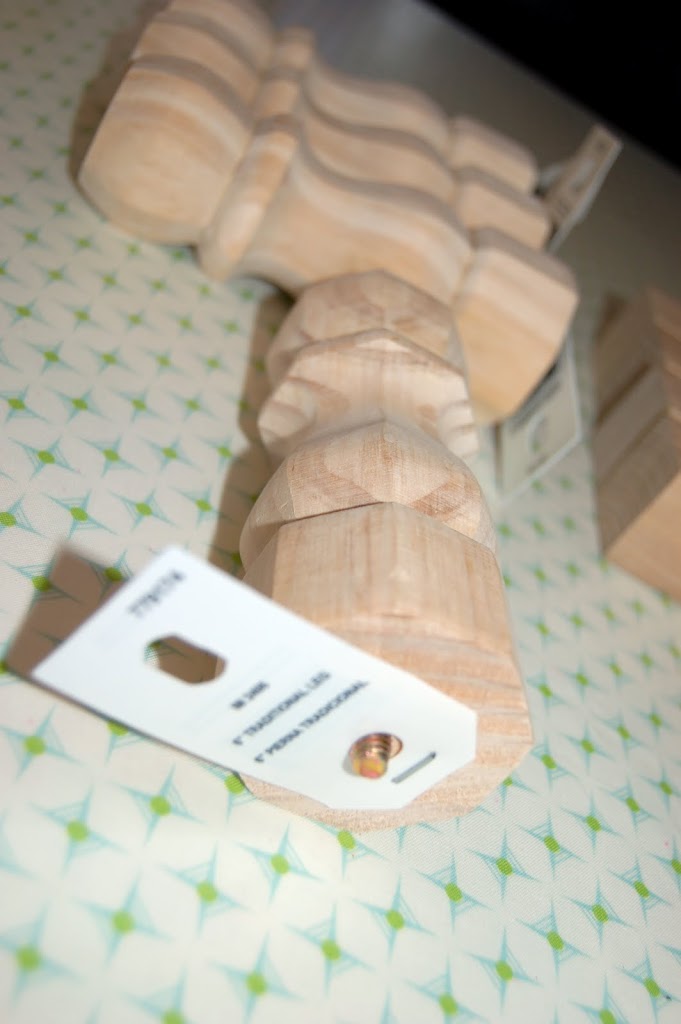
So, I used a 3/8″ drill bit and drilled a hole 1 1/2 inches in from each side about the depth of the screw (umm…is that a bolt, sorry for my lack of tool knowledge! screw it is!)
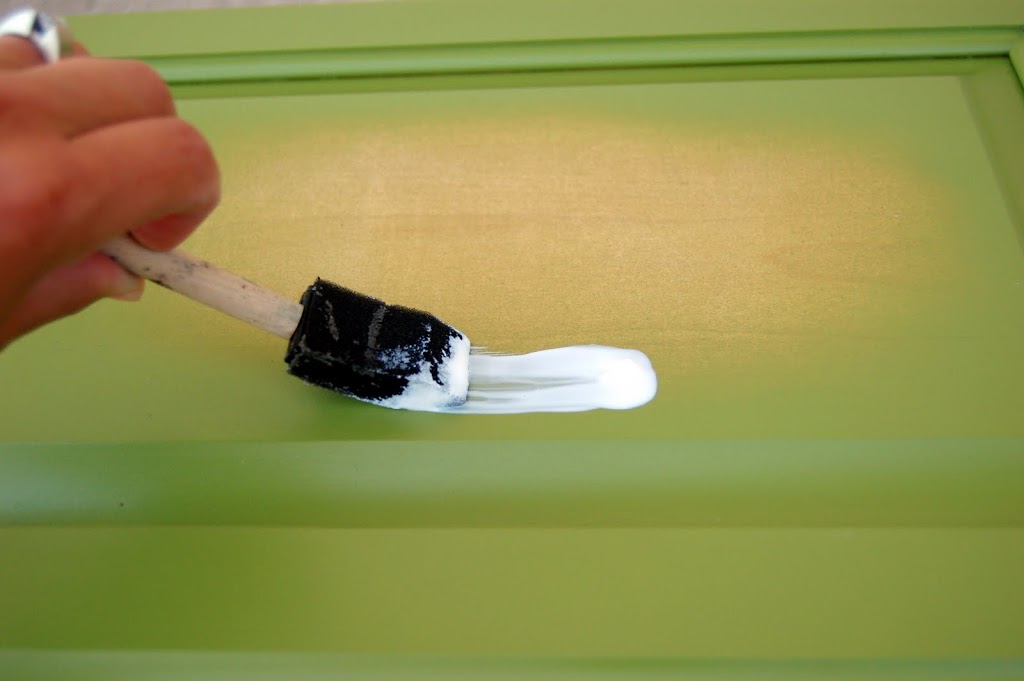
I filled up the hole with liquid nails plus a little dairy queen dollop on top, stuck the screw in the hole and twisted it all the way down to the liquid nails squeezed out the side. I just smoothed out the excess glue with my finger and turned it upside down with a weight on top to let it set over-night. The Liquid Nails is completely paintable, so after it set, I re-sprayed the cupboard and the legs, and then covered it with a couple layers of clear top-coat.
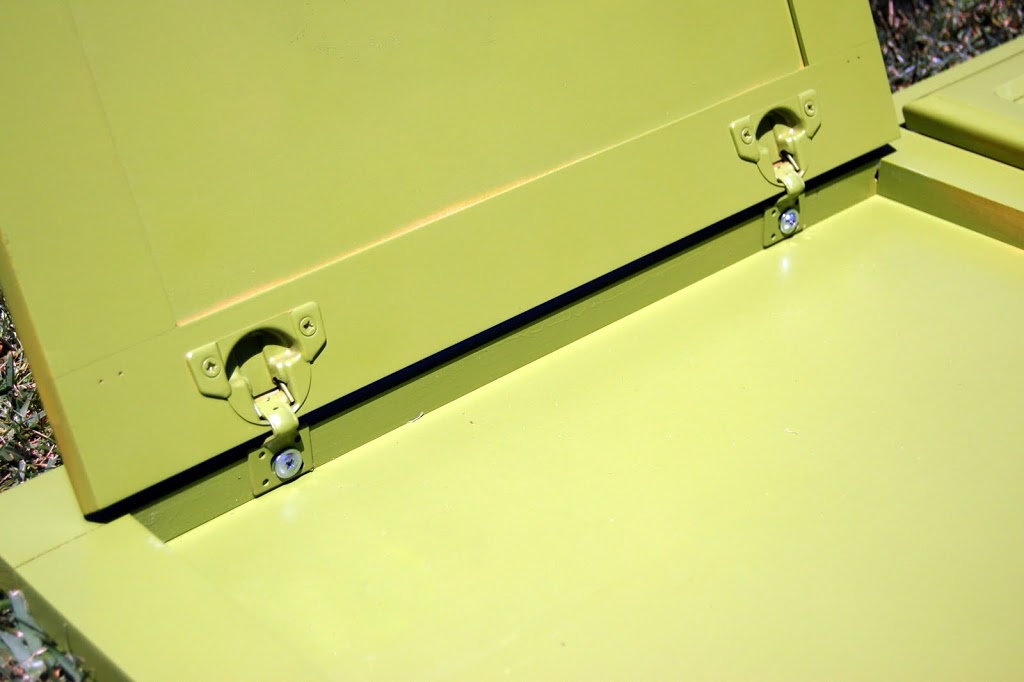
I screwed the cupboard door back into place after the glue had completely set:
 Here we are so far:
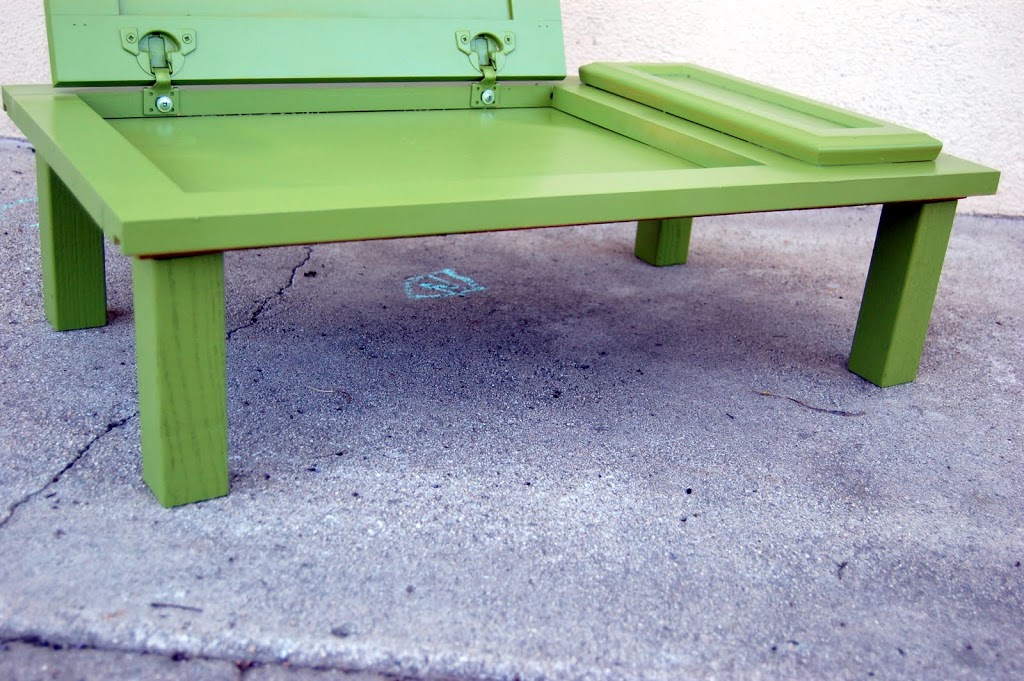
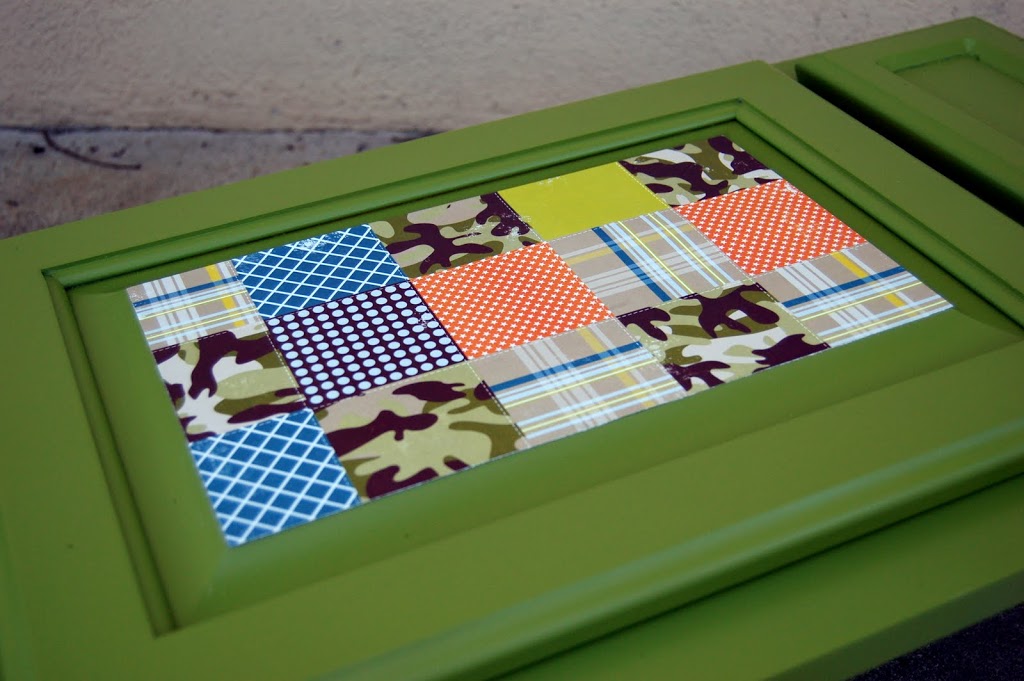
I cut a piece of scrapbook paper to fit the inner panel of the door and mod-podged it in place.
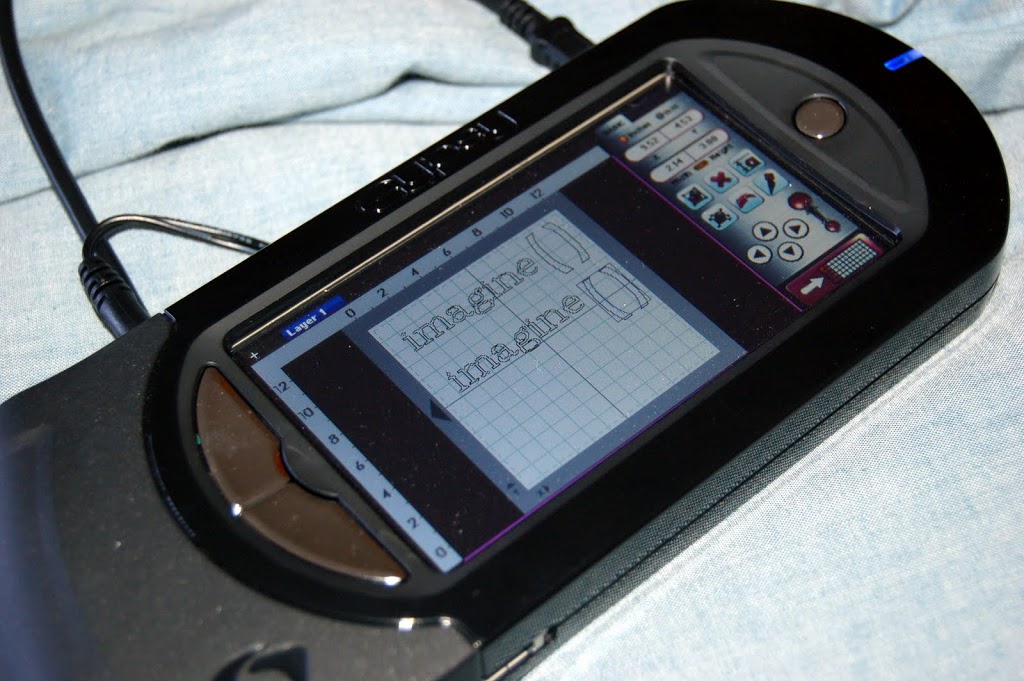
While that was drying, I used my Gypsy and Cricut to cut some black vinyl to spell out the word (imagine)
I used ‘doodletype’ font…which seems to be my fav lately.
After applying the vinyl, I re-coated just the top of the cupboard door with a light layer of top coat to protect the vinyl and the paper from little picky fingers.
…and this is what we’ve got:

My kids have been begging to use their ‘desks’ through the whole process, and I think it’ll be so fun to have a little art center for them to use with our little projects. I can just imagine my little girl feeling so grown-up at her own little desk! I love that the cupboard door can close and hold about an inch-worth of stuff…extra papers, or old projects or papers. Or a place to store homework until it’s done. I might still attach a little clip on the inside top of the cupboard door to stick a finished project for it to dry, or whatever, but we’ll see.
I hope this little project has inspired you to something similar! Whether you have cupboard door and drawer face like I did or not, you could use any old sheet of wood and put those little legs on for super cheap to make it your own.
Come see us at iCandy!
-Autie

Those are so great … I’m heading over to check out her other projects.
Super cute idea! Love how it opens up for more drawing space!
OH MY GOODNESS!!!!!!!!!!!!!!!!!!!!!!! (seriously, I want to keep adding the “!!!” about hundred times over!!!) I MUST DO THIS!!!! AHHH!!! Amazing, amazing…
(can you tell I am excited about this?)
-Heidi
This is the Cutest thing ever. You are soooo imaginative! Thanks for sharing. I also loved the colors you used!
i just found icandy like 3 weeks ago…wondering what rock I have been living under! love i candy!
Way too cool! My parents are remodeling their bathrooms right now. I’m going to see if I can score some cabinets!
What a cute, clever idea! I love it, and I know my kids would love something like this as well.
What a cute idea! I love how she made one for each child, and the colors are so fun.
These are so amazing! I have been following icandy for awhile now and they are always coming up with the best ideas!
So freakin’ awesome! I am LOVE this — genius! Can’t wait to pin it.
~Nike@Thrive
some people are so smart and creative! you are one of them for sure! soo adorable
Love this.
Love it, Autie! So awesome!
What an adorable idea!! I wish I was short enough to have one for myself.
LOVE it. you are amazing.
These are amazing! What a terrific upcycle idea 🙂
These are super cute… I am wondering if you put an anti-slam on the door itself, to prevent smooshed fingers. Or are they soft close ‘cabinets’ to begin with?
Genius!
Thanks for the opportunity to play on Ucreate, Kari! So fun!
I LOVE this, the next time I see spare cabinet doors they are MINE and I am gonna make this! Awesome project!
Oh my gosh! These are awesome! What a fabulous idea!
WOW!!!!!!!!!!!! LOVE LOVE LOVE this!!!!! Super cute and creative!
Wow! One of the best creative ideas I have seen in a long time! Love them. My kids would love them too!! sharing with my FB fans!!
This is seriously the COOLEST thing I have EVER seen. Amazing!!
Wow that is one creative blog!! LOVE how this turned out! So so cute! And the colors are perfect!!
Wow! Wow! These are so great. Is it awful that my first thought was “That is so much work. Where could I buy that?” and my second thought was “Nope, too expensive to buy, so I HAVE to make one now!!”
This is great!! Would love for you to link some of your projects to my Delightfully Inspiring Thursday Party sometimes. 🙂
http://delightfulorder.blogspot.com/2011/05/delightfully-inspiring-thursday-party.html
DaNita
This is so cute! It totally needs to be a ‘Create with Me’ project!
Autie dear…if you could just stop being creative for like 5 seconds and making the rest of us look so bad..;)! Ik you are awesome and I’m totally copying this idea. love!
OH MY GOSH! These are adorable and fantastic! If you sold these at a craft sale — you’d be the most popular booth for sure! Great job!!
Love this!
These are just amazing!
This is such a clever idea! Simple but brilliant- I love it! You always find people with such great projects!
These are so cute! I’m featuring them on my blog as a favorite find this week! Thanks for the inspiration!
http://copy-cat-crafter.blogspot.com/2011/05/five-favorite-finds_06.html
The colors, the idea, the finished product–everything about this is AWESOME!
VERY cute!
molto bellllllo ,mi piace il tuo tavolino…. lacasadellasarta@virgilio.it
what a rockin idea!! i love this:)
These are absolutely PRECIOUS!! I can see why the babes were so excited to use them! Yay for free, yay for awesome neighbors!
This may be a really dumb question, but what is the backing on the cupboard door? Did you attach a piece of wood to the back to make the solid writing surface?
I was wondering the same thing as VirtualVocations. Does the cupboard have a board inside it already because it is a sample, or did you put the board there to make it solid as part of the process?
Hey guys! It’s me, Autie!
A couple of answers for you:
Dear Silly Puppet: These particular cabinets don’t have the anti-slam on them… I realized quickly that the slammage was not my fav, and taught my kids how to shut them nicely! The only thought I had was to put a few of those little felt or rubber circles on each corner to cushion the slam…but you’re smarter than me!
love autie
Dear VirtualVocations and The Petersons,
Your question was totally not dumb. The cabinets I used WERE, in fact, samples, so they come mounted on the board like that! Someone commented on iCandy that they’re local cabinet shop was selling the discontinued samples for $2 in the front of their store…something to maybe check out!
love autie!
hope that answers your questions!
I grabbed up a few of these at my local Habitat for Humanity ReStore, out back on the refuse pile. They were completely free, and I go there once a week to check what they are pitching, then head inside for awesome supplies greatly discounted. All counties have a ReStore. Check it!
Thanks for the Tutorial!
Thanks for this! I had no idea that existed….I have several projects rotting in my diy folder because I can’t seem to find the hardware pieces for cheap enough. I’ll have to start looking at the local ReStore!
This is so cute! I want one for taking in my RV this summer! It will hold everything inside and take up hardly any room but a guaranteed hit on a rainy day! What a great plan, thanks so much for sharing!
These are so cool!!! And the kids look so cute using them.
Love this project so much! Just posted it on FB!
Those look awesome! I have a couple cabinet doors I’ve been trying to figure out what to use them for. I may have to try something like this.
This is SWEET! I’m not so much a painter as a wood burner (pyrography), but I’ll be doing this and looking for cabinets from remodels on freecycle and craigslist now. Thanks!!!
Popping over from Amy’s Mod Podge Rocks. Your cabinet door re-do is AMAZING–a really clever and useful project.
It would also be neat to paint the art area with chalkboard paint.
OMG, this looks amazing! What a cool idea! Thanks for sharing…(FYI, I couldn’t keep this to myself so I posted it on my Facebook page to share with my fans: http://facebook.com/bagalicious.)
these are so totally awesome. what a great idea, and would go perfect with our homeschooling. 🙂
Thanks for the inspiration… I just completed two Christmas gifts!
http://michmashmusings.wordpress.com/2011/10/30/christmas-gift-1-and-2/
I was just wondering if you had the measurements on this.(WxH) I am going to make this for my son for Christmas. I know he’s gonna love it. Thanks.
These are adorable! I did not read all the comments so someone else might have mentioned this. Use Chalk Board paint in the larger door area instead of a paper etc. You could also adapt these to make a lap board for an adult or even a bed tray!
What an amazing idea..superb upcycle work…Love the colors used!
I am thinking of doing this for the grandson. I think instead of the picture on the lid, I will paint it with chalkboard paint, would make a secondary drawing surface that way. This was a really neat idea, thank you for sharing.
I so love this! I have to make one.
What a wonderful idea! I love it! how smart! I love using things that I all ready have around the house to turn into something you would really use!
Totally awesome idea…I too think I’ll use some chalk board paint and a pit of cork board on the inside portion of the door for more drawing and display of artwork. thanks so much for the idea!!!!
Waow ! That’s so niiice. I love it, what a marvellous idea. My children who lov drawing would be pleased to have that !! Thanks for the tutorial !
What is a “Gypsy”? I’m really wanting a “cutter” that I can hook up to my laptop and cut any font, picture, etc with.
Great idea! I like the one that leigh Ann said too, about chalk board paint and cork board. I’m wondering what a “Gypsy” is though?
I think I would like the hinges you put on a toy box that hold the lids open so there are no accidents on little heads or fingers.
We happen to live in an area where there are tons of cabinet shops and they have rejects all the time. They give them away. That might be a source for others if you know someone with a cabinet shop. Also, You might want to add one of those hinges that locks into place to keep little fingers safe.
this is a brilliant idea!! I second the anti-slam hinges.
Could you possible use the inside of the open door as a painter’s easel, or does it angle back too much?
Maybe use the inside of the door as a painter’s easel?
Chalkboard paint would be awesome where you glued the paper. It gives it an additional use!
I love it!
Nice project.It reminds me the days when I made same kind of table for my daughter 15 years ago.Love theses tables.
Normally there is a hole behind the cabinet door, these in your photo are odd that they solid. On normal cabinets could you put mdf in the open area behind the door?tia
Wow, how creative, and I’m thinking it would make a great lap desk to use in bed too! You are inspiring!!!!!!!!
So I guess I’m confused my cupboard doors open it open there’s no word there do you glue the door on a peice of wood.