
I am SO excited for the opportunity to guest post on Ucreate! Thank you for having me!
My name is Jamie, wife to Jeremy, mommy to Stella, and creator of [kreyv].

I am totally and completely obsessed with complex carbohydrates, Stella’s chub, Jeremy’s smile, and interior design! Really, what else do you need? I started [kreyv] to catalog my inspirations, diy projects, and daily randomness!
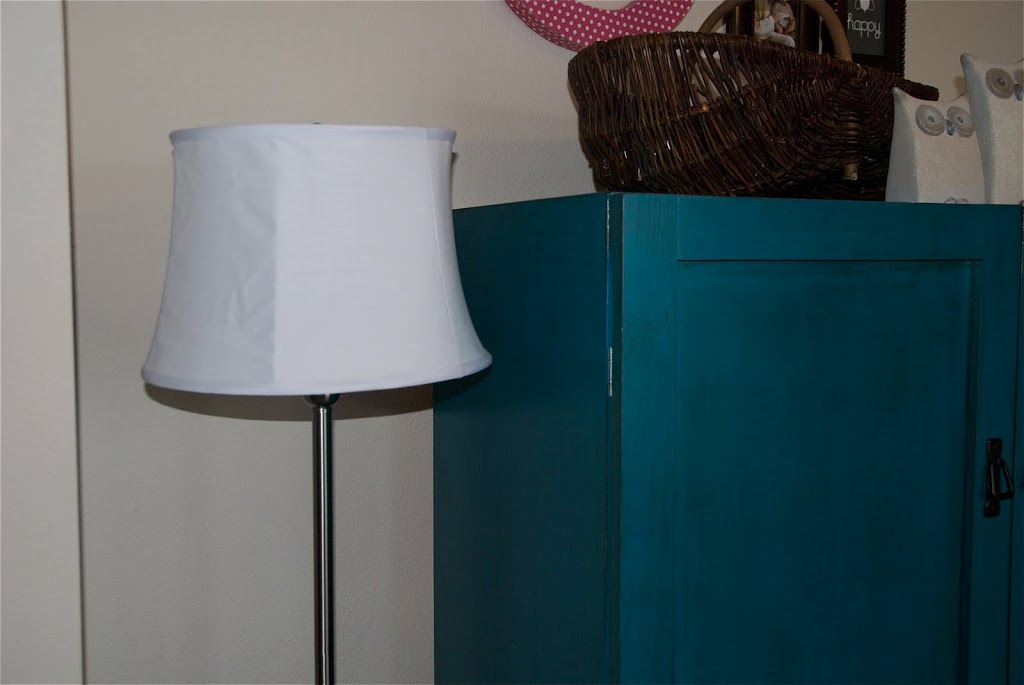
I am always changing the decor at my house and finally decided to give Stella’s lamp a little somethin’ somethin’! Here is the before:
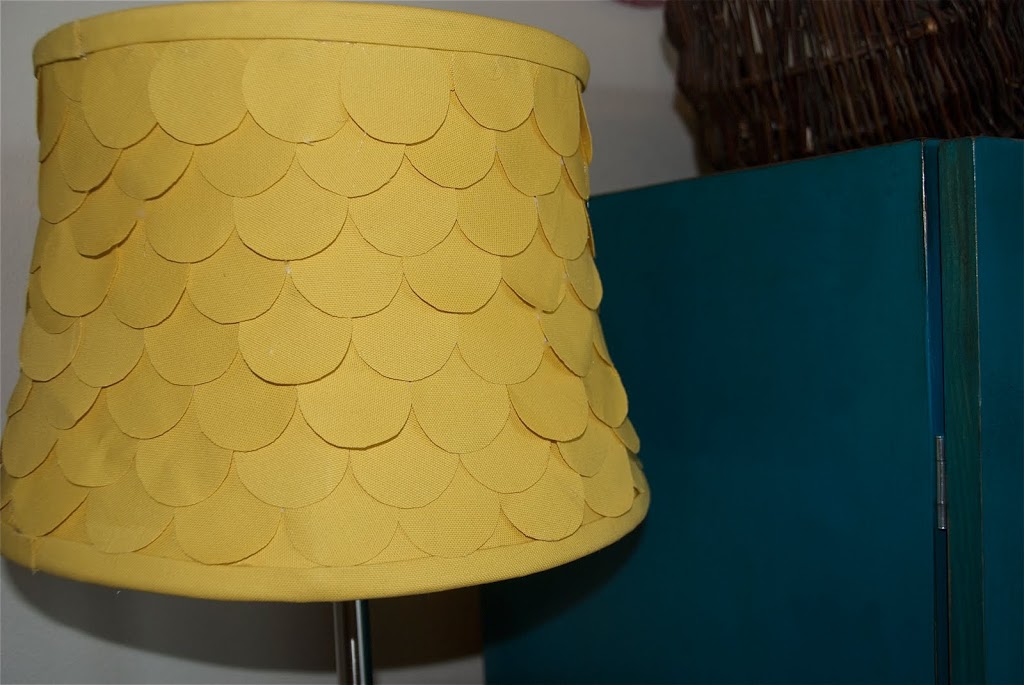
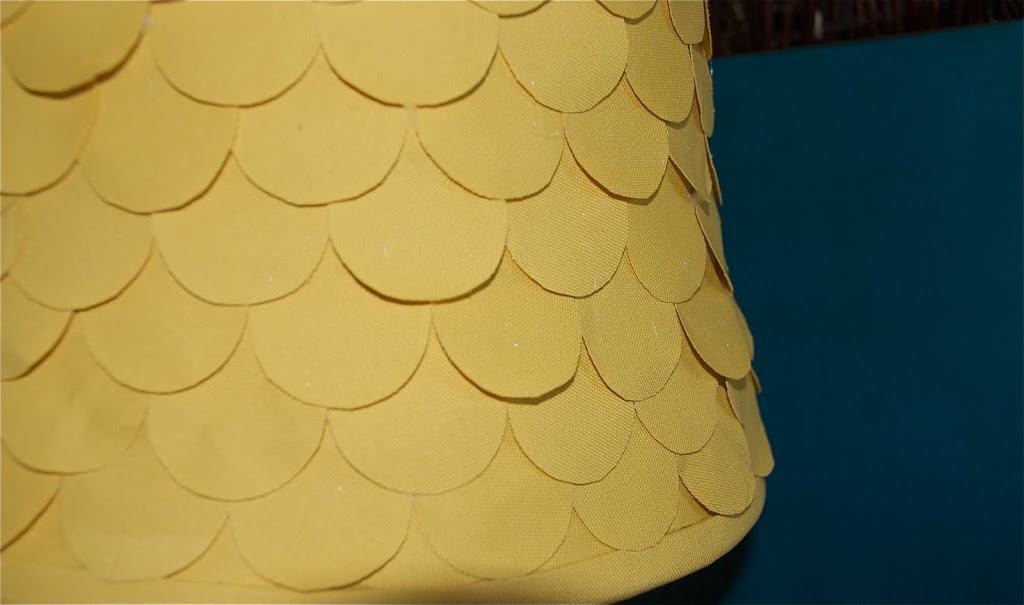
And the after:
All you need is about 1/2 yard of fabric cut into circles (amount depends on size of lampshade), hot glue, glue gun, and scissors. Here’s the low down on the redo:
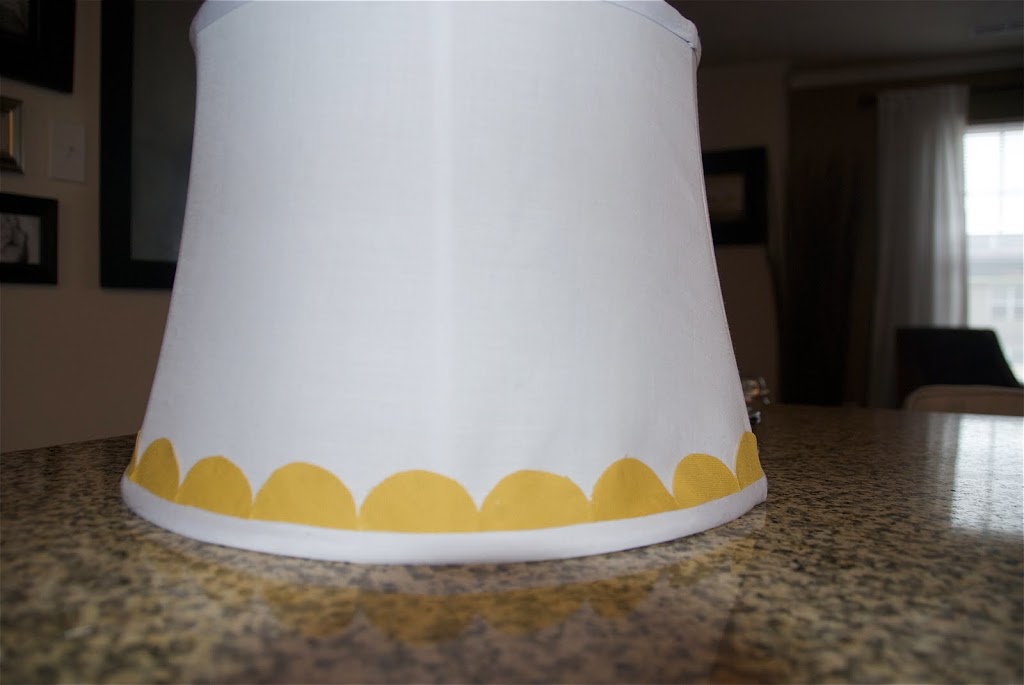
Starting at the bottom, attach half circles around the entire base of the shade following the line of the lampshade binding. Make sure they are all touching to cover up the original shade.
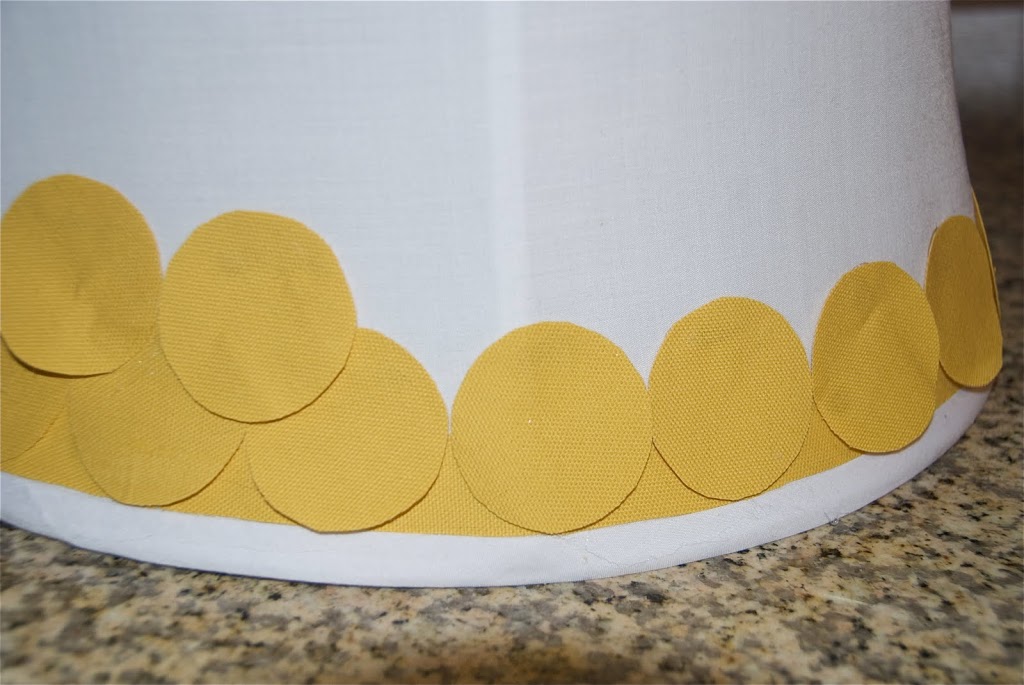
Continue the next row with full circles. Again, make sure the circles are touching, and line the bottoms up with the shade binding. Only glue the tops of the circles, so that the bottom of the circles are not attached. This will give more dimension.
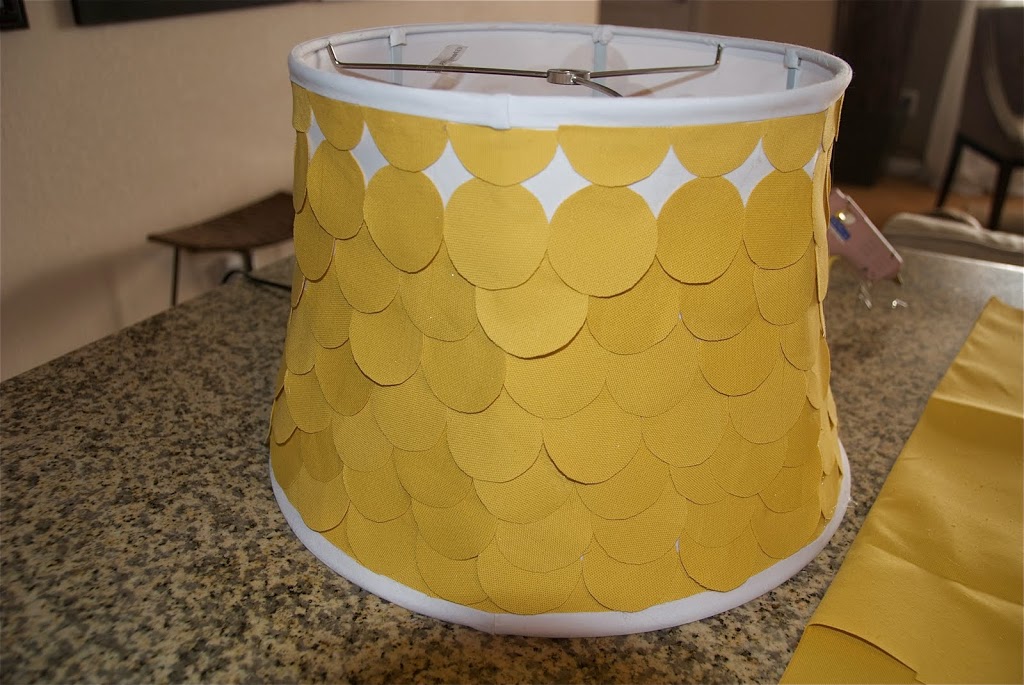
Keep on going until you get close to the top. Once you get close, attach a row of half circles to the very top of the shade, lining up with the shade binding. (I suppose this step could also be done at the beginning, but I obviously didn’t think this through before I started!) Cover the spaces with full circles until, with the exception of the bindings, the lampshade is completely covered.
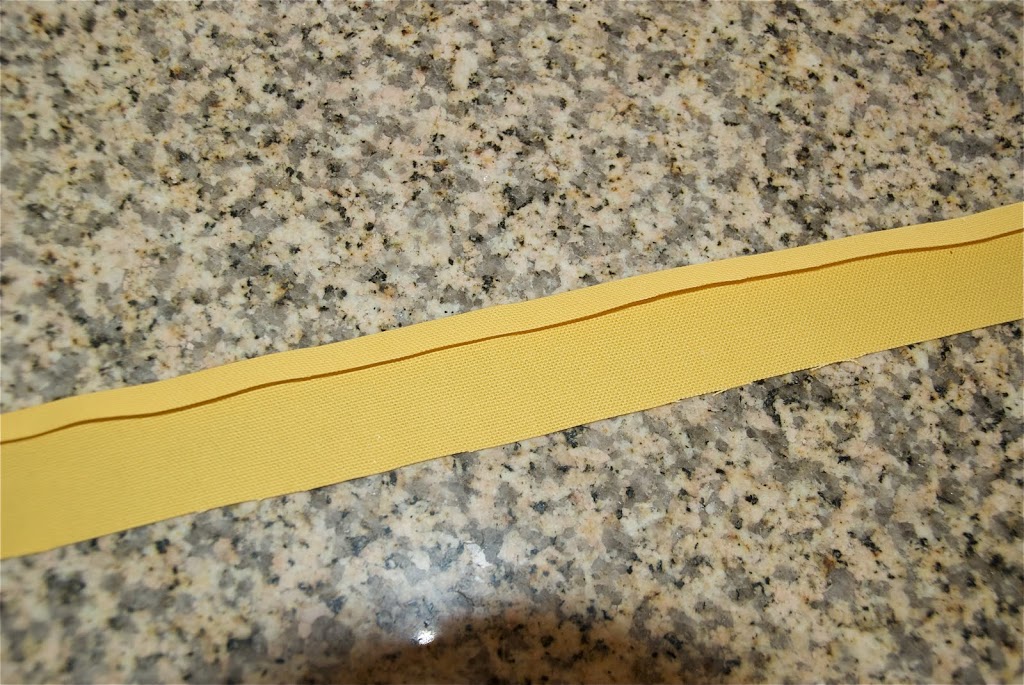
Cut two 21/2 inch strips to cover the existing bindings. (No, I cannot cut a straight line!) Fold one side down (about 1/2 inch or depending on the size of the existing binding), and iron, so that it is well-creased.
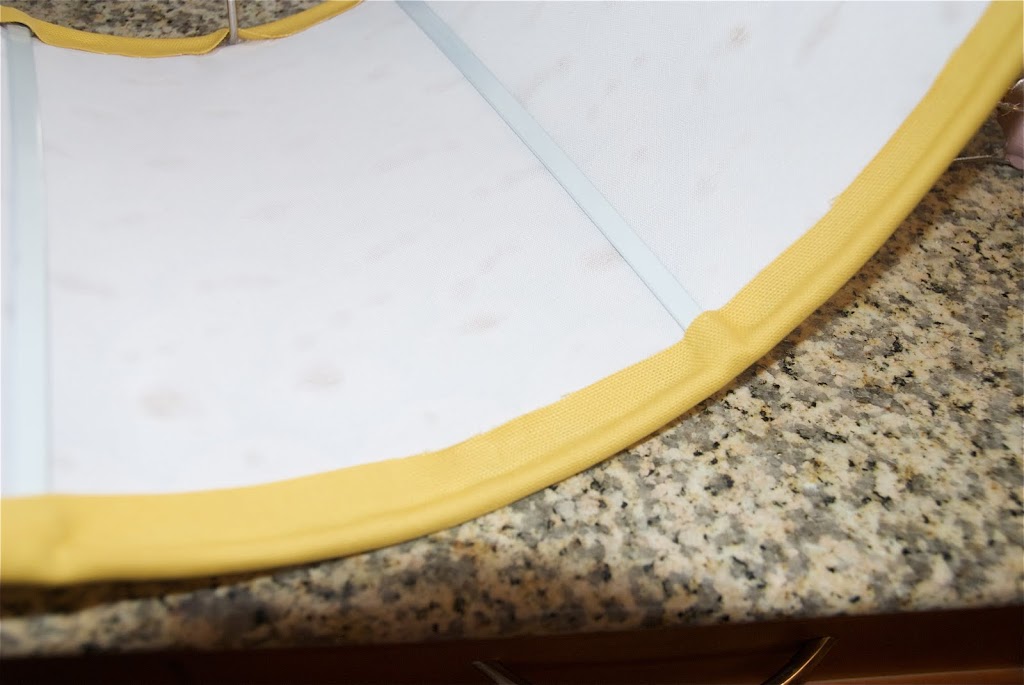
Add glue to the folded over part, and attach to the lamp, working it all the way around. Then, attach the rest of the fabric to the inside of the shade, pulling tight and keeping it smooth as you attach it with glue. That’s it! You now have yourself a new lampshade! Cheap and easy, just the way I like it!
Thanks again to the girls at Ucreate for having me today! I hope you enjoyed my project and find other inspiration at [kreyv]!


Welcome Jamie, hats off to your patience. Cutting such small circles out of fabric you have given a good look to an ordinary lampshade. Hope stella enjoys its new look.
very cute thank for sharing 🙂
I love this!!! I’m hoping to make one of my own! For some reason your link is not work 🙁
how adorable! How on earth did you cut the circles so perfectly?
Sorry about the links! They are all fixed!
Isn’t this lamp beautiful? The yellow looks fabulous!
my son’s lamp might get a makeover soon, thanks to your tutorial!
looks great!
jamie
oh wow. It is FAB-U-LOUS!
Oh so cute, and looks so easy to do, love it!
Jamie! I love this website and I love you. So fun to see you on here. And for those of you that don’t know Jamie on a “personal level” like I do, I can guarantee you that she is pretty much even more amazing then her lamp creation and that is saying something. 🙂
Congrats Jamie for being in U-Create! 🙂 Love the lamp re-do. I know Jamie and her family and they’re A.W.E.S.O.M.E.
LOVE it! What a fun project and a “pop” in Stella’s room!
Hi, I have just found your tutorial after so many years. I love the lamp! Do you have photos with the lights on? I am wondering how it looks like at the glued parts (where there are 2 layers). Thanks