
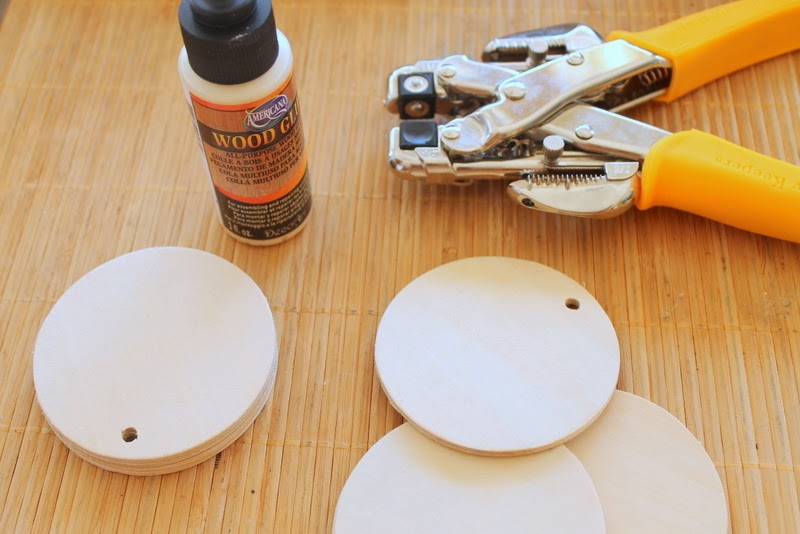
- Round wood shapes
- Wood glue
- Hole punch sturdy enough to punch wood or drill with drill bit
- Craft paints
- Small nails
- Hammer
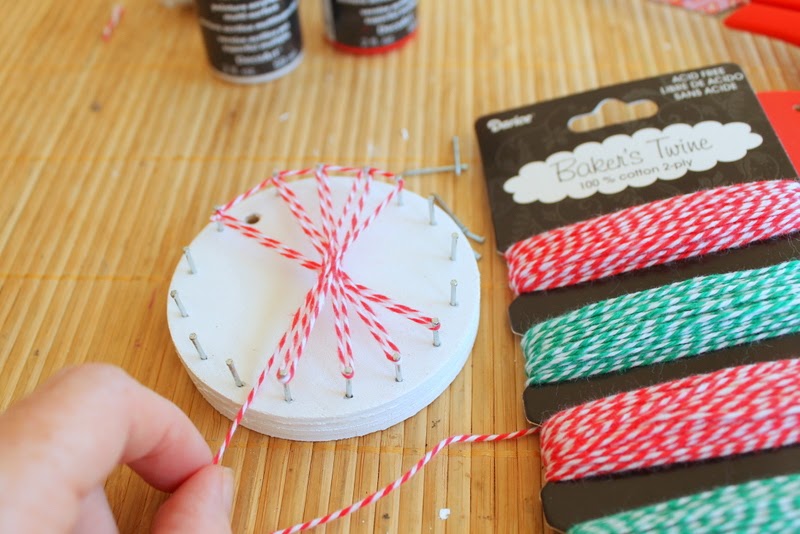
- Baker’s twine
- Ribbon
- Hot Glue
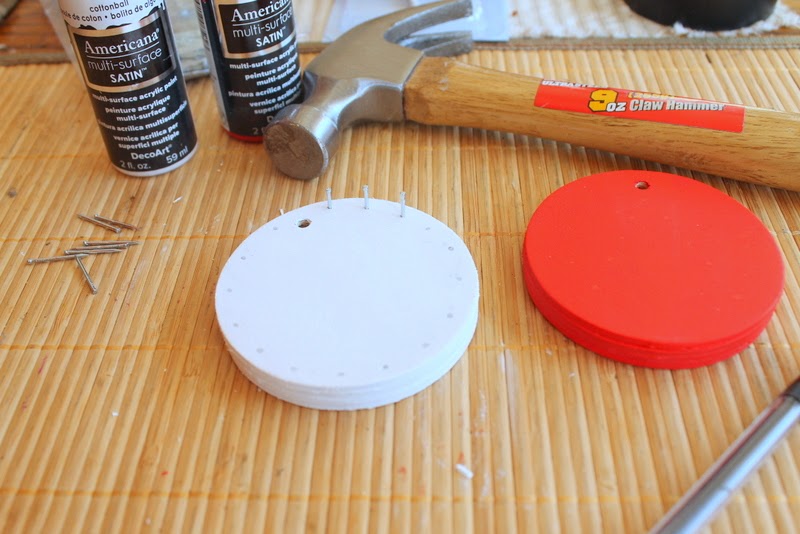
Use a pencil to mark holes where your nails will be located. Put a nail in each location being sure not to go all the way through your stacked shapes. Use baker’s twine to wrap your nails and create string art. Start on your first nail by knotting off your baker’s twine and end with a knot as well.
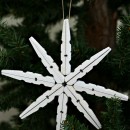
Cover the exposed edges of your ornament with ribbon using hot glue to secure. Add some ribbon for hanging on your Christmas tree as well.

The possibilities are infinite for the shapes you can create with this string art. Maybe make one with each of your kids’ initials? Or a fun chevron pattern? What shape would you make your DIY string art ornaments?

Thanks so much ladies for having me here today. Y’all can come visit the cottage anytime for even more fun inspiration.


This is so creative! I think I’m going to try this. Great post!
xoxo Zoe
http://thatszoe.blogspot.com/
I love this awesome trend turned into an ornament! Thanks so much for sharing your fabulous ornament with us today Angie!!