U Create

It's a good day to create!

  • pinterest
  • facebook
  • instagram
  • twitter
  • rss
  • crafts
    • crochet/knit
    • jewelry
    • kids crafts
    • paper crafts
    • sewing
      • bags
      • boys-clothing
      • girls-clothing
      • women-clothing
      • pillows
      • quilts
  • home decor
    • bathroom
    • build it
    • frames
    • kids
    • kitchen
    • office
  • recipes
    • desserts
    • dinner
    • snacks
    • soups
  • parties
    • baby shower
    • birthday
    • games
    • gift wrapping
    • party decor
    • party favors
  • printables
  • holidays
    • Christmas
    • Easter
    • Father’s Day
    • Halloween
    • July 4th
    • Mother’s Day
    • New Years
    • St. Patrick’s Day
    • Thanksgiving
    • Valentine’s Day
  • gifts
    • baby
    • electronics
    • graduation
    • teacher gifts
  • About
  • Be My Guest
  • Advertise
  • Contact
  • pinterest
  • facebook
  • instagram
  • twitter
  • rss

20 Jun

Fabric Basket Tutorial

Hi U Create fans! I am super excited to be here for the Summer Fat Quarter Series.

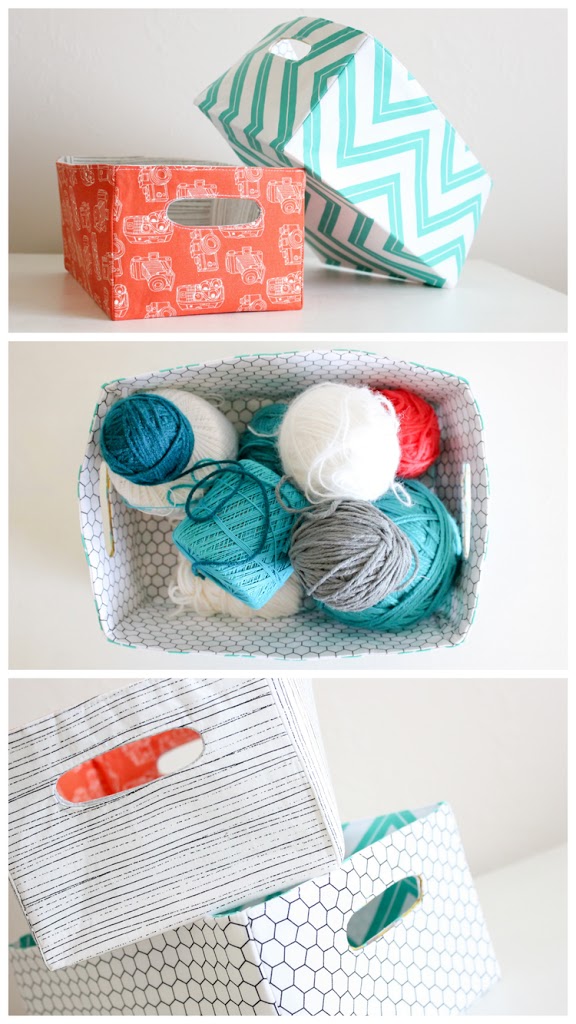
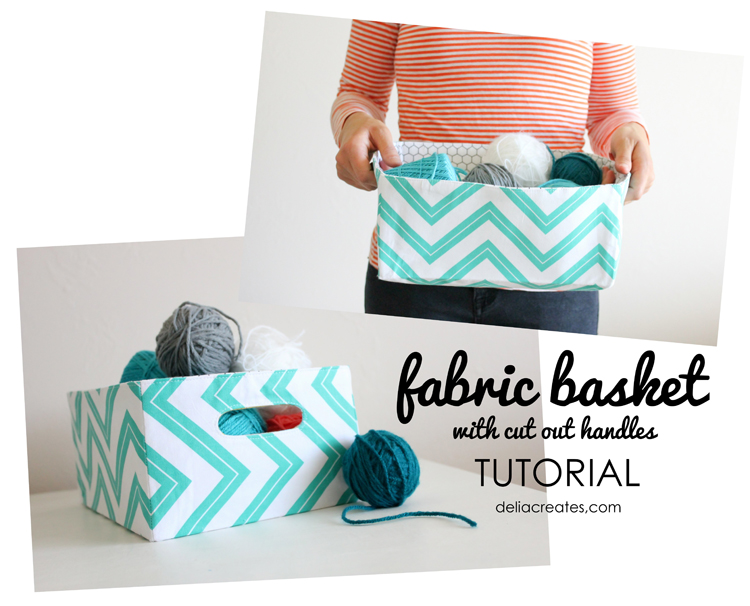
Today, I am sharing a simple project that takes just two fat quarters and some interfacing.

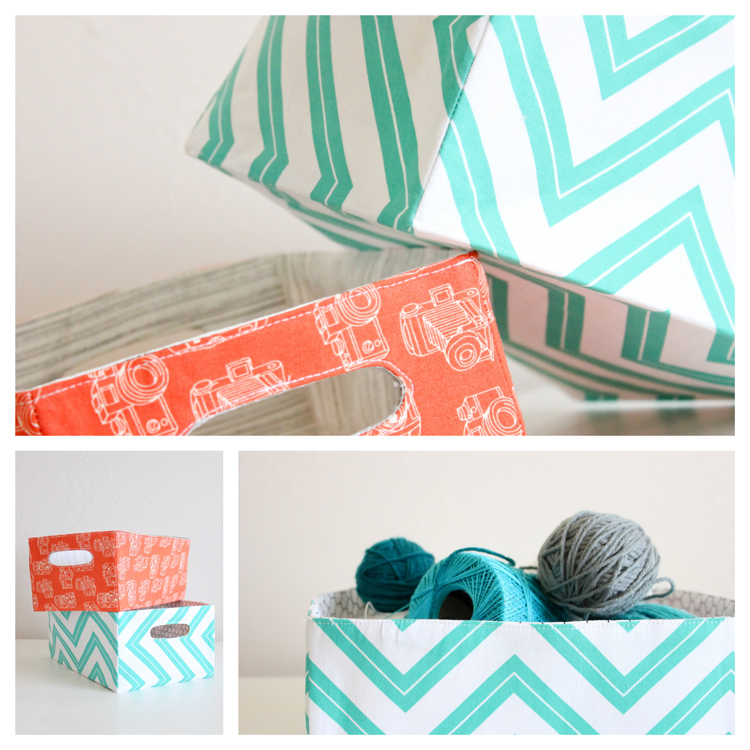
Fabric Bucket (with cut out handles) Tutorial by Delia Creates
It’s reversible too! 🙂
How to Make Fabric Baskets by Delia Creates
Let’s get right to it, shall we?
Materials:

two fat quarters
1/2 yard of stiff fusible interfacing
contrasting or matching thread
rectangular fabric scraps (preferably matches your fat quarters and no smaller than 4×4 inches)
fabric glue
That’s it!
Please note: I made two baskets so you will see the fabric interchange in some of the steps.
PREP YOUR FABRIC
Fabric Basket Tutorial by Delia Creates
-Wash and press your fat quarters. Don’t have fat quarters? You can simply cut a 1/2 yard of 44 inch wide fabric in half (parallel to the selvage) to get two fat quarters. Cut your half yard of interfacing in half as well so that you have two fat quarters of interfacing.
– Following the manufacturers instructions, fuse each piece of fabric with interfacing.
– Clean up the edges of your fat quarters to make everything nice and even and so that there are no frayed edges.
– Stack your two fused fat quarters and cut them again if needed so they are the same size. Sometimes, due to excessive fraying, you will end up with a slightly smaller basket (you can see a difference between the sizes of my two baskets). To help avoid  this, you can buy a 1/2 yard, wash it and then cut it.
CUT YOUR CORNERS
DIY Fabric Baskets by Delia Creates

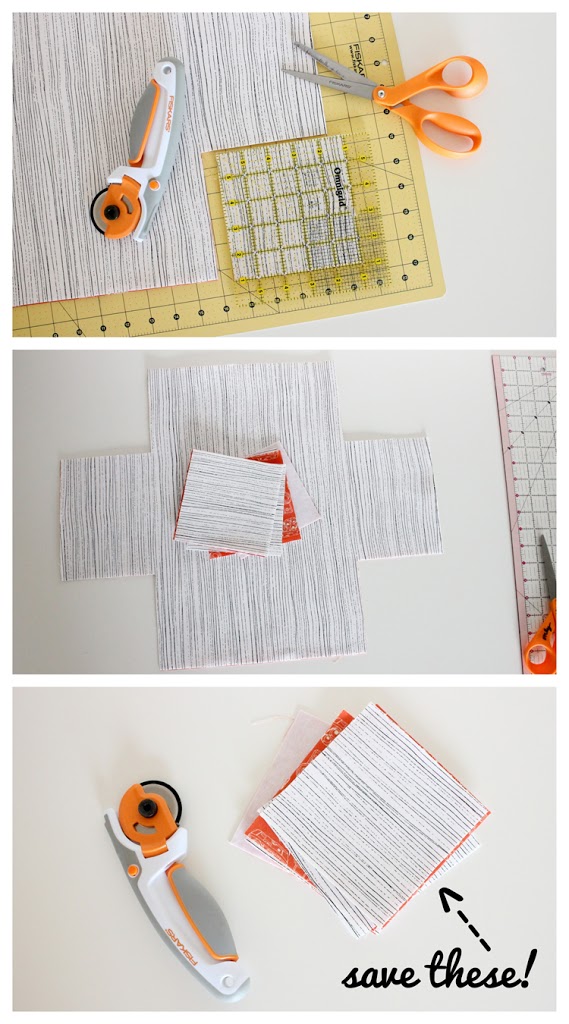
– Cut five by five inch squares from each corner. To make sure things stay nice and even, do it while your fat quarters are still stacked together. For a reversible tote, keep cuts the same. If you only plan on having one side be the outer piece, go ahead and cut the liner piece slightly smaller. 5 1/8 x 5 1/8 inch corner squares should do fine.
– Oh and hang on to those 5×5 squares! I am sharing three simple projects using them on my blog today. Go HERE to check them out.

PREPARE CUT OUT HANDLES

Reversible Fabric Basket Tutorial by Delia Creates

– Go HERE to download my fabric handle pattern. Print and cut it out…or you can trace it from your computer screen. 😉
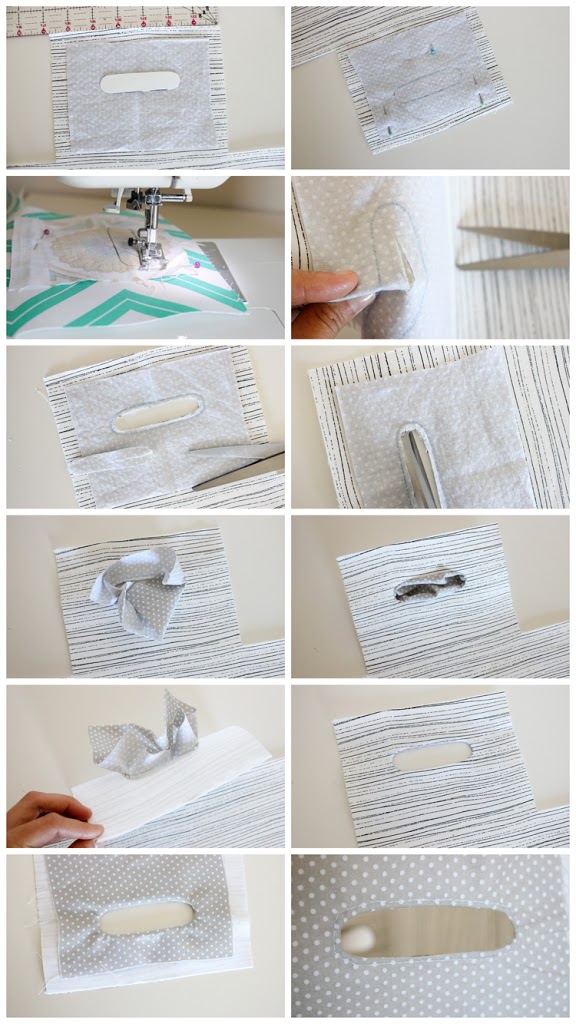
– Grab your scraps of fabric, I used non-matching pieces but it creates a cleaner look if you can match it to your fat quarters. Center them at the short ends of your fat quarters. Pin in place.
– Center the fabric handle pattern piece about 2.5 inches down from the top. Trace.
– Sew on the traced line.
– Snip in the middle of the handle, then cut the inside of the handle out.
– Clip the curves without cutting through the stitches, push it through the hole and press with an iron.
-Top stitch around the handle opening.

*You won’t see top-stitching on the handles here because it was a change I added later.

FORM THE BASKETS
How to Make Reversible Baskets by Delia Creates
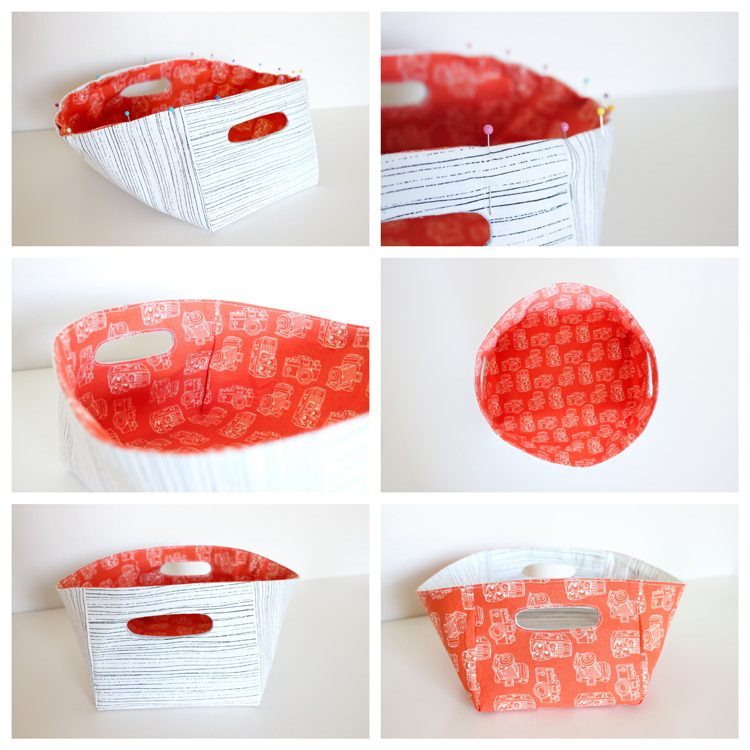
– Pin the corner edges together.
– Sew with a 1/2 inch seam allowance.
– Clip the corners and press open the seams.
COMBINE BASKETS
DIY Reversible Fabric Baskets by Delia Creates
– Also press down the top raw edge 1/2 inch.
– Turn one basket right side out and keep the other wrong side out. Nest them together.
– Add a thin line of fabric glue around the perimeter of the wrong side of the handles and glue the baskets together at the handles. I don’t anticipate I will be washing these baskets much if at all, since it will soften the interfacing, but if you need to, fabric glue holds up to machine washes.
Reversible Fabric Basket Tutorial by Delia Creates
– Pin around the perimeter of the basket.
– Top stitch around. To create a cleaner look lengthen your stitch.
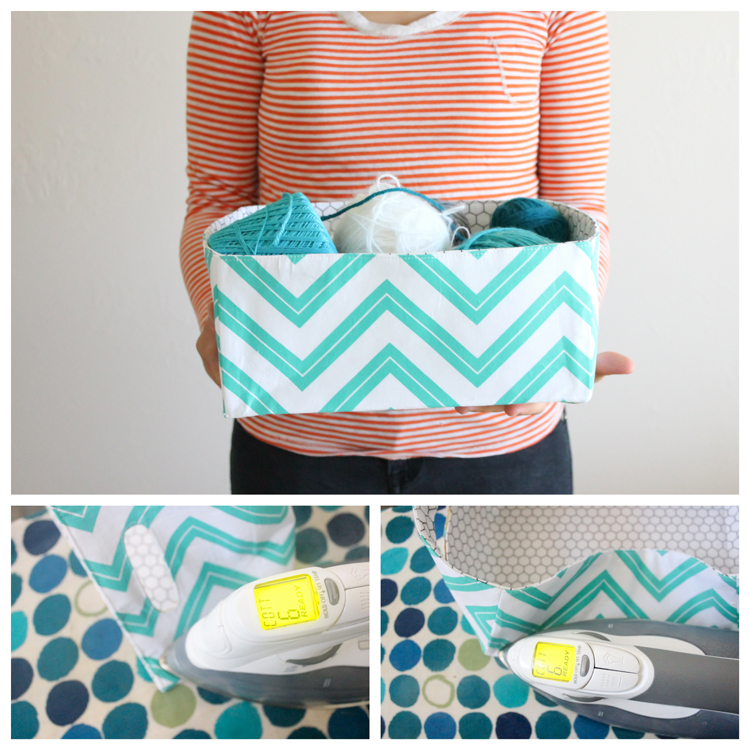
– Now you have a reversible basket! You can keep it rounded like this…or…
PRESS YOUR BASKET INTO SHAPE
DIY Reversible Fabric Baskets by Delia Creates
– Turn your iron on high with full steam and press it into a box shape. You will have to press each bottom edge and side seam several times before it takes shape.
-If ever it loses it shape, simply give it another quick press.
– If you made the basket reversible, you will have to re-press it when you switch to the other side. I do not recommend switching it too often, because it will wear the interfacing down over time.
And you’re done!
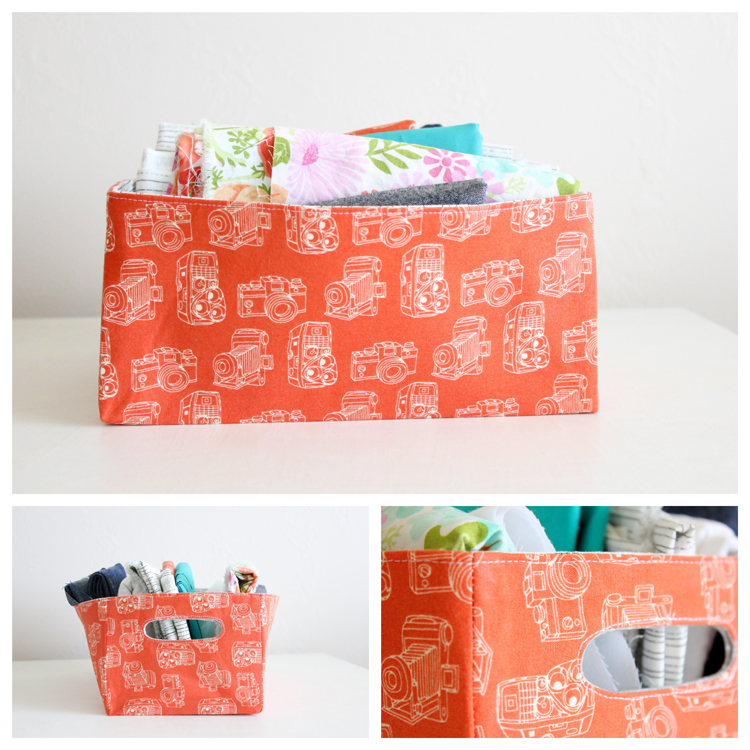
Fabric Baskets with Handles Tutorial by Delia Creates
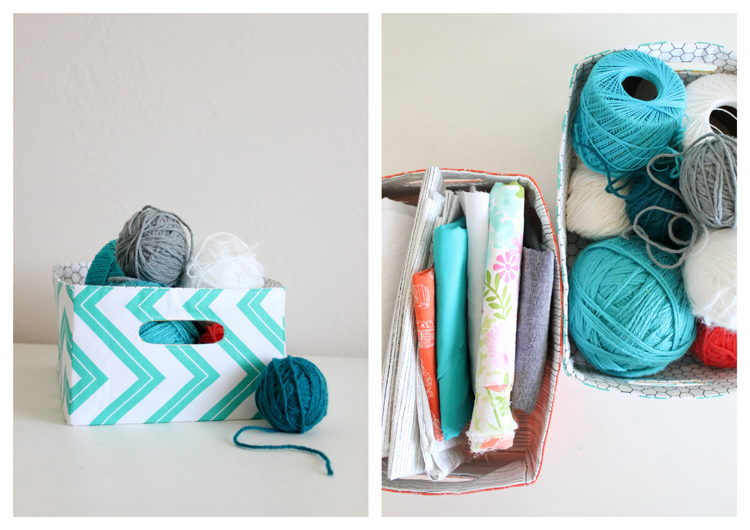
It’s a cute customized basket, great for storing almost anything. Craft supplies preferred. 🙂
Craft Basket Tutorial by Delia Creates
A pretty solution to your organization woes.
Fabric Storage Baskets by Delia Creates
The sides can flex out depending on its contents…it is a fabric basket after all. But, as I mentioned earlier, you can repress it in shape if it gets out of whack, or just leave it rounded and don’t fuss with pressing it at all.
They are such pretty things. I have been using them to store WIP projects on my sewing desk.
If you are wondering what to do with those 5×5 inch corners we cut out earlier, come by my blog (HERE) to see three easy projects I made using them!
Thanks for having me over Kari!
Fabric sources:
Orange Camera fabric – 2wenty Thr3e – Kodachrome – Clementine by Eric and Julie Comstock- Southern Fabric (sponsor)
Chicken Wire – Oink a Doodle Moo by Jenn Ski – Southern Fabric
Chevron – don’t remember designer, small local quilt shop
Crayon Stripe – from Benartex from Quitology

You may also like these

Sewing Sheets for Kids – PART TWO!One Hour Bindless Baby Blanket Tutorial1-Hour Bindless Baby Quilt10 Comfortable Mask TutorialsSewing Sheets for KidsMessenger Bag TutorialMessenger Bag Tutorial
Previous Post: DIY Hexagon Clock by Owens Olivia
Next Post: DIY Bike Basket

Comments

  1. Nancy@OwensOlivia says

    June 20, 2013 at 4:42 PM

    Cute baskets!

    reply to this comment >
  2. Kari Sweeten says

    June 20, 2013 at 4:44 PM

    Love these baskets Delia!! Such a beautiful way to store pretty much anything! Gorgeous fabric, too.

    reply to this comment >
  3. Anna says

    June 20, 2013 at 4:47 PM

    yay Delia! these rock! seriously good stuff.

    reply to this comment >
  4. Glass Slipper Gourmet says

    June 20, 2013 at 6:44 PM

    i LOVE LOVE LOVE your fat quarter series!!!! all of the ideas are so fantastic and creative! I look forward to seeing the rest of them! 🙂 thank you for doing this series!
    k

    reply to this comment >
  5. lasmanualidadesderita says

    June 20, 2013 at 7:35 PM

    Really nice

    reply to this comment >
  6. Amy Winkel says

    June 20, 2013 at 9:05 PM

    cute basket! What is the finished size?

    reply to this comment >
  7. Melanie@Crafty Cupboard says

    June 20, 2013 at 3:41 PM

    Delia does it again! Love the handles, very cute addition!

    reply to this comment >
  8. Sandy says

    June 20, 2013 at 4:17 PM

    Love this project! Can you please share what brand/type of interfacing you used? I want to make sure my basket holds up well! Thanks.

    reply to this comment >
  9. Delia says

    June 20, 2013 at 5:49 PM

    Sandy, good question! I used 809 Decor bond because it was what I could find in my tiny town. For even greater strength I think I would consider ordering 520 Deco Fuse (I have heard that it is great for projects like this but I haven’t used it yet). Just get the firmest kind of you can find. Add a third layer of interfacing if you need too…If you don’t mind basting sew in interfacing in, you could probably use a craft grade interfacing. 🙂

    reply to this comment >
  10. Michelle {Daydream Believers} says

    June 22, 2013 at 2:26 AM

    Looks easy enough 😉 Thanks for the great tutorial Delia!
    Happy Day!
    Michelle
    http://www.daydreambelievers.net

    reply to this comment >
  11. Delia says

    July 2, 2013 at 8:06 PM

    I wanted to add an update here. After a month of flipping my baskets in and out a couple times and reironing them they are really wearing down. I would like to add to the tutorial that I recommend the 520 Deco Fuse which SHOULD hold up better. You can also use a fusible fleece interfacing. It is thicker but also SHOULD last longer. My baskets are still in use, but I can tell the 809 Decor Bond is not holding up as well to the beating I’ve put it through. 🙂

    reply to this comment >
  12. diligentmonster says

    August 13, 2013 at 8:27 AM

    This is awesome! I was just thinking about something like this and am sure I’ll make a couple of them 🙂

    reply to this comment >
  13. Jeri Niksich says

    August 18, 2013 at 10:29 PM

    Love these baskets and I want tyo tell you that you truly are one of my favorite Bloggers I follow I go straight to your email 1st everyday. You always have something that interests me. Thanks for Everything.
    Jeri

    reply to this comment >
  14. Jocelyn Chappell says

    August 29, 2013 at 2:07 AM

    Thanks for the great tutorial!!! I used your instructions to make some baskets for my nursery. They’re perfect for holding onesies and sleepers.

    reply to this comment >
  15. Jocelyn Chappell says

    August 29, 2013 at 2:09 AM

    Thanks for the excellent tutorial! I used your instructions to make some baskets for my nursery. They’re perfect for organizing onesies and sleepers! Thanks for taking the time to share your skills and knowledge.

    reply to this comment >
  16. Trinity says

    March 31, 2015 at 4:44 AM

    Found your fabric basket tutorial via Pinterest and just love it! Thanks for sharing-new follower looking forward to checking out all your crafts. 🙂

    reply to this comment >
  17. Kate says

    December 30, 2015 at 4:47 PM

    They look great. What’s the finished size?

    reply to this comment >
  18. Karen says

    July 5, 2020 at 2:24 PM

    These could be a great solution for me in organizing with what I have, but is there a way to make them to a specific size?
    Thank you for the great tutorial!

    reply to this comment >

Trackbacks

  1. Fabric Basket Tutorial - Sewtorial says:
    March 28, 2015 at 4:15 PM

    […] for a storage solution? Try this fabric basket tutorial by Delia Creates (with U Create) in your favorite fabric to match any […]

    Reply

Leave a Comment Cancel reply

Your email address will not be published. Required fields are marked *

Recipe Rating


Popular Posts

New Year's Eve Minute to Win It games by U Create

New Year’s Eve Minute To Win It Games

Free Printable "Color Your Own" Christmas Banner

Merry Christmas Coloring Banner

Free Pattern: Fall Turkey by U Create

Fall Turkey Printable

Free Printable Pumpkin Games

Halloween Printable: Bugs and Kisses

Halloween Minute To Win It Games

  • pinterest
  • facebook
  • instagram
  • twitter
  • rss
 
Privacy Policy
Back to Top

Copyright © 2023 U-Create • All Rights Reserved • Site Design by Emily White Designs