
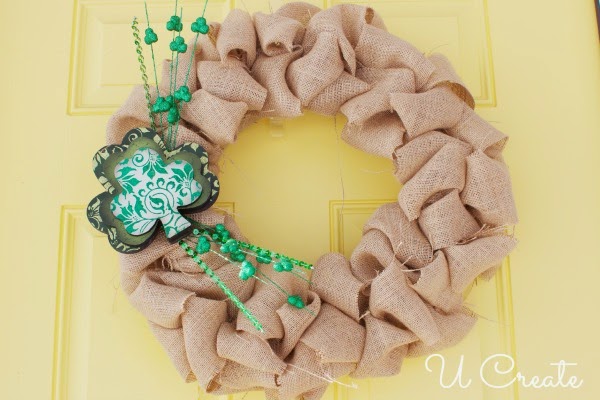
I love wreaths and I love to DIY wreaths for the different seasons. I have one for every season, but it’s tough to store them and remember to get them out. Yeah, I know it sounds lazy, but I am all for taking the “path of least resistance.” So, I came up with the idea of making an interchangeable holiday wreath. The actual wreath took little time to create and even less time to change it up for the current season. This tutorial will walk you through how to create a beautiful burlap wreath and the best way I have found to make it interchangeable.
Supplies Needed:
-Burlap Ribbon (You then need 2 to three yards of burlap. This can vary depending on how full you make your wreath. I got 2 yards. And I found a burlap from JoAnn’s craft that has a gold speckle in it, and I LOVE It!)
-Foam Core Wreath
–T Pins (You need “T” pins. Otherwise regular pins will go right through the burlap.)
-Holiday Decorations:
(I like simple, so I don’t buy a lot, but I tend to buy more than I need, and then take back what I don’t need. Because its difficult to know how it going to look.)
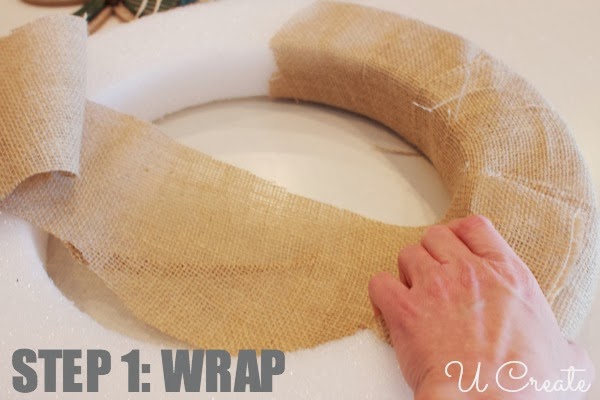
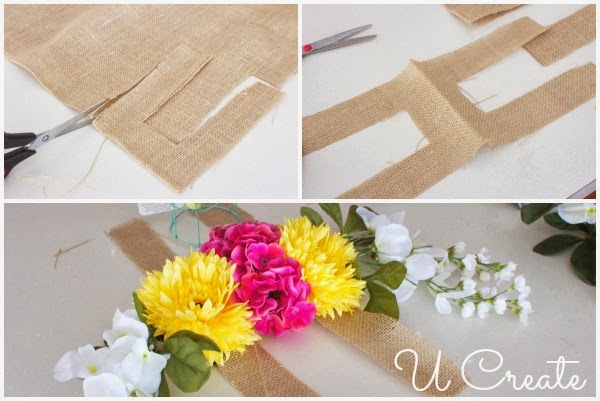
With the burlap folded in half I cut long strips of fabric that were about 4 to 5 inches wide. To completely hide the styrofoam, I wrapped the strips around the wreath and pinned each piece until the whole wreath was covered.
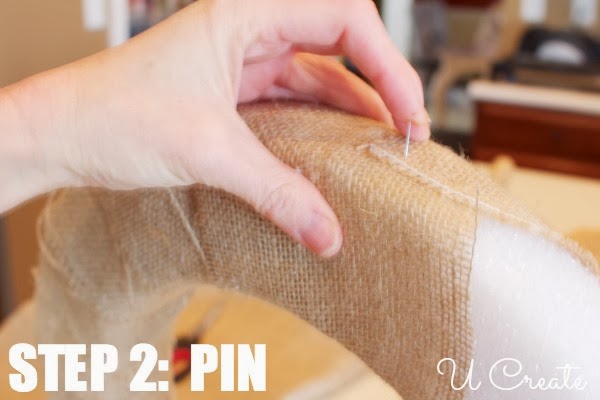
I took a strip and pinched one end and pinned it down, and then I twisted the burlap and pinned it again so as to make a bubble. And then pinched and pinned it again. And then just keep repeating that and tucking it and pinning each time.
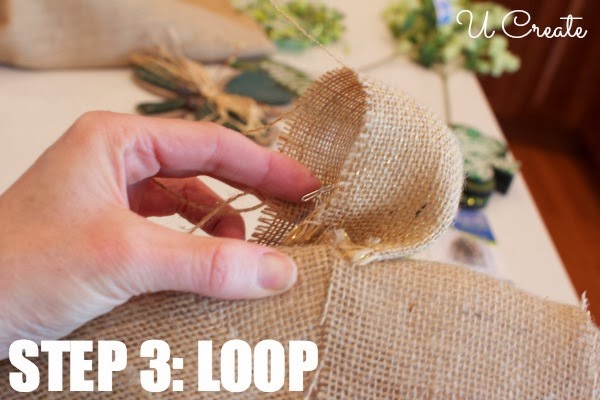
How big you make the “bubbles” or twists and where to tuck and pin, depends on how full you want your wreath to look. Mine took about 9 strips and I didn’t worry about making it full on the sides of the wreath, just the front of it. But when it hangs, you can’t see the sides because they are covered in burlap and it looks fine. Also, don’t worry about making mistakes or making them all perfect, or at least for me, the goal was to not look “perfect.” I wanted the frayed edges too. So I like the strings hanging all over. But its up to you. You can clip those to make it look more “clean.”
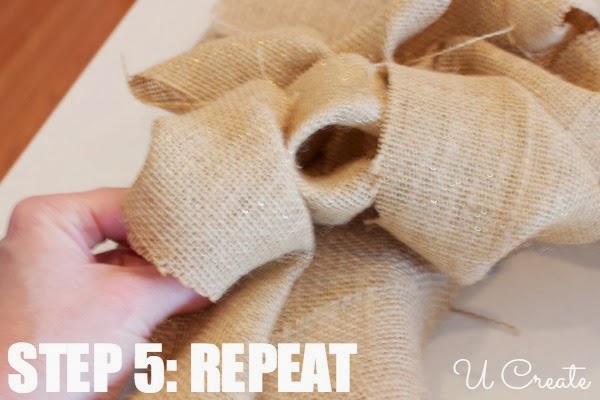
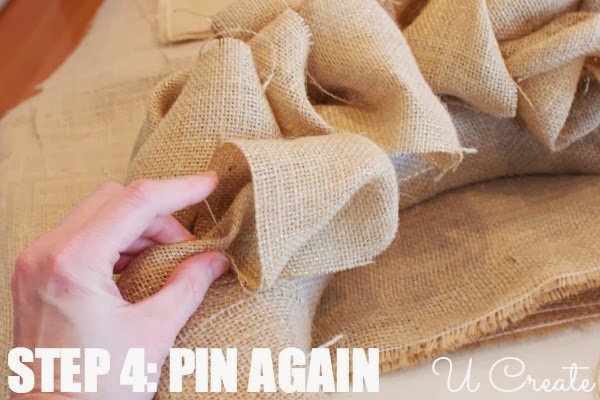
When I was finished, I pinned some of the “bubbles” that didn’t look right to me. So you can still tweak it after you have finished wrapping it.
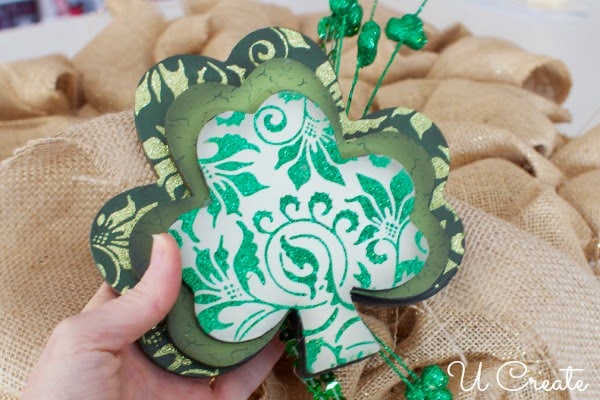
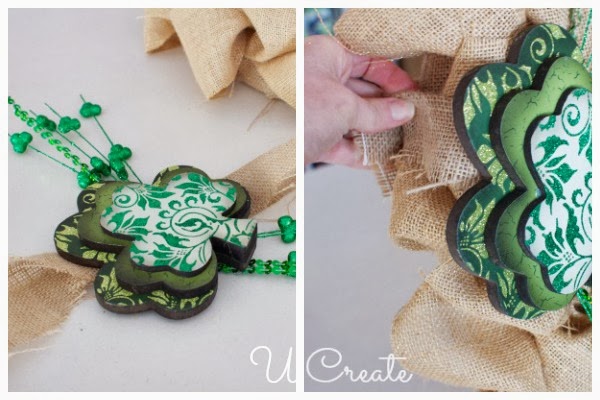
St. Patrick’s Wreath:
Green sprigs
Stacking Clovers
hot glue/gun
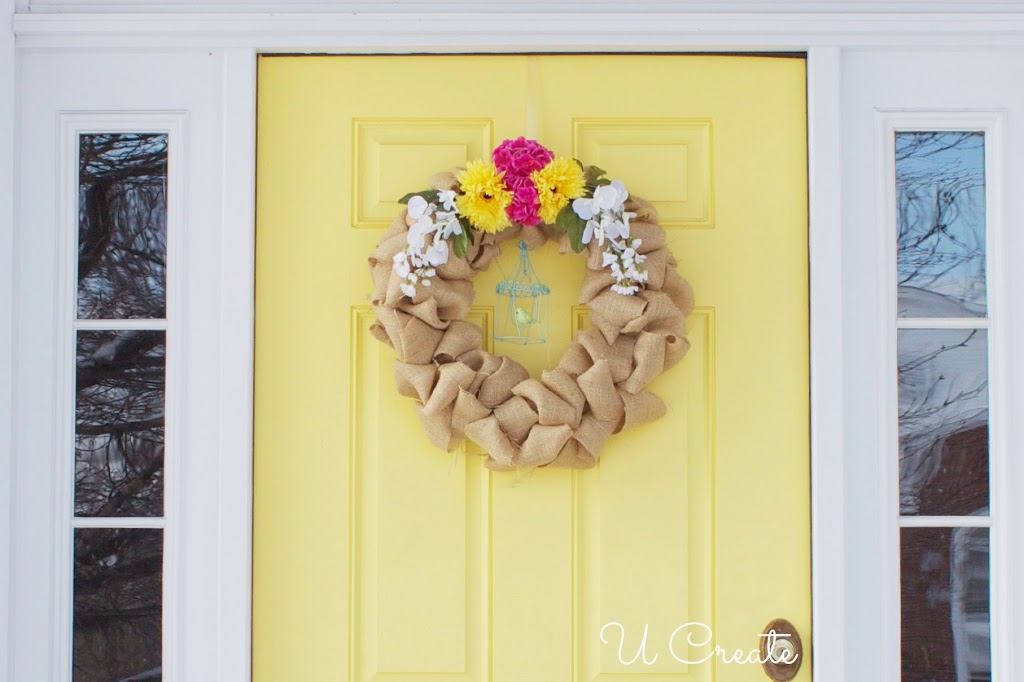
Spring Wreath:
Bright Flower spread
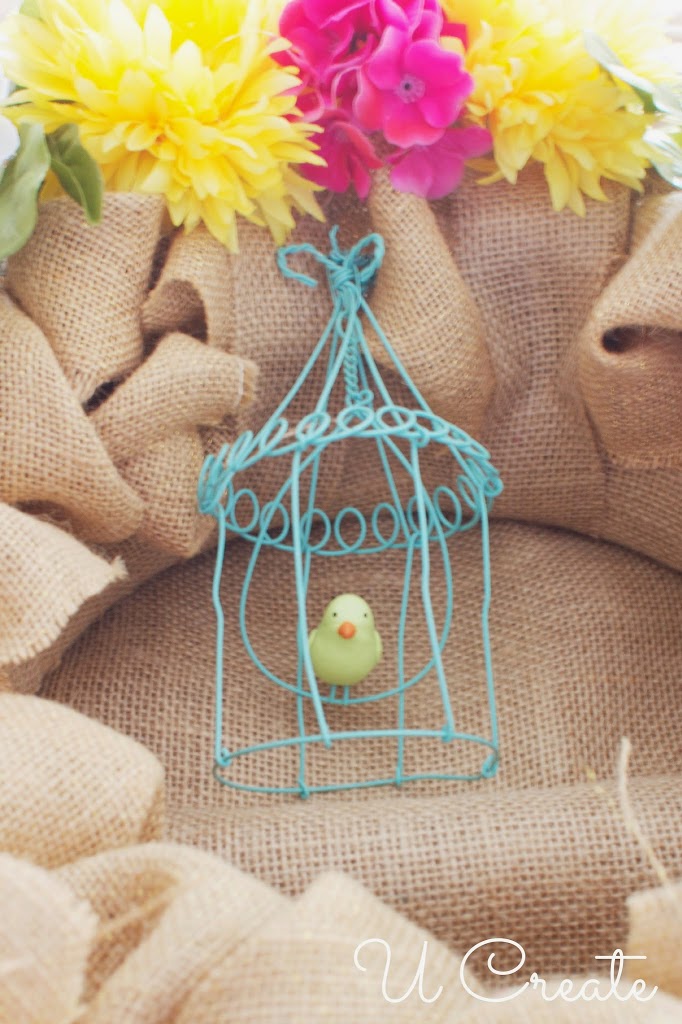
Little bird cage
hot glue/gun


I love this wreath Kellee! So many ways to spice it up for any season! Thanks for sharing!!
I did this last year when I needed a wreath, but didn’t know what the future would hold for me (post divorce.) Anyway, I made my wreath with burlap ribbon (2 – 5 yd rolls) and a metal wreath form. I’ve been changing out the decor on it ever since!!! I love it, cause it’s SO MUCH easier to store the “decorations” rather than each wreath!!!
Wreaths take up so much space in storage, so I LOVE this idea!