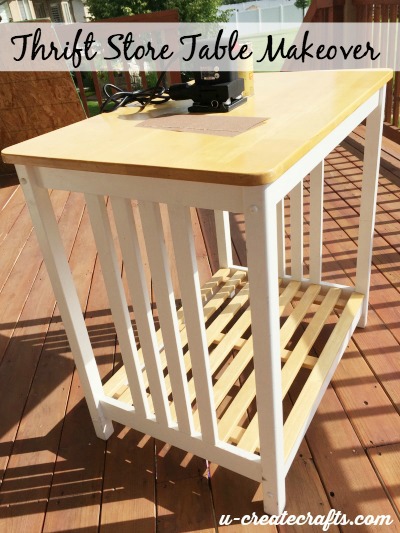
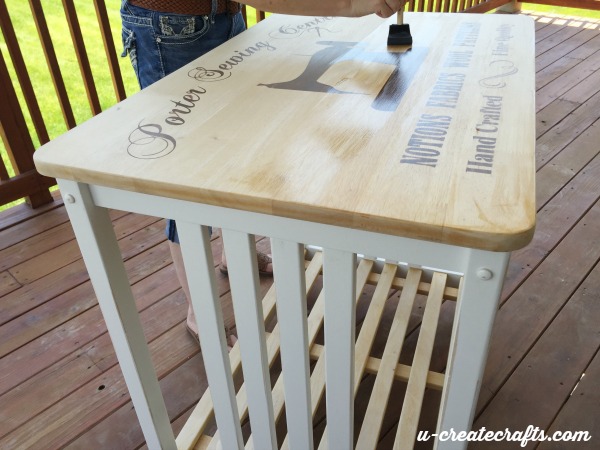
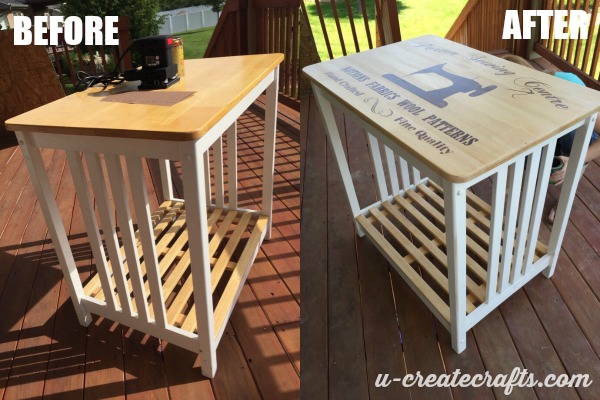
 My mom has a table in her sewing room that she has set up as a cutting center; her cutting mats are on it with her rotary wheels and that is where she “squares” her quilt squares. However, she has to slouch over it or bend over it and her back get sore. My Aunt Penny wanted to do something very special for my mom’s birthday so for MONTHS she scoured Yard Sale sights on Facebook for a table she could makeover as a cutting table for my mom. Through a really awesome sequence of events, my Aunt found this amazing old kitchen island. The table is tall enough that Mom wouldn’t have to hunch over it to cut fabric. She bought it, called me and asked if I could design a vintage looking sewing store sign for the top of the table. I loved the idea and couldn’t wait to get started. Here is a step-by-step tutorial of how we turned an old thrift store table into an amazing sewing room table!
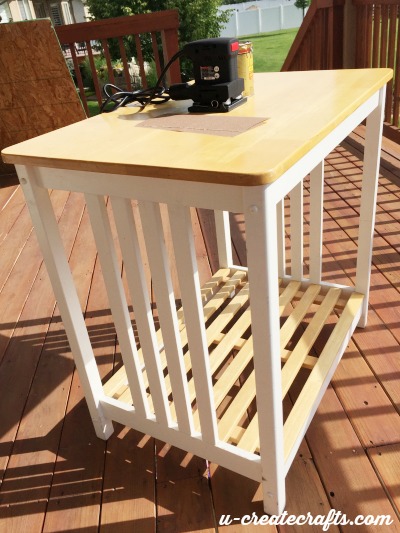 Supplies Needed:
- gritty sand paper
- fine sand paper
- hand sander
- vinyl stencil
- brown acrylic paint
- sponge brushes
- polyurethane
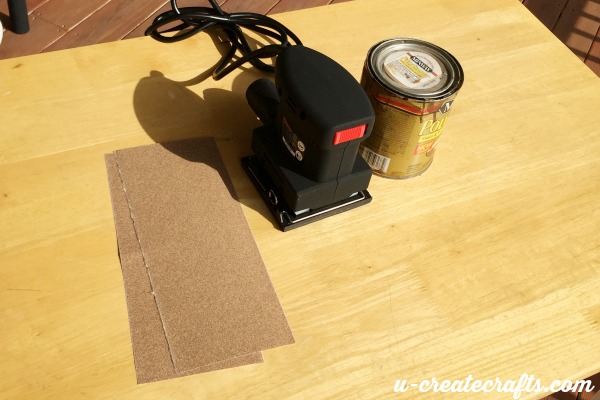 Step #1: Sand off the stain and gunk with the hand sander. First, use the gritty sandpaper then run a fine sandpaper over it to smooth it out.
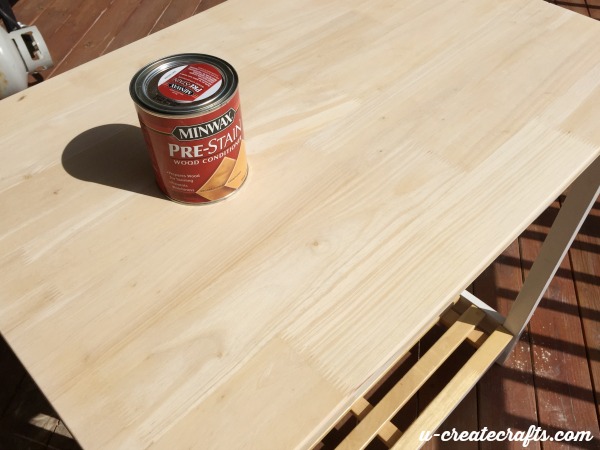 Step #2: We loved the natural look of the wood and decided against darkening it. So we used a cheesecloth to wipe off the sandy dust and got it ready to apply the vinyl.
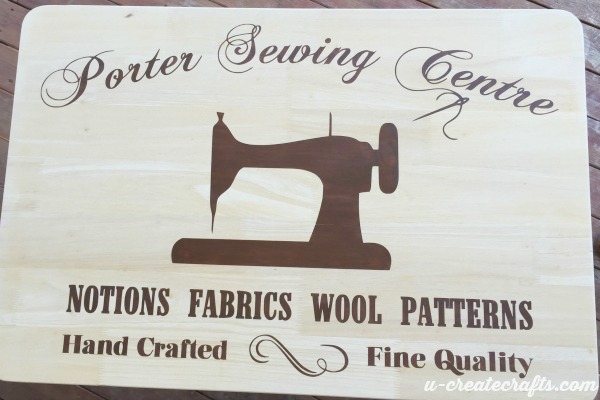
 Step #3: We cut the vinyl in 3 pieces and laid it all out before we applied it to make sure it looked awesome…and it totally did!
Vinyl is a great stencil! You can only use it once, but when it’s a personalized table top or something like it you really aren’t going to use it again. A great thing about using vinyl is the crisp lines you get when you apply the paint.
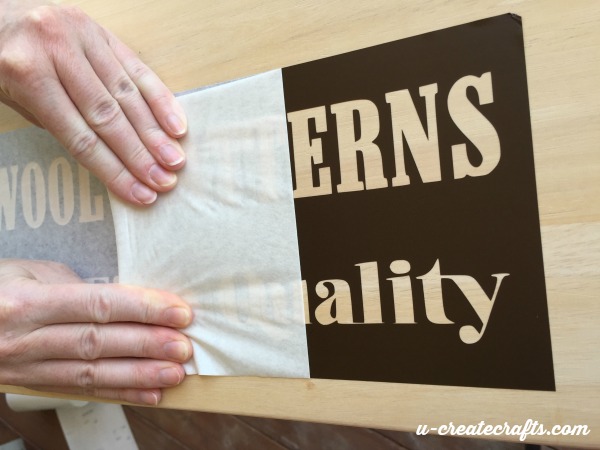 Step #4: Apply the Vinyl! Take off the backing of the vinyl and lay it on the table. To get it straight we used the planks of wood on the tabletop as a guide. Once the vinyl is down, rub it all over and make sure the bubbles are rubbed out. Then starting at one end, pull back the transfer paper slowly.
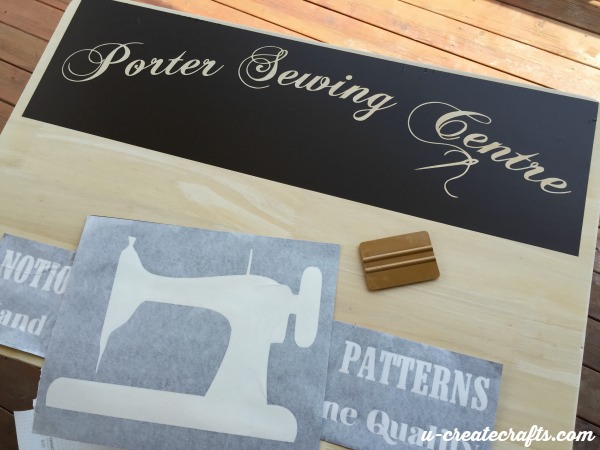
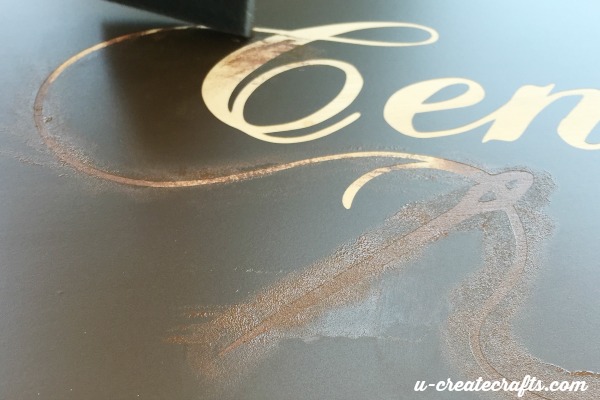 Step #5: Apply the paint! Using a sponge brush, we applied the paint by dabbing the brush up and down. We did that really gingerly at first, but by the end we were just brushing it on heavily. The only thing you have to watch for is paint going underneath the vinyl (if you didn’t get the bubbles all the way out).
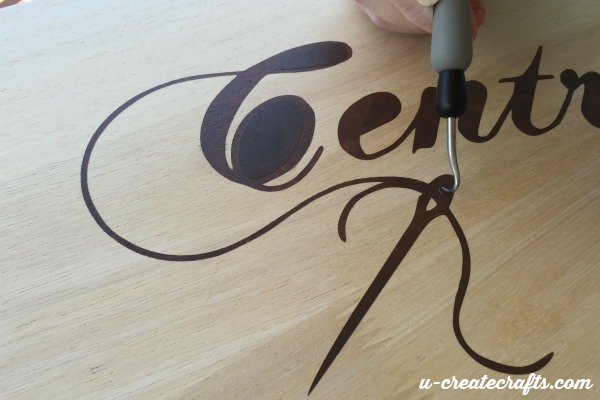 Step #6: Take off the vinyl while the paint is wet. I know some people are super against this, but it prevents you from pulling up any paint. I do it this way every time. We used a dental hook to get the little pieces of vinyl off.
 We took all the vinyl off and were beyond happy with the way it was looking. However, we wanted a “vintage” look and it just looked too crisp and perfect. So, we took sandpaper to it.
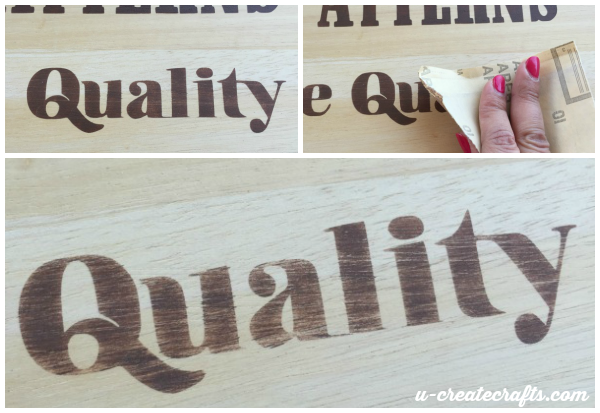 Step #7: Using a fine grit sandpaper or sanding block made the table look less perfect and more used and vintage looking.
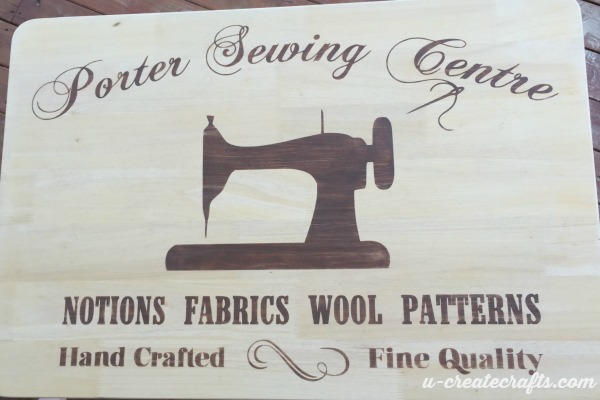
 Step #8: Once we sanded the heck out of the top and wiped all the dust off, we applied three coats of satin polyurethane. This gave it a little shine and a very smooth finish.
{Helpful hint: between each layer of polyurethane, my aunt took a very fine grit sandpaper and lightly went over the top. That process gave the table a smooth professional look.}
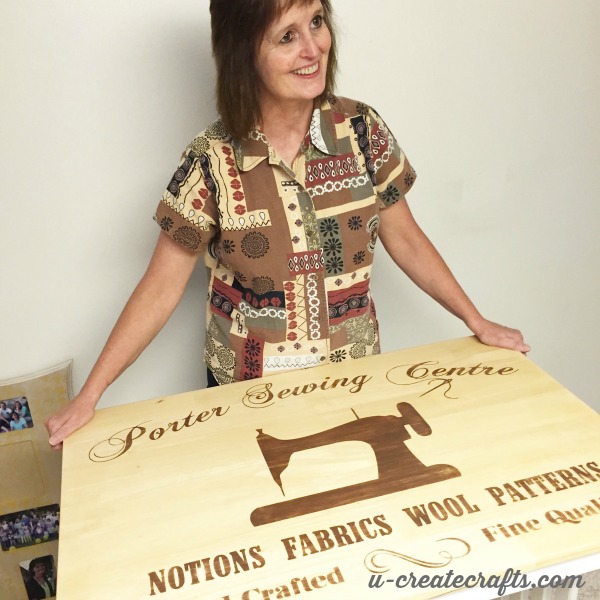
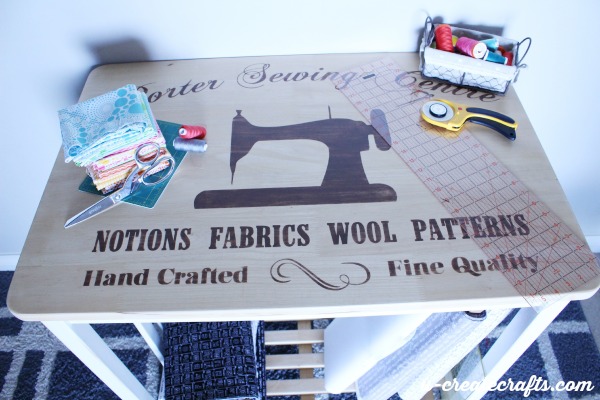 Now we were ready to give it to my mom! It looks perfect, right?! My Aunt and I couldn’t wait to give it to my mom. {Wanna know a little secret? I seriously wanted to keep this table so BAD!}
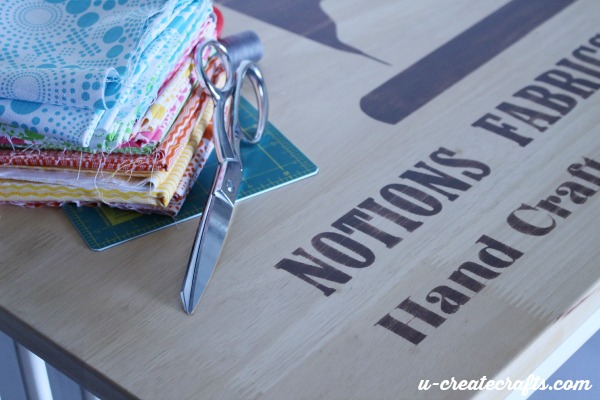
Okay, so I really wanted to keep it until I saw my Mom’s reaction when we presented it to her. She was so surprised and touched by such a thoughtful gift from her sister. It’s not often I see my mom moved to tears, but she was this time.
 Happy Birthday, MOM!
Posted By: Becky Vandenberg and Penny Duran


That table is awesome and what a nice personalized gift for your mom. Those are always the best presents.
Thank you so much for your comment. She loves that her name is on it!
Very cool. Can I ask how you created the stencil?
Yes! I finally have a craft I did featured on u create. I couldn’t be happier with the final result. Thanks for the help, Beck.
That is really cool! I love the stencil- I’d love to know what fonts and files you used to make it.
Awww — this post really made me smile. What a wonderful gift!!!
Thanks. Her reaction was priceless. In fact, the next day she texted me and said, “I was so happy the table was here when I woke up. I thought it was a dream.” 🙂
This is the sweetest thing ever, my Mum would loves table like this, as would I!! I love the stencil idea, I must try it out!x