Hi, Guys! It’s Lindsay from Living With Lindsay! Kari has allowed me to take over her blog today to show a little project I created just for you. I sure hope I don’t break anything while I’m here. ::looks around sheepishly::
Anyway, just minutes before it was time to put my 3 year old down for his nap a few weeks ago, I came up with the idea of an etched glass silhouette mirror. Believe it or not, the entire project was finished before he woke up. Folks, you can do this one very quickly!
I’m really obsessed with silhouettes right now. In fact, as I was working on my new project, I realized that Jill’s adorable silhouette pillow from right here at U create may be the original source for my new obsession. I’m totally blaming her. No one’s profile is safe in my home – my dogs and cat have even sat for their profile photo session. I kid you not, but that’s a blog post for another time.
Supplies:
Mirror
Waxed paper
Contact paper (sticky shelf liner)
Etching cream and foam brush
Tape
Pencil
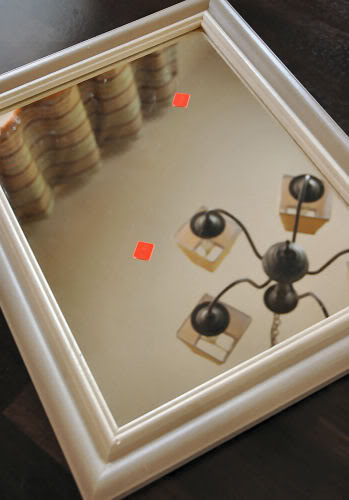
1. I began with a cheap framed mirror I found at a local thrift store. I was originally going to use it for another project but had a change of direction, so this mirror was just sitting in my craft room screaming to be used.
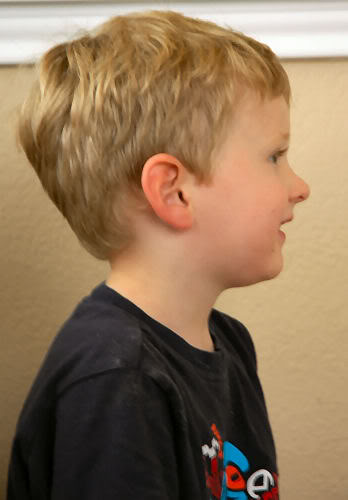
2. I took a photo of my son’s profile. It must have taken me 50 pictures to get this one. Little, wiggly 3 year-old boys don’t sit still for very long.
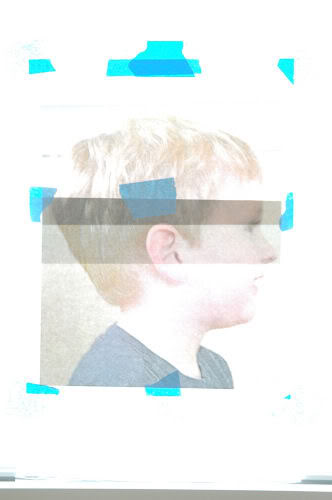
3. I printed out his photo so that it was the size I wanted on my mirror. It took a few attempts to make sure it was just the right size to fit in the mirror. Once printed, I taped it to a window and then taped a layer of waxed paper on top of it. Then, I traced the outline of his silhouette. I took the artistic liberty of smoothing over the cowlick on the back of his head so that it wouldn’t look like I didn’t comb his hair (Well, I didn’t comb it, or change his dirty shirt, but still).
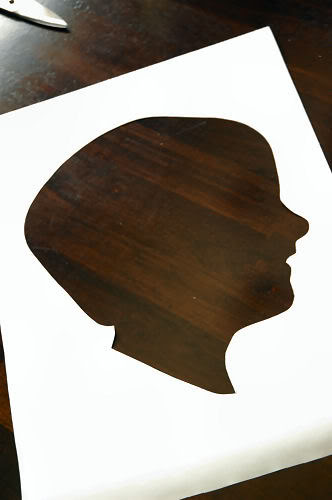
4. I cut the shape out of the waxed paper and traced it onto the contact paper. Then, I cut out the negative of the image.
5. After removing the mirror’s frame, I applied the contact paper directly to the mirror, placing the cut out exactly where I wanted it to be etched, and smoothed the bubbles from the paper. I transferred some etching creme into a plastic bowl and used it to paint the cut out area with the foam brush.
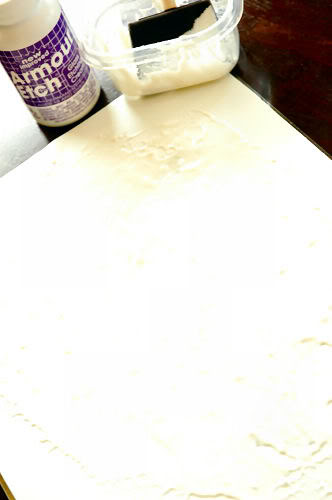
Make sure to apply the cream thickly and evenly. Allow it to sit for five minutes and then rinse the mirror off under running water. It’s hard not to think of the etched glass as painted glass, but don’t worry, it won’t run or smear. You can dry it with a towel and even use glass cleaner.
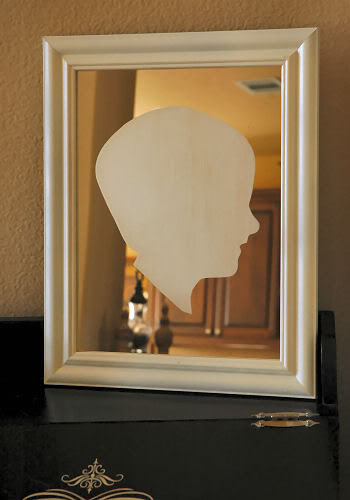
6. I spray painted the frame an antique white and put the mirror back in the frame.


That is really beautiful! Thanks for sharing.
I didn’t even know that such an etching product existed! Thanks for sharing!
Lindsay,
I really LOVE this idea!! BRILLIANT!
Thank you so much for sharing it with Ucreate!
What a great idea!! I will have to try this for sure! Thank you for sharing!
Great job! Love the idea.
Come see me sometime, will ya? (smile)
sweetjeanette.blogspot.com
i have a mirror that’s just been waiting for a project like this!! thanks for the great idea!!
Great Blog! I will definitely be back!
I love this idea. I love etching it is quick and easy and so beautiful when you are done. Perfect job. Thank you so much for sharing, I will have to try this.
Today I made my own version of the baby-bear blanket and you told me to share: Here it is!
http://dreamingofbeaches.blogspot.com/2009/09/he-had-his-head-decap-ditated.html
Wow, that’s fabulous! Thanks so much to both of you, I love this! I’ll be linking.
Where can i find that etching product? I love this idea!
Mistuk- It’s available at any craft store. 😀