U Create

It's a good day to create!

  • pinterest
  • facebook
  • instagram
  • twitter
  • rss
  • crafts
    • crochet/knit
    • jewelry
    • kids crafts
    • paper crafts
    • sewing
      • bags
      • boys-clothing
      • girls-clothing
      • women-clothing
      • pillows
      • quilts
  • home decor
    • bathroom
    • build it
    • frames
    • kids
    • kitchen
    • office
  • recipes
    • desserts
    • dinner
    • snacks
    • soups
  • parties
    • baby shower
    • birthday
    • games
    • gift wrapping
    • party decor
    • party favors
  • printables
  • holidays
    • Christmas
    • Easter
    • Father’s Day
    • Halloween
    • July 4th
    • Mother’s Day
    • New Years
    • St. Patrick’s Day
    • Thanksgiving
    • Valentine’s Day
  • gifts
    • baby
    • electronics
    • graduation
    • teacher gifts
  • About
  • Be My Guest
  • Advertise
  • Contact
  • pinterest
  • facebook
  • instagram
  • twitter
  • rss

15 Nov

Ballard Design Inspired Ornament Tutorial

 Hi UCreate readers! I am excited to be with you today to teach you how to create an incredibly easy and chic holiday ornament!

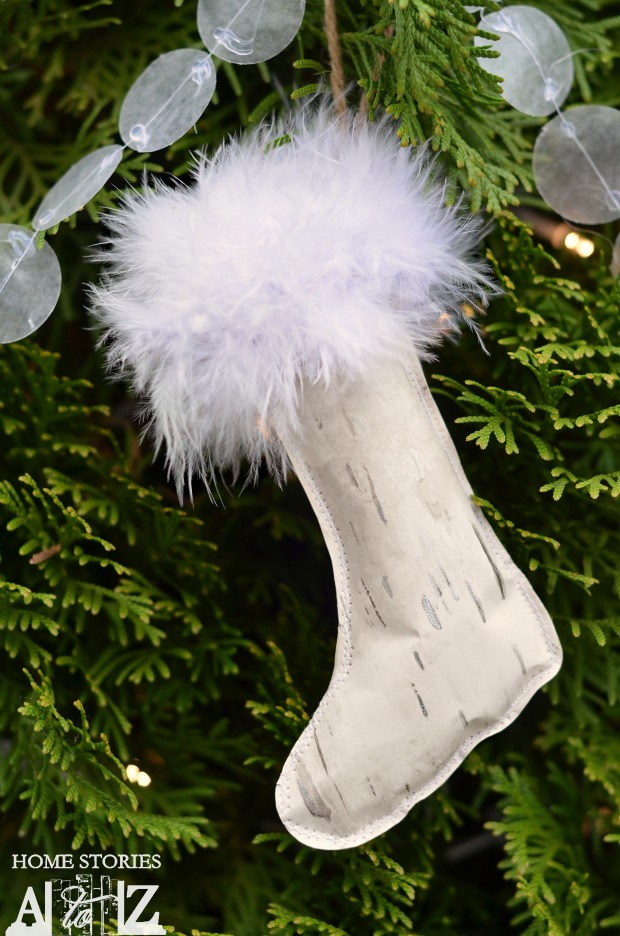
I recently bought a roll of birch bark looking wallpaper off of ebay in preparation for some Christmas decorating. When I saw this adorable birch bark stocking ornament in my Ballard Designs catalog, I knew I could create my own!

ballard designs inspired stocking ornament

Supplies Needed:

To create this ornament you will need the following:

  • Birch bark paper
  • Fur trim ribbon (I bought my boa-ribbon at JoAnn’s.)
  • Pencil, scissors, glue
  • Sewing machine
  • Polyester fiber fill
  • Twine
  • Metallic paint

Step 1: Create a stocking pattern and trace it onto paper.

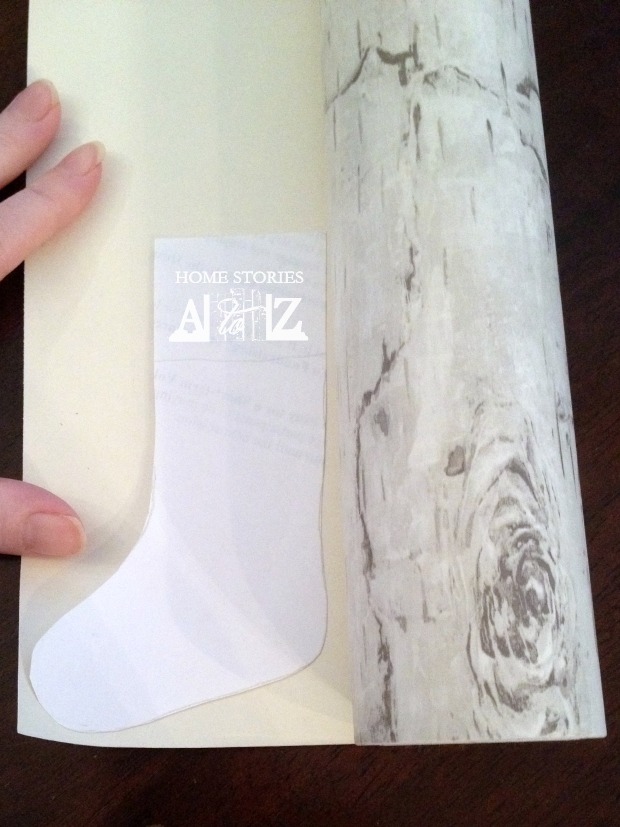
I drew a stocking shape onto some scrap paper, cut it out, and then traced it onto the back of my birch bark paper. Be sure to trace it twice, creating a mirror image of the stocking.

Birch Bark Stocking Ornament by Home Stories A to Z

Step 2: Cut out the stockings.

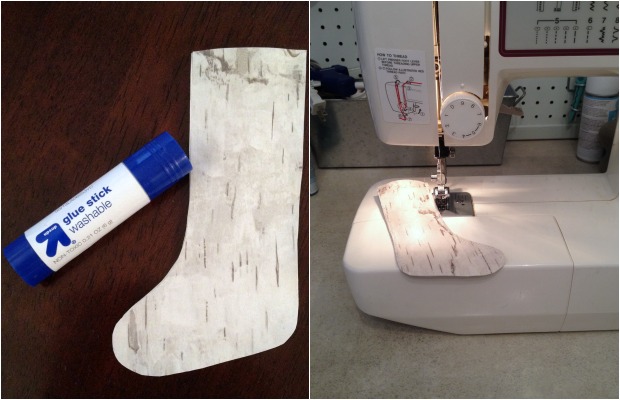
Use a sharp pair of scissors to cut around your pattern.

Birch Bark Stocking Ornament by Home Stories A to Z

Step 3: Glue edges and sew the stocking together.

To make sewing the edges easier, first glue your two stocking edges together being sure to only glue the edges and leaving the center of the stocking open. When sewing, just go slow around the curves. I used white thread and a decorative zigzag stitch.

Birch Bark Stocking Ornament by Home Stories A to Z

Step 4: Fill stocking with stuffing.

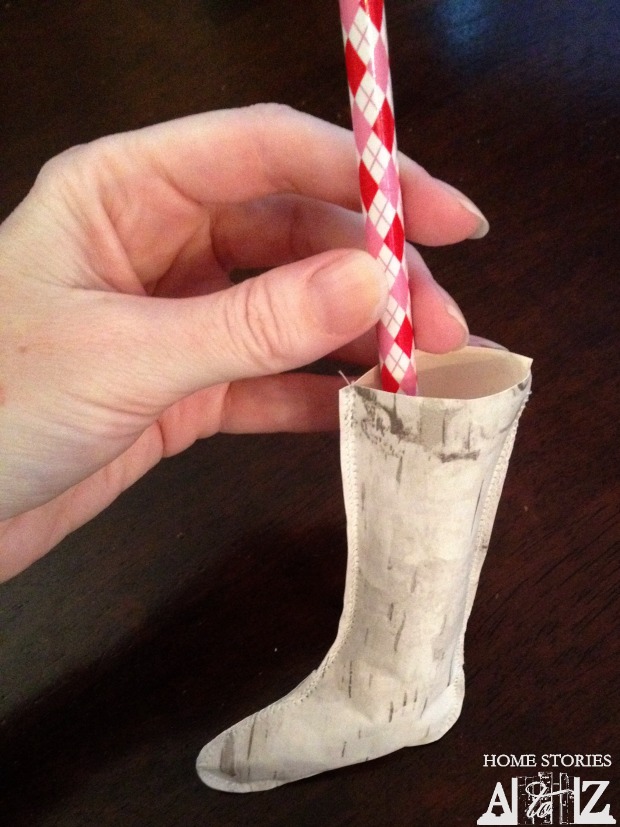
You can fill your stocking with polyfill, or even with shredded tissues if you don’t have polyfill on hand. Use a pencil to position your stuffing in the toe.

Birch Bark Stocking Ornament by Home Stories A to Z

Step 5: Glue twine and trim onto ornament.

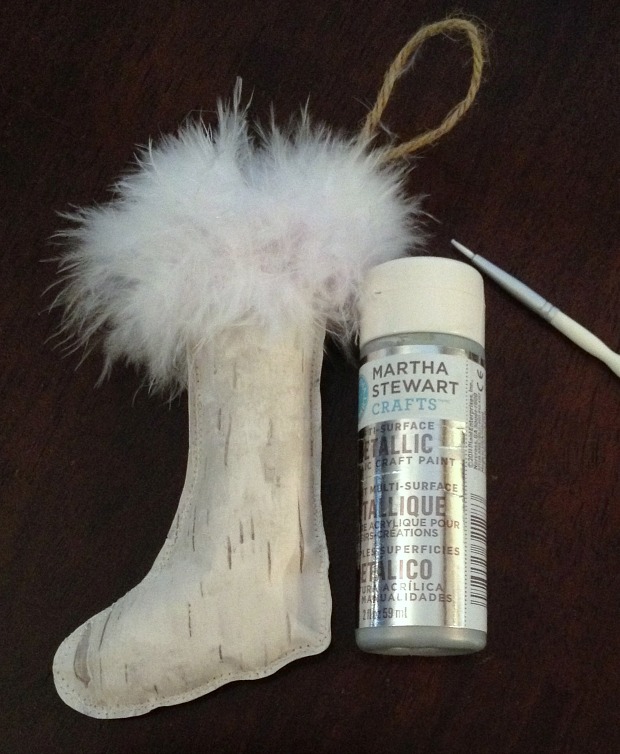
Cut a piece of twine and place it inside the top of the ornament. Secure in place with hot glue. Wrap your fur trim around the ornament and secure with glue. I wrapped my trim around the stocking twice to make it look a bit fuller. Birch Bark Stocking Ornament by Home Stories A to Z
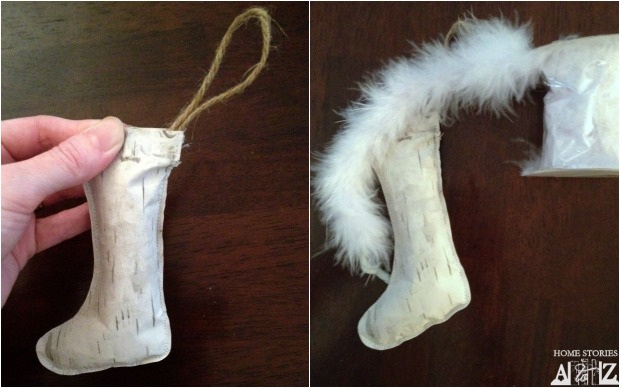
Step 6: Add metallic paint to your ornament.

This step is optional, but it adds some fun bling. Use a metallic paint to paint over the birch bark lines.

Birch Bark Stocking Ornament by Home Stories A to Z

I love the way it turned out! I plan on making a few more stockings for the tree as well as some other cute shapes.

Birch Bark Stocking Ornament by Home Stories A to Z

Thanks so much to Kari for inviting me over today! I hope you’ll stop my blog Home Stories A to Z to see all of my Christmas tutorials!

Post By…

Beth Home Stories A to Z

You may also like these

Free Printable "Color Your Own" Christmas BannerMerry Christmas Coloring BannerChocolate Covered Caramel Pretzel BitesM&M Christmas PoemEgg Nog Cookie Recipe by Twin Dragonfly DesignsEggnog Cookies RecipeFree Printable Adult Coloring PagesFree Christmas Adult Coloring Pages
Previous Post: DIY Simple Mini Wreath Ornaments
Next Post: Gold Dipped Feather Ornament Tutorial

Comments

  1. Zoe Cayetano says

    November 15, 2013 at 10:17 PM

    That is so adorable! Very creative. Great post!

    xoxo Zoe
    http://thatszoe.blogspot.com

    reply to this comment >
  2. Kari Sweeten says

    November 16, 2013 at 5:57 PM

    I had no idea that there was birchwood paper. Your ornament is gorgeous. Thank you so much for sharing your talents with us today!!

    reply to this comment >
  3. Becky Marie says

    November 19, 2013 at 3:47 AM

    Okay, I love this so much! Great job!

    reply to this comment >

Leave a Comment Cancel reply

Your email address will not be published. Required fields are marked *

Recipe Rating


Popular Posts

Easter VIntage Art Printables at U Create

Vintage Easter Art Prints

Spring Coloring Poster and Page

St. Patrick's Day printable games - by U Create

St. Patrick’s Day Game Printables

St. Patrick's Day printable - more precious than GOLD tag - by U Create

St. Patrick’s Day GOLD Printable

16 Easter Craft Ideas for Kids

DIY Easter Crafts for Kids

St. Patrick's Day Coloring Page by U Create

St. Patrick’s Day Coloring Page

  • pinterest
  • facebook
  • instagram
  • twitter
  • rss
 
Privacy Policy
Back to Top

Copyright © 2023 U-Create • All Rights Reserved • Site Design by Emily White Designs