Hello U Create readers! I am so excited to be guest posting here today with y watermark tee tutorial. It just so happens to be my first guest post and I’m still a little shocked that it’s here at U Create, one of my favorite blogs!
A little bit about me..
I’m from a little town called Keller, Texas.
I’m a junior at Texas A&M University (whoop!).
I’m working on my education degree and expect to be an elementary school teacher in just two short years.
When I’m not busy studying for classes, I love to sew. In fact, I’m all about DIY fashion.
I just started blogging in May and have already met all kinds of wonderful women, I hope you’ll stop by and say hi too!
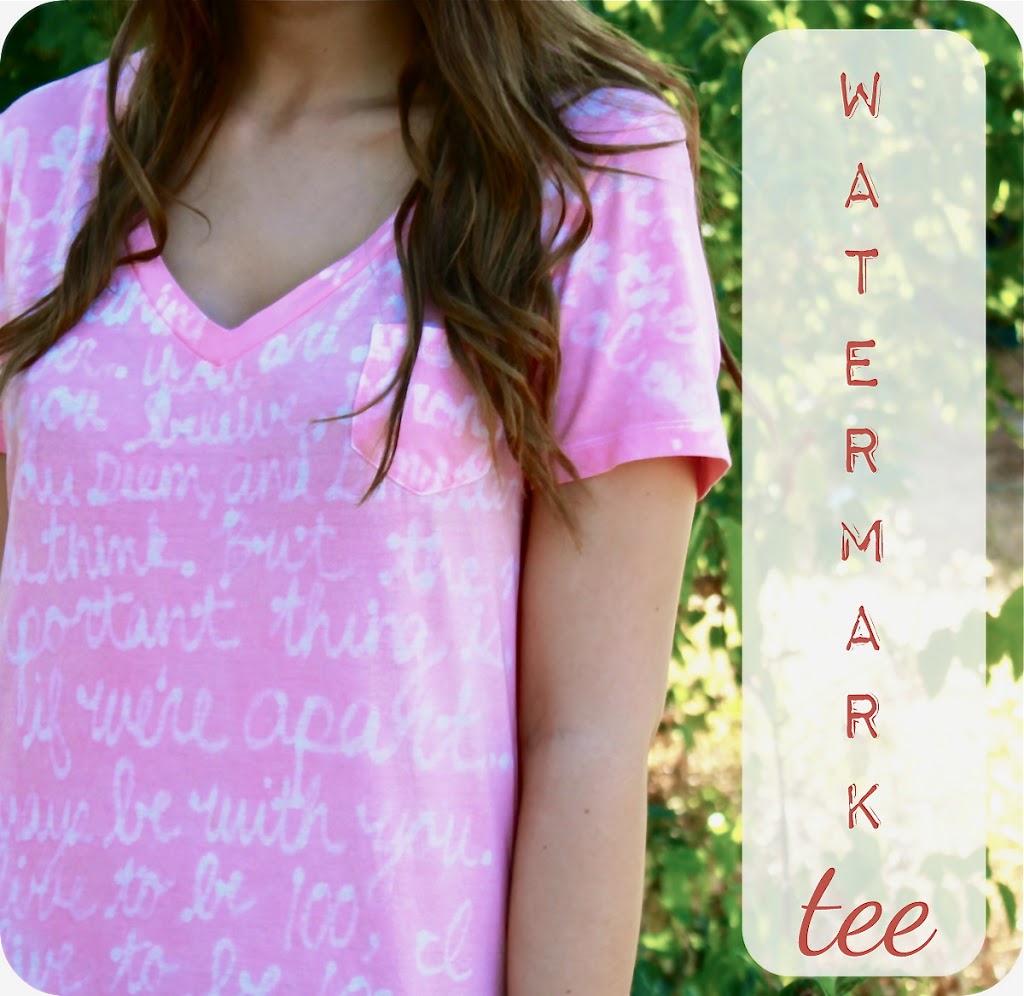
Watermark Tee Tutorial
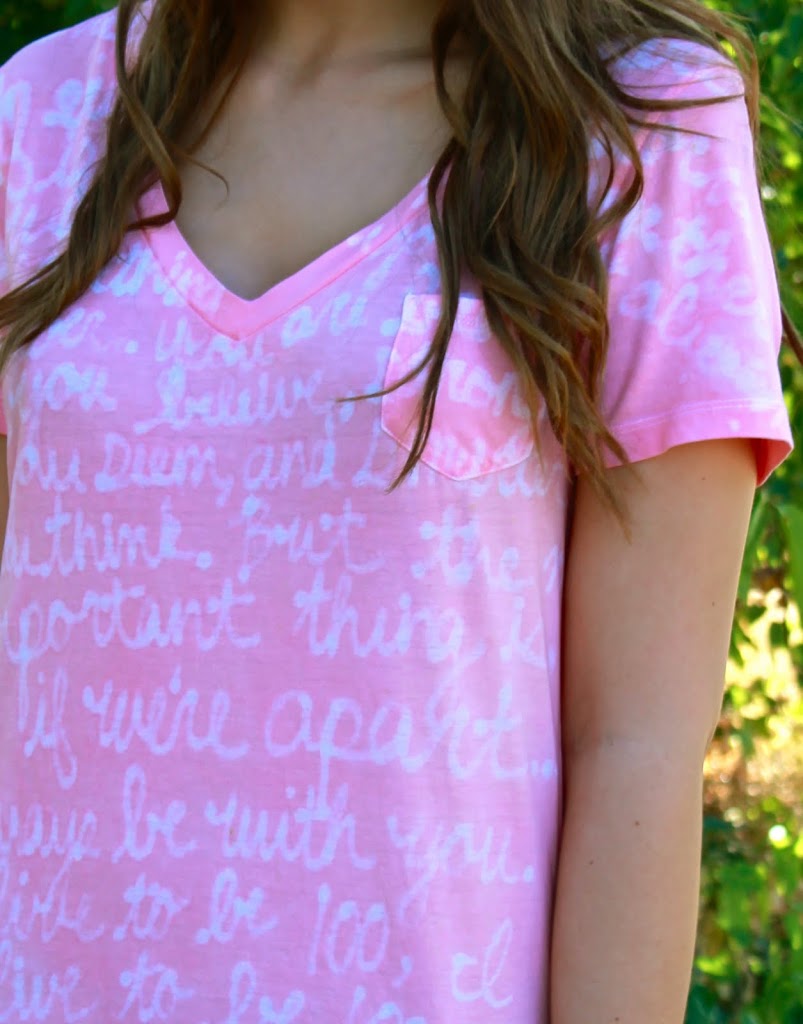
What I love about this project is that it’s completely customizable. I used favorite quotes to decorate my shirt but you could also use song lyrics, bible verses, favorite book excerpts, etc. You can also choose whatever color you like. I think it would be a very kid-friendly project as well. There are so many possibilities!
Materials:
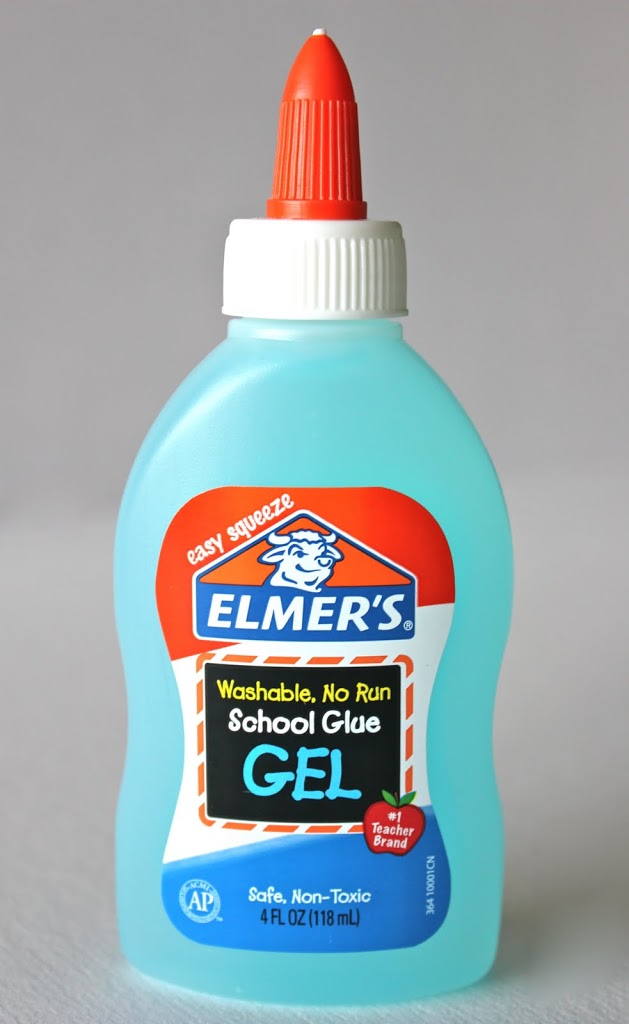
Elmer’s Blue Gel Glue (it must be the blue gel, white won’t work)
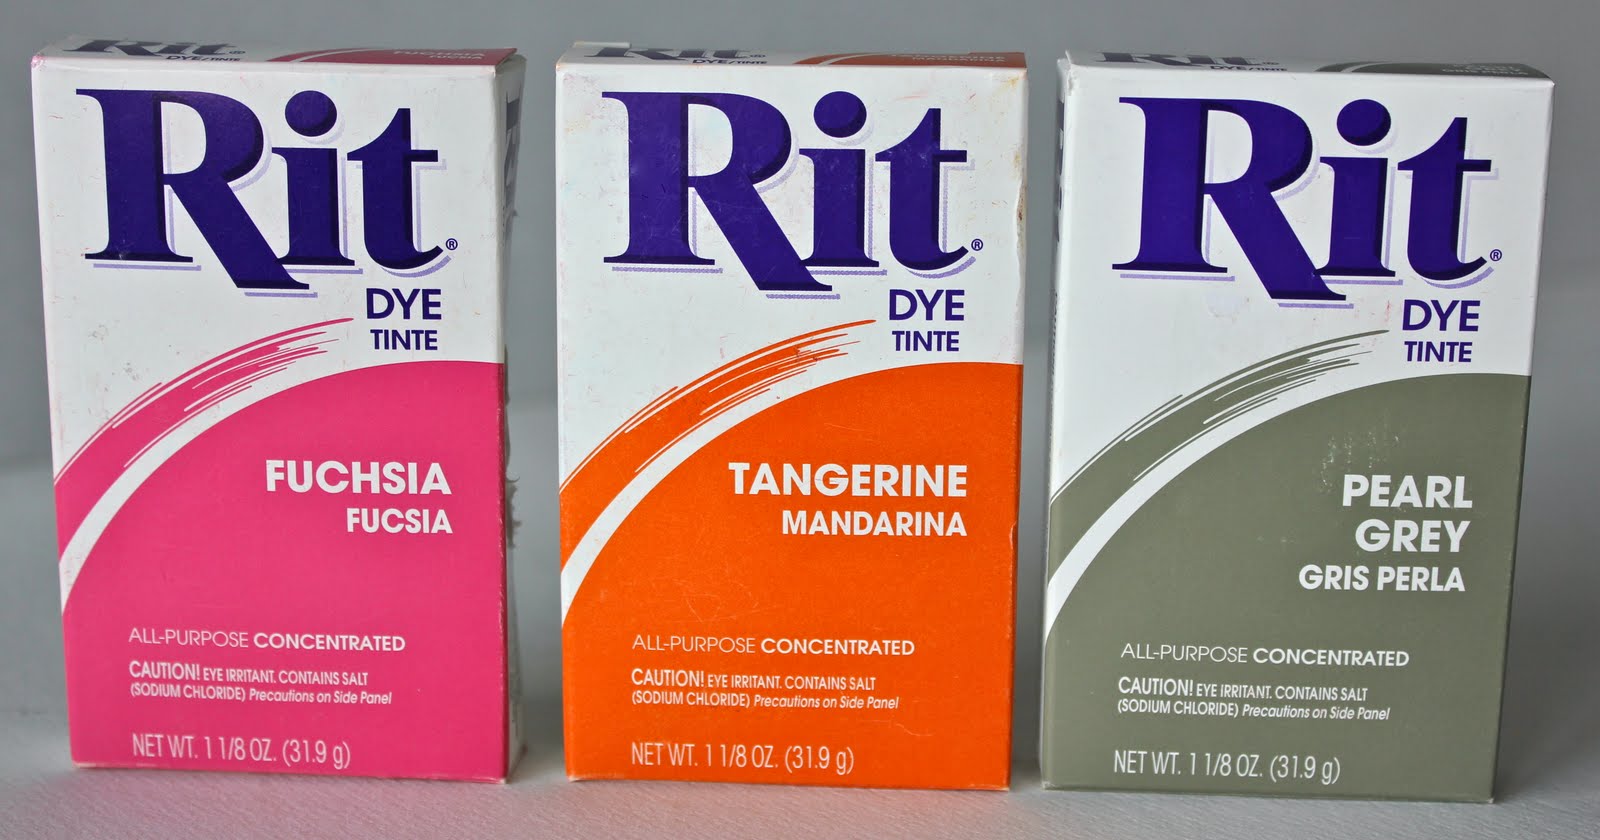
Fabric Dye (RIT is my tried and true brand)
A white cotton Tee, Tank, Dress, etc.
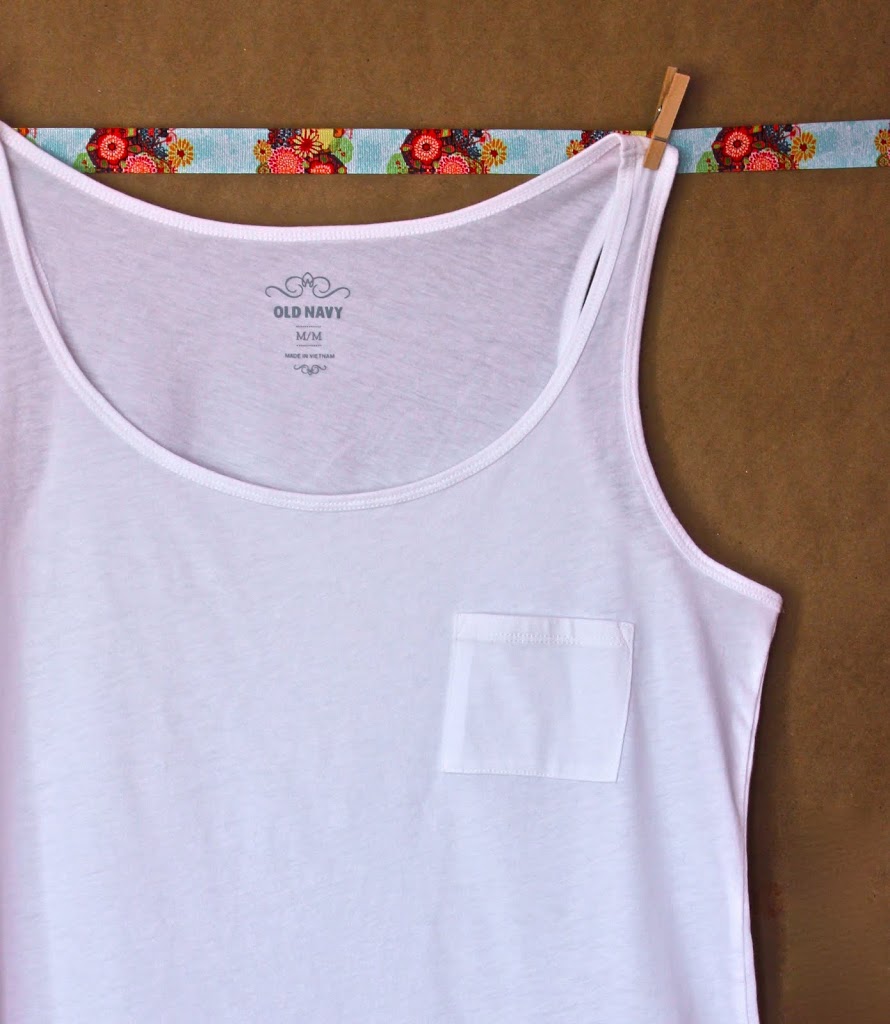
Tutorial:
If you’re unfamiliar with Batiking, it’s a method of dyeing fabric in which you create a design with a dye-resist. When you dye your garment in cold water, all will be colored except where you’ve placed your dye resist. In traditional batiking, you would use wax as a resist. I tried this out and found it to be messy and difficult to control. Using store-bought glue is much more convenient and very easy to control.
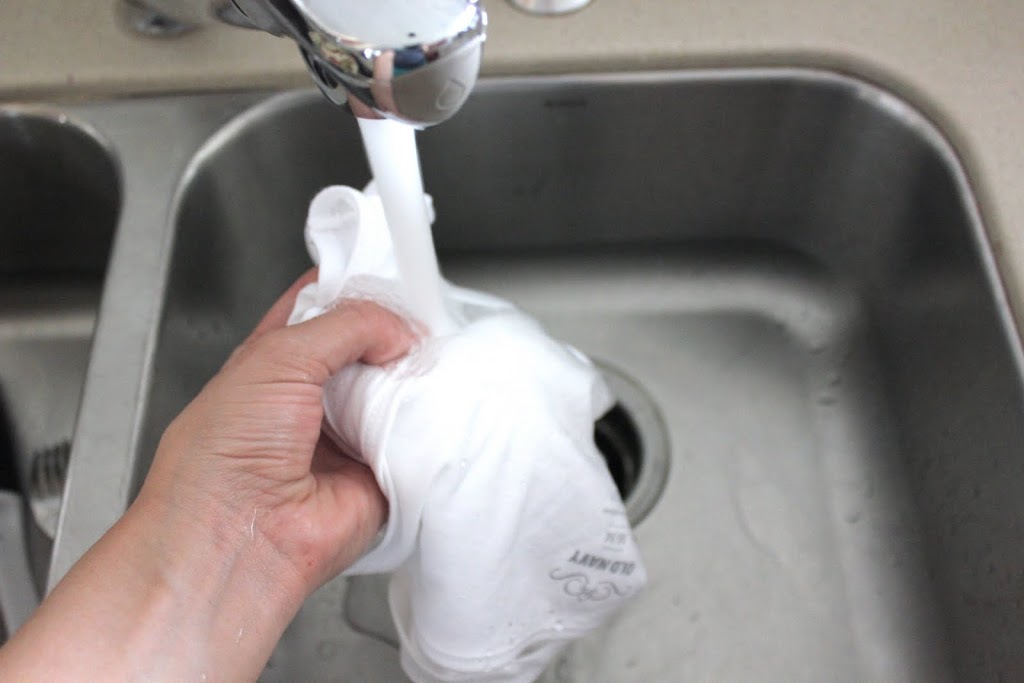
Step 1: Prepare
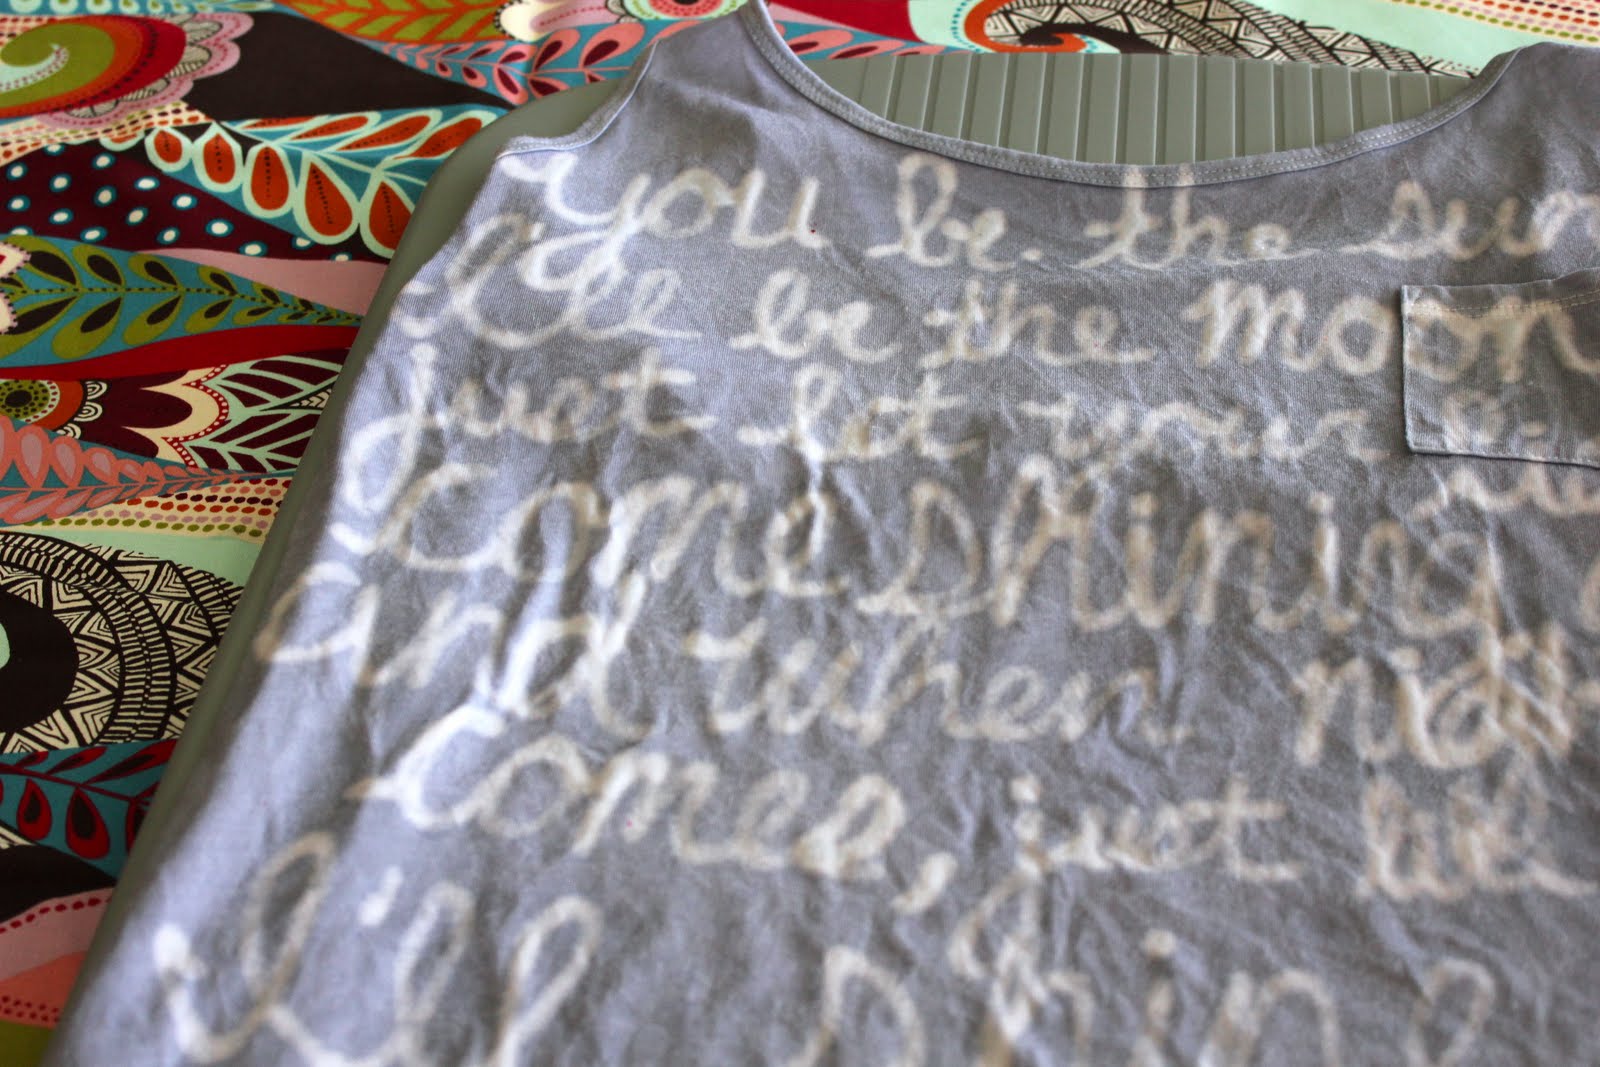
Wet your tee with cool water and place a water-resistant board between the layers of fabric. I used the lid of a bin.
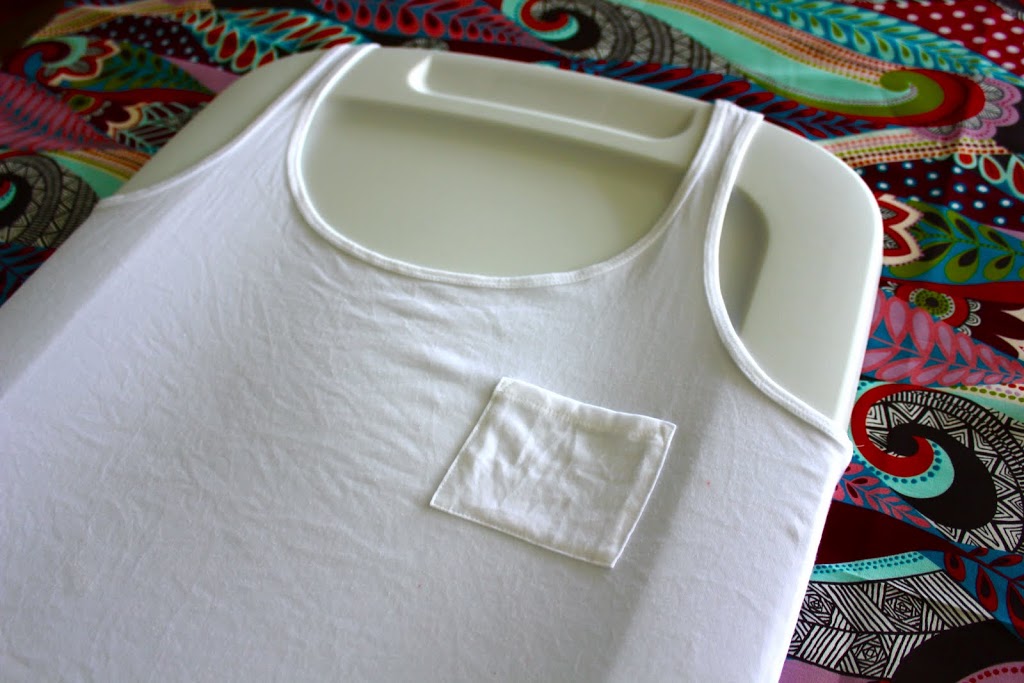
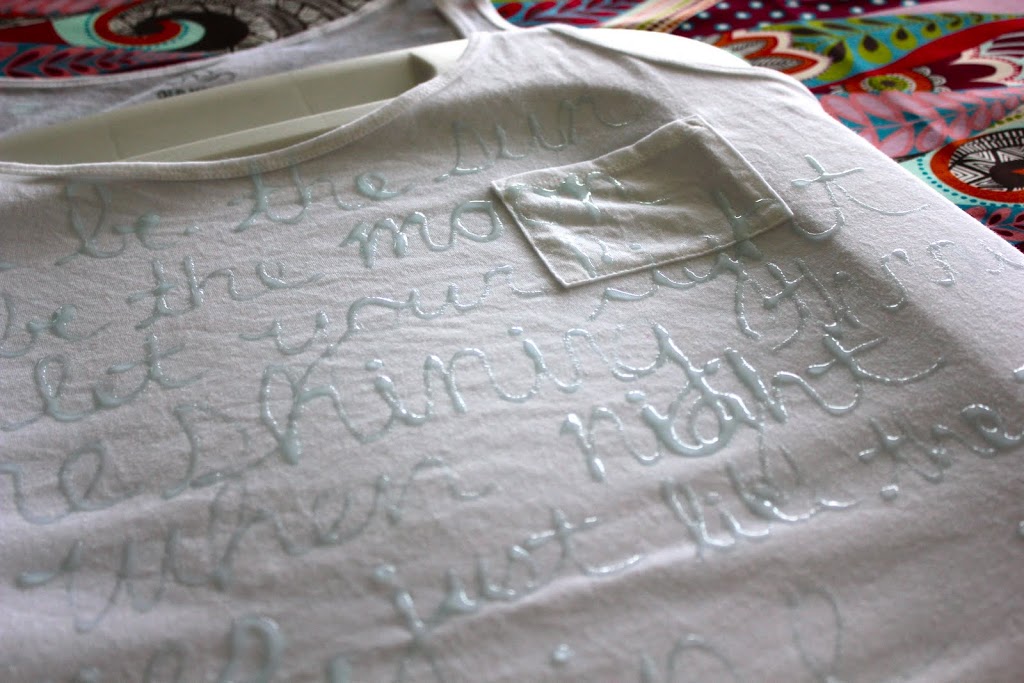
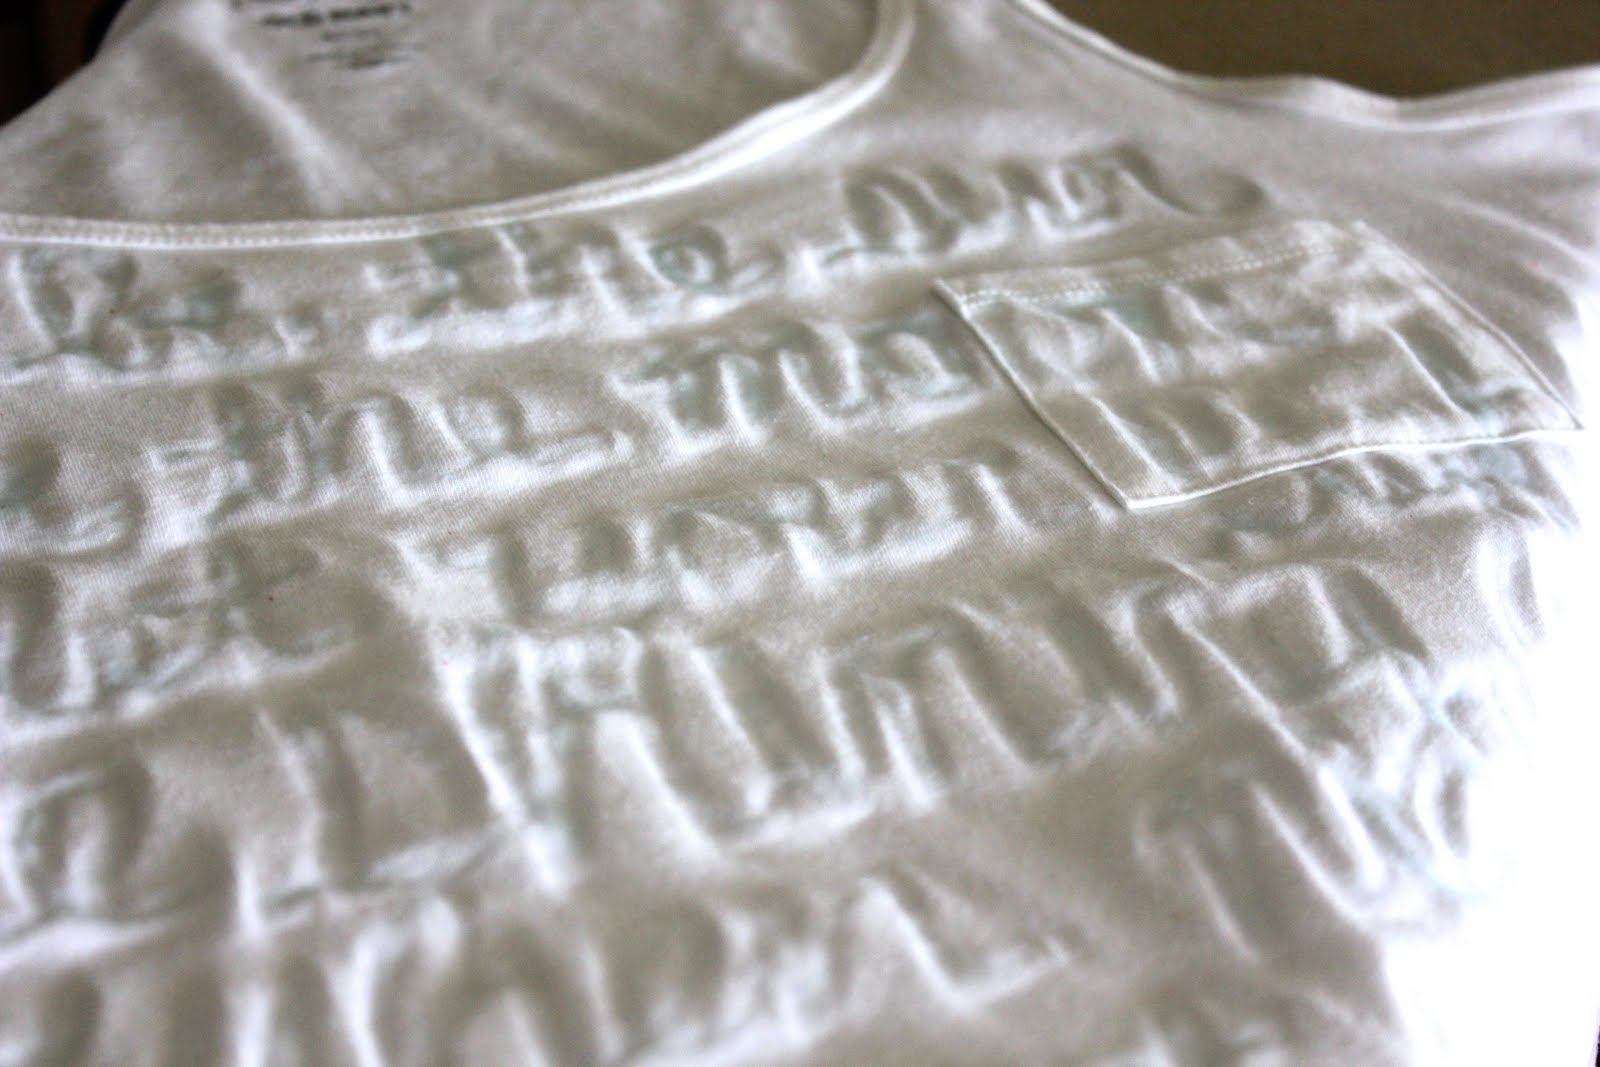
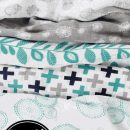
Step 2: Design
I’m not much of an artist, so what worked best for me was writing favorite quotes right across the front of the shirt.
 |
| Source |
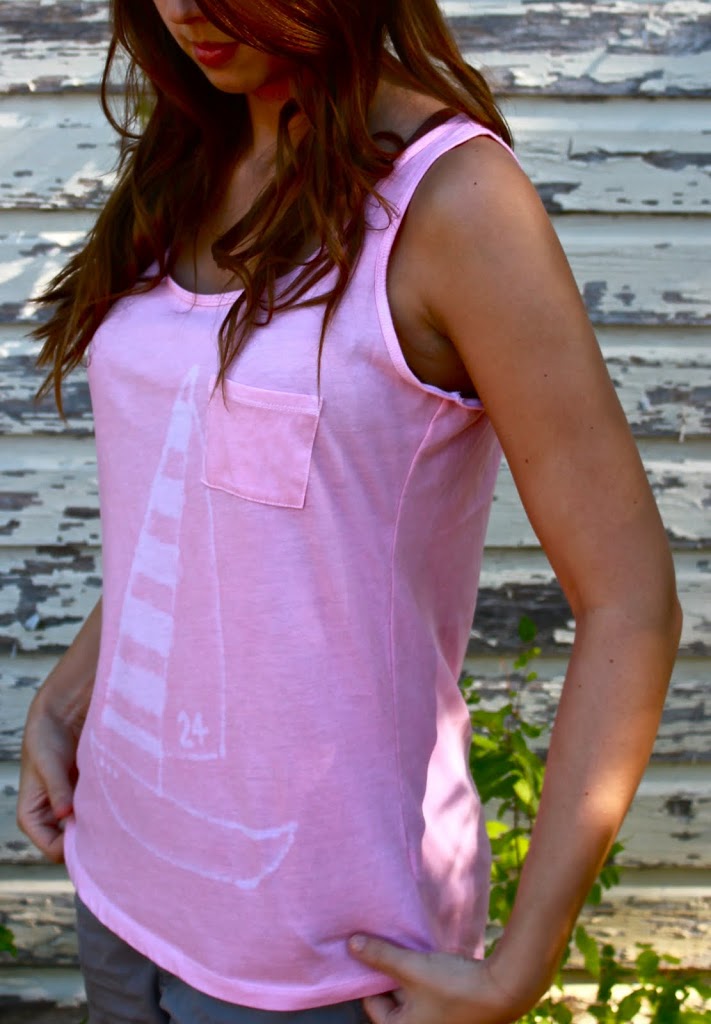
You could also try drawing a simple design like my very amateur sailboat:
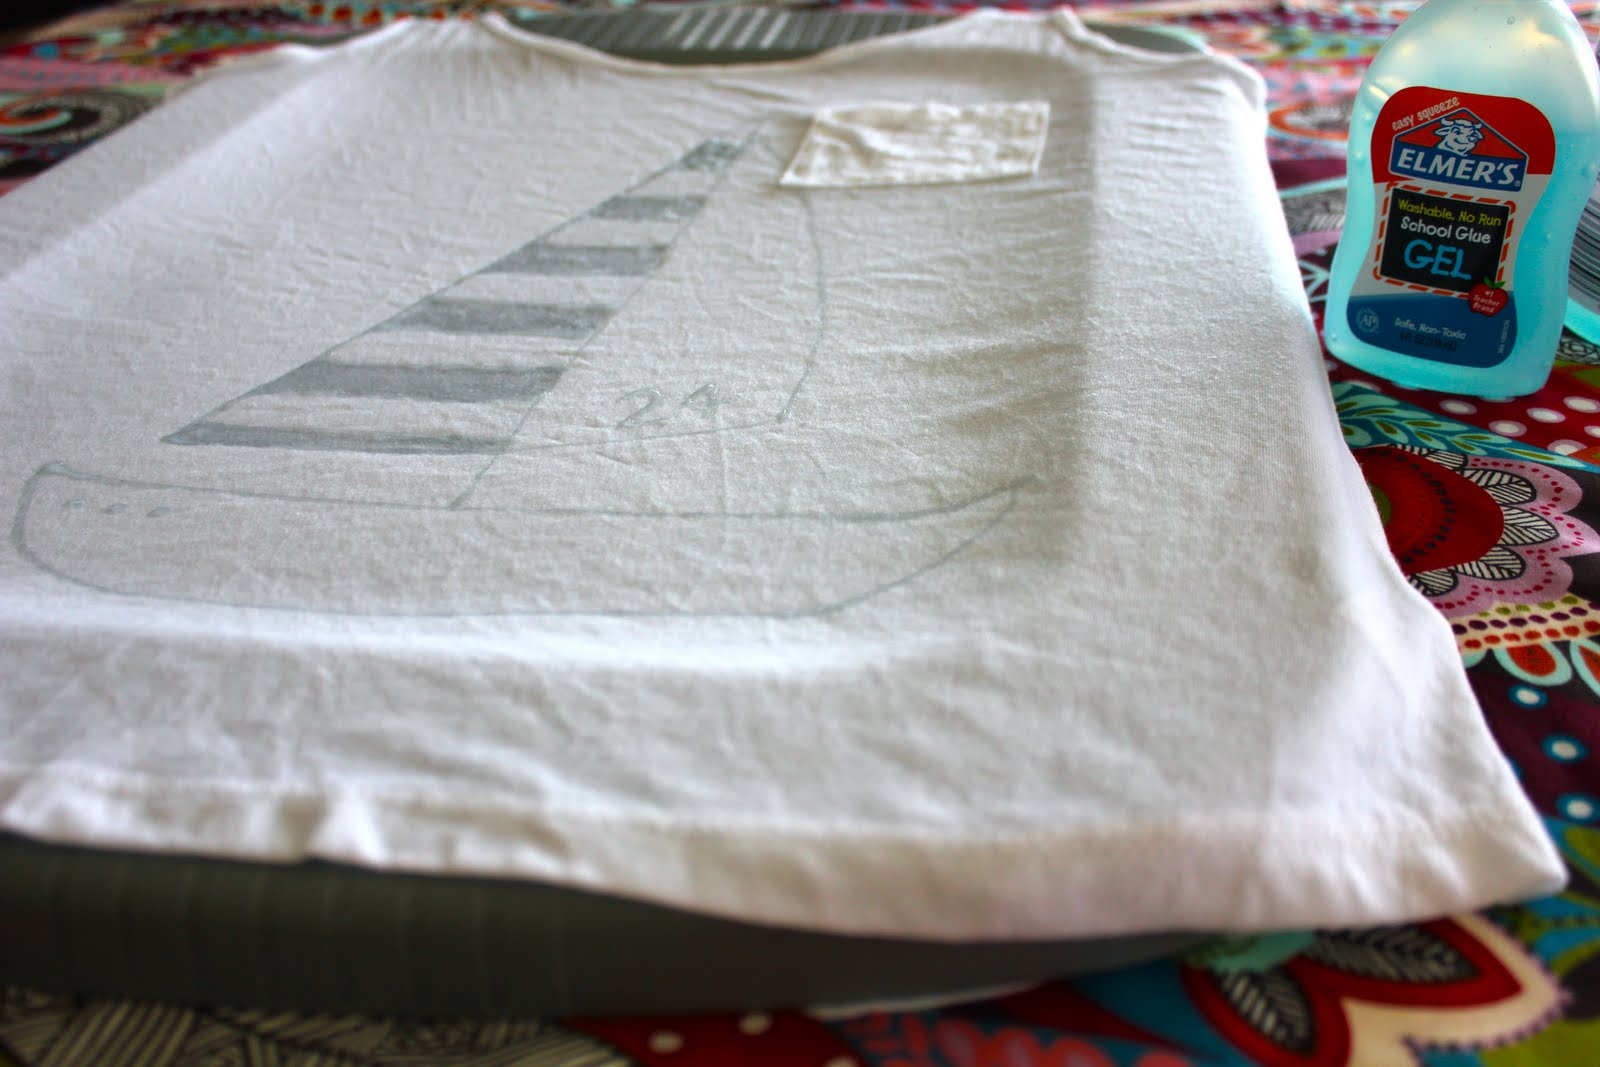
Let dry completely. This will take several hours.
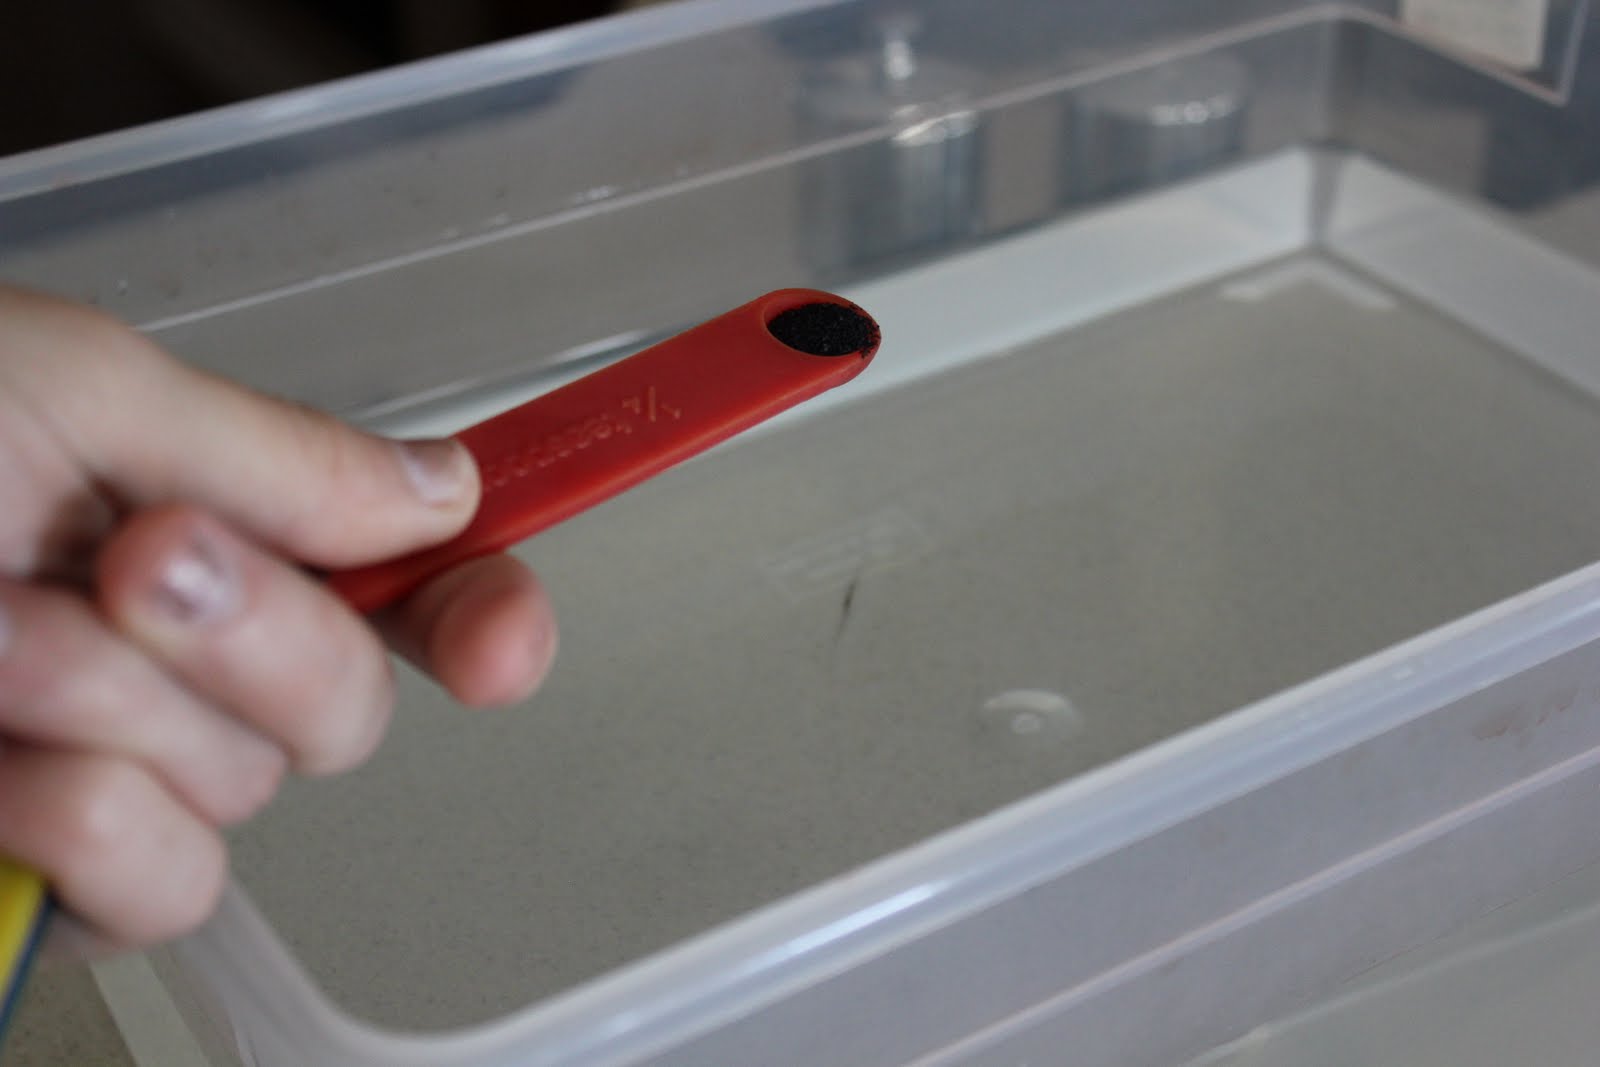
Step 3: Dye
Your dye bath should be prepared using cool water. Experiment with different amounts of dye until you find the right concentration. Keep in mind that the color that comes out of the dye bath will be a couple of shades darker than the dry, finished garment.
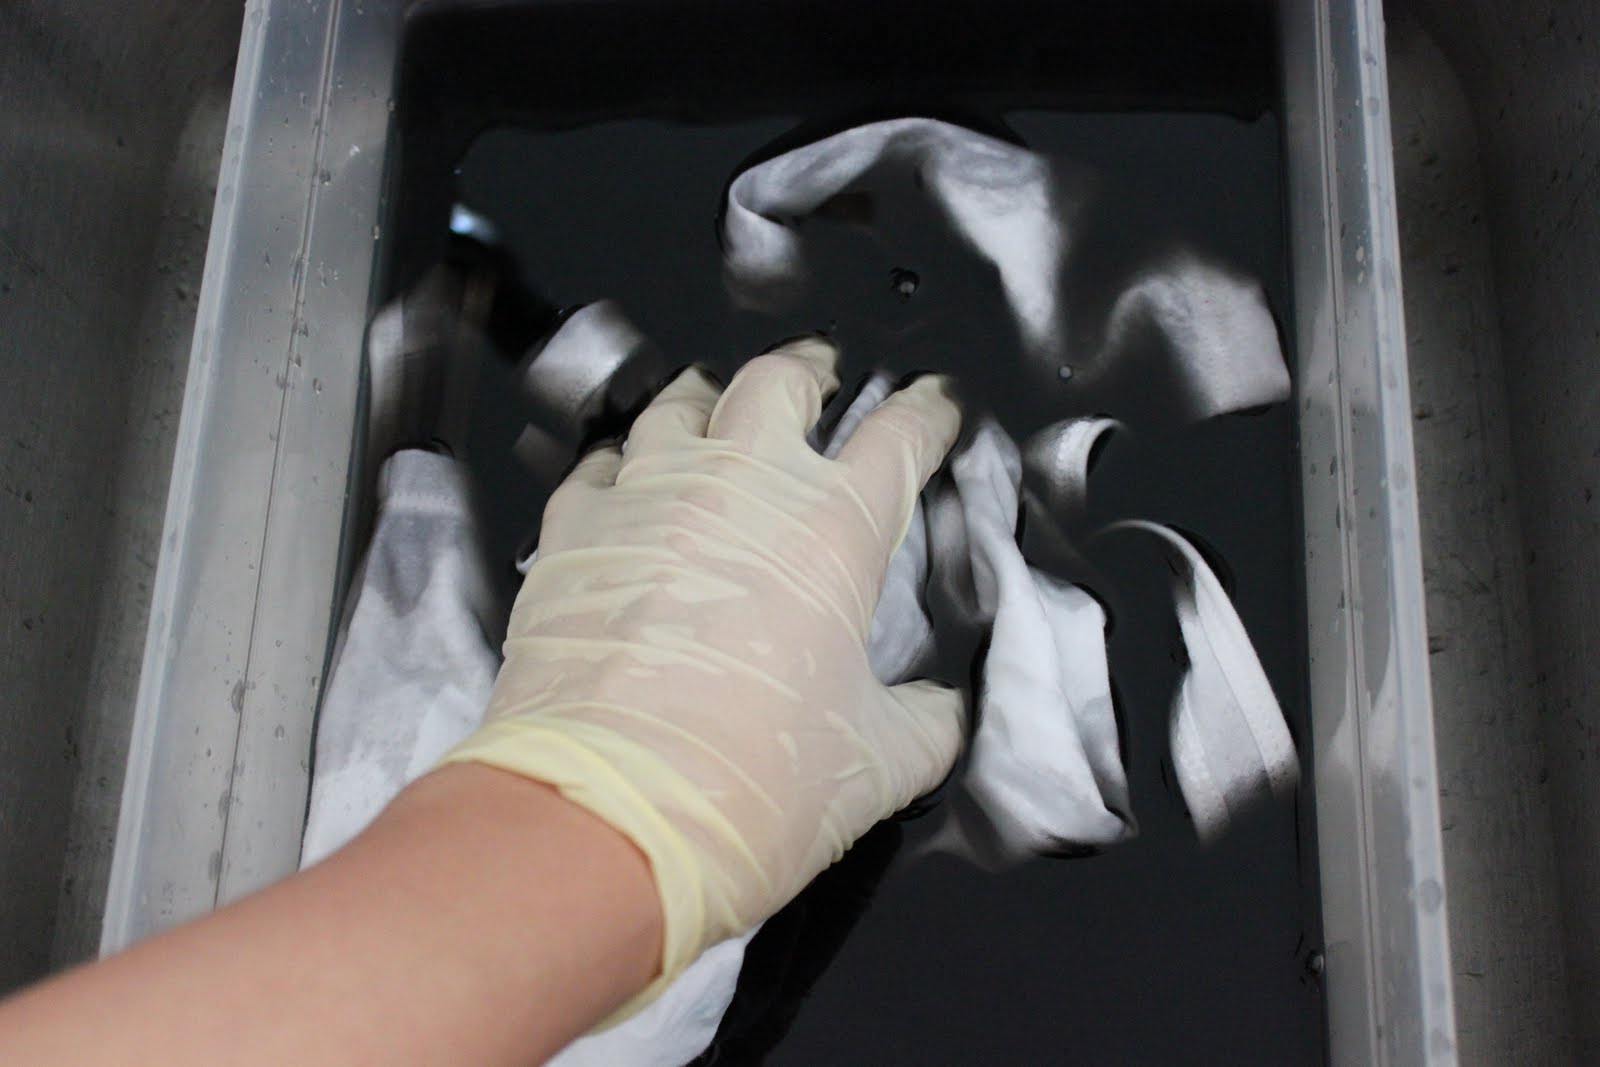
When you get the color you want, lay your tee flat to dry.
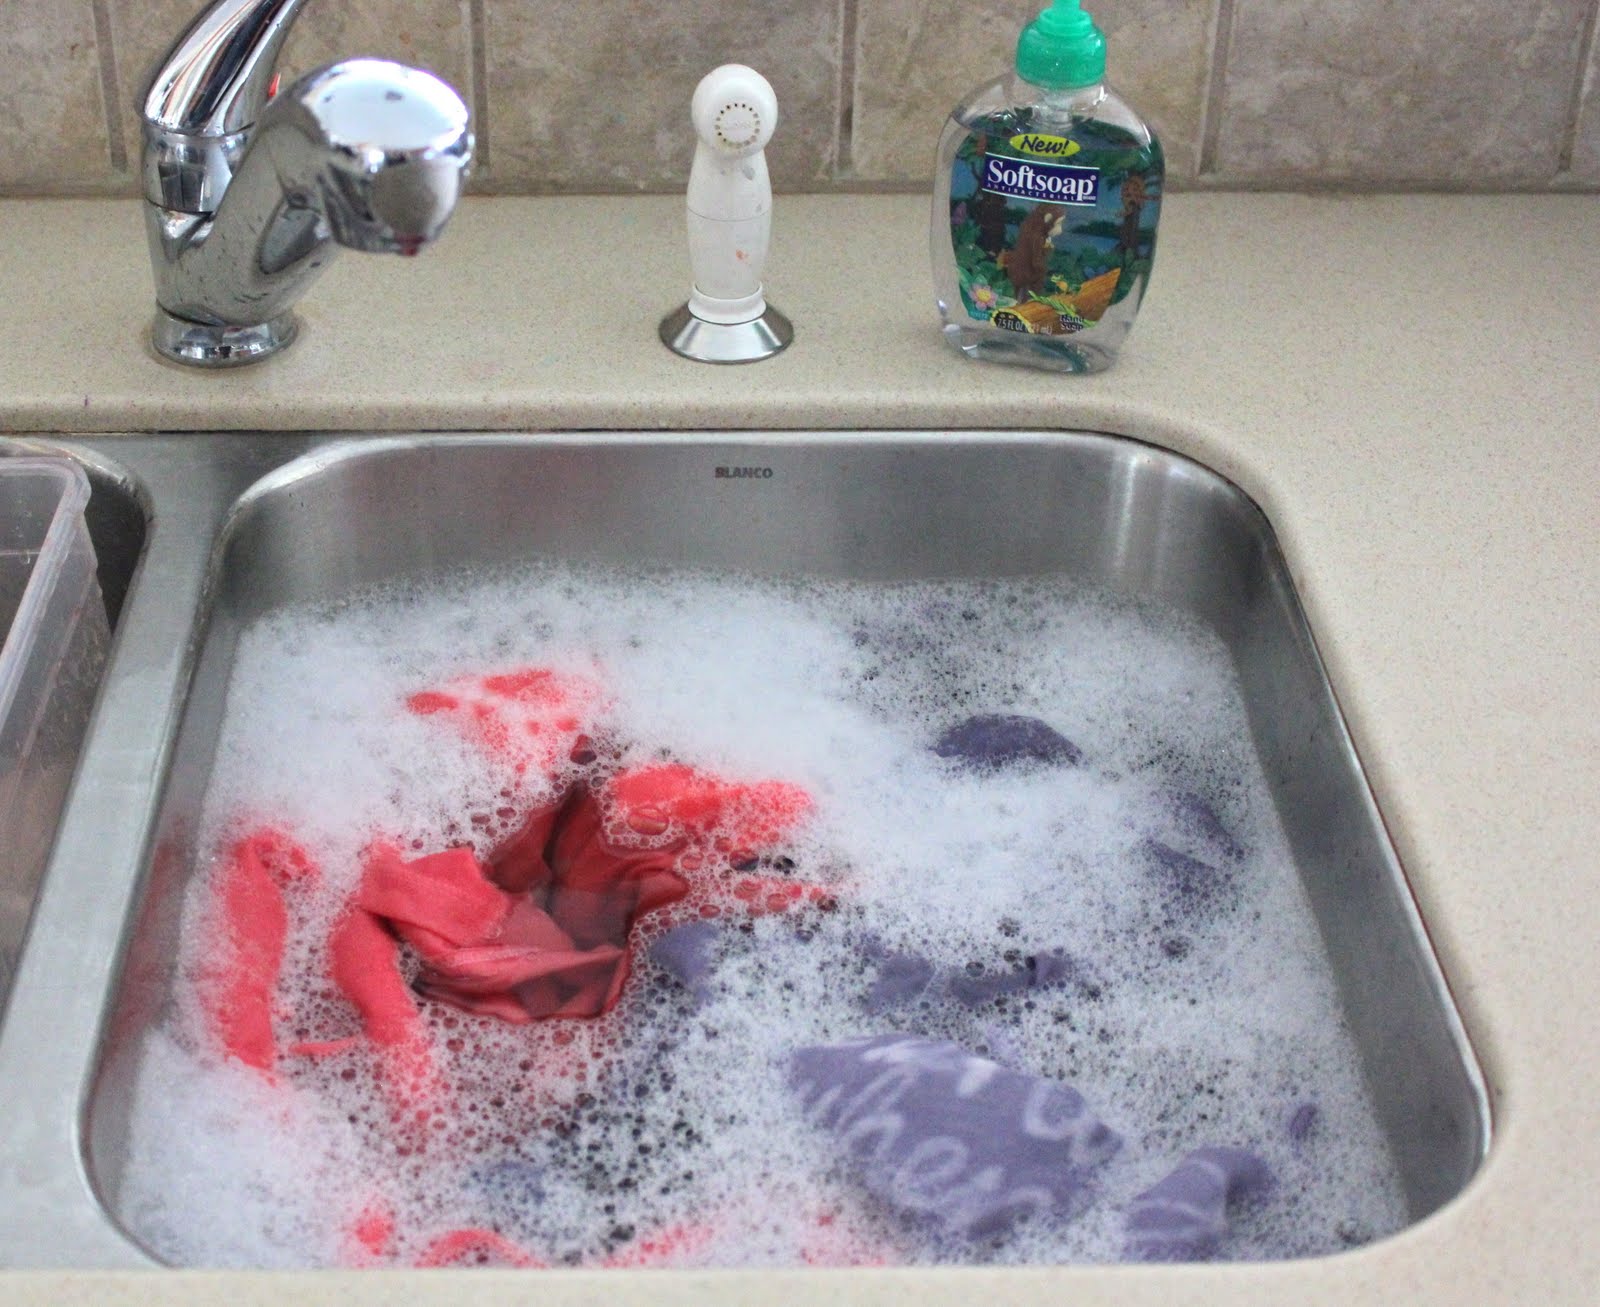
Step 4: Wash
When your tee is dry (to let the dye set) soak it in cool, soapy water for about 15 minutes. This soak washes the extra glue out. Throw it in the washer and dry as you would normally.
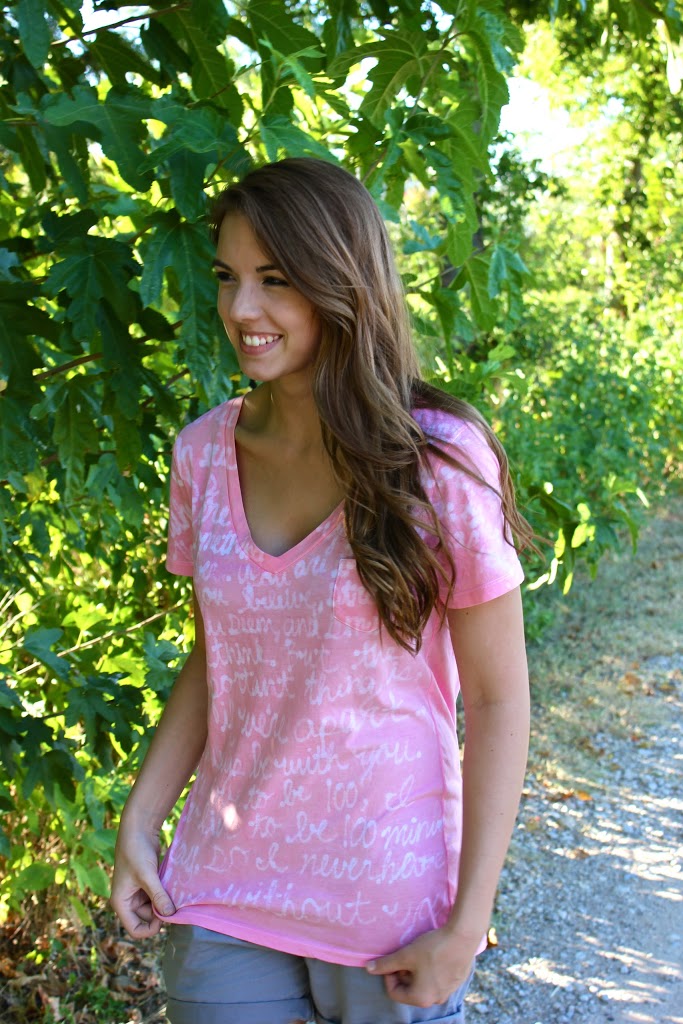
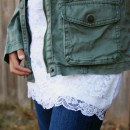
Step 5: Wear and Enjoy!


I love her! She is sooo great!
rachelsayumi.blogspot.com
Popped in to say hi! That’s seriously cool!
This is so amazing! love it!
Such a cute idea!!! I have to try it!
Xoxo, Ashley
justmeandtex.blogspot.com
WHOOP! So fun to see an Aggie featured on here. And what a cool project! You have some seriously great creativity going on.
Wow. I am continually amazed at what people come up with. I love it.
Yeah those are really pretty!
I was looking for a method for dying the white pillow cases that were given to me to sew pillowcase dresses and I think this is it. Thank you for sharing – when I get them done I’ll post some pictures. Regards Thea
Very creative and simple.
This is really cool (:
amazing idea.
Its so awesome tutorial. I can’t wait to try this!
We did this for a girls’ retreat week-end, at the beach. They turned out amazing & the teens LOVED it! Thank you for sharing!
We did this for a teen girls’ retreat at the beach & everyone loved the activity, loved the outcome, & we all wore them to church yesterday! You have 3 adult women & 17 teen girls who are VERY happy you shared this! Thank you!
Hi can you use other types of glue as I am having trouble getting the blue gel glue
It looks like the other comments on this post have tried other glues and it just didn’t work. You can find the blue gel glue on Amazon 🙂
Love this. How creative!
I…Love…This. I would love to make these with my kids too. Excellent tutorial!
So cool! Love this for a little girls top! I have so many songs that I sing to her, it would be great to see it on a shirt 🙂
I will admit to some skepticism when I saw the title of the post as well as the materials, but once I cycled through the entry I had to eat my words — this was super cool, super easy, and came out super chic! 😀
super cute, love the writing. 🙂
adorable! I love Katy’s blog 🙂
Umm this is amazing and I’m making one this weekend!
This is such a cute project! I’m going to try this for some cute shirts for my 2-year old!
What a Great idea!
freshlycompleted.blogspot.com
This girl is amazing! I just recently jumped on the Sweet Verbana train. She is just a doll too. Love this idea and I can’t wait to try it. Thanks for sharing.
super cute and fun. You are a gorgeous model!
What an AWESOME diy. Gotta try it!
Love it! Can’t wait to do my own!
Very nice! I thought it would be a bleach pen craft! haha.
This is great! I am elementary art teacher and I can see doing this in an after-school club. I’m also expecting and I do believe this method would be so cool on a cute little baby onesie or two!
Thanks!
Jen N.
Absolutely adore this! Thank you so much for sharing! I can’t wait to make some cute tees!
Great tutorial, I’ll try it!
LOVE! So cute. Just started following your blog, very impressed by what you have up so far!
This is SO cool!!
Great project! I may be trying this on some onesies 🙂 Enjoy A&M all you can! Abby (Fightin’ Texas Aggie Class of ’02 – Whoop!)
Whoop! Love seeing Aggies around the internet! I’m a junior Viz major at A&M.
This is so clever! I’ve got to try this.
Woww! Such a great idea! I love your blog, and recently I had found Katy’s blog. Thnaks for this tutorial!
Ludmi
I love this! I am going to try it out today with my daughter for an upcoming baseball game we are going too.
LOVE. Such a great idea! Everything Katy does is great. 🙂
Thank you! What a great and easy way! I love it!
You’re so lovely and this is an awesome tutorial and so very trendy right now! Thanks! 🙂
I love this tutorial!! I’m going to do this in every color Rit I can find this weekend.
Great idea! I can’t wait to do this with my girls!
What a great idea!!! And it can be done with kids too! I am excited to find a fellow Texas blogger, I live in Lewisville, just down the road from you. I just love this idea!
I am just sad that my Target didn’t have the blue gel glue.:( I was buying school supplies today and thought I would pick some up but no luck. I will keep searching because I adore this!
I looked at a bunch of different places and finally found the glue at Michaels!
I found the glue at Michaels!
My Michaels didn’t have it, but I lucked out at Hobby Lobby!
JoAnn fabric carries the blue glue and the Rit dye!
That is seriously sooooo cool!! I can’t wait to try it!!
How neat is this? Ist wonderful. I think I might try this out with my granddaughter. Thanks so much
What a fabulous idea…it’s lovely.
Unfortunately there is no Elmer’s Blue Gel Glue in Germany, but I’m going to with other washable glue.
Thanks for the inspiration 🙂
SO doing this… and pinning it! 🙂
LOVE it…tfs. Great tut!
🙂
I love it! Thanks for sharing!
I am having trouble finding the blue school glue at target or walmart, they said they don’t sell it anymore…. do you know if the clear school glue will work? Thanks!
I would try a craft store like Joann’s, Hobby Lobby or Micheal’s…I got mine at Micheal’s because I had the same problem with places like Walmart and Target.
Thanks for sharing this!
I have a character t-shirt in white that I want to dye or tie-dye, but I didn’t want the character’s colors to change. I couldn’t figure out how to do it. Now I know! ^_^
Very cool idea. So much better than the mess of wax. Thanks!
Oh wow–I’m already dreaming up very cool ideas. I can’t wait to give this a try… on my old white tshirts that could easily be revamped and on baby onesies as bay gifts… 🙂
How FANTASTIC!!! AWESOME idea!! You did such a great job and even if you cant draw a sailboat….THAT is awesome too!! LOL…going to go check out your blog!! Bye!!
Like you, I also tried batiking in high school and also found it too messy – so – I love this idea and can’t wait to try it.
I wonder if it would be possible to take an old colored t-shirt and make up a mild bleach solution and do this in reverse??? Any thoughts on that idea???
Lisa
We did this in Girl Scouts decades ago….use a dark colored shirt and use liquid dishwasher soap (the kind that contains bleach). It will not bleach the shirt white (if you have a navy shirt, where you use the soap, it will turn it several shades lighter but not white). Still it is very unique looking. For intricate patterns, use a small artist paint brush dipped in the soap.
Kay
I bought my glue at Michaels today for about 2 bucks. I have 4 shirts now waiting to dry overnight and I will begin to dye them in the morning. I have 2 with inspirational quotes from Maya Angelou and 1 that has hearts all over ( I may try to ombre dye that one ). Thank your for the idea and options for taking a boring tee and turning it into a masterpiece.
Amanda
Love this!!
I’m a member of PRSSA and this will be a great way to make shirts for our national conference this year!!
This is awesome I can’t wait to try it. I’m going to re blog this its so cool!!
L.O.V.E. this! It is definitely on my Crafts To-Do list.
I was just wondering… Will this work if you don’t wet the shirt first??
I completely forgot, until I re-checked the tutorial :/
I forgot to wet the shirt before, but it still worked beautifully!
Love this and have to try. I’m from Keller, great place. lived there. 12 years and now retired in Ma. Good luck at A&M
I turned two responsible teen-aged artist girls loose on this project. Came home both days in a row and found the house intact. Yesterday they did the art work, today they did the dying. Now the shirts are drying waiting to be washed. Cool and easy. I am only sad that I didn’t get to do one for my toddler and myself. Hopefully I will find the time and space for that.
I tried this with a bunch of teenage girls, they were all so excited but the glue washed off and the whole shirt was dyed. How long do you leave it in the dye? Maybe we left them in too long. 🙁
I just did this with my daughter. We used the white washable RoseArt glue and it worked fine. We noticed the glue was starting to get soft, so we took it out of the dye sooner than we would have liked. But still, amazing results!
I found this post on pintrest!
What an awesome idea!
Ps. way to be a loud proud fightin Texas Aggie! A! A! A! A! A!
I made this today/yesterday, and it looks pretty cool! I had some problems in the beginning, so here are my notes: leave the shirt dry. It spread all over the place and was illegible when I did it wet. Also, be sure to use Elmer’s brand glue. I used the clear gel kind, and it turned out fine. Before that, I tried a blue version that was a store brand. It wasn’t as thick so it was also illegible.
That is genius!
i love this shirt!! would it work with a ribbed top?
um, cutest thing ever. can’t wait to try it.
sad face…when I tried it while my shirt was damp, like Kristen said, it spread all over the place so I just threw that one in the wash. My 2nd attempt, well…I’m not convinced yet. Still having some running issues. I’m using the clear Elmer’s glue. Might try the white next time as I couldn’t find the blue. I’ll be dyeing it in the morning. keep your fingers crossed for me!
okay. happy face instead now! used white elmer’s glue. didn’t wet shirt. perfection. just dyed it & now it’s drying. Will wash glue off & wash/dry in the AM. CAN’T wait to wear it! I was able to write part of the Holstee Manifesto on it. 😀
Love, Love, LOVE! This is positively genius! Will definitely be doing this from now on and creating my own t-shirts.
that is the cutest t-shirt design ever!!
oh.my.goodness!! would make like a hundred of these!!
Wow, this is so so so so so so awesome! I am a total quote freak, and this would just be the coolest thing ever. I think I’ll have to go find some glue!:D
How cute and simple! My daugther is going to try this with my granddaughter… great idea…
LOVE THIS!
Very nice, thank you!
“Amaturish” or not, the sailboat one is my favorite! Too cute!
… i gotta try this! this is awesome! 😀
Nice one
just tried it! I don’t think I used enough glue on my first one but the second looks great!!!! thanks so much!
Stumbled upon this and thought i would say its cool and Whoop! Great to see an aggie on here. Thanks and Gig’em
This is an awesome craft! I can’t wait to share it with my Granddaughter who is 15. Thx for sharing!
Love,
Softa123
Amazing! Thank you so much for sharing! The sailboat turned out great!
This is a great idea! I wish I had done the same with my shirt that got a bleach stain on it.
so creative!!!
Really great. I need to buy some blue glue and get on it with some of my t-shirts
It’s VERRRYY COOlllll….
Cheers,
Parfum
Has anyone tried this with yellow dye??
Yes, and I wrote out part of “You Are My Sunshine….” along with a sun. Turned out super cute!
AWESOME!!!
I love the pink tee. In my mind’s eye, I can imagine how wonderful a peony would look with this technique.
FABULOUS tutorial. Love it!
I love this idea!! Very simple and cute. Thank you! 🙂
Wow I must be the only guy on here. lol A bit awkward for me to comment, but I came across this on stumble upon. I just recently started making my own shirts to save some cash and for me to come across this is really awesome! Great job on the tutorial, and much thanks from one college student to another!
Tried this technique with onesies, problem is the blue gel glue spread out and didn’t stay as defined as your example. would a dry shirt work better?
Adorable! In LOVE with this idea!
I LOVE this so much and am thinking about throwing a batiking party as a Christmas gift to my friends. However, we will be having said party during exams and won’t have a whole lot of time. So, is there a safe way to get the glue to dry faster?
I love this idea and was thinking of having a batiking party for my friends as a Christmas gift. However, we won’t have a whole lot of time to craft, so is there a safe way to get the glue to dry faster?
Thanks for sharing your awesomeness!
Fantastic! We’re doing homemade for the Holiday this year and this will make great gifts! Thanks so much for sharing this great idea!!
that’s amazing! so easy… totally gonna do it!
such a great idea! Thanks for sharing this one!
I’m making these as Christmas gifts for my college roommates–using lyrics from their favorite songs and then using a dye in their favorite color. So genius–thanks!
How fun is that? Great post!
This is great! It seems so simple to do…I will be trying this out very soon.
Super cool! Who would have thought that elmers glue could do so much. Going to do this for sure!
Great idea. My kids at school would love this project. Thank you!
I love that you used gel glue, that really makes it a lot easier and controllable (I think). Thanks for sharing the tutorial, I’ll have to try this with my kids and maybe…even as gifts!
Love love love this. I’m always creating art that I feel is “useless” in a sense. But with this… I can wear it! Amaze!
Very Very cool!!!
Great idea, i could use it in my cotton bags.
wow! you did it well! will surely try it when Christmas vacation starts…
Great idea and tutorial. What a fun project! Thanks for taking the time to post!
Nice idea.. really inovative.
I was wondering, do you think this would work with white converse? please help!
What an awesome tutorial, and who would have thought simple glue would work so well? Thank you, Kari, for allowing Sweet Verbana to share on your blog!
wow, what a great idea! i havent seen,oar heard of any uses for fabric dye since tye-dye! not only that ,but what a cute way to personalize homemade gifts!with the econamy the way it is a couple white t shirts and some dye , could potentionally b gifts for the family this christmas !
great idea , what a wonderfull homade gift for the hollidays!cant wait to try it!
i stumbled upon this and ABSOLUTELY LOVE IT! I recently did some batiking at a girl scout event with wax. it was awful! the wax was practically impossible to control and the fabric turned out really stiff and uncomfortable. this is a MUCH better idea!
love love love this! i stumbled upon this and it’s a great idea! i recently did some batiking at a girl scout event with wax. it was awful! the wax was practically impossible to control and the fabric turned out stiff and uncomfortable. this is such a better idea!
I do not know how I missed this tutorial! Thanks for the tutorial. I will have to find myself a white maternity top and make it super cute with this technique! Thanks!!!
This is an awesome project!
Good work. thank you for sharing such a beautiful snaps
This is such a great idea! I love it!
Now that is a super cute idea! I may have to try this sometime! 🙂
-Mandee from http://raisingmy5sons.com
Great job m gonna try it soonn !! 8)
Fantastic! I am completely craft-imp[aired, but I love this so much I will definitely give it a try!
Do you think this would work if i put the glue on jeans and bleached the jeans? Because I want to make cool vintage star shorts 🙂
I have a pair of white jeans that I don’t really like. I may try this with them, and use blue dye…
WOW super smart and creative 😀
Such a CREAT idea! And so easy! I can try that with 4 year old niece and nephew and four grandsons. They would love the idea. Thanks. So clever!
That is amazing! So simple and so cool! I must try this. Such creative people out there. Love it!
Wow, amazing tutorial! Thank you for sharing such a creative and fun idea. I will definitely have to try this soon. Cheers!
What a cute idea- I used to dye my white pants all sorts of colors when I was younger I never thought to do the same with a shirt, simple yet cute!
This is such a great idea! I love it!
I love creativity and you certainly have a gift and are using it to your full potential. Good Luck with all this – you are a very talented young lady. B.T.W…my son is a junior (4th year) at Rochester Institute of Technology in NY (they go 5 years with 1 full year as a paid co-op) so I know all to well that juggling school with what you love to do can be hard but it’s oh so worth it. My son has helped me with my business so many t
I love the way you put it here online to demonstrate things Well done
This is actually SO AMAZING. First DIY in a while I am dying to try ASAP. Love the pink, love the sailboat.. I want to try an anchor tee! Thanks for sharing + inspiring. xo
Amanda
somethingtrendy.blogspot.com
This DIY is sooooo awesome!!!! I love it so much!. I made mine with Elmer’s washable white glue and it worked out great! Thank you so much!
I love this idea! You could also use this as a gift to your bridal party and make write a favorite memory you shared with that person on it! They will have it as a keepsake forever!
I really want to try this out, its so nice, I do tie and dye but I have never done it this way, I am so going to try this out this summer.
this is such amazing idea!
i definitely have to try it soon 🙂
xxx
LOVE this idea. I cannot wait to try!
I’m not an Ag but reside in CS.
Looking forward to seeing more of you ideas!
Lovely, it more practical then with wax like batik dye. Thanks
this is ingenious!
This is a great idea! I realized when I was writing with the glue you have to make sure there is good space in the curves of the letter because it bleeds pretty good.Part of my shirt is just a blob lol
Loved this! I just made a shirt for my daughter for Valentine’s Day. Will def. make a great summer project for the neighborhood kids.
This is so sweet!! I cant wait to try it!!
hey its awesome idea coollll… will try this
This looks like so much fun! What a great idea. Can’t wait to try it:)
awesome idea…
What a FABULOUS idea! Gotta do this!!! Oh, and by the way, I’m from Keller TX too–small world!
That is really creative!
I want to do the same, but I’m from the Netherlands and I’m afraid we don’t have that glue you use. Do you have any idea what I can use instead? Does it have to be blue glue?
Keep up the good work!
it can be plain glue! that is what i used and it worked!!
My girl scouts tried this with boy boxer shorts to make pajamas. They wrote the lyrics to their favorite songs on them and they came out precious!
wow………….
its realy good………..
Love this. Now I have to figure out what I want to put on my Tees. Great post.
Great!!! Wish you all the best on this Valentine’s Day. Thank you.
Very nice!
This is such an awesome idea to do with my teenage daughter. She lost two classmates this year in a car accident & making a tee with a quote, saying or just their names would be a very healing project for her…THANKS!!
Getting to know how to create new designs, and clothes,.,Is a real blessing, I love to see what others are up to,.its fun to share ideas.
Getting to know how to create new designs, and clothes,.,Is a real blessing, I love to see what others are up to,.its fun to share ideas.
great creation. so nice of you to share. thank you.
WHere do you get your white t-shirts from? Target has them in the mens section, but there 2 big on me and don’t have that cute pocket! Places like goodwill dont have just plain ones. Target? Walmart? Forever 21? Urban Outfitters? Pac Sun? American Apparel? Where did you get them at…..
target carries boyfriend tees for women with the pocket… i have tons… they r around 8 dollars
I bought mine at Walmart for @ $4.00-$5.00. No pocket, though.
Don’t know if you’re still looking for them, but I get my plain t-shirts at either JoAnn’s or Micheal’s. They don’t have a pocket like that, but I only paid $2-3 for them. 🙂
~hannah!♥
Cute this is a awesome thing to do.
For anyone willing to attempt this… DO NOT, i repeat, DO NOT forget to wash your garment before throwing into the dryer… YOU WILL SEE DISASTER!!!!!
very good!
The simplest ideas just work the best! Love that girls hair!
Fantastic! Love this thank u.
Thank you very much for share, great idea
Holy crap that is brilliant. i am so going to try this!
Wow that’s awesome! Great tutorial. I’ll be doing this my girls very soon!
Awesome..very nice..Super like..
wow…. its so simple yet amazing.. will definetly try it out!!!! 🙂
WOW! love it <3 im defiantly going to try this. THANKS!! 😀
WoW Very Cut
Very cool!!
I’ve been looking all over for the Elmer’s blue gel glue (Walmart, Office Depot, CVS, Walgreens, HEB, Kroger, and Texas Art Supply). Anyone know where I can buy it, not online? Or know of anything you can use instead? Thanks 🙂
I couldn’t find it anywhere either, I had to order from Amazon…
Others have said the white washable glue worked just fine. I’m going to try it as I cannot find the blue glue either.
I was able to easily find it at JoAnn Fabrics.
Hobby Lobby or Michaels both are crafts stores 🙂
We got the Gel Glue in South Texas at Office Depot 1.99 per bottle?
HOLY COW!! This idea is awesome!! I will be doing this !! THanks a bunch !!!!
wow lovely its a fantastic Idea , Thanks for Sharing
Such a great idea! Going to make one for my Adventure Girls!
I tried this once, but I used yellow and didn”t let it dry after the dye bath. It didn’t work that time, but I decided to try again. I used one of the yellow shirts, but I did it in pink dye. It ended up coming out as a really cool shade of coral.
This turned out really well for me! Thank you so much for sharing your idea! I even did tried it with my little brother, and he loved it.
I used white elmers glue and it worked!! i just had to wait until it was completely dry, but it turned out the exact same 🙂
will be doing this with the kids during summer vacation! Thank you for sharing!
Who would have thought!! Great idea I will do with mys tudents and my own kids soon! Im a teacher in Tx too!! ♥
This is great!! Do you know if this will work on canvas (like a canvas tote bag or apron)?
Oh I just love this, what a nice way to upcycle something old.
My daughter and I just made these tees! Great idea, thanks!!
Great! this is very interesting and m gonna try this on the weekend, thank u so much!
This is genius! Testing it out ASAP!
Super cute idea! I’ll have to pin it.
Thanks for the inspiration.
Genny
very cute, I’ll make a mental note to myself to try this technic!
I did this with my teens today – we had a great time! Thanks for sharing this fun idea! The shirts worked out great!!
Bernadine
that’s a really cool idea, i can’t wait to try it myself 🙂
Love this idea! So creative and unique
wow so amazing what people can do.
im gonna try on my shirt….
I think it makes it ten times gorgeous because of the effort put into making it. I am so going to use these ideas on pillow cases and scatter cushions 🙂
Thank you
great idea!
Wow this couldn’t be any more fortuitous, I just moved from Keller, Texas not a month ago and a good friend is moving away this week so as a present I was going to make her a shirt like this. Thank you Stumbleupon! Thank you for the post. :3
Wow! Very creative! Love it. Pretty impressive!
Fantastic idea! This would look great on canvas totes too, I’m going to do up my boring grocery totes. Thanks for posting this wonderful project.
What an easy way to end up with a cool unique type of shirt
This is so cute! I used this method for making pillowcases. The result was fun!! Thanks for sharing! Idei
This is a great tutorial! I see some very meaningful gifts in the future.
Exemplary! The materials are dead simple, too! I gotta try it this weekend, and I’m thinking a black shirt with Gondor’s White Tree in it. Thanks a lot!
Totally pinning this! I love this idea and I have so many white t-shirts!
Rachel
turborachelfitness.com
This is absolutely fantastic! I can’t wait to get together with my girlfriends to try this technique out! Thank you for your post!
Thank you so much,I have Grandbabies 22yrs – 1 month old. LOL This Christmas I’ll be the cool Nana.;)ty <3
Worked like a charm. Thanks for the idea. 🙂
Ahhhh awesome idea! I’m from Keller too! Woot woot! (:
Fabulous idea! Can’t wait to try this!
I am a former Aggie…Class of 2007 (WHOOP!) :Love the tee…Keep the crafty ideas coming 🙂
i like it .
i like it .
Simple and beautiful.
I love it.
Thank-you.
Could I use stickers to do this? My handwriting isn’t that great and I’d hate to have the shirt come out with sloppy handwriting.
Oh I can’t wait to make some T-shirt dresses for my granddaughters!! I love it when they are all dressed in similar outfits for photos but it gets expensive and HARD to find them in sizes ranging from newborn to kids size 12. THIS IS GREAT!! Congrats on being featured and best of luck on your schooling!!
Brilliant!!!! Seriously, I love this!
Brilliant!!!! Seriously, I love this!
I have glue applicator syringes that I use for rhinestoning & I think I may try putting the glue in that to be able to control the flow a little better for detail work. This looks really cool.
I LOVE IT! Your a genius! I am SO happy I tried it because it worked SO well! Here’s the poem I put on my shirt (It took both sides and the sleeves too!):
You Learn
After a while you learn the subtle difference
Between holding a hand and chaining a soul,
And you learn that love doesn’t mean leaning
And company doesn’t mean security.
And you begin to learn that kisses aren’t contracts
And presents aren’t promises,
And you begin to accept your defeats
With your head up and your eyes open
With the grace of a woman, not the grief of a child,
And you learn to build all your roads on today
Because tomorrow’s ground is too uncertain for plans
And futures have a way of falling down in mid-flight.
After a while you learn…
That even sunshine burns if you get too much.
So you plant your garden and decorate your own soul,
Instead of waiting for someone to bring you flowers.
And you learn that you really can endure…
That you really are strong
And you really do have worth…
And you learn and learn…
With every good-bye you learn.
Jorge Luis Borges
Very Nice Post
school shirt designs
Absolutely adorable!
I love what you did with your shirt and have featured it in my post as one of ten ways to redesign t-shirts: http://thedomesticatedprincess.blogspot.com/2012/11/from-t-shirt-to-treasure-part-2.html.
wow…!!!!!!!!!!! Amazing idea…thanks..
Nice idea! Gonna try it 🙂
This is awesome! I was trying to find somerhing cool for my neices.
nice shirt need to make some for me
Just made my daughters some shirts, they are wearing them now and look adorable! I can’t wait to make even more designs, thanks so much for sharing this, it’s genius!
Wonderful and super duper cool. Thanks for sharing.
Love your tutorial, used it for inspiration for a Valentine’s shirt.
http://barnnumber2.blogspot.com/2013/01/valentines-day-shirts.html
Check it out! I have linked back to your post.
Lori
Fantastic idea! I’m going to try this right away! As a side note, my family just moved from Keller, TX last year. Small world!
A lot of people are asking about the blue glue. I got mine at Hobby Lobby, no prob!
I love it! Thanks for sharing!! My teen daughter will definitely be trying this! Consider yourself, “Pinned.”
Love this project. I had my daughter’s friends write their message on a shirt for her graduation. Thanks for sharing.
Thanks for the awesome idea! It worked great. I used your reverse applique template for the little bird on a branch and traced with glue on a baby onesie. I dyed it bright yellow and it’s so cute!
Saw this on Pinterest and love this idea! I could let my kids decorate without worrying that they would stain things and then I could just help with the dye. Thanks for sharing!
I am visiting today via pinterest and I am so glad to have found your post!! I can hardly
wait to try this. Have a great day and thank you for sharing your tutorial with us. :o)
Good luck on getting job in teaching…recommend a business minor. There are very few teaching jobs, unless you are high school Mathematics or Science.
Good luck on getting job in teaching…recommend a business minor. There are very few teaching jobs, unless you are high school Mathematics or Science.
This is like mind blowing!:)
This is so friggin’ cute & creative!!! I can’t wait to try it!!! xo
T-shirt is adorable! You sweet lady are gorgeous, your smile brightened my day & I can’t wait to try tutorial! Thanks 😀
This is Great, but i was wondering if you could do it opposite, like bleaching the shirt instead of dying it.. Would that work?
So VERY, VERY cool! Love it!!!
As I’m typing this comment, I see a slideshow of ideas in my mind.
Thanks!
Lorette
This is great! I’m definitely gonna try this!
Thank you for sharing this! 🙂
Hey there!
Just found this via pinterest, and absolutely love it!! I’m planning on giving it a go soon, but first I had a question. Will it work to do designs/words on BOTH sides of the shirt? Like if I did the design with the glue on the one side, let it dry, then flip it over and do the other? Would that work?
Thanks so much for sharing this awesome tutorial! 😀
~hannah!♥
Love this! I can’t wait to do this as a mother child craft!!!!
I love this tutorial. I’ve wanted to try to do this with a bleach pen, but I’ve heard they break down the fabric. I’ll have to try it this way instead!
Has anyone tried it with a tie dye method?
So much fun! I’m so excited to read about this idea. I’m ready to try it out with a shirt. I really like the quotes you used.
Neat Idea. Good luck with your plans to be a teacher.
Really cool thanks for sharing, I’m from Australia and haven’t heard of blue glue, do you know if it is available here?
¡Genial! Te quedan muy bien las camisetas.
After the initial wash (after the dyeing) did you wash your shirt with other clothes or separately?
hey! love this idea. have you tried this with procion mx dyes? I’m thinking of trying this with traditional dyes.
Oh my gosh, this project speaks to me! I love, love, love it.
I’m preggo with my first and was, until getting pregnant, building a sailboat. I can’t work on it anymore due to epoxy and all the other caustic goodies that come with boat building. BUT, at least I can sketch out my little boat’s profile on some crib sheets for the bambino!
And just think of the quotes you could fit on a crib sheet. Thanks for sharing!
could you do the writing and then do a tye dye swirl design? Would it be the same?
Absolutely! Just make sure the glue is completely dry! That would look so AWESOME. Make sure to send us a pic when you’re done!
OMGosh! I LOVE this for me & my 23yo daughter. I’m putting the “Blue Glue” on my need-to-find list right away! Thanks so much for sharing – the shirts you made are beautiful!
Smiles, DianeM
Would this work on a colored shirt? E.g. glue on black then bleach?
I am not sure if it would work as I have only done it on white. If you do it on a colored shirt, let us know how it turns out. 🙂
I wonder if this could work with tye dyeing.
I absolutely love your ideas for the graphics tee and for the lined paper tee also. The lined paper Tee would be such a perfect gift for a teacher. (I live in College Station and used to teach in Keller. In fact, Keller was my first teaching job back in 1971 when it was a sleepy little town with only one high school.)
Have you ever tried this method but instead of one color you tie dyed it? Thx
This is an awesome idea. I can’t wait to try it!
Why won’t white elmers glue work?
So cute!