I was recently asked to make a craft inspired by the magical movie OZ the Great and Powerful. Have you seen this incredible movie? We watched it for our Friday Movie Night and my family LOVED it. In fact, my children have watched it everyday since then. For my craft, I wanted to make something that would reflect the beauty and adventure of the land of Oz, but one that would also involve my children. So we brainstormed a bit and decided to create a Hot Air Balloon Piñata exactly like the one in the movie

Using this photo as our inspiration, we made a supply list and headed to the craft store!
Supply List:
- punching balloon
- roll of kraft paper or paper bags from the grocery store
- bowl of flour/water mixture (1 cup flour to 1 cup water)
- blue paint
- blue and red crepe paper
- small 4” doilies
- jute twine
- 2 12×12 brown pieces of paper to create the basket
- scissors and double-sided adhesive
 Step #1: Blow up your punching balloon as big as you dare. I had my son do this…he is more brave than I am.
Step #2: Cut strips of kraft paper (I bought a roll of it at the dollar store) or use paper bags from the grocery store.
Step #3: Make your flour/water mixture. I mixed 2 cups of water with 2 cups of flour.
Step #4: Submerge your kraft strips in the mixture. Slide your fingers down the paper strip to remove the excess mixture.
Step #5: Lay your “goopy” strip of paper across your balloon and smooth it out. Repeat steps 4 and 5 slightly overlapping the paper strips as you go. Step #6: Hang your completely covered balloon to dry for a couple of hours. My inventive son used a hanger and a binder ring and hung ours outside by the wind chime.
Step #7: Once it is completely dry, cover with another layer of paper strips and goop. Let it hang to dry again. Step #8: When it is completely dry and the paper strips are hardened, cut the end of the balloon and let the air leak out. Take out the deflated balloon. Now it’s time to decorate!
 Step #9: Apply a layer of true blue paint. {I put a zip tie at the top of it to hang so I could paint and decorate it easier.}
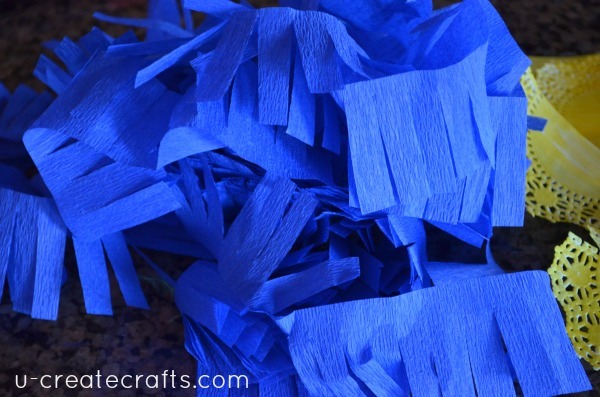 Step #10: Cut strips of blue crepe paper and create a fringe by cutting little slits up the edge.
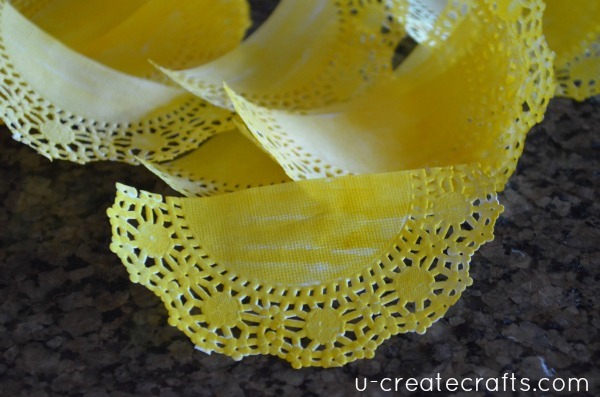 Step #11: Cut the 4” doilies in half and, with a marker, color 9 of them yellow and 10 of them red.
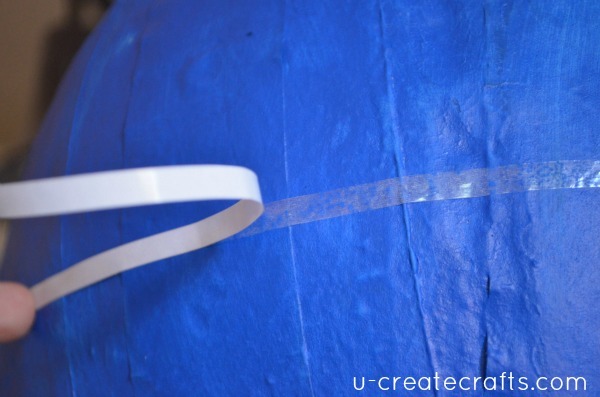 Step #12: Starting at the bottom apply a strip of double-sided adhesive around the piñata and apply a row blue fringe crepe paper. Put the next row of adhesive about half an inch above the first and apply another row of blue fringe. Do this until you have applied three rows.
 Step #13: Next take the red crepe paper and create a banner around the piñata by bunching it together every 2 inches. Tape the bunched parts to the piñata.
Step #14: Apply 6 more rows of blue fringe.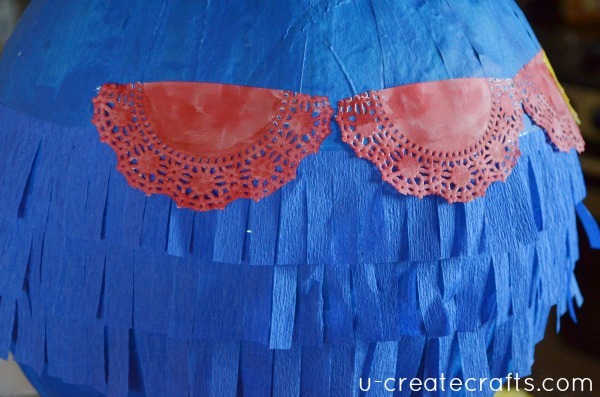 Step #15: Apply the red half doilies around the piñata.
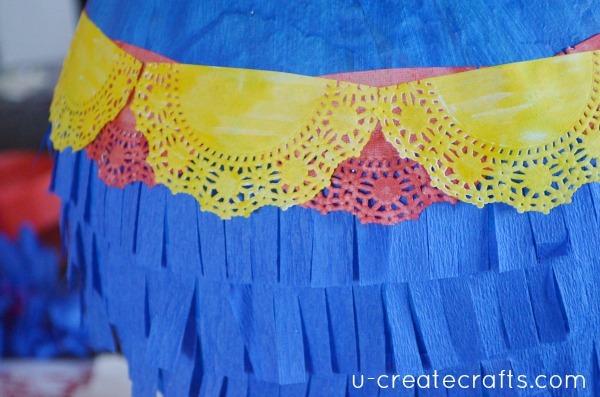 Step #16: Apply the yellow half doilies in the middle of the red ones all the way around the piñata.
Step #17: Apply 5 more rows of blue fringe until you get to the top. Step #18: Flip the piñata over and apply a ring of double-sided adhesive. Take 6 3 inch strips of red crepe paper and apply them the the ring of adhesive. They will hang down when the piñata is right side up.
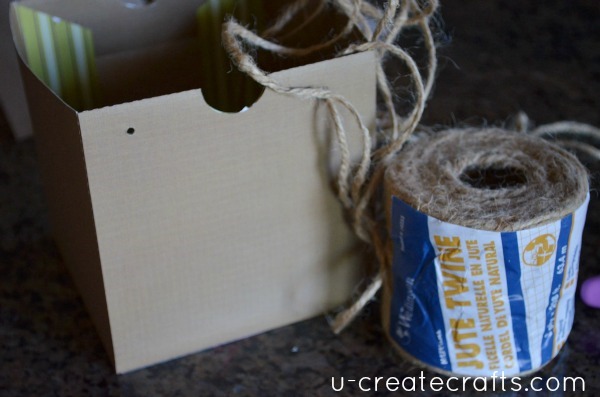 Step #19: Next, create the basket using a digital craft cutter {or you can use a Chinese take-out type box and cut the flaps off}. With a hole punch create two holes of one side and two holes opposite of the first holes.
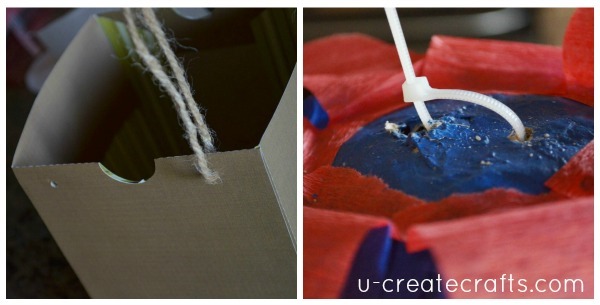 Step #20: String some jute twine through the hole and thread all the ropes through a zip-tie at the bottom of the piñata. Tie all the ropes together with a big knot.
  Step #21: Fill the basket with chocolate gold coins and the balloon with glitter and coins.
  Now you have a piñata for a fun Land of Oz party!
Post By –


This is amazing!!! Such a great project. 🙂
you are so nice. Thank you.
Coolest pinata ever Becky!!! I bet your kids had a blast with an Oz family night!
Seriously, we had so much fun. What a great movie!
Cute! and did you get a mini blog makeover?? – love it!
Love this idea! Pinning. 😉
Super cute! I am pinning!
Clever! I bet your pinata is easier to break than the store bought ones. I want all of those chocolate coins inside as quickly as possible.