Hello! I’m Jill from Meet the Dubiens and I am just so excited to be a creative guest today on U Create!
Here’s a little bit about me. I’m a working mom who loves to craft and cook with my kiddos in my spare time. I have 2 wonderful kids, a daughter who is 3 and a son who is 2. I started my blog as a way to share pictures and our daily activities with family, but it has turned into so much more. I love doing crafts with my kids, taking pictures of my kids and creating fun things in the kitchen with them. We’re always creating something cute! Stop by and visit us at Meet the Dubiens and come see what fun stuff we’ve been up to. Now on to the craft. Plastic bottle bowling.
I’m always looking for crafts that use recycled materials because a) it saves me money from having to buy craft supplies, and b) it helps save the planet! I don’t drink bottled water myself, but I raided the recycling bin at work and in just 3 days I had enough bottles for 10-pin bowling. Awesome. I may get a few side-eyes from digging through the trash, but you can make some truly incredible crafts with what people normally throw out. It’s become such a common occurrence at work that my co-workers are now asking me what I want before they throw it out, lol!
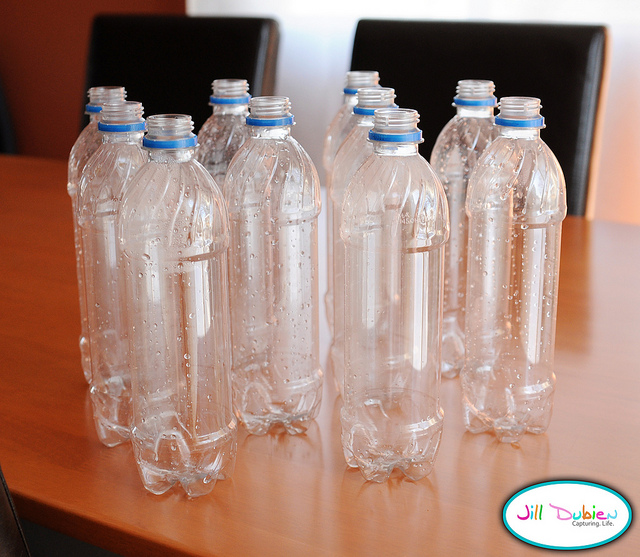
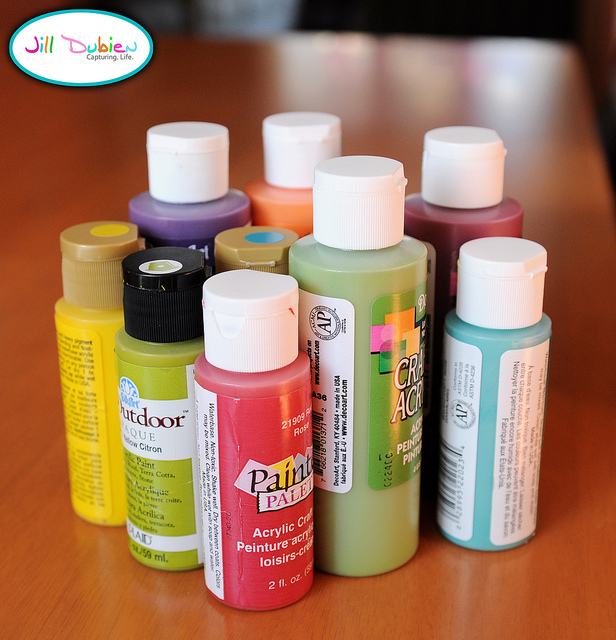
This was a really fun craft to do. It took very little time and supplies and the kids ADORE playing with this. SO.MUCH.FUN! I love that these are painted from the inside so they are totally safe to play with. I don’t have to worry about my son licking or scratching the paint off. I’m sure moms of boys out there can totally relate with that! Here’s how you make them: What you’ll need: 10 plastic bottles 10 shades of paint a tiny bit of water a ball – I got mine at the dollar store optional – glue gun Instructions: Remove cap from bottles and clean thoroughly.
Find 10 shades of paint. I tried to use 10 different colors, but you can use whatever you have and make these whatever color scheme you wish.
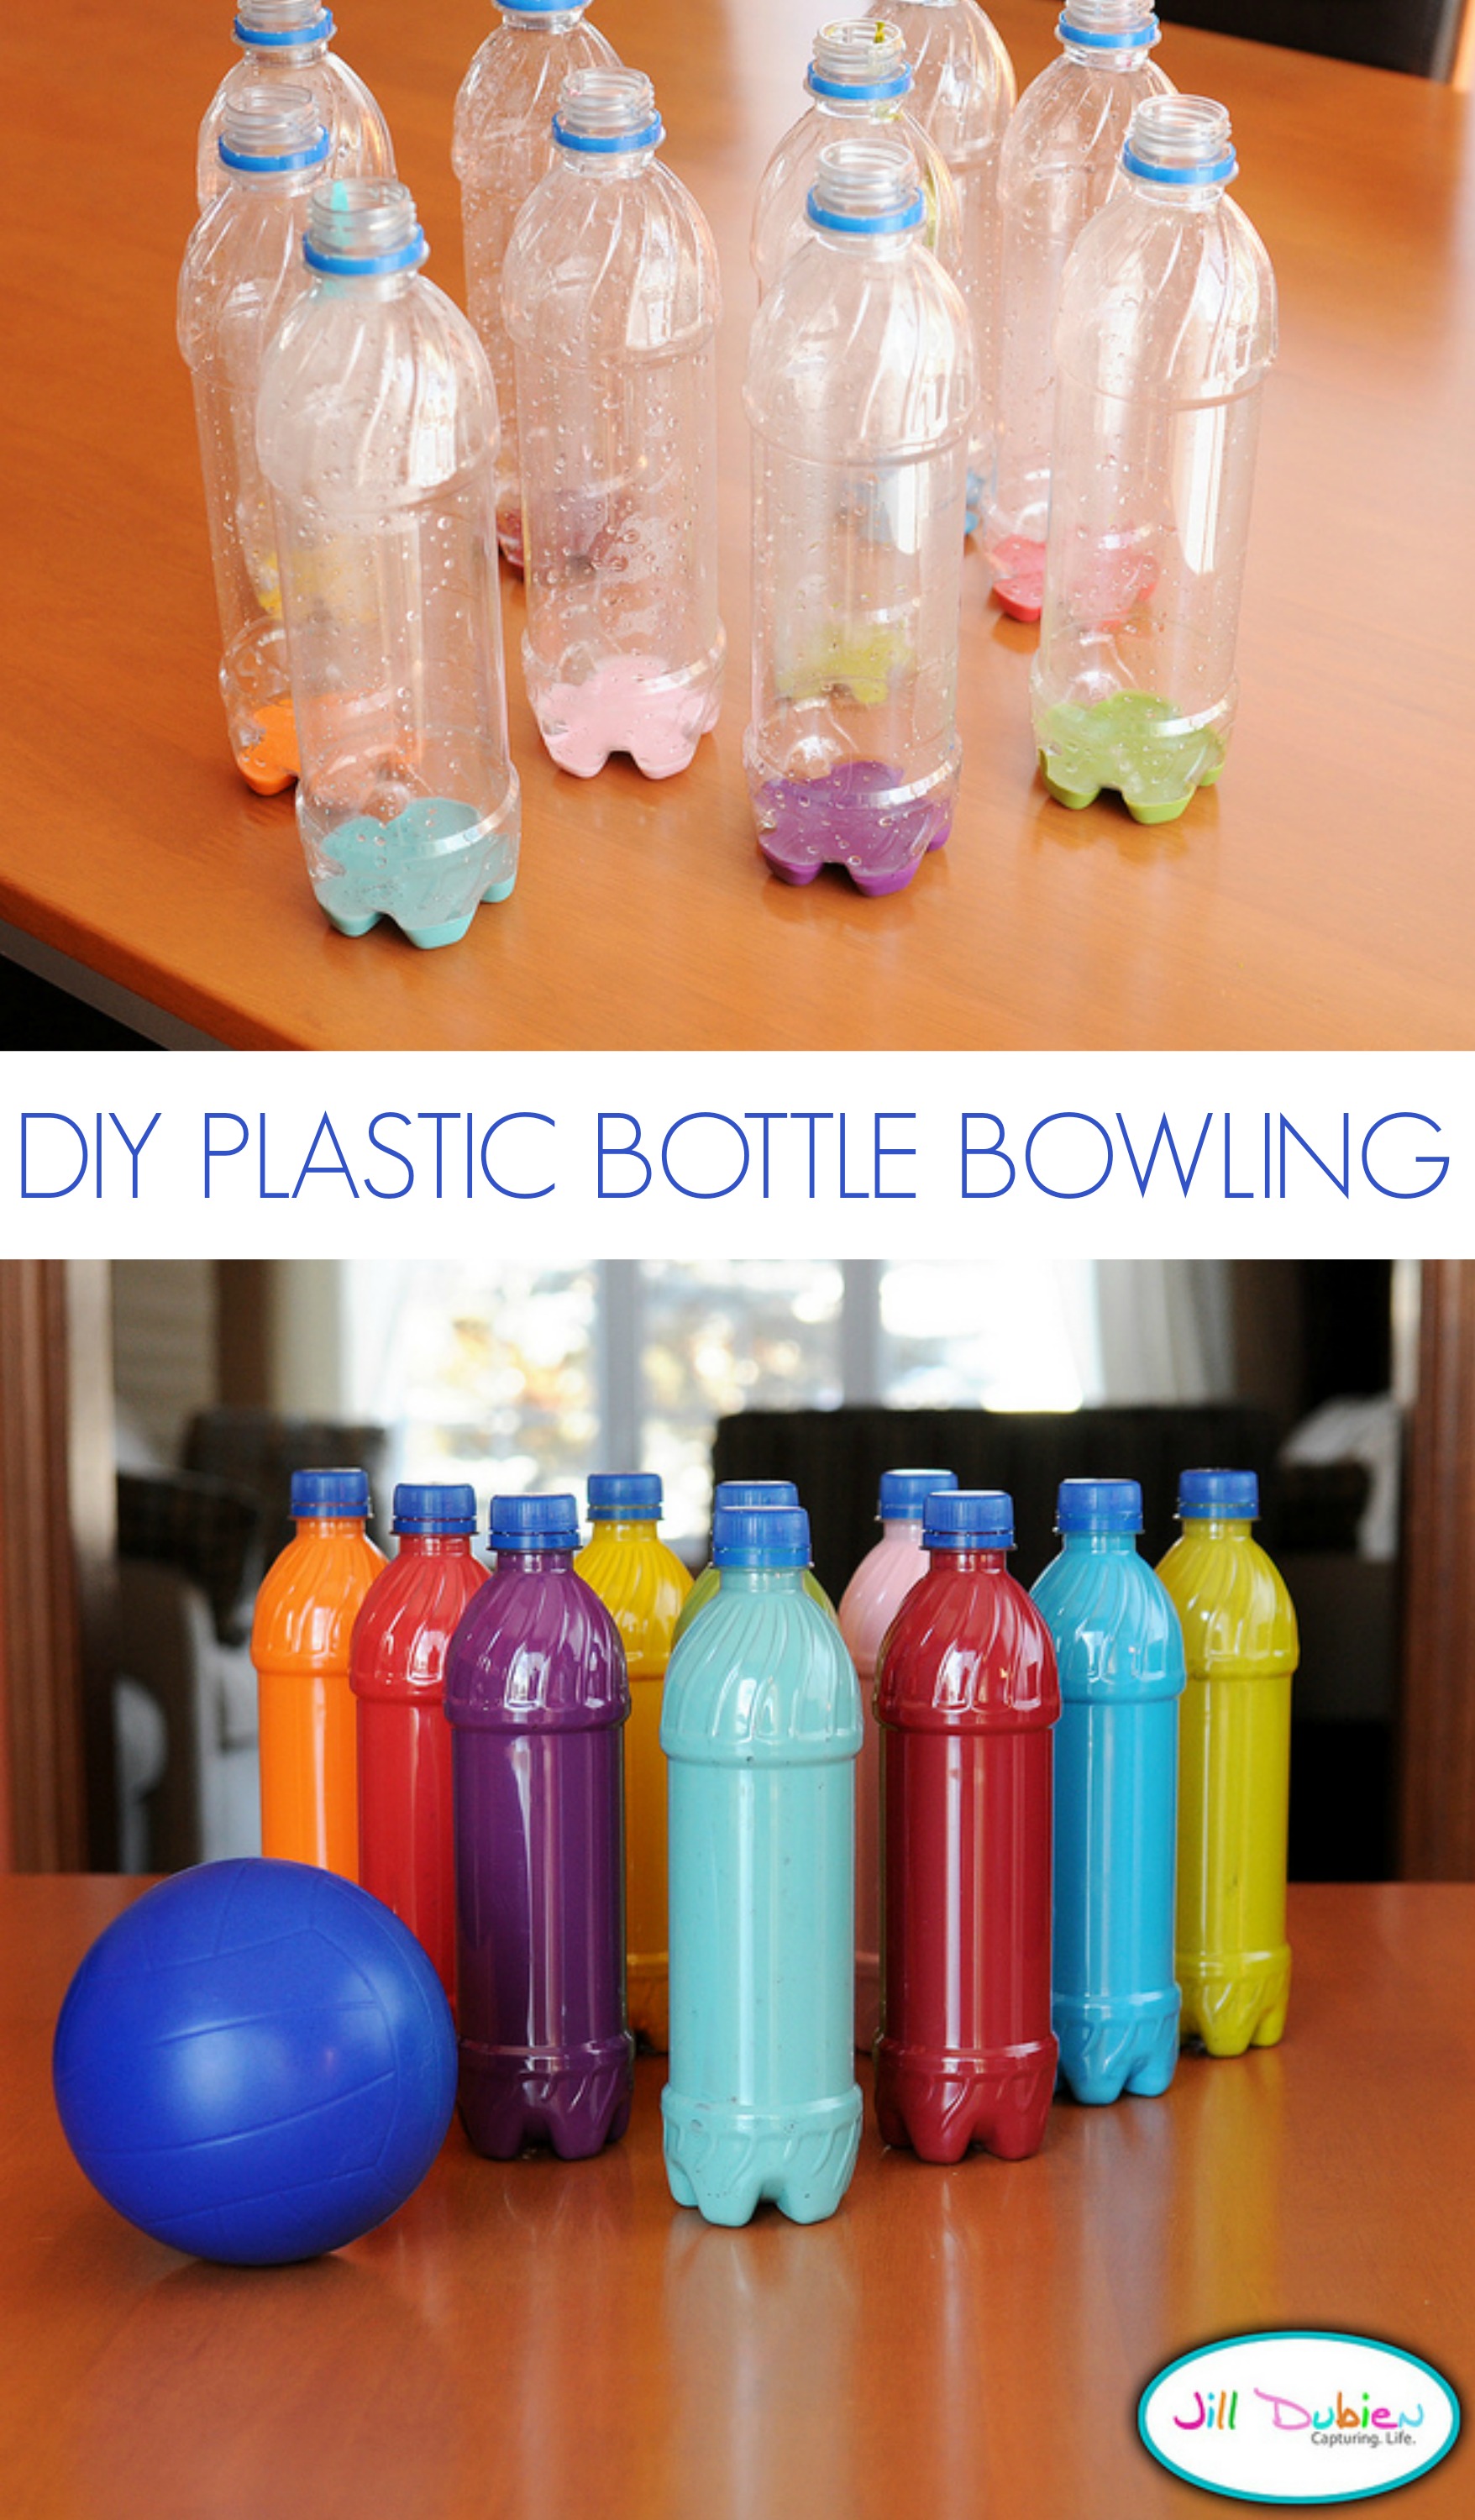
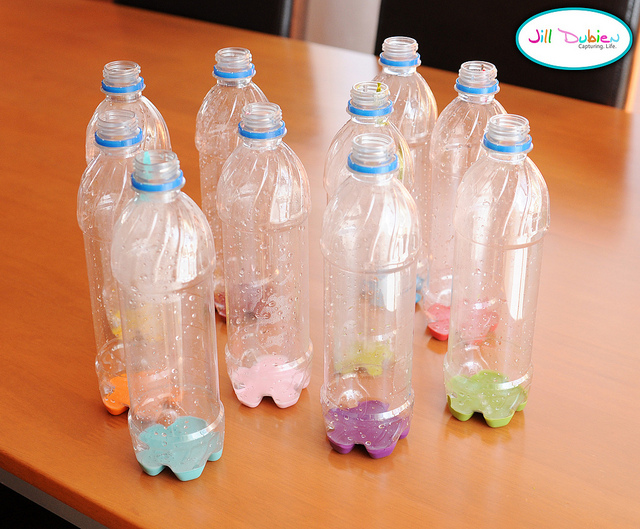
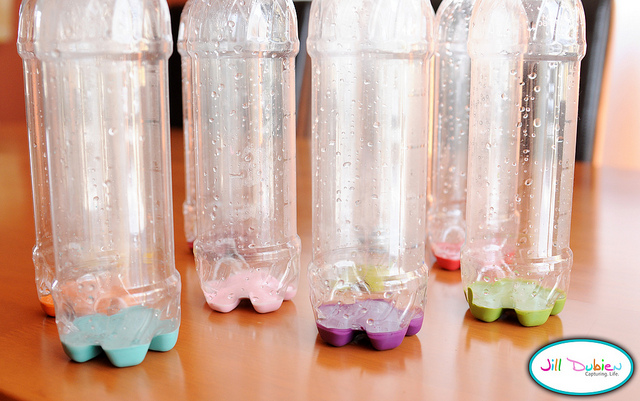
Squirt a small amount of paint in the bottom of each water bottle. You can see from the picture about how much I used.
If your paint is really runny you can skip this step. If your paint is pretty thick you’re going to want to add a small amount (like 1 tsp) of water to each bottle. This will make the paint a little runnier so it will be easier to shake. Don’t add too much water though or your paint won’t be thick enough and won’t cover the bottle properly!
Put the caps back on all your bottles. Shake each bottle vigorously to spread the paint all through the bottle. The kids loved this step!
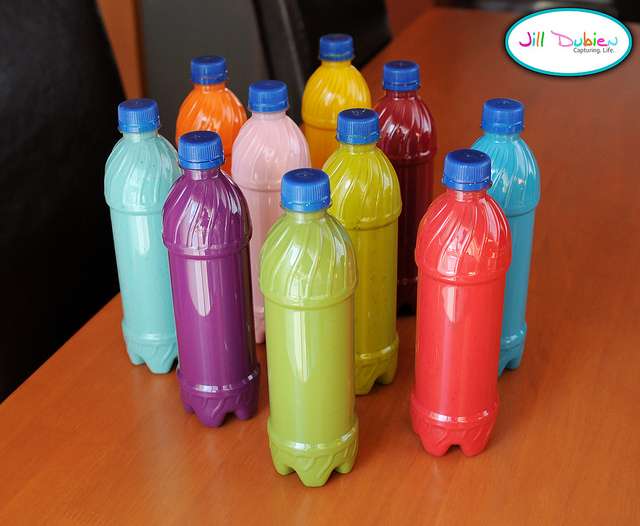
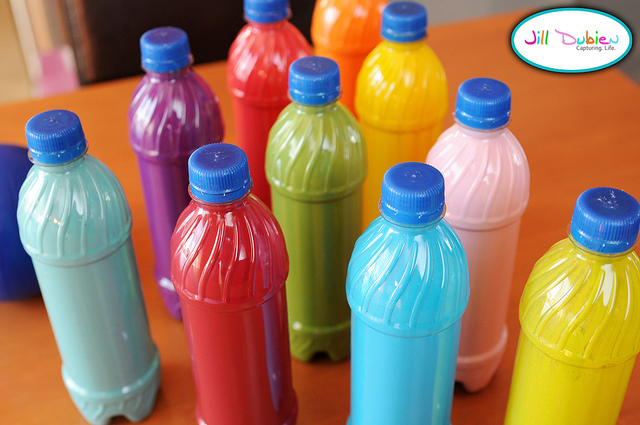
Remove cap and pour out any excess paint/water. Keep the cap off and allow your paint bottles to dry. Mine took at least overnight. When dry you can put the lids back on. Optionally, if you’re worried about your kids being able to open the bottles, you could use a glue gun and glue the lids back on. I didn’t do that, and my kids have never tried to open them. Set up your bowling pins, grab a ball and have fun!
Thanks again U Createfor inviting me to be a creative guest! This is such an amazing site and I am so honored to be here today.

Great craft. Jills the best!
I’ve found Jill’s site recently and love love it. She has so many wonderful ideas and takes great photos. This bowling pin idea was cute. Thanks for sharing.
Kendra beat me to it…we put a little rice (or lentils or popcorn — whatever’s in the pantry) into the bottles for added stability.
Putting a little sand in the bottom also helps make it a pinch more challenging for older children. 😀
Brilliant! What a great way to recycle something ordinary into something really fun!
Love Jill’s site and now have a new favorite here too!
Kerri
Thank you so much for the fabulous tutorial! I used it to create a “Pig Bowling” game for my daughter’s Angry Birds party. It was a huge hit!
http://www.simplystyledhome.com/2011/07/angrybirds4.html
Love this! I’m in the middle of creating these bottles right now for a fall carnival. One of my colors isn’t coating well as I think I put too much water in. I was wondering if you used regular acrylic paint? Also, after you poured out the extra water and let them dry overnight, how were they stored? Upright, upside down, on their sides? Thanks for any tips!
I encountered similar issue. The paint drained down to one side. What should I do? I didn’t even add water in. ( I used acrylic Paint bought from Michaels.)
My daughter ‘invented’ bottle bowling on her own 🙂 The bottles aren’t painted though. They were just standing by the fridge.
I LOVE this!! wish my girls were still little (I need to start a grandkids idea folder lol)
I used to teach first grade and I would take plastic water bottles filled with water, add a little glitter and some dice. Glue lid on. Now the dice don’t get lost when the bottle is tossed and the bottle is virtually indestructible. The glitter makes every toss a little special. Square Fuji ottles worked the best. The little kiddos loved them! I used them for years!
Great idea! Found you on pinterest!
GREAT IDEAL
Perfect! I’ve been searching all over the Web for a tutorial on making a bowling set for our church scouting group. Can’t wait to make it. Thanks!
Just wanted to say thank you for this idea. My son did this for a 5th grade school game and it turned out great! It only took about one hour and all I had to buy was the water.
❤️❤️❤️❤️❤️❤️
❤️❤️