I’m honored and excited to be the creative guest this week. Kind of nervous too.
I’m Jessica and my blog is called Running With Scissors.I chose to share a project that includes a lot of different elements that reflect a lot of what I love right now; sewing, freezer paper stenciling, applique, and more recently decor as we bought our first house and I’ve been working on furnishing/ decorating it. My blog has recently been more decor oriented, with some furniture building/ makeovers, and lots of thrift store remodels. My favorite projects are usually ones that take junk and transform them into something great, all for the least amount of money possible.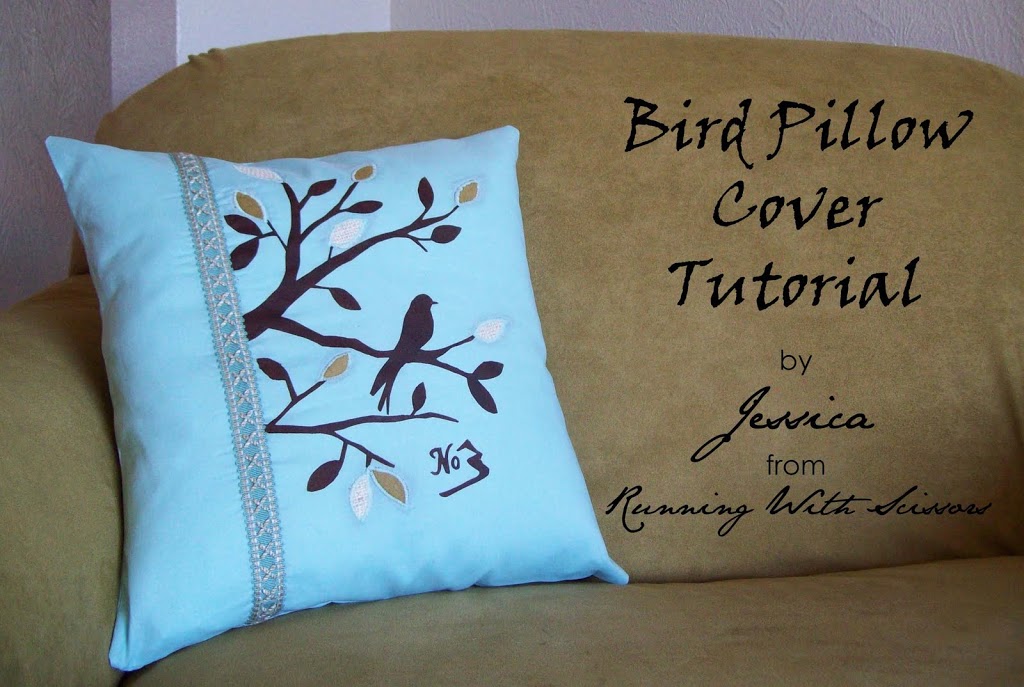
I’m Jessica and my blog is called Running With Scissors.I chose to share a project that includes a lot of different elements that reflect a lot of what I love right now; sewing, freezer paper stenciling, applique, and more recently decor as we bought our first house and I’ve been working on furnishing/ decorating it. My blog has recently been more decor oriented, with some furniture building/ makeovers, and lots of thrift store remodels. My favorite projects are usually ones that take junk and transform them into something great, all for the least amount of money possible.
I’m a stay at home mom to a toddler son, and wife to a hard working husband. I do have a little etsy shop, but lately it’s been pathetic and totally empty.
So on with my tutorial for today.
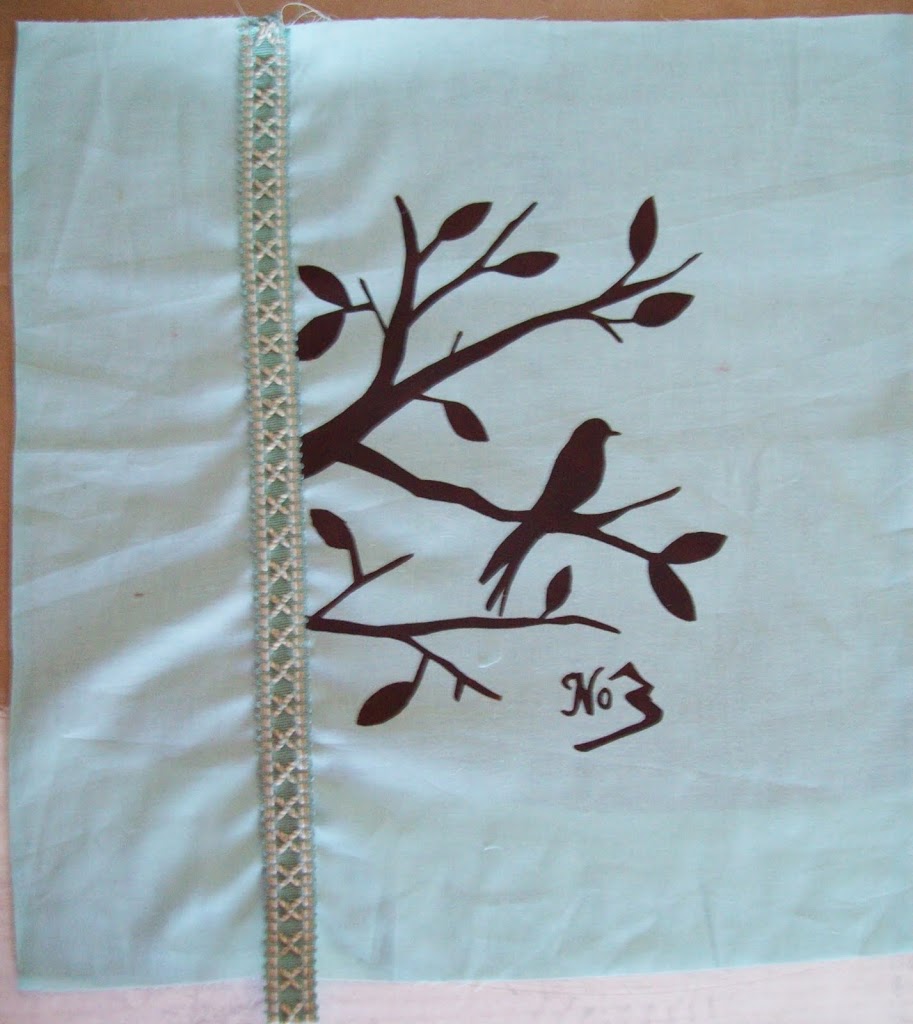
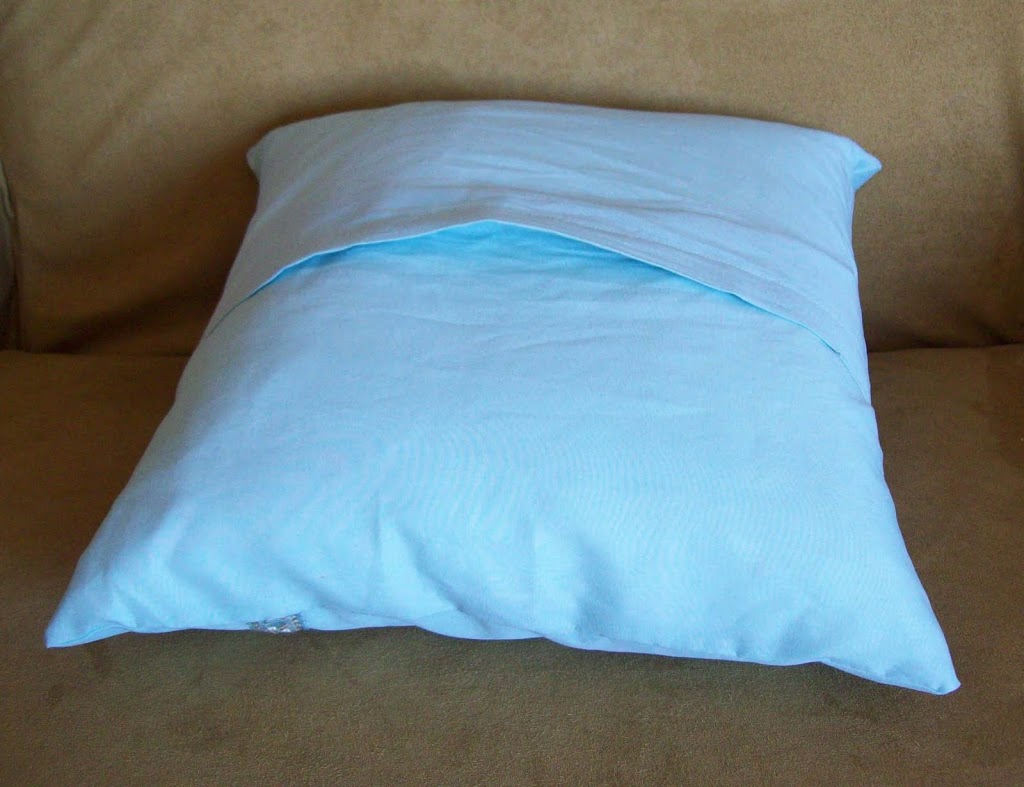
We’ll be making this bird pillow cover.
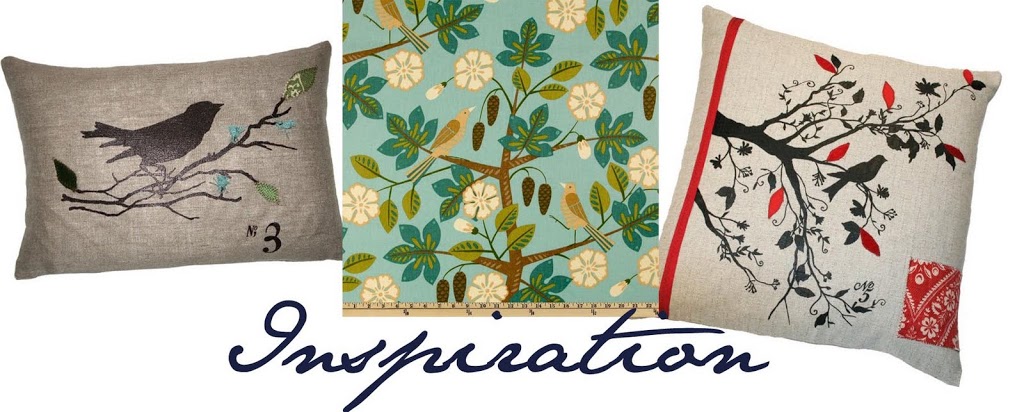
Many different ideas combined to inspire this pillow.
Here are a few:
The pillows you can purchase here for $124 to $135.
The fabric is from fabric.com HERE for $14.00 per yard.
So I combined my fabric scraps and designed my own variations of these to make a unique decor pillow.
SUPPLIES:
-pillow form (mine today is 16×16) I snagged mine for $1.00 at a yard sale!
-main fabric (1/2 yard)
-scraps for applique leaves
-freezer paper (buy next to the tin foil) or freezer paper printable sheets in craft section
-fabric paint
-decorative trim (18 ” or half yard)
1. Cut fabric
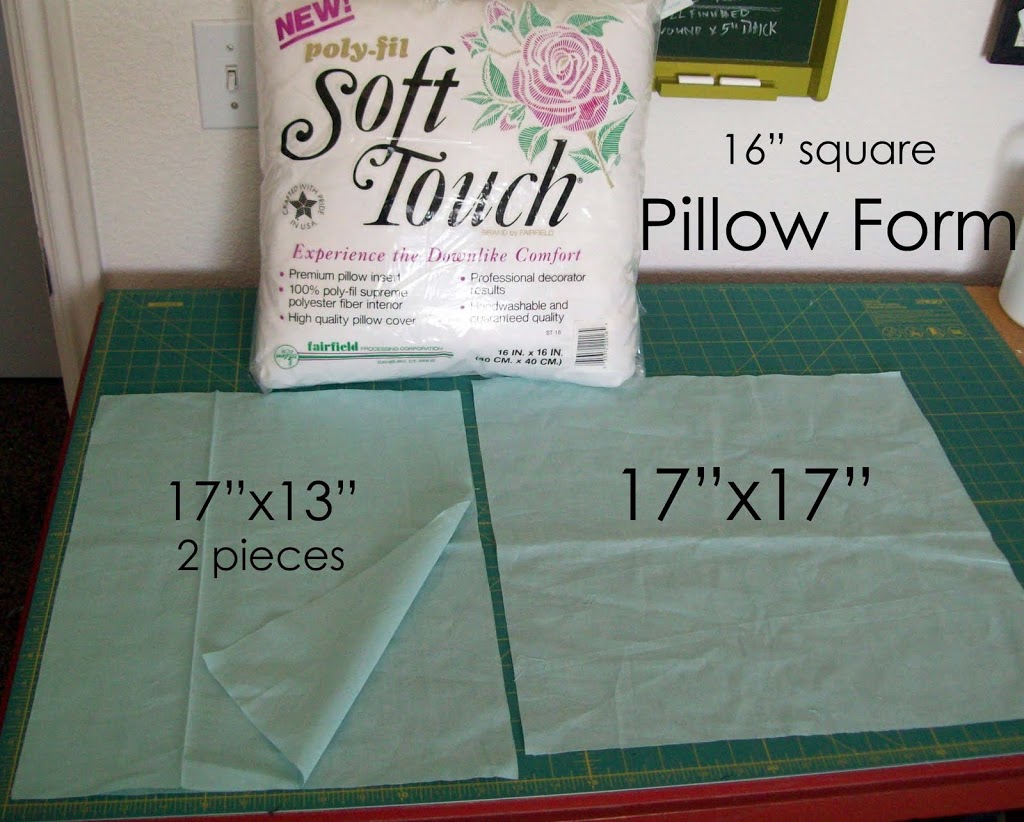
You’ll need:
1 square 17×17
2 rectangles 17×13
These dimensions are for a 16×16 square pillow form, just add 1″ in each direction from the pillow form size for other pillow sizes.
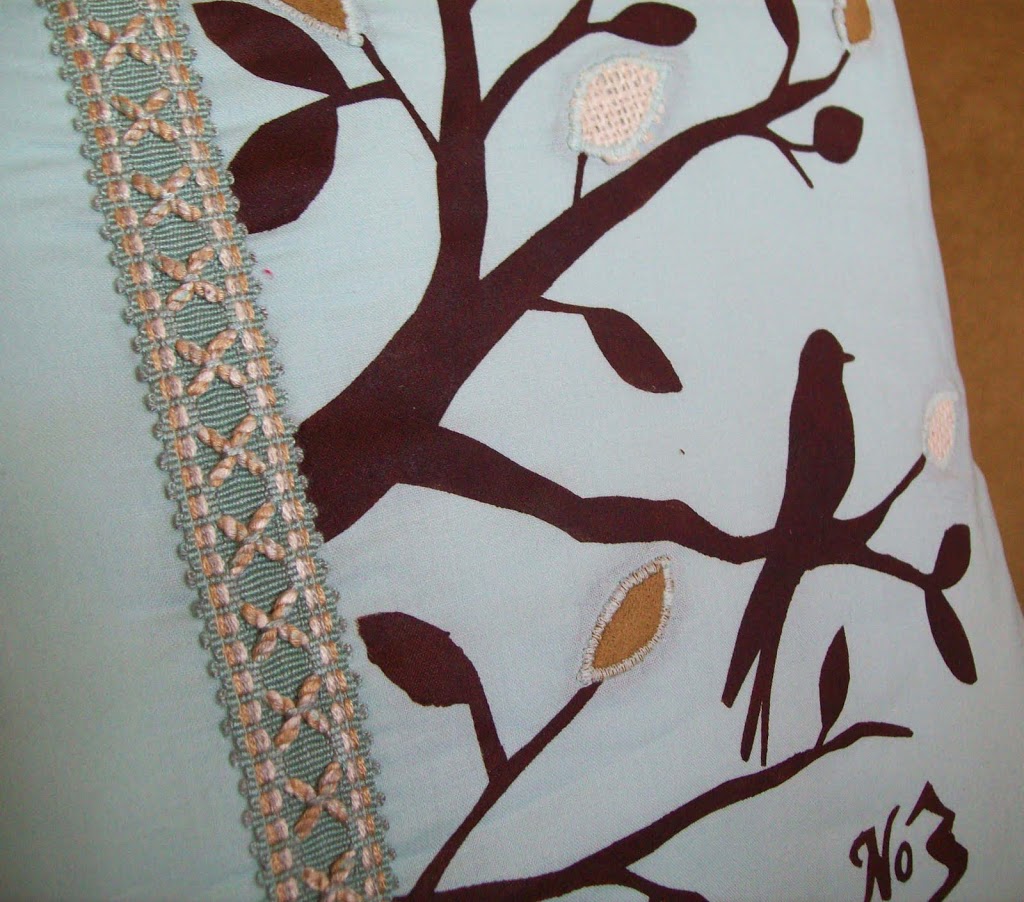
2. Apply Freezer Paint Bird
If you are new to freezer paper stenciling, here’s a more in depth tutorial. We’ll briefly go through the steps here.
First, cut your freezer paper down to 8 1/2″ x 11″ so it can go through your printer. Make sure you load the freezer paper so it will print on the paper side, not the plastic side.
{I just sketched the template myself, so don’t expect perfection!}
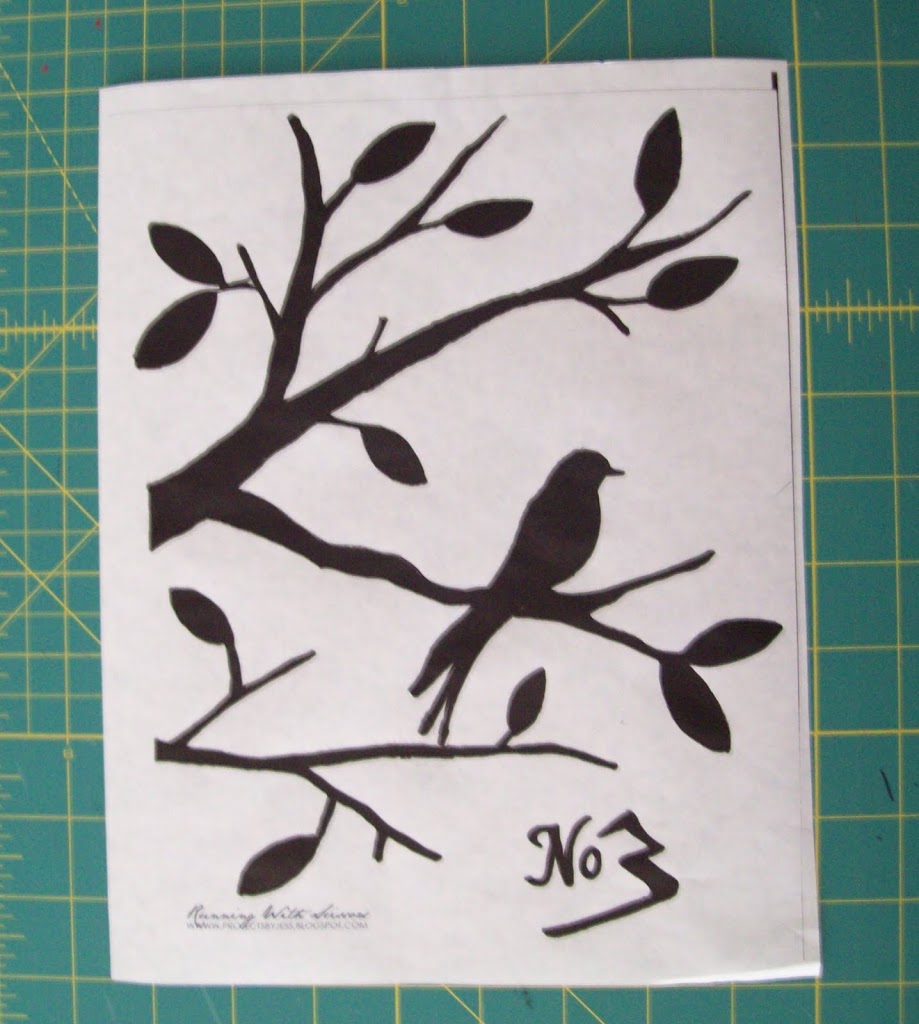
Next you’ll cut out the image, making the stencil. I just use regular paper scissors, and a craft knife in certain places that are tight.
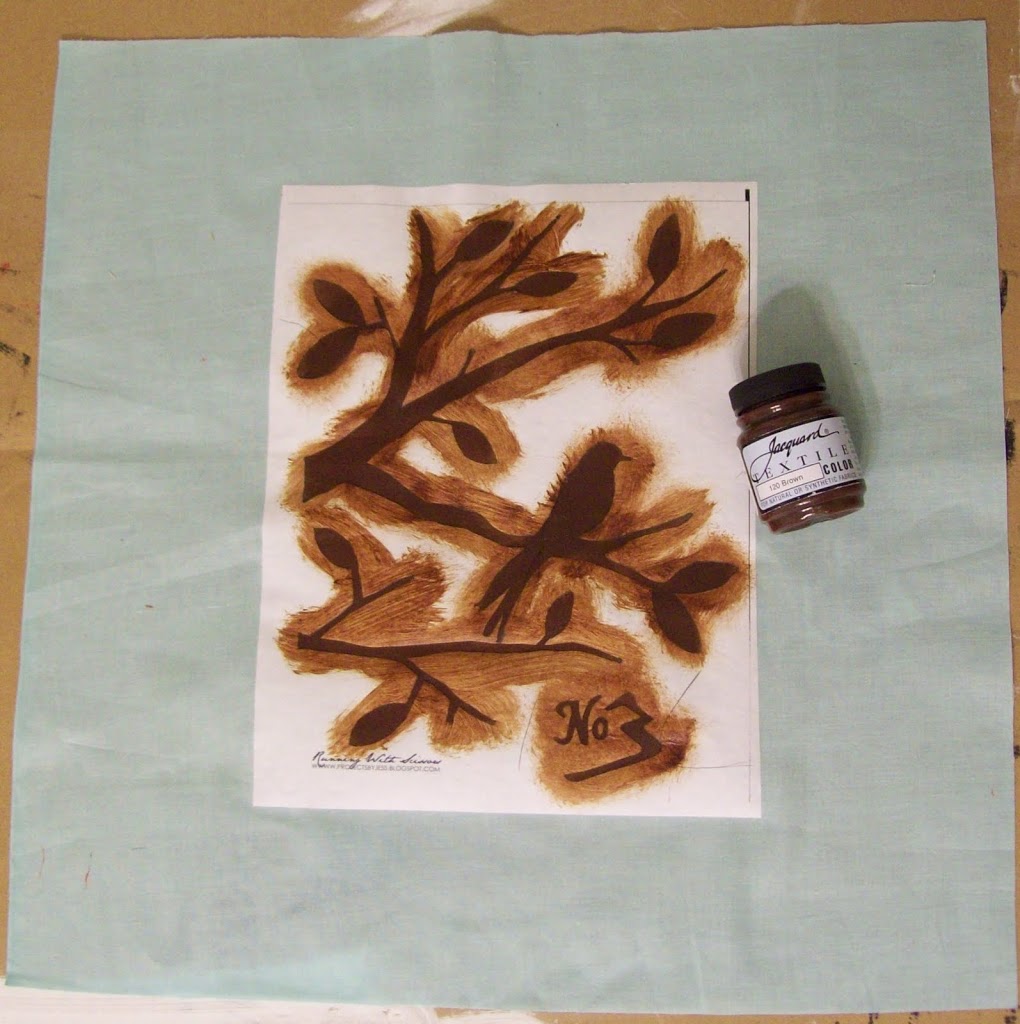
Center the freezer paper on the right side of your 17×17 square and iron in place.

Put cardboard under your fabric, and paint the stencil using fabric paint.
I always let it dry at least an hour, then paint a second coat.
The brand of fabric paint I used requires you to iron to seal the paint once it’s dried, just follow the directions on your paint if there’s additional instructions.
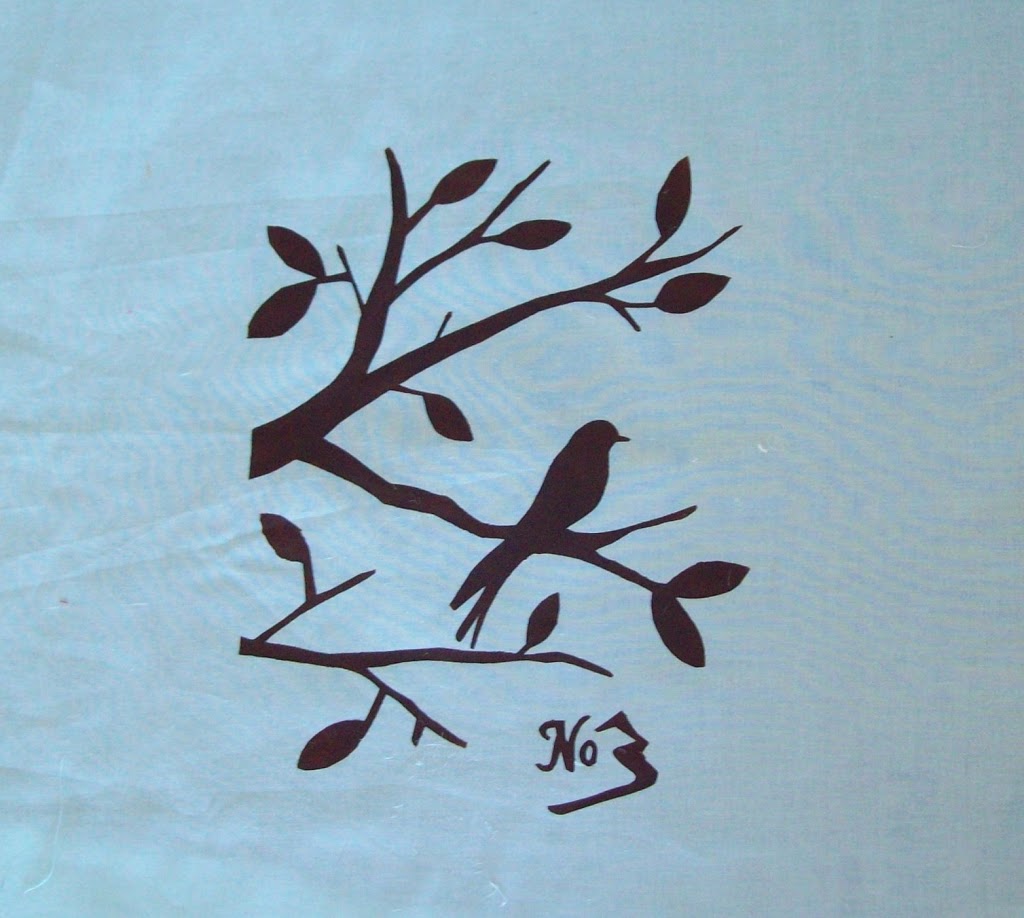
Peel off the paper once it’s dry.
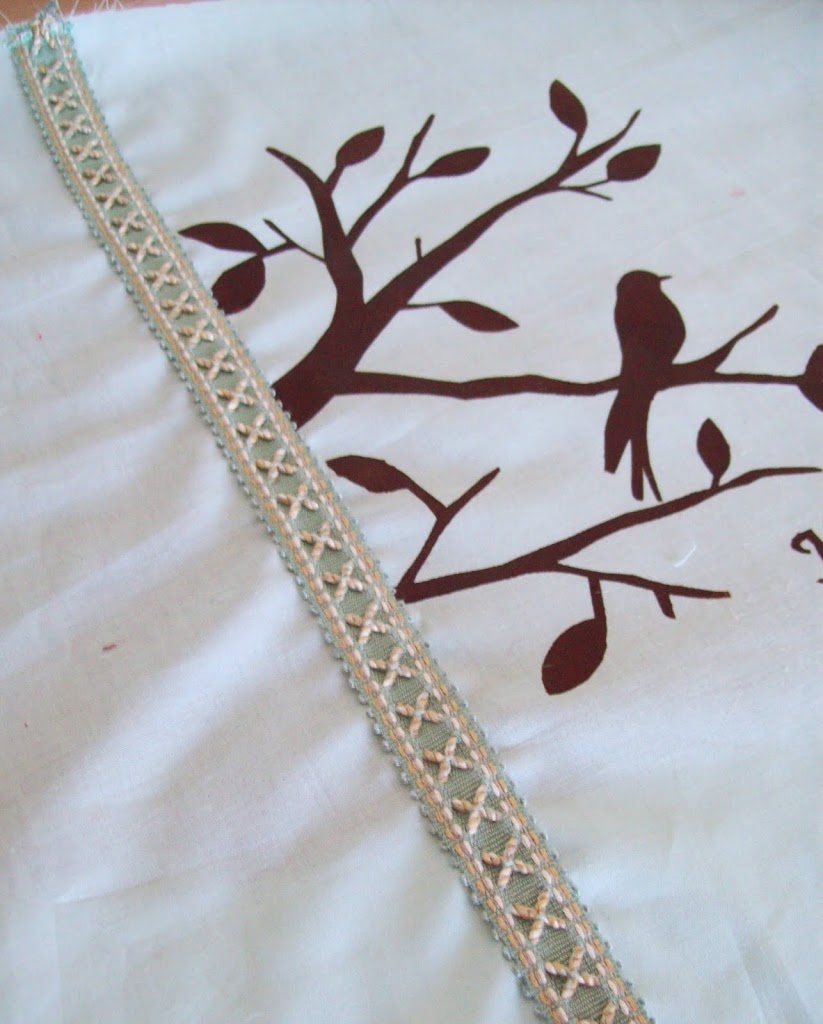
3. Add Trim
I pinned and top-stitched along each side of the trim, going the full length of the pillow
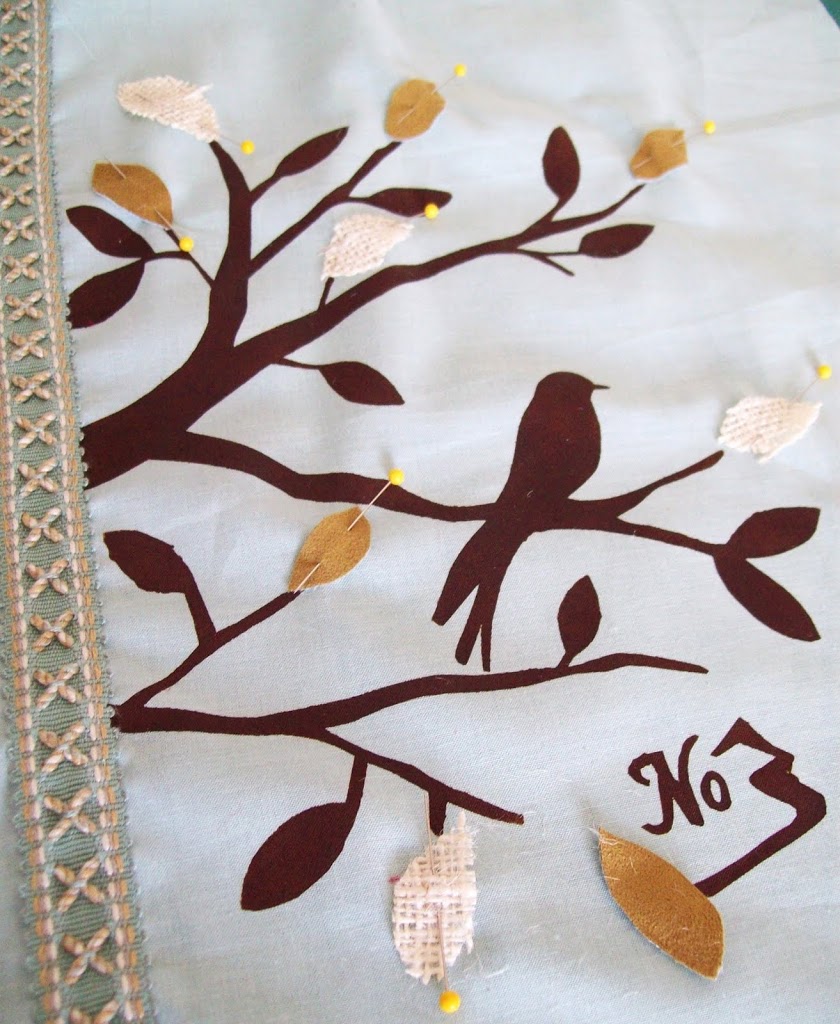
4. Applique Leaves
I just hacked out leaf shapes from 2 different colors, white burlap and chartreuse suede left over from the slipcover I made for the chair this pillow will go on. You could use the bird template as a pattern to cut your leaves if you don’t want to just hack them out.

I played around with the leaf arrangement until I liked it, and pinned the leaves on.
NOTE:
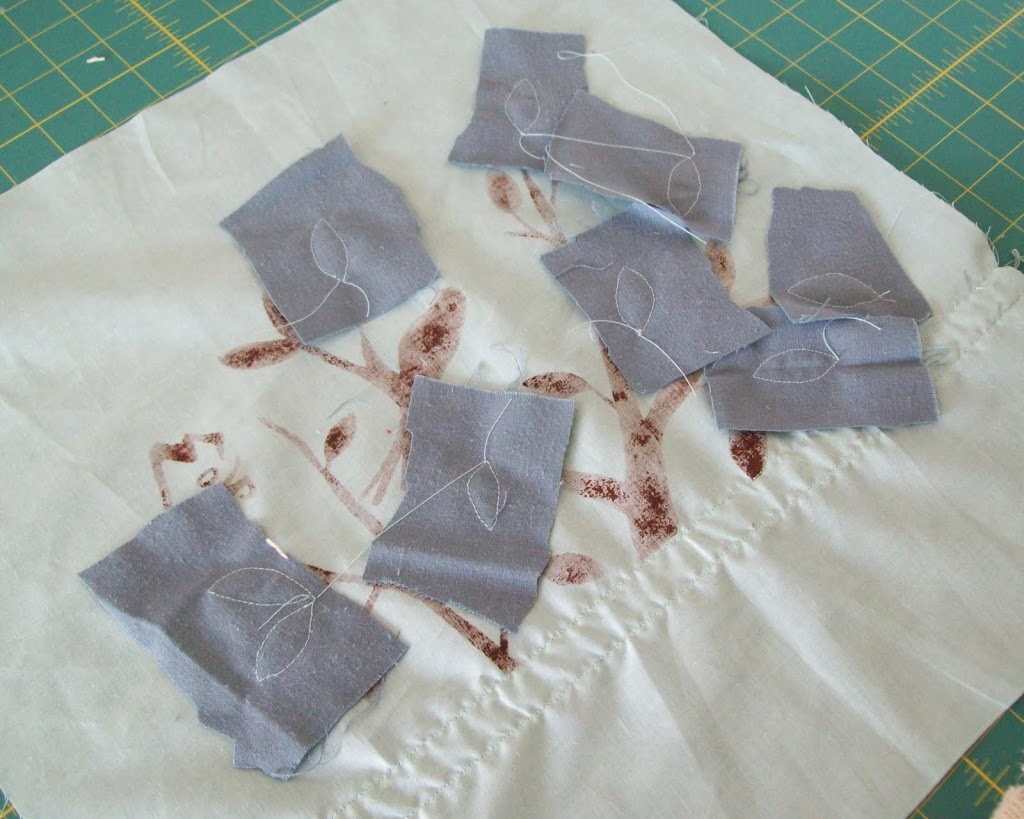
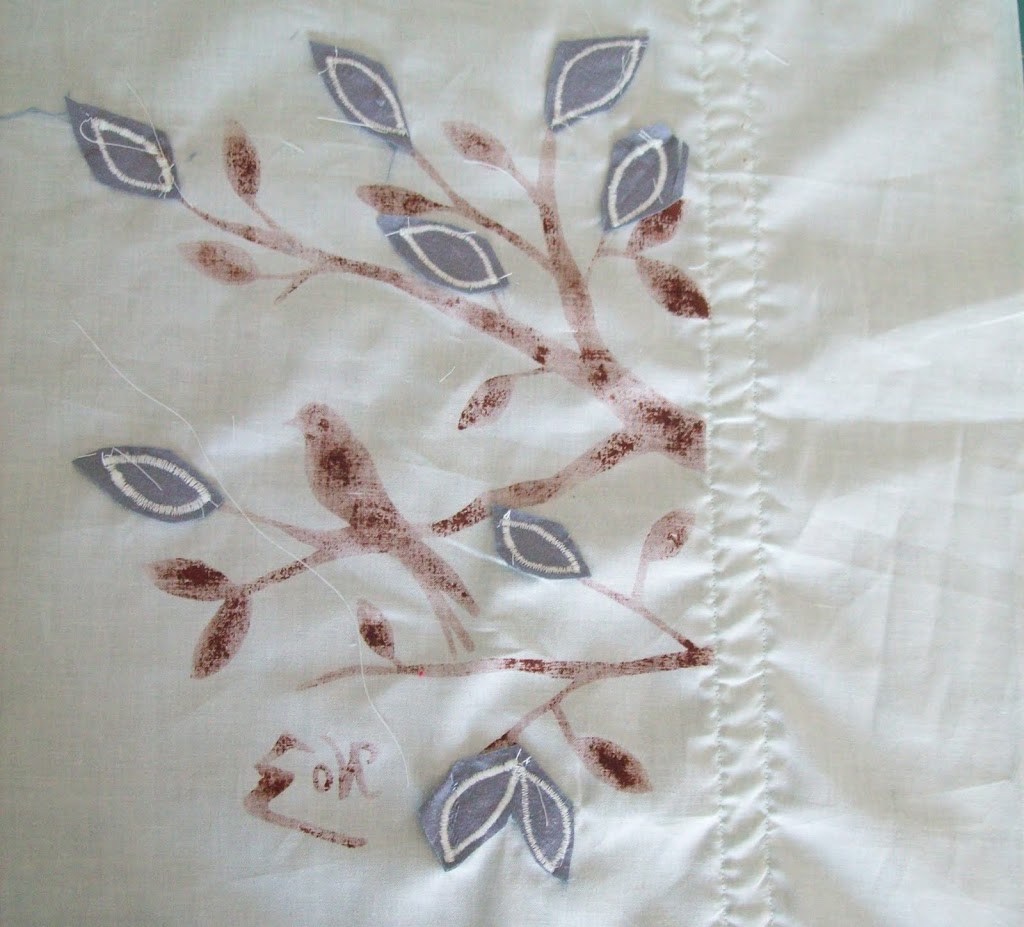
Usually with applique, you reinforce the fabric with fusible interfacing, Heat N Bond, lots of starch, or I’ve even used a coffee filter in a pinch. Because these fabrics were thick and quite stiff, I didn’t reinforce them, but just sewed them straight on the pillow. If your leaves are quilting cotton, I’d recommend using one of the above reinforcing methods on the back.
Usually with applique, you reinforce the fabric with fusible interfacing, Heat N Bond, lots of starch, or I’ve even used a coffee filter in a pinch. Because these fabrics were thick and quite stiff, I didn’t reinforce them, but just sewed them straight on the pillow. If your leaves are quilting cotton, I’d recommend using one of the above reinforcing methods on the back.
You also have lots of different options when sewing on your leaves. You can just sew a straight stitch around, blanket stitch, zig-zag, etc.

I chose to use a zig-zag with a width of 2.5 and a length of almost zero, creating a thick, solid looking edge.
I used the blue thread to applique my leaves on, but after I thought a dark chocolate brown would have looked cool too, to use a contrasting thread to stand out.
Because the blue fabric of my pillow was just thin cotton broadcloth, I added scraps as I sewed each leaf on to reinforce the blue pillow. Once the leaves were sewn, I trimmed off the excess scraps. If you’re using medium to heavy weight upholstery fabric, you probably don’t need to back your leaves like this.
5. Construct pillow back
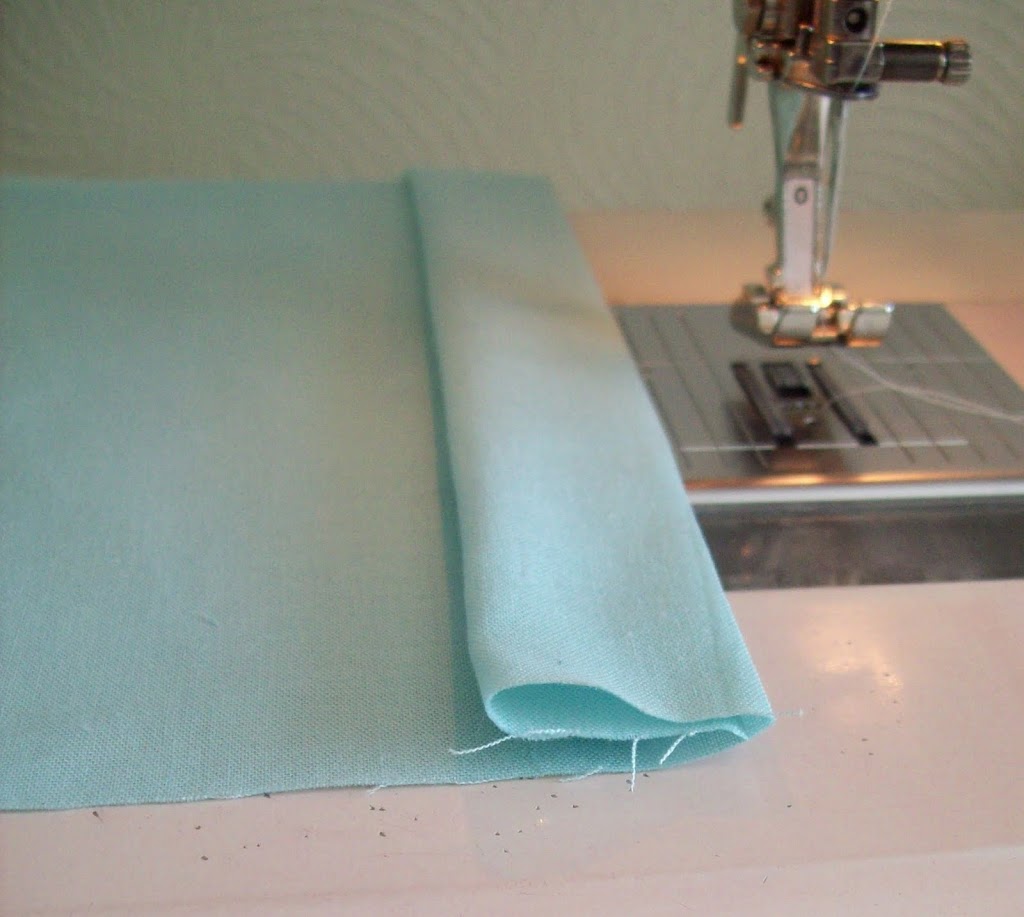
Fold and press a long edge of your rectangles 2″, folding the right side onto the wrong side.
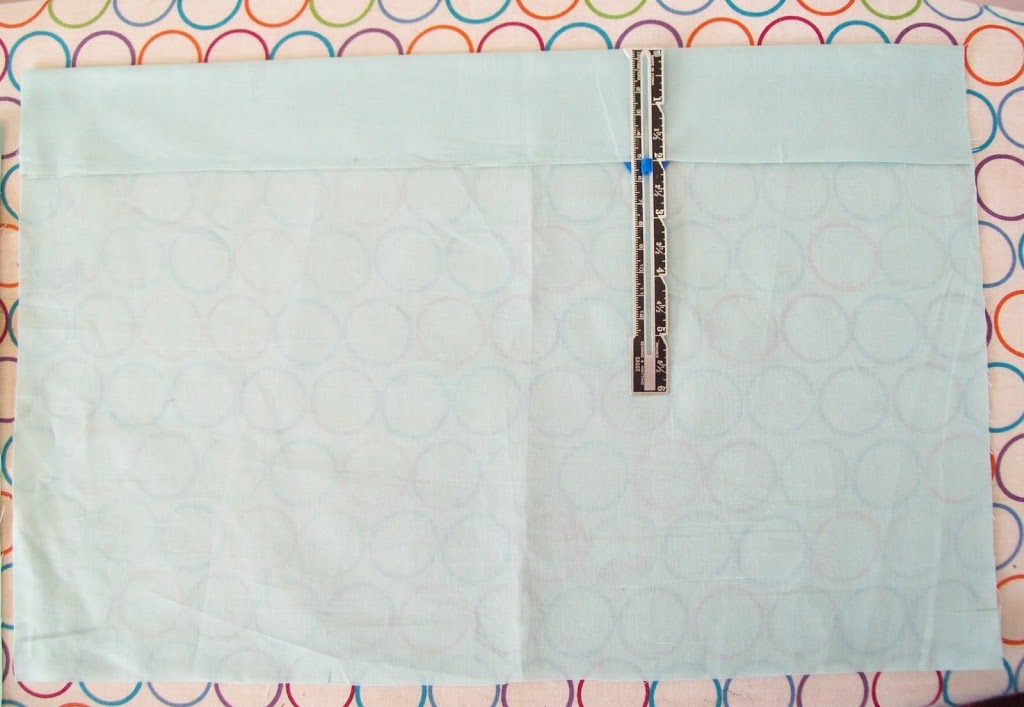
Fold the raw edge under, to tuck it right into the fold you just ironed. So now you have a hem that is 1″ folded twice. Sew down the hem.
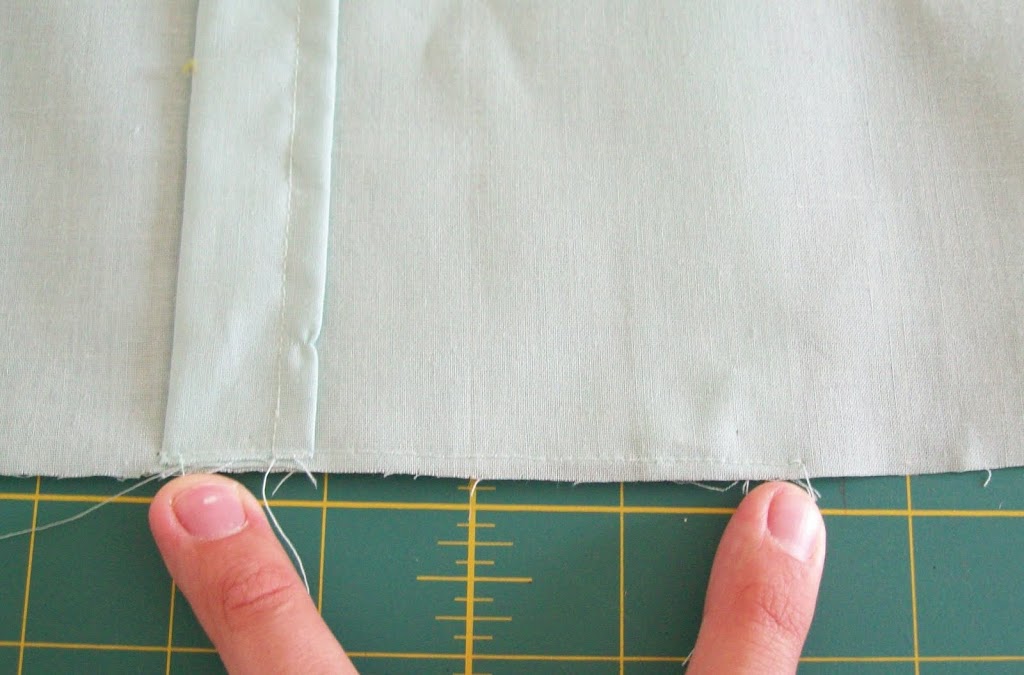
Once both back rectangles are hemmed, place them together, both right side down, and overlap one over the other, to make a 17×17 square. This has the hemmed edges overlap in the center 4″.
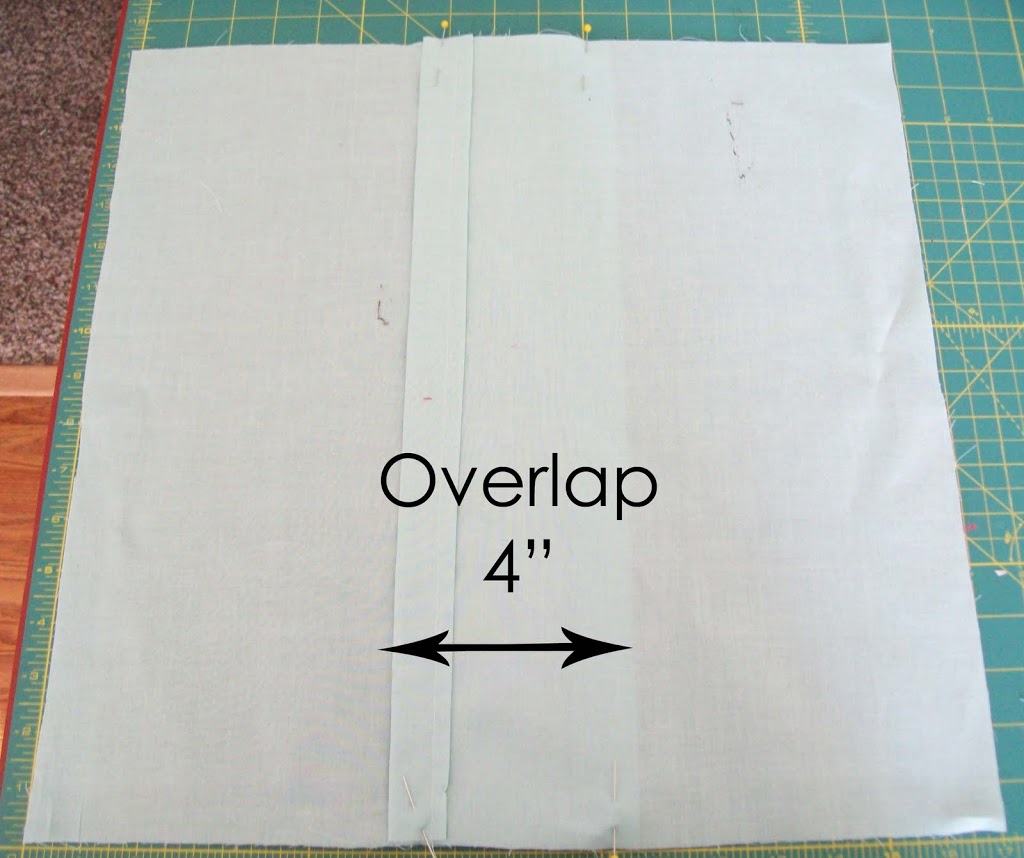
Sew the 4″ of overlap on each side to secure them, with a 1/4″ seam allowance. Now you’ve made the back of the pillow cover, and the overlap creates a kind of pocket to get the pillow form in and out.
6. Sew Pillow Cover Together
Take the front and back, and place them right sides together. Remember to put the opening of the back perpendicular to the trim, so the pocket opening is horizontal on the pillow.

Sew around the entire square with a 3/8″ seam allowance (the line just to the right of your presser foot edge)

Trim off the corners.

IT’S FINISHED!
Press it if you need to, (I starched mine since it was just broadcloth), jam the pillow form in, and plop it on your couch.

It was fun being a guest here!
Come visit me on my blog for more sewing, furniture makeovers, and decor if you are interested!
Thanks!


Cool Tute! Thanks!
Wow, this is AMAZING! I really want a pillow like this. 🙂 Thanks for the tutorial!
Very nice Jessica. Great directions. I would have never thought about the painting! I like it!
Wow! I’m loving this. You are so creative! You did a wonderful job.
Thank you for sharing your great idea, love it!
Jessica…you are totally awesome…this is totally awesome. Great job!
Those are so cute!!
I love it! I could see how this would be addicting.
Great job Jessica!
I am thrilled you were a guest. I love love love your creations. And I can see even more of them at your blog. Thank you for sharing your ideas. I am ever so grateful.
beautiful Jessica! I’m heading to your blog right now.
thanks for the tute
gail
“Sew” neat and beautiful!
really cute pillow, I need to learn how to use my sewing machine….ugh!
Wow this is so pretty Jessica! Thanks so much for the how-to, I’ll be linking.
Great tut! I love how the freezer paper and fabric are combined to make the image even that more remarkable and interesting! I did my own version of this pillow thanks to your good find with this tut and thanks for inviting Jessica to come blog! She is good inspiration!
http://bugcreator.blogspot.com/2010/08/i-am-mommy-hear-me-rawr.html <– the pillow
That is SO COOL. I am TOTALLY copying this! 🙂 Thanks so much!
Can’t wait to make this! Would be a great gift too.