
Hello, U Create Fans and Readers! I’m Angelina from JoJo and Eloise.
I am so excited to be here with you today. First let me say I can’t even believe I am here!!! And, to be a part of this Fat Quarter Series, where there is some SERIOUS talent!! Well, Frankly I am just simply, AMAZED and Humbled!!
I am one of those, who LOVES a good challenge. So when I heard the words, “FAT QUARTER”. My brain immediately started, THINKING and PANICKING all at the same time. LOL!!
I mean, let’s face it! A Fat Quarter, isn’t a whole lot of fabric to play around with. Unless, your making something that is on the SMALLER side of things.
My fabric of choice was, Linen. I purchased a Quarter of it at JoAnn’s Fabric.
I have to admit, once I got home with it, all I could do was STARE at it! I wasn’t quite sure what I was going to do. That is until I had a BRAIN STORM!!! (love it when that happens)
I figured this SMALL piece of fabric I had to work with, would make a GREAT small doll of some kind.
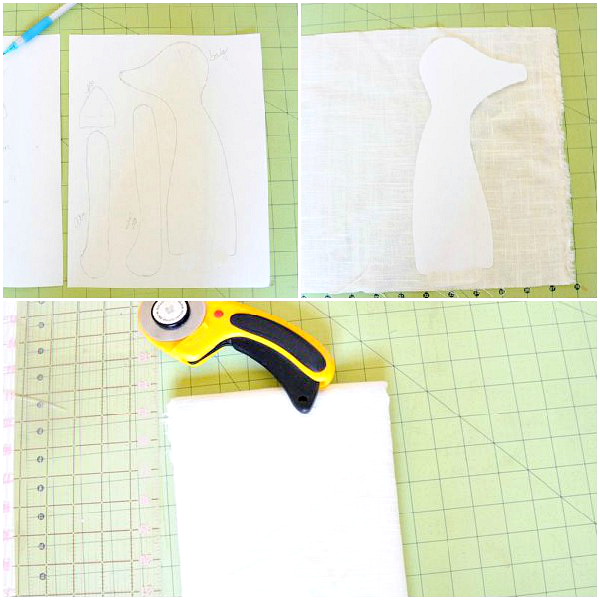
I began drawing different shapes for the MAIN body and eventually came up with this design.
You can draw something similar or you can LITERALLY do any shape or style you prefer.
So here’s what I did:
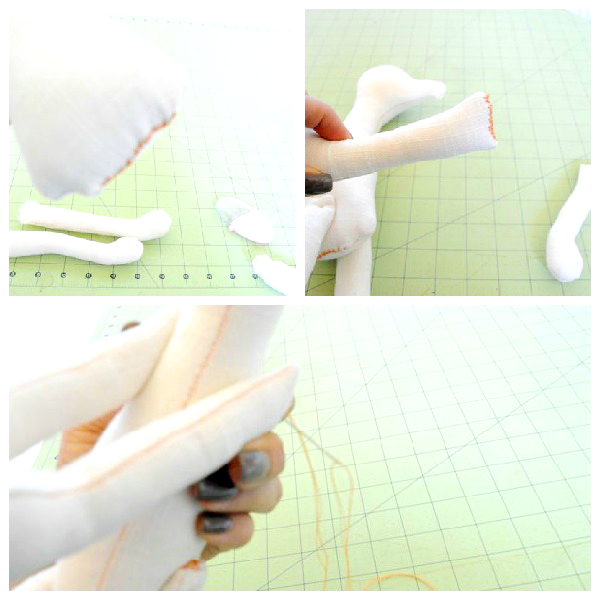
I Drew out on a blank piece of paper, ONE main Body Part, One Leg and Arm.
(originally I was going to add ears but opted not to in the end)
I cut my Pattern out and Traced it onto my fabric, with a pencil.
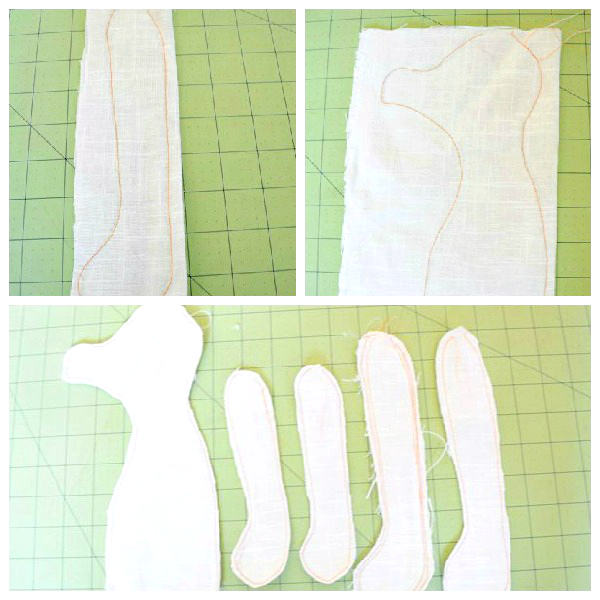
I wanted to take advantage of the fact that LINEN is a natural fiber. I knew that my Stitches would show through. So I decided not to use a Matching thread. Instead I choose to use one that would show, so I went with ORANGE.
When sewing SMALL body parts for Dolls. It’s always best to NOT cut your shape out. Trace your pattern on your Fabric and sew. Then Trim off the excess.
NOTE!!! Be sure to leave a small opening for turning.
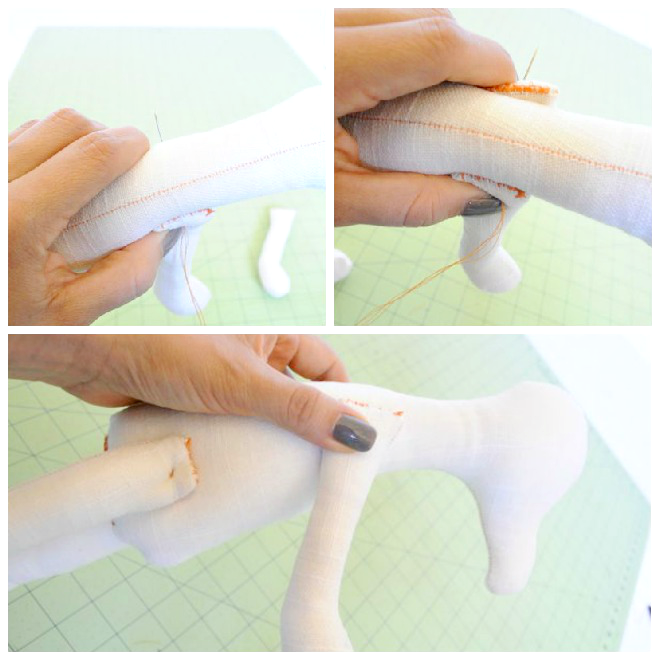
Once you have all your pieces Sewn and Turned, right sides out begin stuffing.
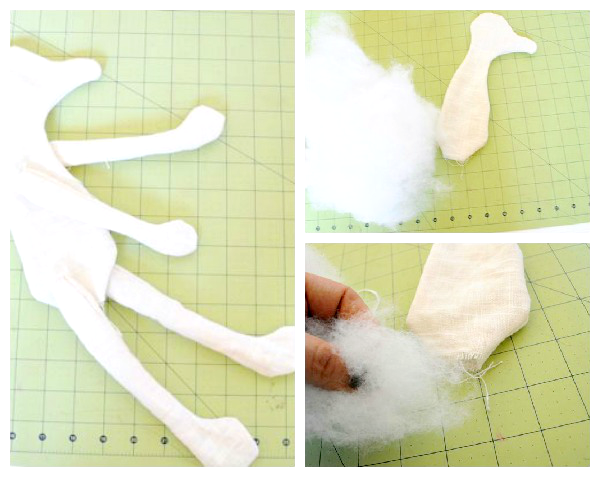
Then with, Thread and Needle stitch your opening closed.
I, wasn’t aiming for a Perfect seem. So I allowed my ORANGE thread to be seen.
Do this on all OPEN seems.
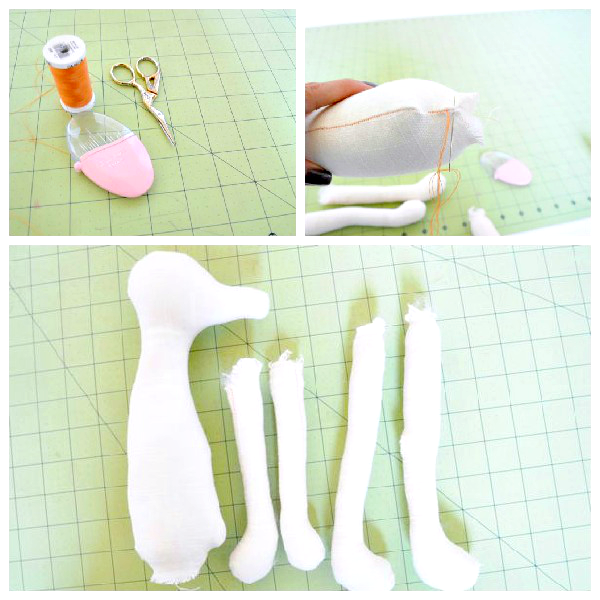
Once all your Seems are closed, it’s time to attach the Limbs.
NOTE!!! Using an Extra Long needle, works best!
Decide your placement and begin Sewing Back and Forth between Each Side of your Arms and Legs.
Continue to do this until you feel your Limbs are secure.
NOTE!! The tighter you do it, the Less movement your Limbs will have.
But don’t do it to loose, where they are not Secure.
Now that my little guy was done, I wanted to add some simple features.
I used some basic Acrylic Paint and Fabric Medium to paint his Nose/Beak.
You can find out HERE how I turned Acrylic Paint into Fabric Paint.
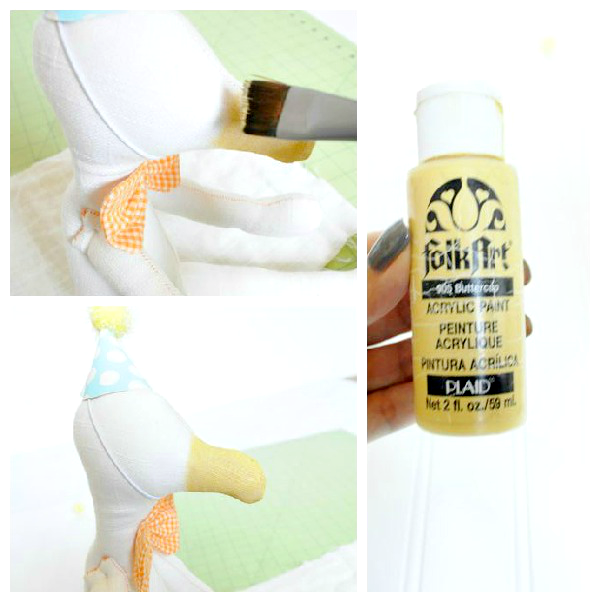
For his cute little Hat. I just took some Cardstock and cut a SMALL 1/2 circle and curved it into the shape of a hat. I hot glued it at the seems and added some elastic. Then topped it with a little yellow, Pom Pom.
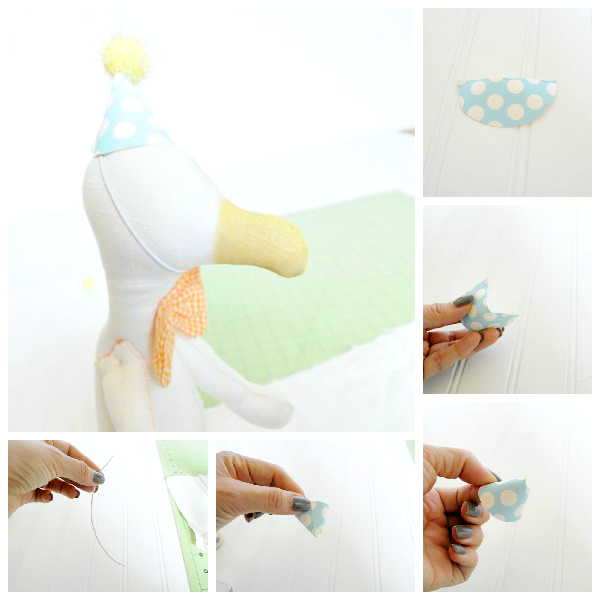
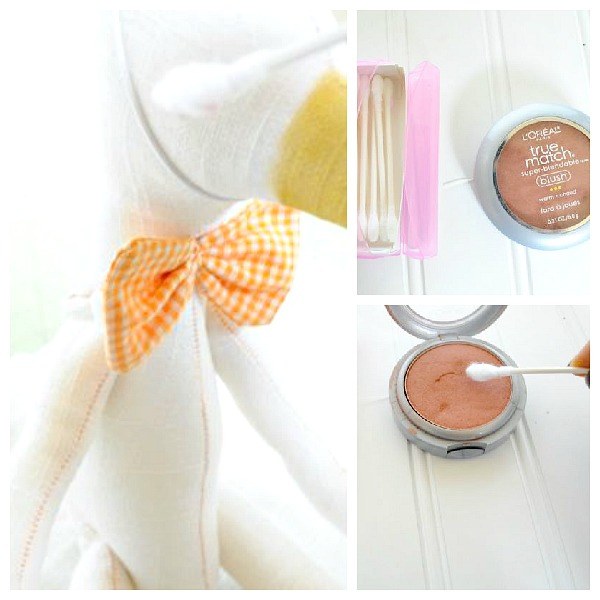
I always keep a CHEAP Blush on hand for projects like this. I use to make Bigger Dolls here and would sometimes add a bit of blush for Rosy Cheeks.
I use a Qtip and rub a SLIGHT hint of it in.
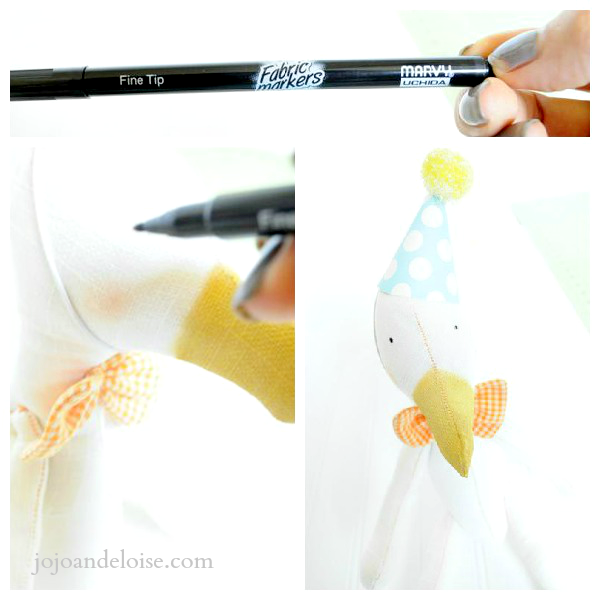
For his eyes. I took a FINE TIP, fabric marker and made 2 small dots.
And, there you have it folks!!!
The CUTEST, Fat Quarter Doll, EVER!!!

We are all SERIOUSLY all, in Love with our little Oscar.
(that’s what we named him)

Because, he is just so SWEET and Soft that you simply can’t resist him.

I think, Oscar would make a Great gift for any one of any age.
Wouldn’t you agree?


Adorable!! I can’t wait to make one. Thanks for sharing!!
Susan
@SugarBeans.org
Thank you so much for having me over. It was so much fun creating something for your fat quarter series. And, thank you Ladies for the SWEET comments. 🙂
xoxo
Hi!!!! He is adorable!!! Thank You
Oh my goodness. He is so cute! Great job Angelina!
I think he’s adorable!
Oscar is very sweet!!! I love all the small, simple details – perfect!!! Your tutorial is awesome, I didn’t think that making a stuffie would be so simple! Thanks for sharing.
Angelina he is absolutely adorable!! Thank you so much for sharing!!