Hi there! I’m Jess and I blog over at Craftiness is not Optional, about sewing kids clothes, sewing for me, and just plain sewing. I also love to craft it up, plan a good party and DIY the heck out of my house!
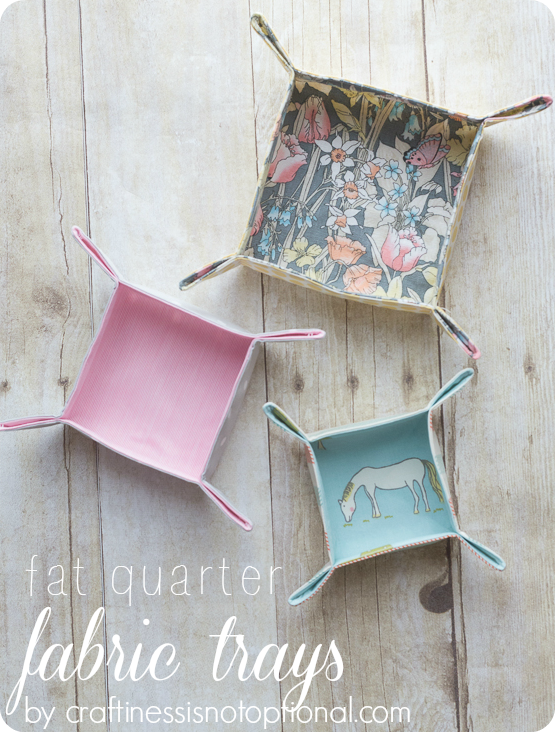
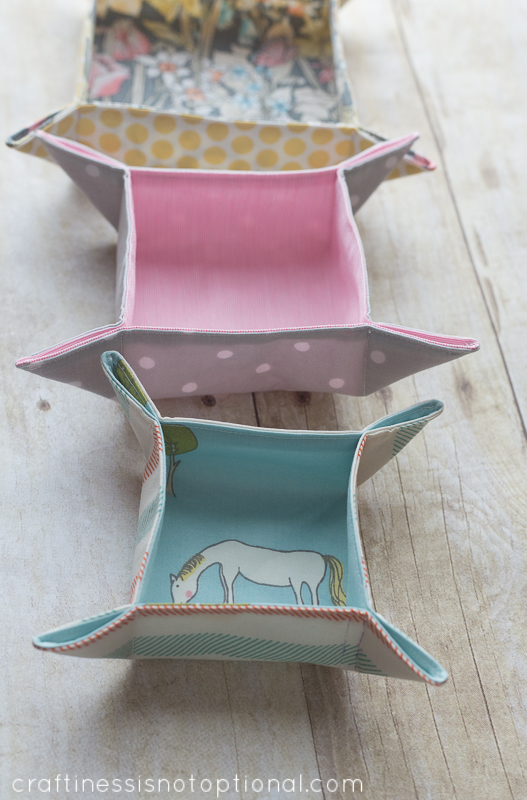
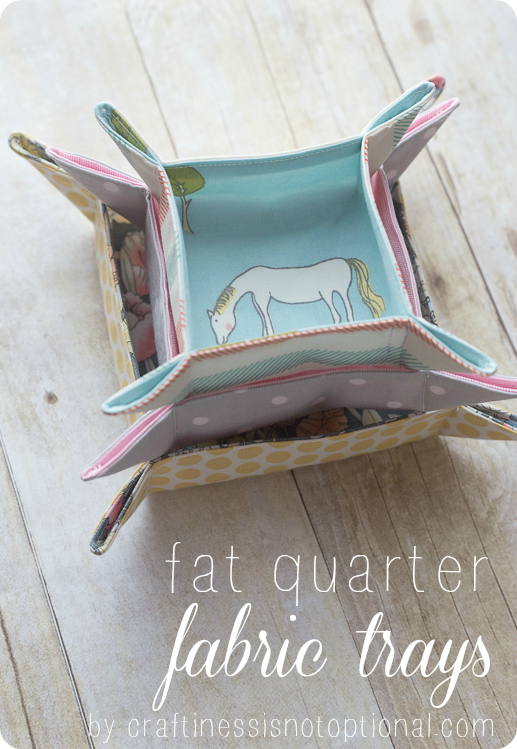
I am so excited to be here today on U Create for this amazing series all about using up those fat quarters we all hoard. I know I’m not alone…right ladies? 🙂 The first step is admitting you have a problem…. hehe. This particular project is fantastic for scraps, as well! These little fabric trays can be whipped up in no time and are great for corralling small items, such as jewelry, loose change & keys, or the obvious: sewing supplies!

Here’s how I made them!
You’ll need:
fat quarters or scraps-lining and main fabric
medium weight iron-on interfacing
thread and basic sewing supplies
that’s it!

For the largest tray I made, I cut an 8″ square from my main and lining fabrics, and also two 8″ squares from the interfacing. The other sizes started out as 7″ and 6″ squares.

Apply the interfacing per the instructions to the wrong sides of the fabric.
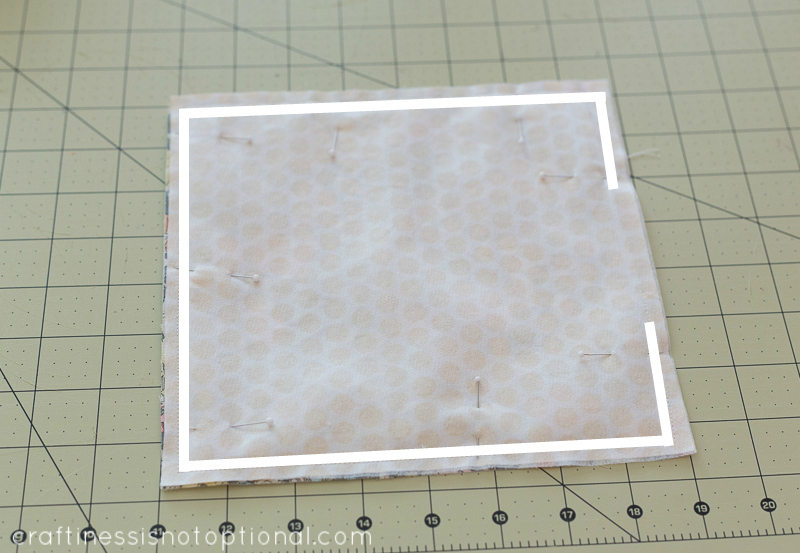
Place the squares right sides together and pin around the outside. Then sew around the square as shown, 1/4″ from the edge, leaving a 2-3″ space for turning right side out. Clip the corners to reduce bulk.
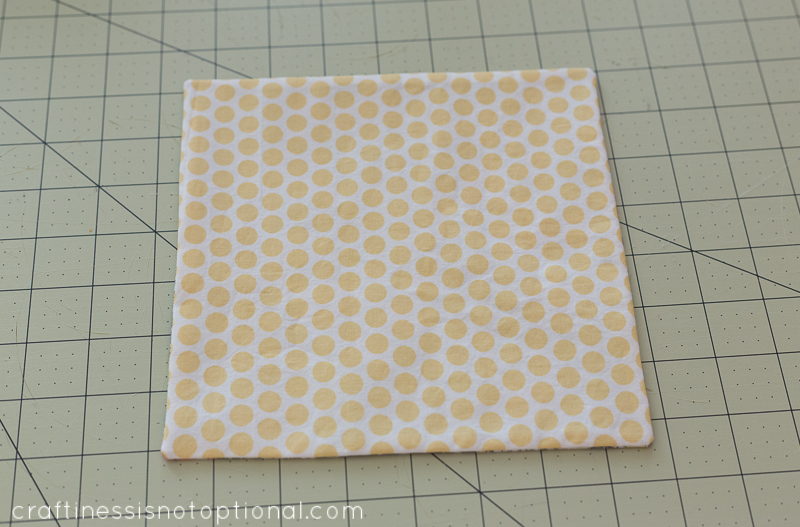
Next turn the square right side out through the hole you left, and gently poke out the corners (I use a chopstick), then press the entire square with your iron, rolling out the sides with your fingers to get a crisp edge.
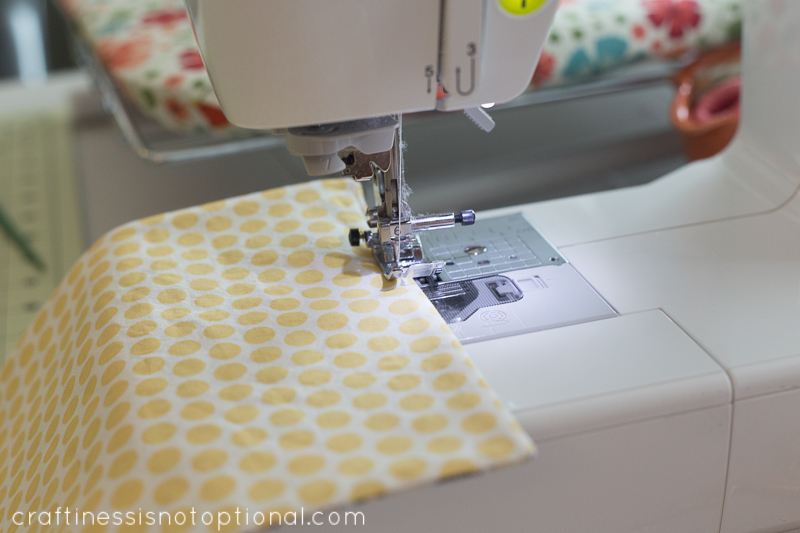
Then topstitch 1/8″ from the side around all four edges.
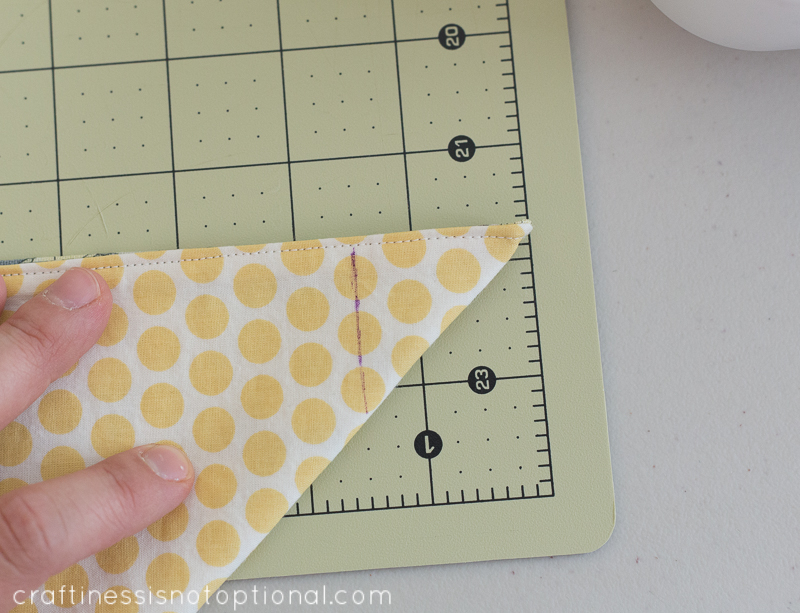
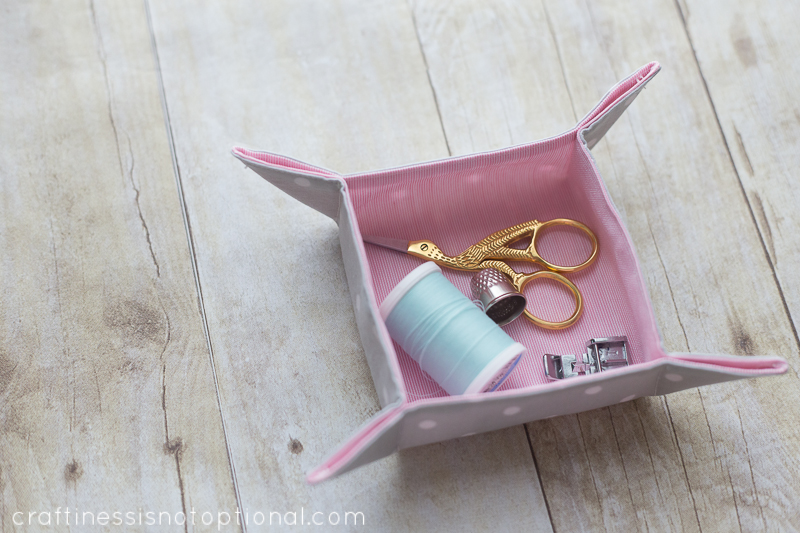
Then fold a corner so that the right sides of the lining fabric are facing each other like so. Measure and mark with a disappearing marker or pin, 1.5″ across the tip like so (1.25″ is a great height for this size, too), and sew along the mark. Make sure to backstitch at the beginning and end of this seam.
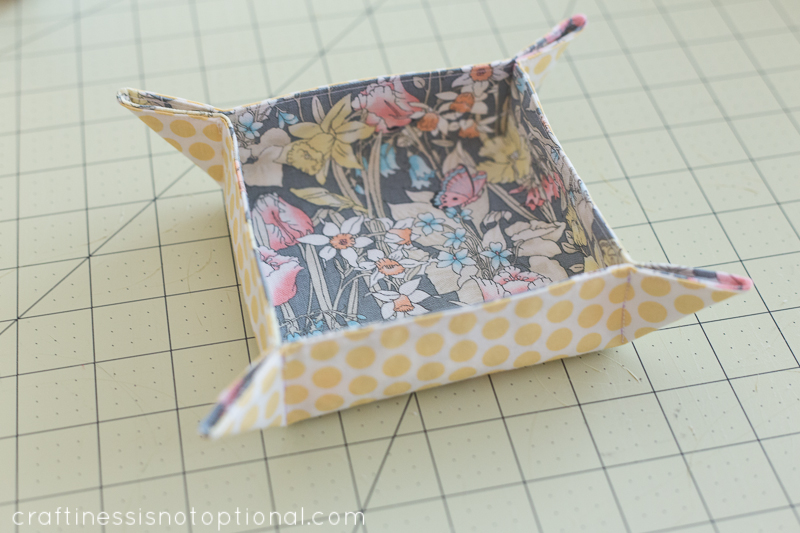
Do the same to the other 3 corners, and you’re done! Add your little gadgets and gizmos aplenty and enjoy your cute fabric trays! Thanks for having me, Kari and Becky!


Neat! Pinned it!
I love these!
I’m pretty new to sewing and wanted to make trays just like this for my desk at work so I really appreciate this tutorial. Quick question from the newbie: when you turn the square right side out and press, will the interfacing then adhere the wrong sides together as well?
You can make bigger ones to, to hold warm bread rolls on your dining table. They look equally FAB.
Hi Dianne-nope! as long as you use one sided fusible interfacing!
Okay, these are too cute! Can you tell me what that horse fabric is? I have a little girl that is horse obsessed, and would love to get some like it!
Tara, it’s from the Storyboek line!http://www.fabricworm.com/jadeorstiigr.html?AdID=3720cm00cm0grazing&gclid=CJbOnaDAiLgCFe9xQgoddQUA2A
so, so cute. Your fabric selection makes these pop! Pinned.
Such a great tutorial. Can’t wait to make some for my sewing desk!
My craft room needs these!!! I love these baskets Jess!!
These are so adorable! I love the floral fabric – do you mind me asking where you got it?
Such a great idea! I featured you today on my Kick-Off Friday post! Have a wonderful weekend!
http://craftivitydesigns.blogspot.com/2013/07/kick-off-friday.html
Erica
Also great to put one in your suitcase and use it to hold your jewelry when you take it off at night.
Super cute!!
Jess, Love that fabric with the horse, where can I find that? LOVE THIS!!
Thanks!
Such a good idea–would be so cute in my sewing room and make a great gift, too. Instructions with illustrations make this look easy to do. Thanks for the great tutorial.
We bought some cork ones of these on holiday to support a local charity and instead of the corners being fixed they had put poppers (press studs) on each corner so you could undo them and lie flat for travelling, ideal for taking away then 🙂