
These DIY painted herb pots are the perfect Mother’s Day project! They’re easy to make, customizable, and filled with fresh herbs Mom can enjoy all season long.
Whether you place them on a sunny windowsill or gift them as part of a little kitchen garden set, these personalized herb pots make a thoughtful gift that keeps growing.
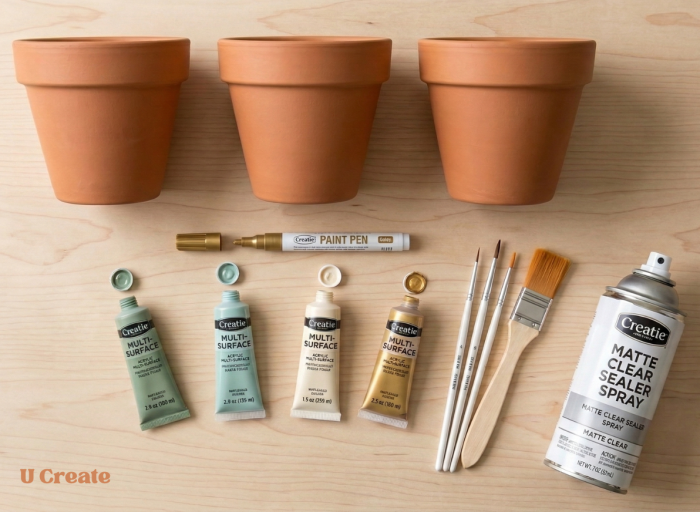
Supplies
- Small terracotta pots
- Acrylic or chalk paint (soft pastel colors work beautifully)
- Small paint brushes
- Letter stencils or vinyl letters (optional)
- Painter’s tape
- Pencil
- Clear matte sealer (optional)
- Potting soil
- Herb plants (basil, mint, thyme, rosemary, etc.)
Step 1: Clean the Pots
Before painting, make sure the pots are clean and dry.Wipe off any dust or debris with a damp cloth and allow them to dry completely. This helps the paint adhere better. Craft Tip: If your pots are brand new, a quick rinse removes clay dust that can affect paint coverage.
Step 2: Paint the Base Color

Using a medium brush, apply a thin coat of acrylic or chalk paint around the pot. Allow the paint to dry, then apply a second coat if needed for full coverage.
Soft greens, dusty blues, and warm terracotta tones create a beautiful garden-inspired palette.
Craft Tip: Chalk paint gives a lovely matte finish and sticks well to terracotta.
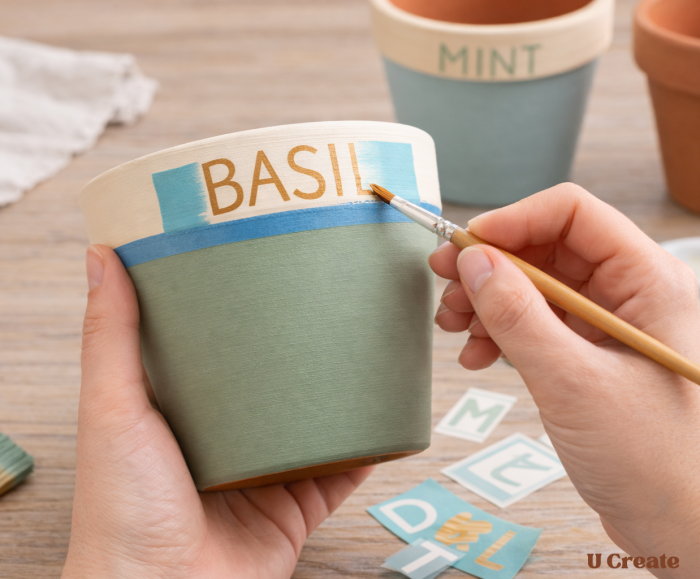
Step 4: Add the Herb Names
Personalizing the pots is what makes this project so charming.
Use letter stencils, vinyl decals, or hand lettering to add the herb names to each pot.
Some great herb options include:
- Basil
- Mint
- Thyme
- Rosemary
- Parsley
- Oregano
Lightly pencil the placement first to keep everything centered, then fill in the letters with paint. Craft Tip: A small detail brush works best for crisp lettering.
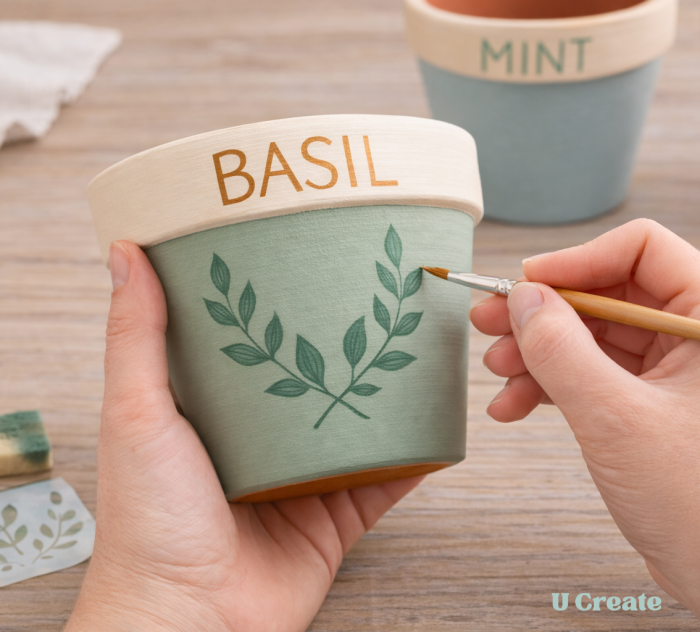
Step 5: Add Decorative Leaves (Optional)
To make the pots extra special, paint simple botanical leaves below the lettering.
You can freehand small leaf branches, use mini stencils, stamp leaves using a small sponge, etc. Metallic gold or soft green paint adds a beautiful garden-inspired touch.
Step 6: Seal the Paint
Once everything is completely dry, apply a clear matte sealer to protect the design. This step helps the paint last longer, especially if the pots will be watered regularly. Let the sealer dry fully before planting.
Step 7: Plant the Herbs
Fill each pot with potting soil and plant your herbs. Gently loosen the herb plant from its container, place it in the pot, and add extra soil around the base. Lightly water and place the pots in a sunny window or kitchen counter.
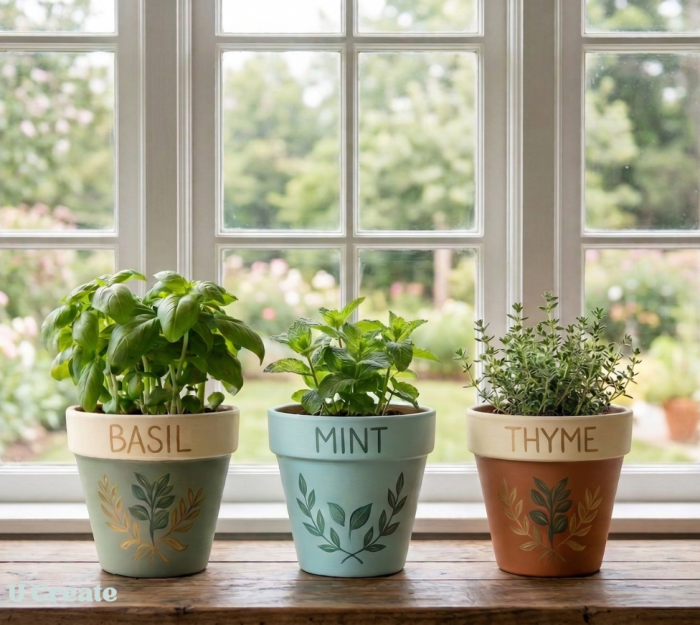
Handmade gifts have a special way of showing love, and these painted herb pots are a simple project that feels both thoughtful and practical. Whether you make one pot or create a whole little herb garden set, it’s a gift that Mom can enjoy every time she cooks or spends time in the kitchen. We hope this project inspires you to add a little handmade touch to your Mother’s Day celebrations.
Happy Creating!


Leave a Comment