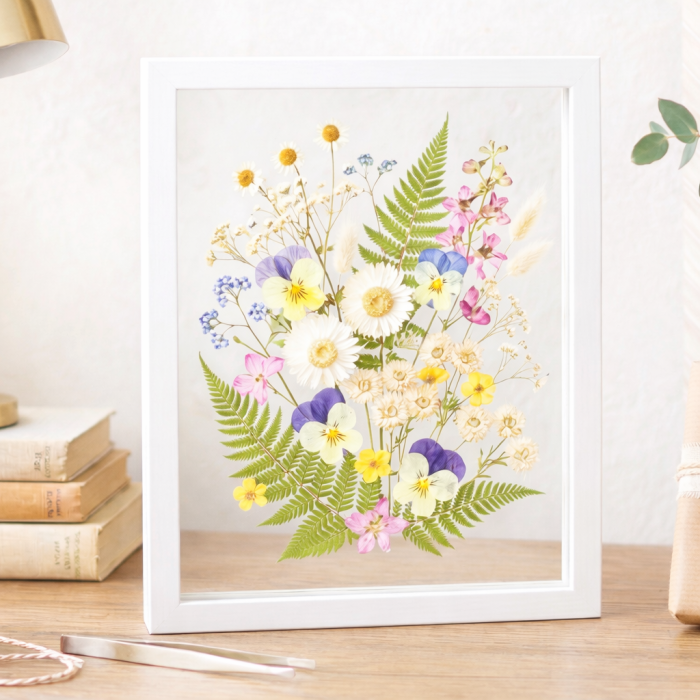
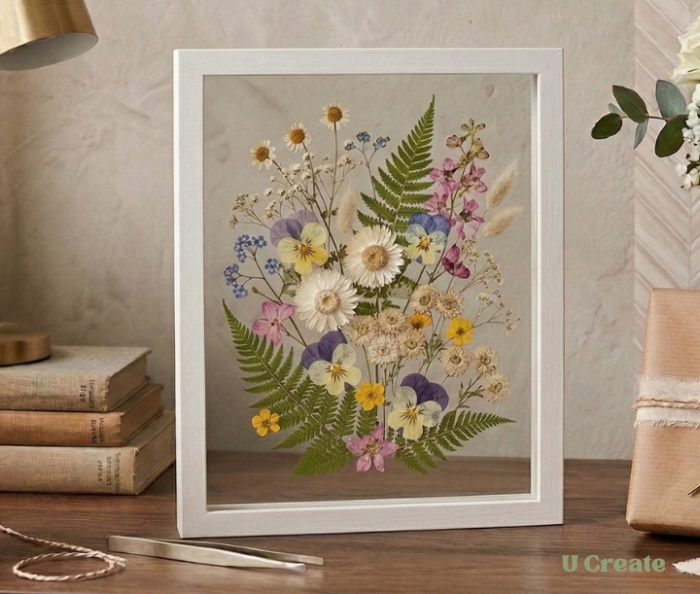
Pressed flower art captures a moment in time – blooms from a special place, favorite flowers, etc.
Because every flower presses differently, no two frames will ever be the same, which makes this project extra special as a gift.
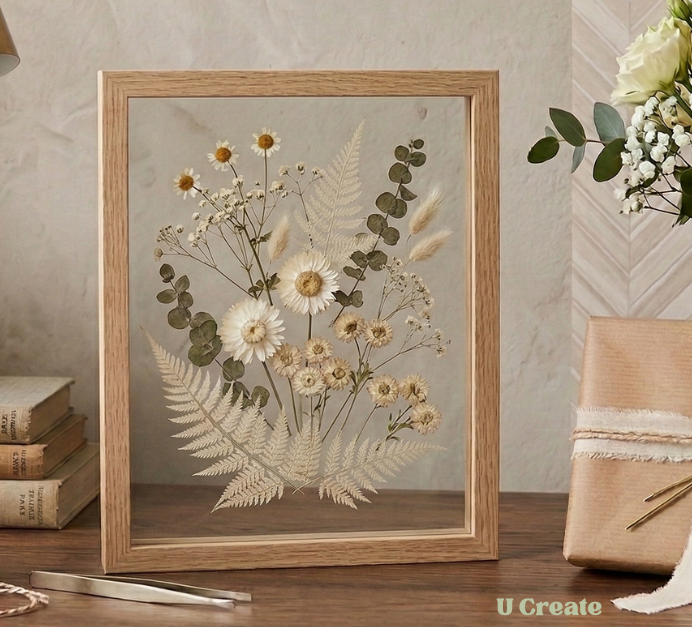
This craft is beginner friendly, budget friendly, perfect for kids to help with, and a meaningful addition to your home decor.
Supplies
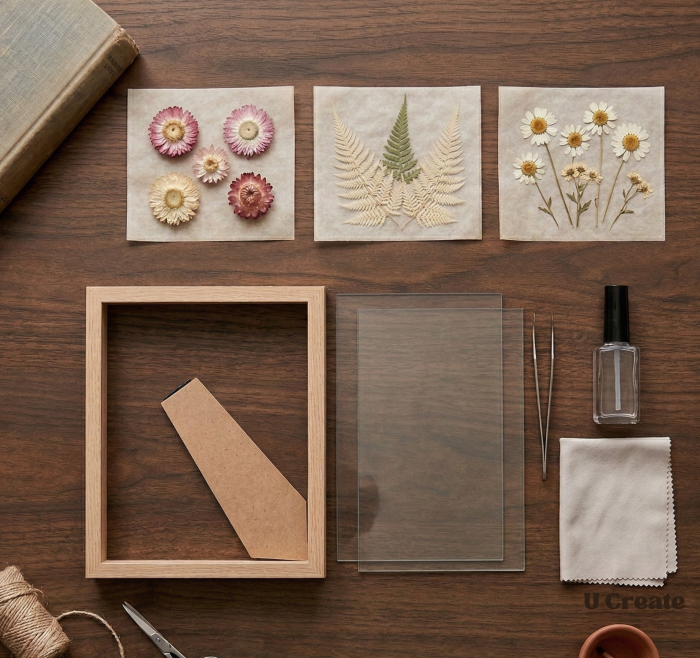
- Floating glass frame or shadow box frame
- Pressed flowers and leaves
- Tweezers
- Clear drying craft glue (optional)
- Cardstock or handmade paper backing
- Soft cloth for cleaning glass
Step 1: Choose Your Flowers
Start by selecting a variety of pressed flowers and greenery. Look for a mix of statement blooms, filler flowers, and greenery like ferns. This combination helps create a balanced arrangement that feels natural and organic.
Craft Tip – Choose flowers that are fully dried and flat. Any moisture left in the petals can cause discoloration inside the frame over time.
Some flowers that press beautifully are pansies, daisies, baby’s breath, ferns, queen anne’s lace, etc.
Step 2: Plan Your Arrangement
Before gluing anything down, arrange your flowers on the glass or backing paper.
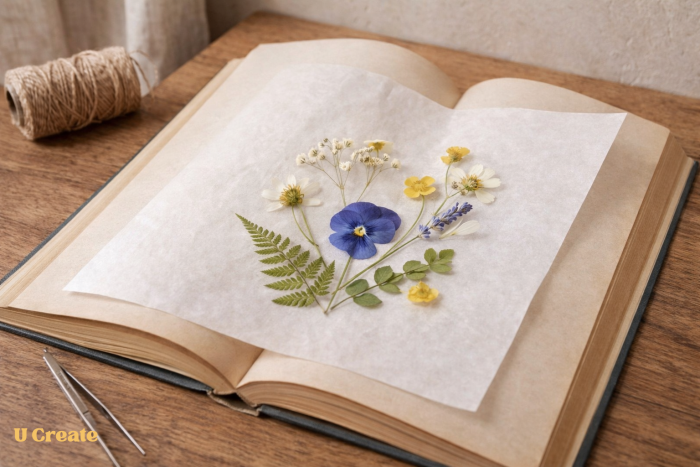
Try layering greenery first, then placing flowers on top to create a natural bouquet shape. A loose triangle or fan shape often works best visually. Use tweezers to gently move petals into place without damaging them.
Step 3: Secure the Flowers
Once you’re happy with the arrangement, carefully attach the flowers.
For many frames, no glue is actually needed because the glass will hold everything in place. If you want extra security, add a tiny dot of clear drying glue behind thicker stems.
Craft Tip – Less glue is better. Too much adhesive can show through delicate petals.
Step 4: Clean the Glass
Before sealing your frame, wipe the inside glass panels with a soft cloth. This removes fingerprints or dust that could get trapped inside. It may seem like a small step, but it makes the final project look polished and professional!
Step 5: Assemble the Frame
Place your floral arrangement between the glass panels or on the backing paper, depending on the style of frame you’re using. Close the frame carefully so the flowers stay in place.
Step 6: Turn It Into a Gift
To make this project even more special for Mother’s Day, add a few thoughtful details:
• Tie a ribbon around the frame
• Attach a handwritten tag
• Include a small dried lavender sprig
• Write the date the flowers were picked
These simple touches make the gift feel extra meaningful!
Happy Creating!


Leave a Comment