
Hi everyone! I’m Ali from Ali Foster Patterns. I feel so honored to be here today. This is my very first guest post!I have always loved sewing and making things. My mom taught me to sew when I was a little girl. In high school I took a class called “clothing construction” and loved it. After graduation, I went on to get a B.A. in psychology. It wasn’t long before I realized that I wanted to do something more on the artistic side so I went back to school for fashion design. Eventually I started making and selling downloadable sewing patterns. You can find my patterns on
alifosterpatterns.com and alifoster.etsy.com. I also have a blog where I share tutorials and things I find inspirational. Please stop by and say hello!Today we are making a mini fold over messenger bag. Let’s get started!
Exterior Fabric: 1/2 yard
Lining Fabric: 1/2 yard
Canvas Fabric (used as interfacing): 3/8 yard
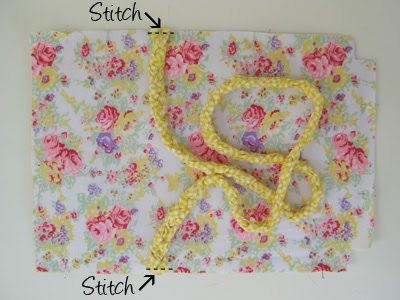
Cording or Substitute for the Strap: Desired Length + 1”
1 Magnetic Snap
2″ x 7.5″ Piece of Plastic Canvas or Substitute (for the base of the bag)
Print the pattern pieces (found HERE). Cut out the pieces and tape them together as indicated. A 1” x 1” print test square is included. Measure this square to ensure that the pattern pieces have printed at the correct size.
From the exterior fabric:
Cut 2 piece AFrom the lining fabric:
Cut 2 piece A
Cut 2 piece BFrom the canvas fabric:
Cut 2 piece A
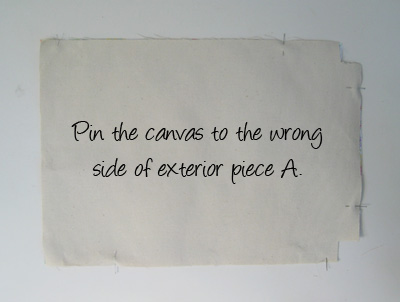
A. Pin the canvas fabric pieces to the wrong sides of the exterior A pieces.
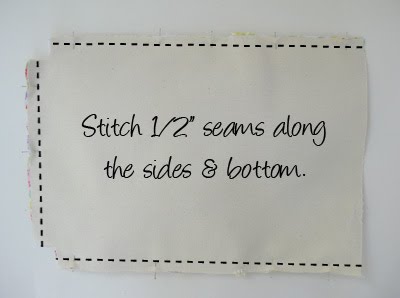
C. With the wrong sides facing out, pin the exterior A pieces together. Stitch ½” seams along the sides and bottom.
D. Match the side seam line with the bottom seam line at one of the corners. Pin in place and stitch a ½” seam. Repeat on the other corner.

E. Trim the seam allowances at the corners about half way to reduce bulk. Turn the bag exterior right side out and set aside for now.
Step 4: The Lining
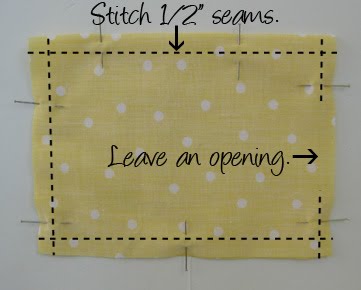
A. Align the 2 pocket B pieces with the wrong sides facing out and pin. Stitch 1/2” seams along the four sides, leaving a 2” opening (approximate) on one side for turning.
B. Clip the corners to reduce bulk. Turn the pocket right side out and press. Stitch a ¼” seam along 1 long edge. This will be the top of your pocket.
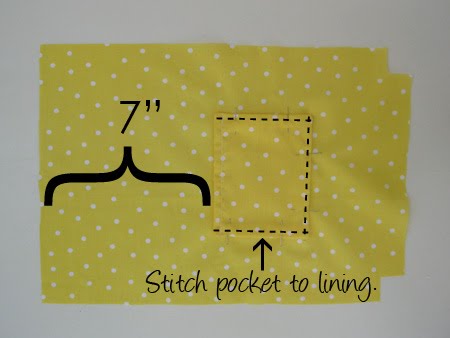
C. Pin the pocket to the right side of one of the lining A pieces. Place it 7” down from the top edge and centered between the sides. Remember that the stitched edge is the top of the pocket. Stitch 1/8” seams along the sides and bottom (you will close the opening along the way).
D. Following the manufacturer’s directions, attach ½ of the magnetic snap to the lining piece A. Place it 1.25” down from the top edge and centered between the sides. TIP: For added reinforcement, place a square of fabric that is slightly larger than the snap on the back of the snap on the wrong side of the fabric. I like to use canvas or felt. Attach the other half of the snap to the other lining piece A.

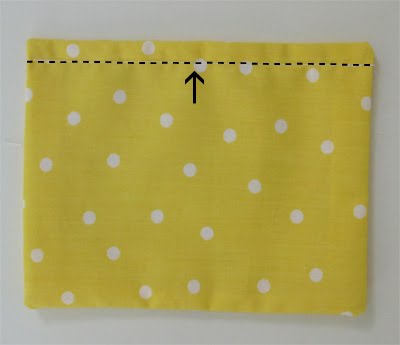
E. Align the lining A pieces with the WRONG sides facing OUT. Pin in place. Stitch ½” seams along the sides and bottom. Leave a 5” (approximate) opening on 1 side for turning.

F. Create the bottom corners the same way you made the exterior bag corners (see step 3-D).
Step 5: Finishing
A. Place the exterior bag inside the lining (with the lining inside out and the exterior right side out). Pin around the top edge. Stitch a ½” seam.
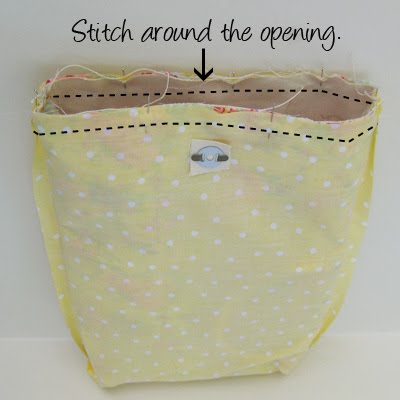
B. Reach through the opening in the lining and pull the exterior of the bag through. The lining will now be right side out. Slip the plastic canvas through the opening and place it in the bottom of the bag.
C. Fold the raw edges of the opening in the lining in and pin. Stitch a ¼” seam.
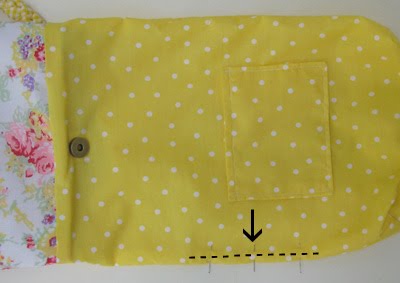
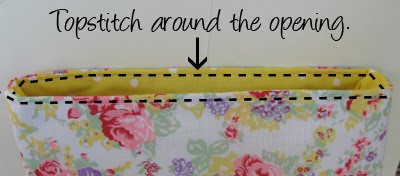
D. Push the lining into the bag exerior. Topstitch around the opening.
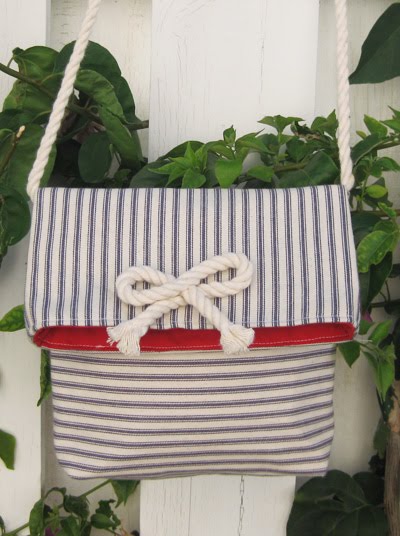
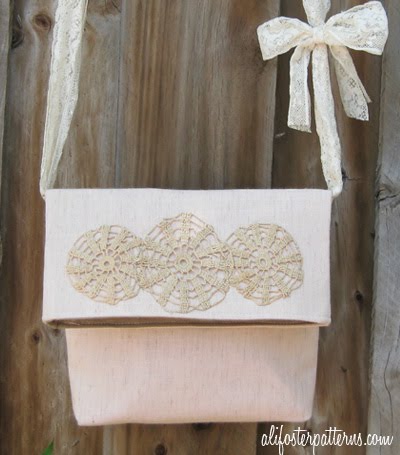
E. Admire your work!
TIP: Try adding embellishments such as bows, buttons, fabric flowers, doilies, etc.


so cute! I love this idea!
I LOVE this…I am going to have to try it! THANK YOU!
Love it! I have a weakness for messenger bags in all shapes and sizes, so this is definitely on my list.
What a great and easy bag, and exactly the style I have been looking for. Thanks for the easy to follow instructions!
Really cute! Looking forward to giving this one a go sometine soon…
This is so cute! Thanks so much for the great idea and pattern. I’ll be linking.
I love it…. but…. you forgot to have us add the 2nd half of the snap!
Very good beginner tutorial! Thanks.
Just made 2 of these. Had to rip a few seams… a few times! LOL But that’s my fault for not reading directions before diving in! They were a little smaller than I envisioned but still totally adorable!! Thanks!
Me and my friend made this purse. It is to cute. Thank you for the tutorial.
The best part of this bag for me is that there are no snaps, buttons or zippers you need to fuss with to get into the bag and yet it looks secure! Thanks for sharing this! I can’t wait to make one or several!
DUH! I said no closure but after reading again there is one. I think you can omit the snap and it would still be secure.
this bag is very easy to make! i just spent half hour on it and it is half way done!Thx for posting this tutorial!