
Supply List:
- Large SHATTERPROOF clear ornaments
- Small Christmas buttons
- Vase Filler {found in the floral or wedding aisle}
- Christmas ribbon
- hot glue gun & glue
- contact paper
Instructions: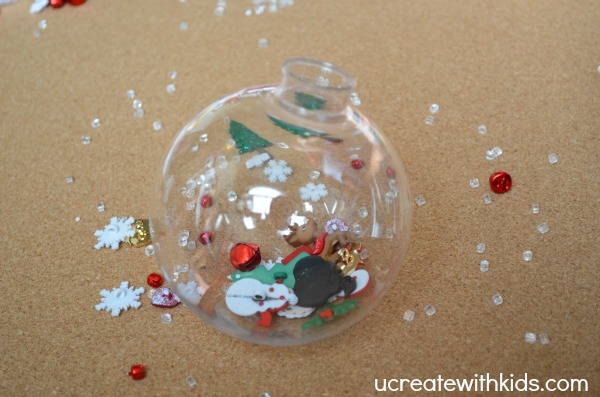
1. Take the top off and insert Christmas buttons. Make a list of the buttons you put in the bulb as you go.
 2. Add some clear vase filler.
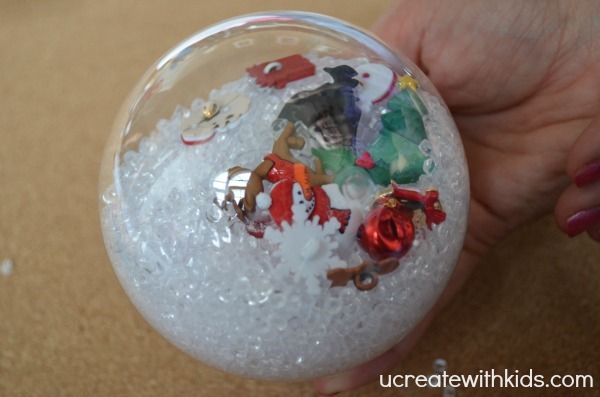
4. Shake it all up to distribute the buttons throughout the ornament.
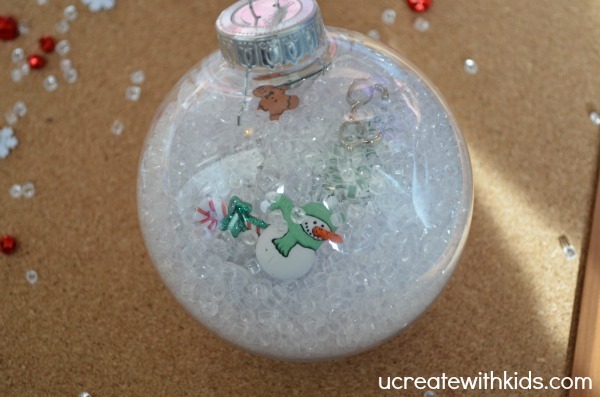
5. Hot glue to top on.
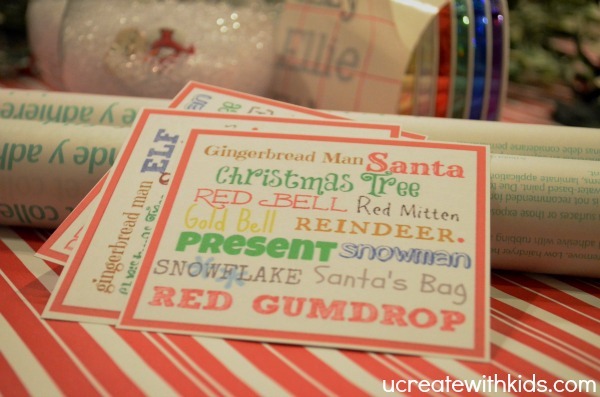
6. Create a cute list of all the buttons in the bulb. I used picmonkey.com!
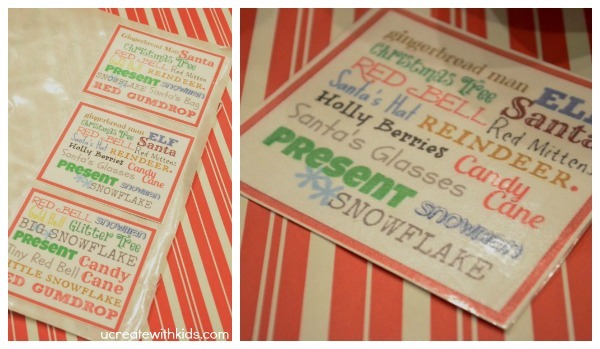
7. Print out on cardstock and cover both sides with contact paper
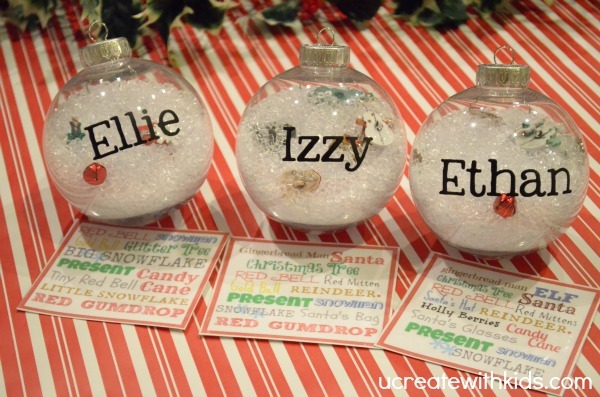
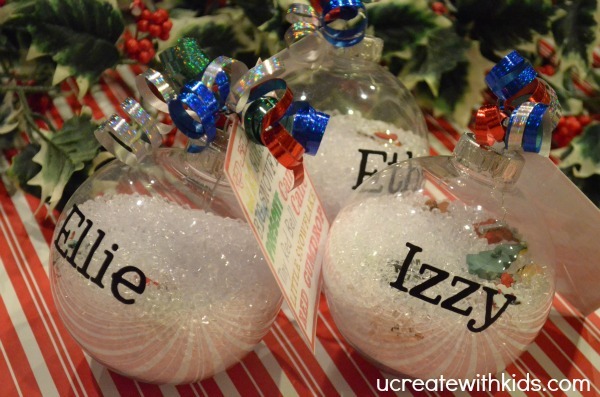
8. Add a personal touch with vinyl or stickers.
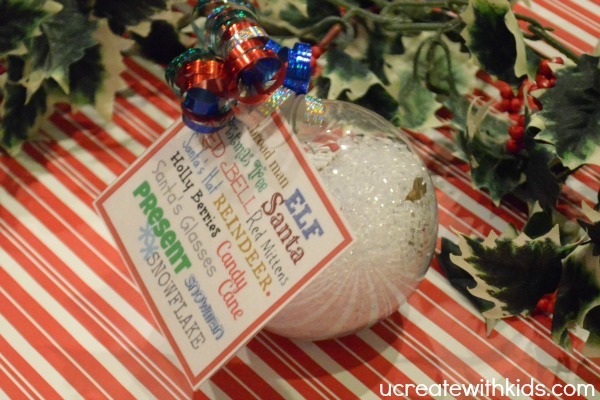
9. Hole punch the corner and tie the list to the bulb with curly Christmas ribbon.
Now you have a perfect Christmas Boredom Buster. My kids play with them in the car and at restaurants. I am sure they will also come in handy at the “boring” Christmas parties we drag them too. 🙂
We plan to make these with the cousins at our Family Christmas party!

Love this! Thanks for sharing!
Thank you. This is such a fun and easy craft. I am glad you like it.
This is such a fun idea and so cute too! My kids would love this!
Janet, you should totally make one. They seriously take no time and my kids have taken them everywhere!
Wow! Cute! Thanks for the idea!!
I am so glad you like it. Thank you for your sweet comment.
those are so cool! i want to make this for my friends,thanks for the idea :{)
You are welcome.
Love this idea! I’m going to make these for my son, nieces and nephews for Christmas. I’m trying to use the PicMonkey site that you used to make cards – any suggestions or tips you can give me? I have downloaded Christmas fonts into my Microsoft Word but I’m not sure how to transfer that to a collage on PicMonkey.
Thanks!
Hello, thank you for the sweet compliment. PicMonkey has a lot of great christmas fonts and images. I used everything in there. have fun!
I got all the supplies I needed for this at Hobby Lobby today (Christmas is 50% off). Instead of the vase filler, I got some little styrofoam balls that are basically bean bag chair filling, but they were sold with the kids’ Christmas crafting items. They were $1/bag and should fill two of the large ornaments.
Hurry if you’re going to make these! Our Hobby Lobby is getting wiped out of Christmas crafting items!!!
What a great idea to use the Tiny Styrofoam balls! It looks like snow! Brilliant! Thank you for sharing.
Mama S. – If you have MS Office, their website has loads of holiday templates. I’m searching on there now for something to adapt to this project. My hubby won’t let me download extra programs, so PicMonkey is out. 😉
Ah, it looked like it needed to download a program to my pc. Thanks, I’ll try it!
Hey Julie, PicMonkey is a free site that requires no downloading. Go ahead and try it. 🙂
Thanks Julie!
Okay, report time! I just filled my first ornament. The styrofoam balls don’t work for a couple of reasons. The first was obvious right away – static cling! They line the inside of the ball. 🙁 The second is they are too light and all the items fall to the bottom and are hard to see.
But I did get to test the fillers I chose! I have some pipe cleaner candy canes, sparkly pom poms, mylar cut-outs, foam stickers, jingle bells, light buttons…and still collecting. I do need to get some buttons because I think they’ll be the correct weight.
As I was writing this, I had an idea and tried it. I had some Poly-Fil Poly-Pellets Stuffing Beads for another project. They work well and look very similar to the initial vase filler in the directions. I think it will be more cost effective than the vase stuff. I paid $4 for a 32-ounce bag, which should fill four of the four-inch ornaments.
I was wondering about the static cling with the tiny styrofoam. Thank you so much for the extra ideas. I am loving hearing about your experience making these. Great insight. Thank you!
could you explain to me how to use pic monkey to make the cute tags? I went to the site but don’t know how to create the collage using different fonts–I wish I had a graphic arts background!:)
Great question, Gail. I have had some people ask them same thing. I am putting together a little walk through that will hopefully be ready Tuesday. It’s not hard, but would be best explained it a little video walk through. 🙂
Where would I find the walk though video on how to make the list?
Thank you 🙂
This is too cute! What a great idea! Would love if you’d join our Countdown to Christmas link party! Hope to see you there! Happy weekend! 🙂
http://dixie-n-dottie.blogspot.com/2012_11_27_archive.html
I found the clear plastic ornaments at Michael’s …on sale too! Also found the buttons at Michael’s. Very cute!
I LOVE this adorable idea! I am making one for each of my kids and my niece and nephew for Christmas, and will be adding the little letter beads to spell out their names, in addition to other xmas trinkets. I am hoping that as they become older, it will be a favorite ornament to pull out and play with before adding it to the tree!
This is so clever… I love this idea!
So cute! My daughter’s name is Izzy! 🙂
What a GREAT idea!!! SO cute!! Thanks, Becky!
These are so easy to make! I cannot thank you enough for posting directions that were very easy to follow. I made nine of these for family night gift baskets and for a friend’s kids for Christmas. They have been a big hit at our gift exchange!
I cannot thank you enough for posting such explicit directions! I made nine of these for Family Game Night gift baskets and they have been a huge hit!
Such a neat idea! I am a huge fan of anything I SPY! I imagine you could use other theme type buttons other then Christmas for year round game/toy!