U Create

It's a good day to create!

  • pinterest
  • facebook
  • instagram
  • twitter
  • rss
  • crafts
    • crochet/knit
    • jewelry
    • kids crafts
    • paper crafts
    • sewing
      • bags
      • boys-clothing
      • girls-clothing
      • women-clothing
      • pillows
      • quilts
  • home decor
    • bathroom
    • build it
    • frames
    • kids
    • kitchen
    • office
  • recipes
    • desserts
    • dinner
    • snacks
    • soups
  • parties
    • baby shower
    • birthday
    • games
    • gift wrapping
    • party decor
    • party favors
  • printables
  • holidays
    • Christmas
    • Easter
    • Father’s Day
    • Halloween
    • July 4th
    • Mother’s Day
    • New Years
    • St. Patrick’s Day
    • Thanksgiving
    • Valentine’s Day
  • gifts
    • baby
    • electronics
    • graduation
    • teacher gifts
  • About
  • Be My Guest
  • Advertise
  • Contact
  • pinterest
  • facebook
  • instagram
  • twitter
  • rss

23 Aug

Brimmed Beanie Hat Tutorial


brimmed beanie hat tutorial by I am Momma Hear Me Roar

Hello everyone!  I’m Cheri from I Am Momma Hear Me Roar.  I was already really excited to be guest posting here on UCreate and then I actually got to meet Kari last week which made me even more excited to be here.  Most of you out there have probably only seen her profile picture and maybe heard little bits from her sister.  Well, let me tell you that Kari is a party!  She is hilarious, extremely kind, and she has some great stories to tell.


Anyhow, I’ll try not to get too sidetracked.  Over at my blog I love to decorate, photograph, sew, refashion, paint.  I am the mother of two boys, so I definitely favor boy crafts whenever possible.  If you have boys then you’ll have to stop by for sure.  My two little guys are my inspiration.  Here they are to introduce today’s tutorial to you…

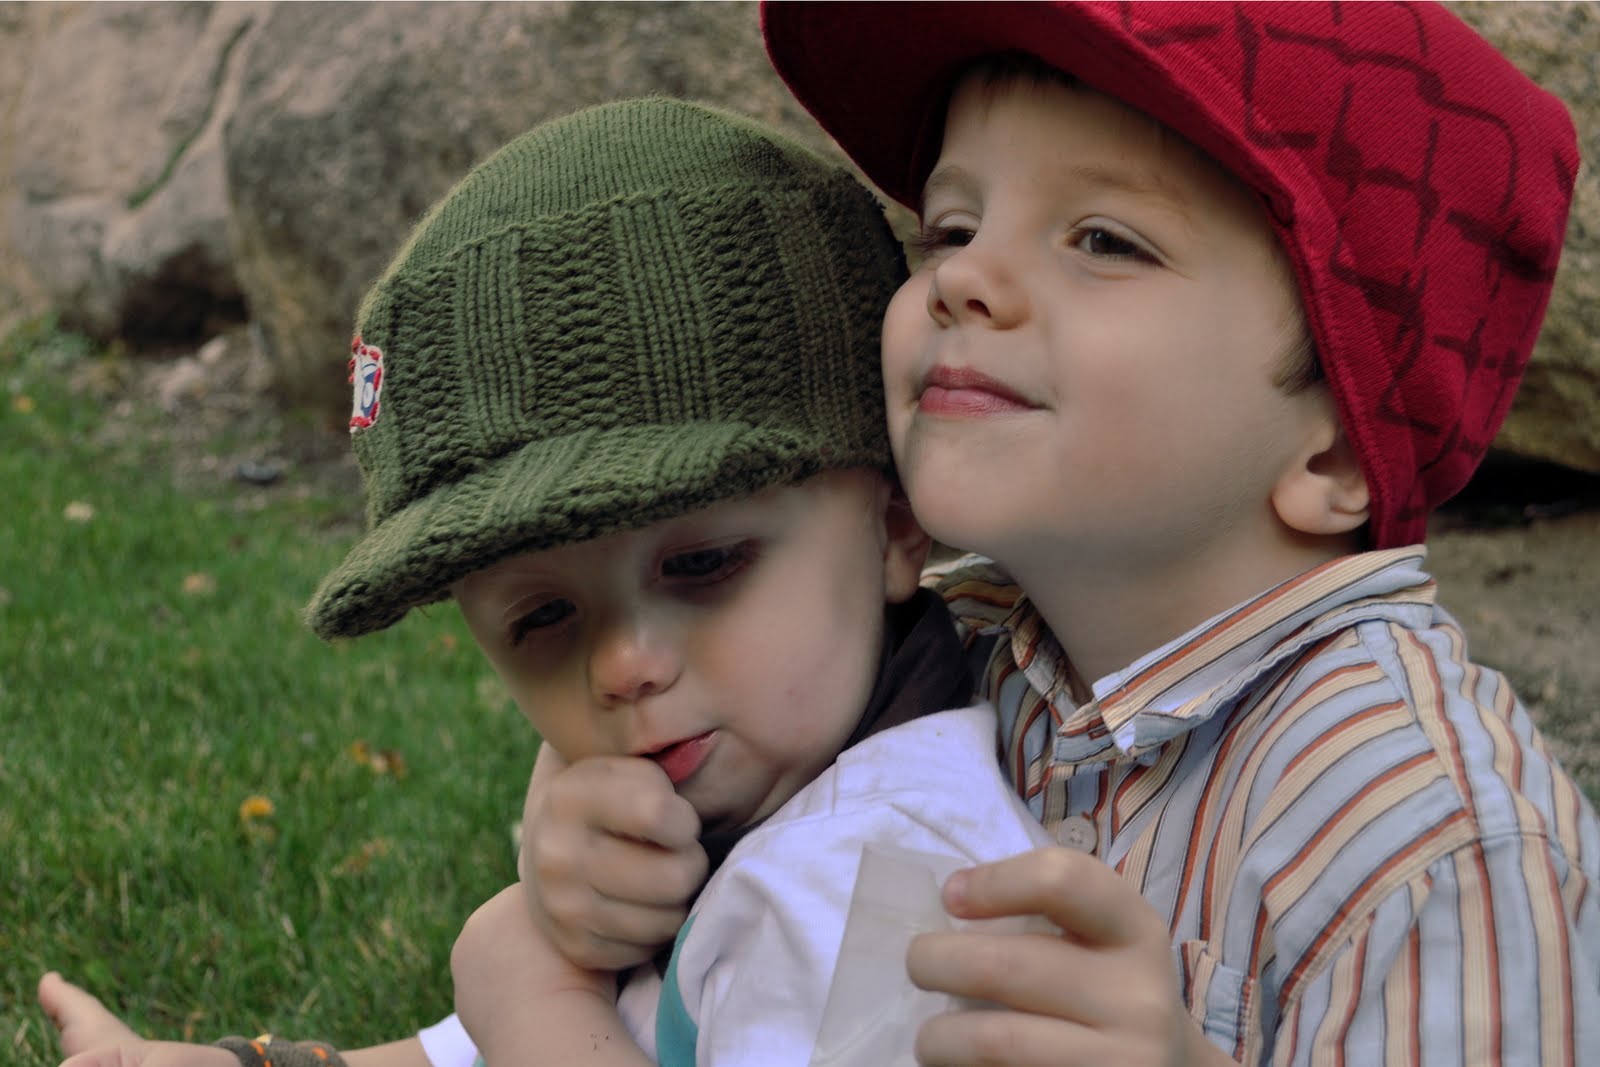
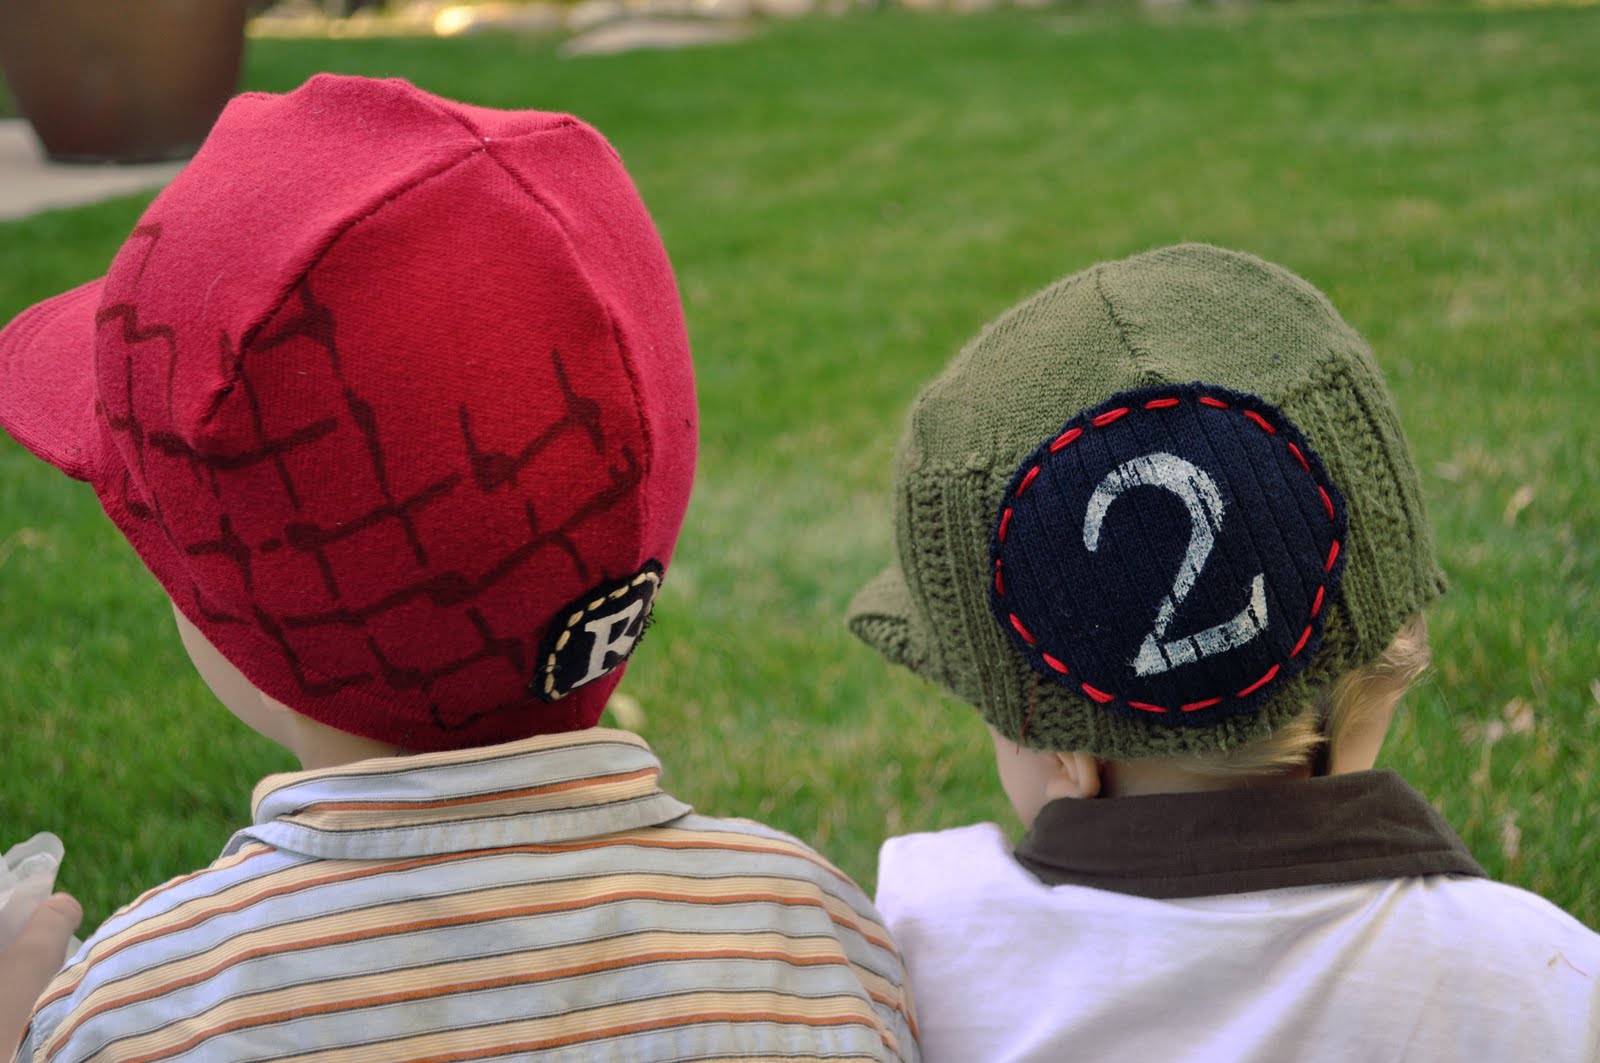
Can’t you feel the brotherly love?  Poor little guy.  Anyhow, I’m going to show you how to make these cute brimmed beanie hats from old sweaters.  I want you to think of it like making a sunday.  First I’ll show you the basics of making the actual hat (like scooping up the icecream) and then I’ll give you a buffet of topping choices…carmel, sprinkles, whipped cream, or whatever you like.  (Yes, I just might be hungry right now.)  I just love to embellish boy stuff.


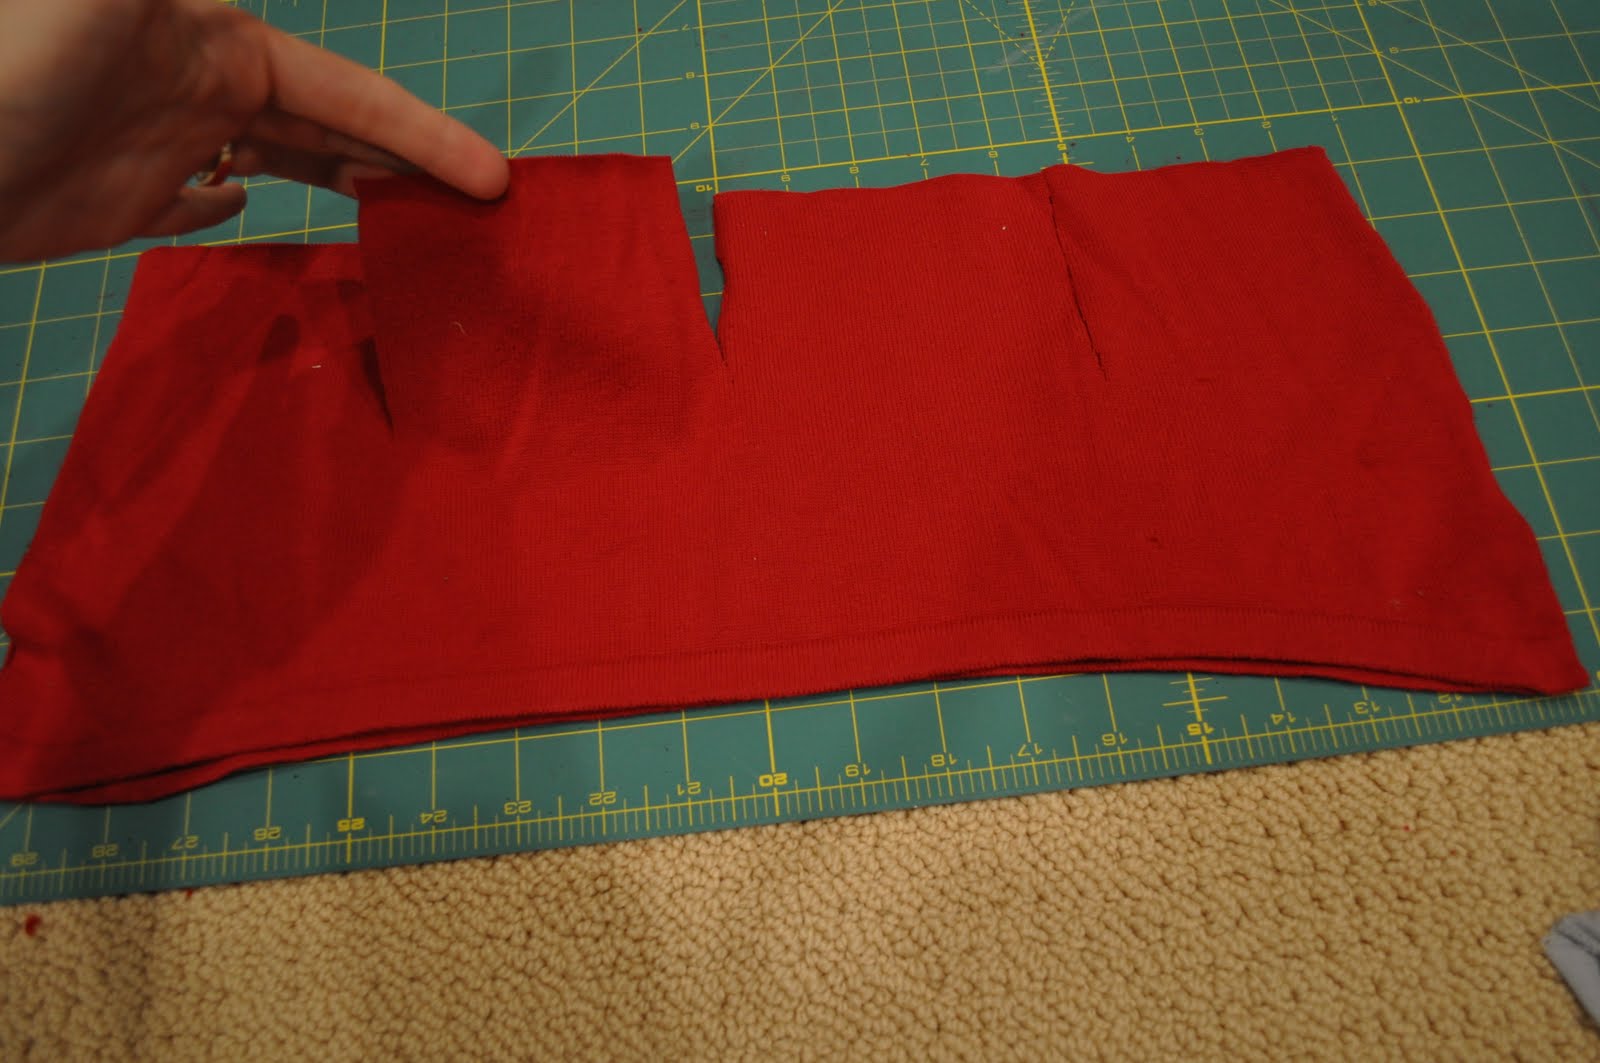
Alright, let’s get started now.  To make the actual hat you need to measure your child’s noggin.  Once you’ve got the measurement you can get out your old sweater.  Cut two rectangles out, utilizing the bottom finished edge of the sweater.  If your sweater stretches a LOT, then make the length of the rectangle an inch or two less then your child’s measurement.  If it stretches normally then use the actual measurement (the circumference of his or her head).  As for the height of the rectangle here are some estimates.  My one year old’s I cut to be 6.5 inches tall and my three year old’s was about 7.5 inches tall.  (Sidenote:  They both have very large noggins for their age.  Yeah, they’re advanced 🙂

 
Once you have your two rectangles, divide the piece lengthwise into quarters and cut three-inch slits down from the top.
 
 
Then cut those pieces into half-football shapes.  What am I talking about?  Just look at the picture below.


Now, take one piece and sew the adjacent footballs together.  Then sew the ends together until you have a basic beanie.  Do this with the other one as well.  One will be your lining and one will be the outside of the hat.
 
 
Now we’re going to make the brim.  I tried using thin plastic for the inside of the brim on this hat so it would be really washable.  However, I recommend cardboard instead (which I used on the other hat).  That’s because the plastic can’t be broken in, so the brim remains flat rather than rounded.  On this hat I copied the brim of a baseball cap, while the green hat has a smaller brim.  I’ll finish showing you the process of the red hat, but then I’ll explain the differences in the other hat and you can pick your favorite.
 
Cut two pieces to match your brim, but leave about 3/8 inch extra on the inside of the brim.
 
 
Put the wrong sides together and sew the outer edge.
 
 
Invert it and slip the cardboard into it.  Put the inside seam all on one side of the brim to avoid bunching.  I sewed around the edge three times like a top stitch to keep it in place and to give it some detail.
 
Now it’s time to sew on the brim.  (You will actually want to do all your embellishing before you sew on the brim and the lining, but I just want to show you all the sewing first.)  You’ll sandwich it in between the outer hat and the lining.  I like to start in the middle of the brim and sew one side and then the other so it stays centered.  Take your time and make sure you have all three layers lined up as you go.  You want to sew as close as possible to the the plastic or cardboard insert.


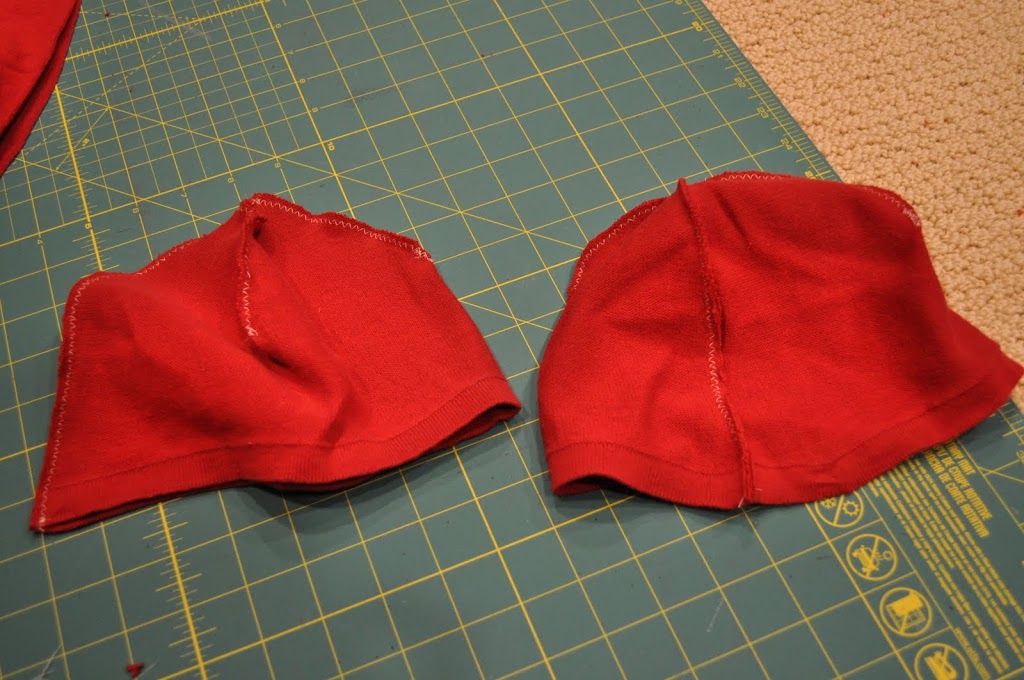
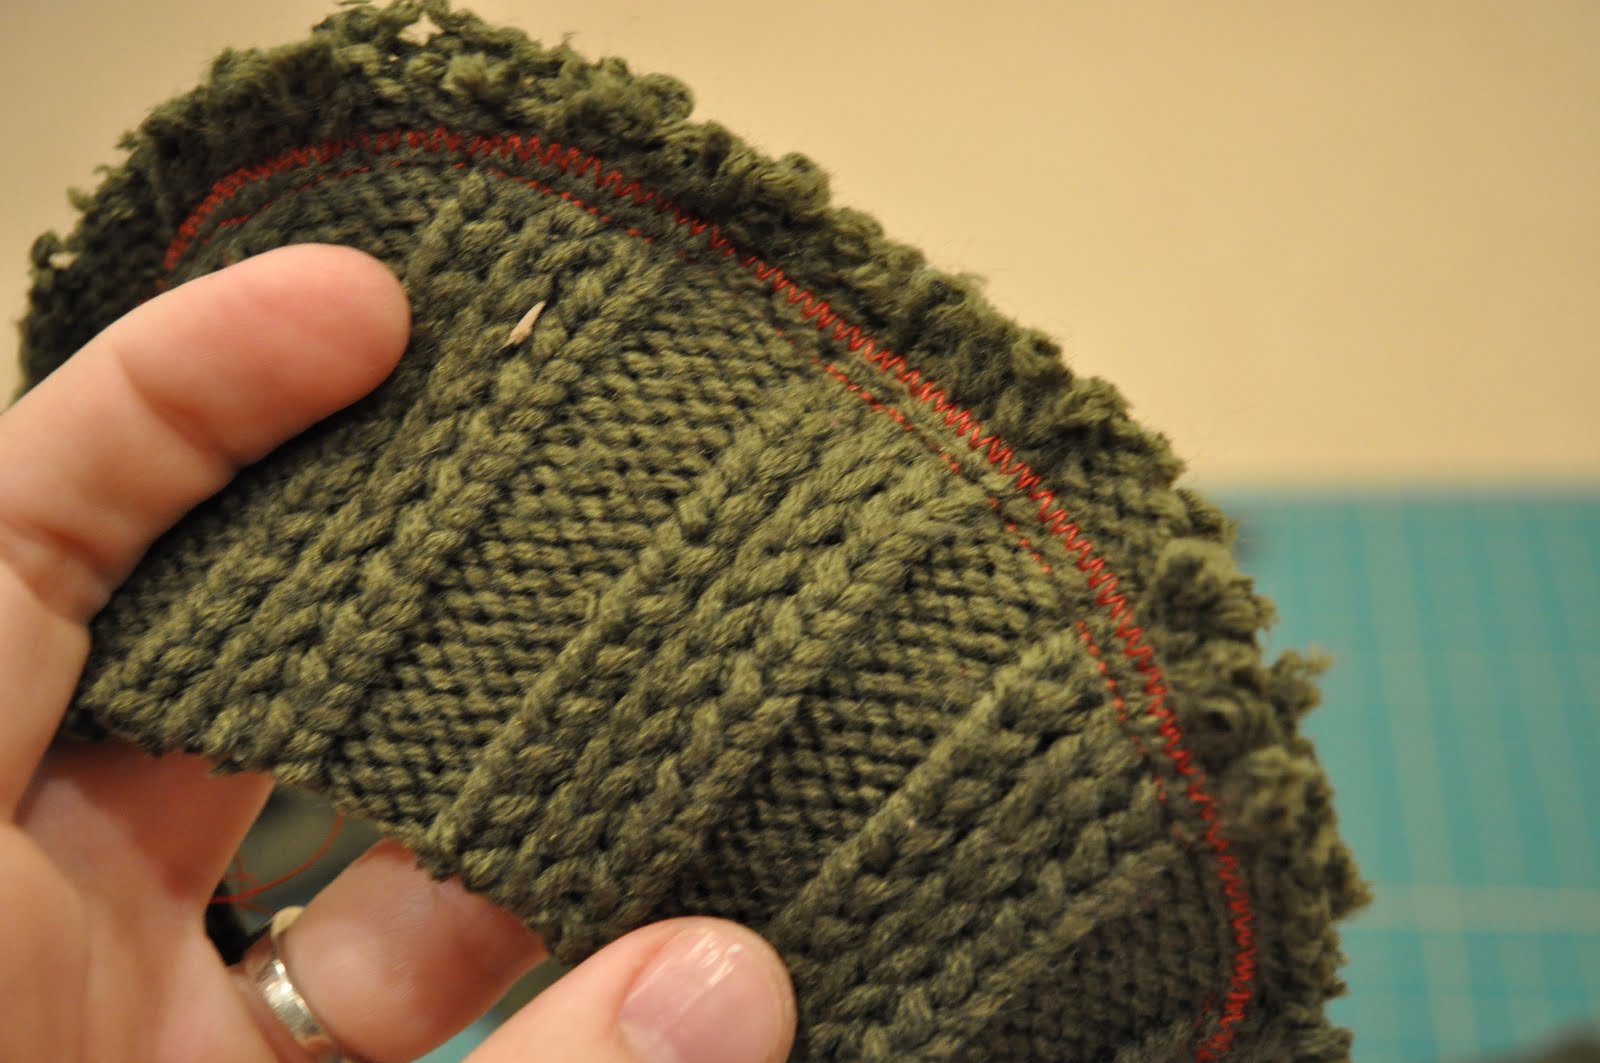
After the brim is on you can sew along the bottom of the hat to join the lining and the outer hat.  Here I recommend using a zigzag stitch so the fabric will still stretch well.  Now that’s all the major hat construction, but let me show you some things I did differently on the second hat.

The brim was smaller, which I liked better.  You can use my brim if you’d like.  Click HERE to download a free PDF file of it.  Because these types of hats usually have smaller brims I think this brim would work from age 1-10.  The sweater I used for this hat was a lot more stretchy and loosely woven.  When I made the brim I cut the pieces to be much larger than needed so that I could sew the edge and zigzag it so nothing would unweave. 

 
Then I trimmed off the excess and inserted the brim.


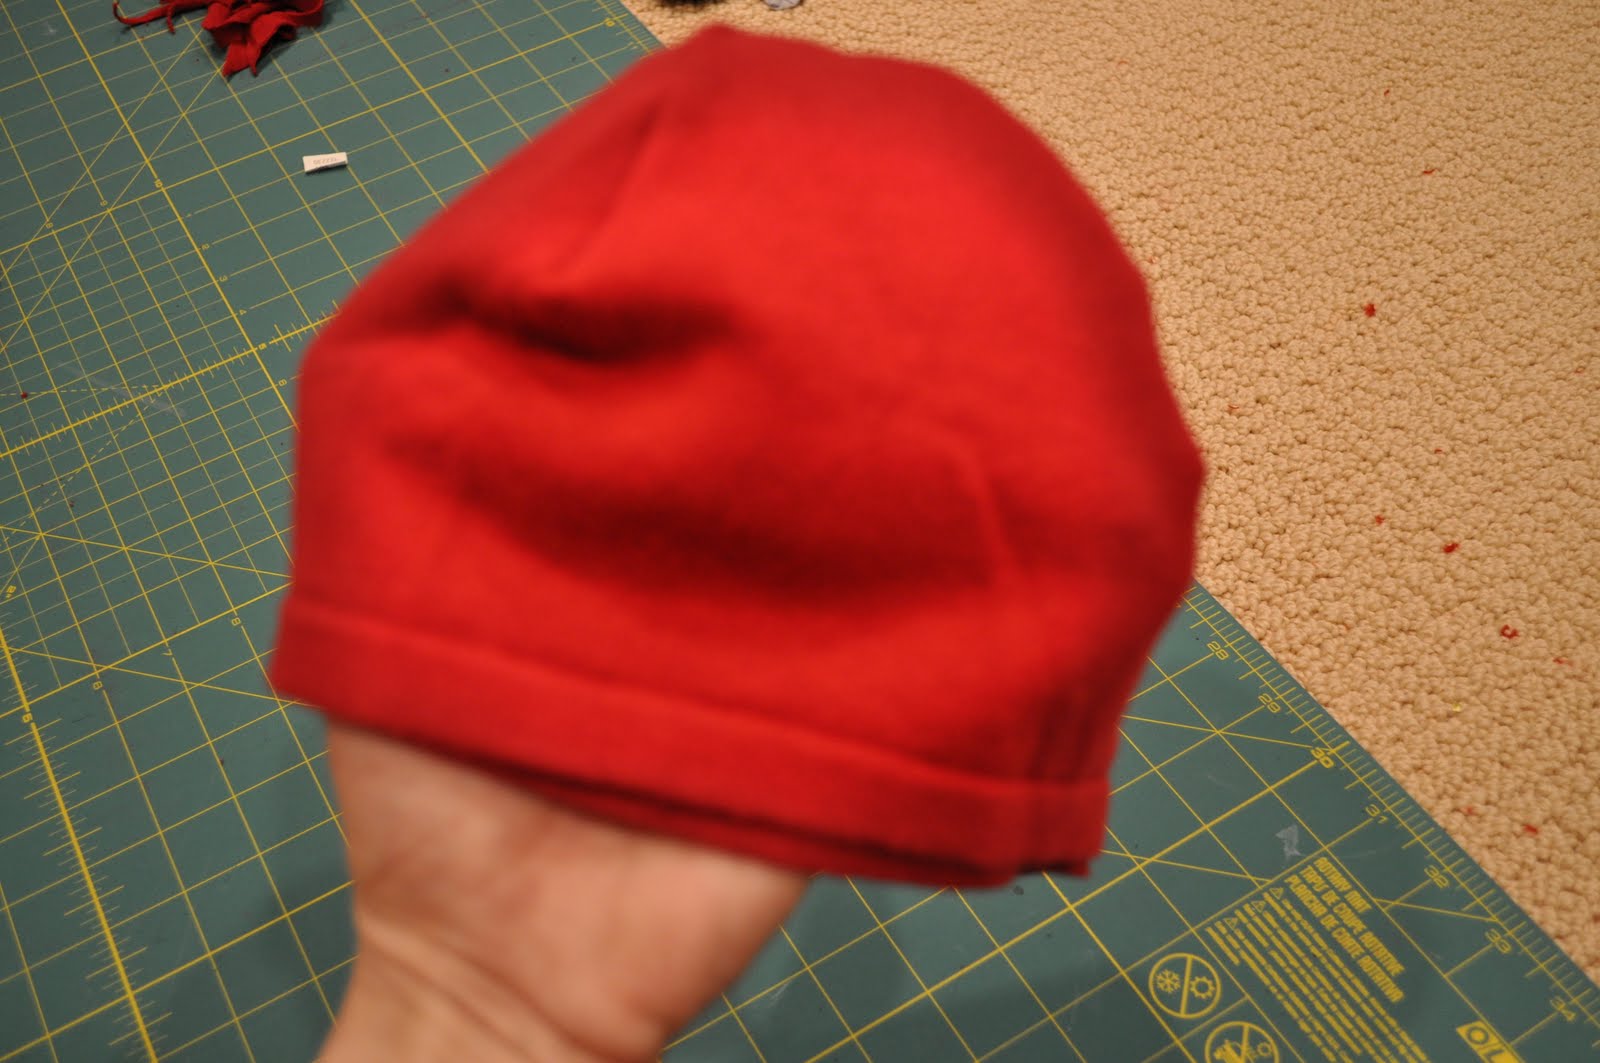
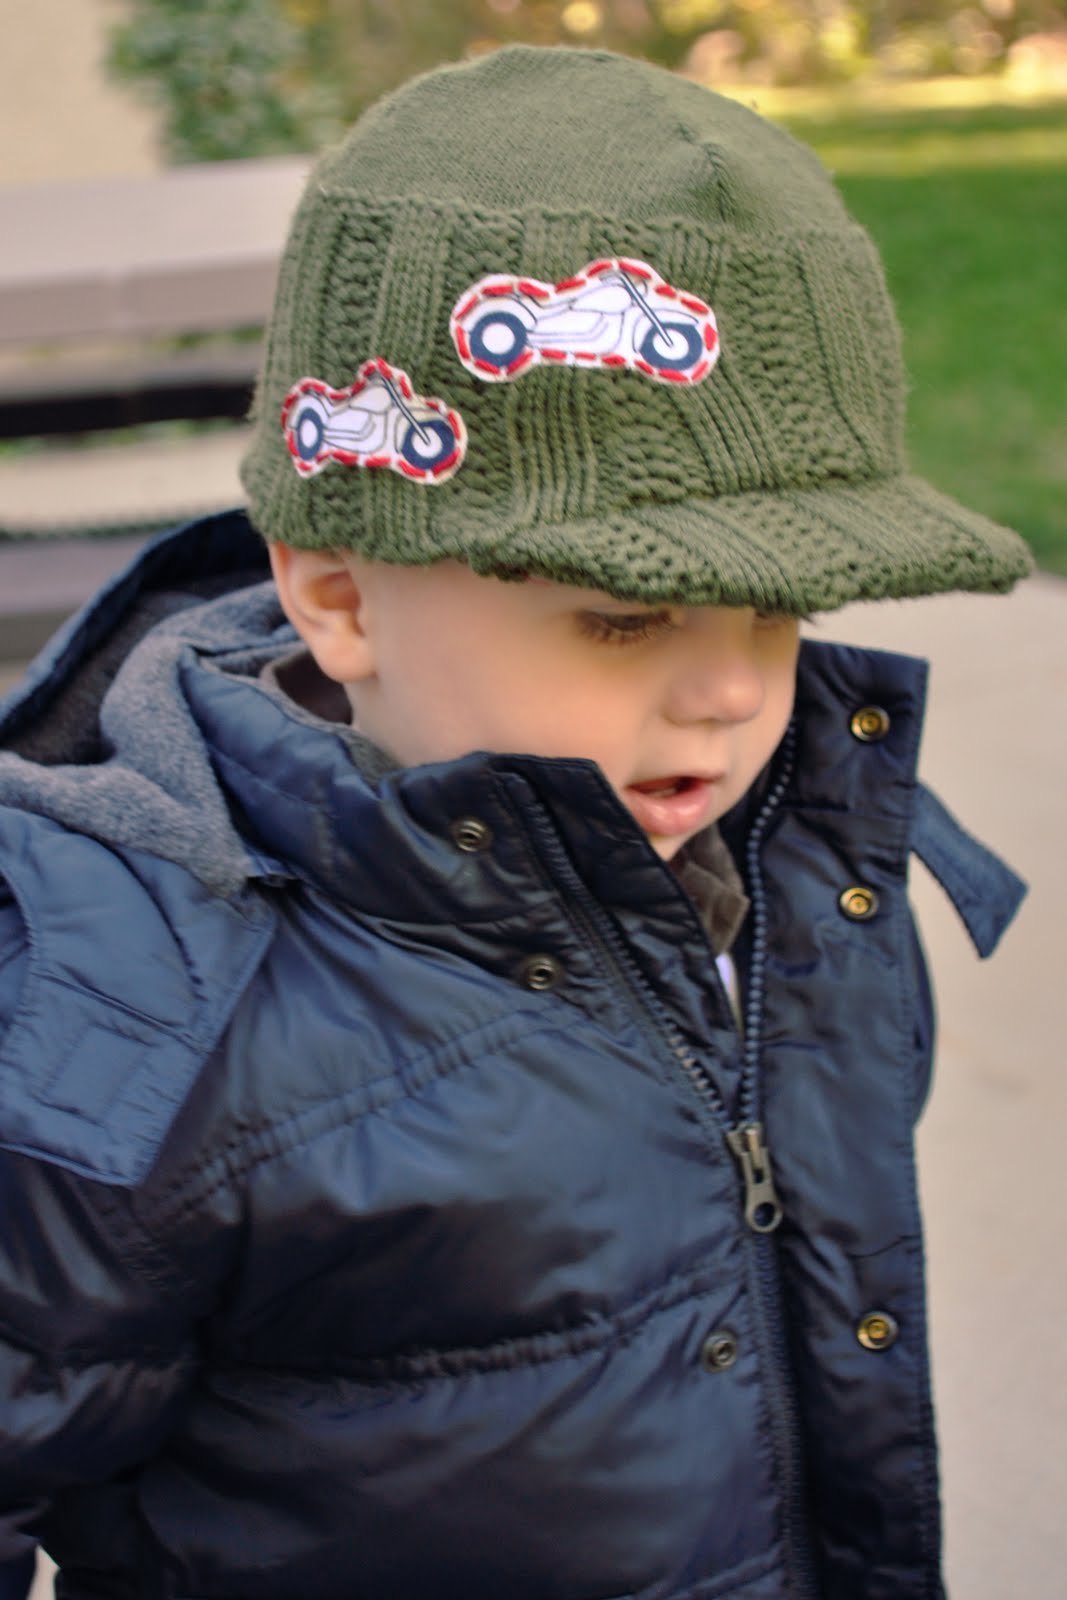
I did not make a lining for this hat, since it was a heavier sweater and because it was for my youngest son who is constantly sweaty.  When sewing on the brim, I obviously didn’t have two layers to sandwich it in between, so I flipped up the brim and sewed it on the outside of the hat as shown.  I let it climb up the hat a bit, which worked out really well.  That way the brim sits a little higher and doesn’t cover his eyes too much.  I followed up with a zigzag stitch and trimmed off the extra.


Now here comes the fun part.  And, if you don’t sew you can buy a hat and add some fun stuff to it.  Here are your toppings:


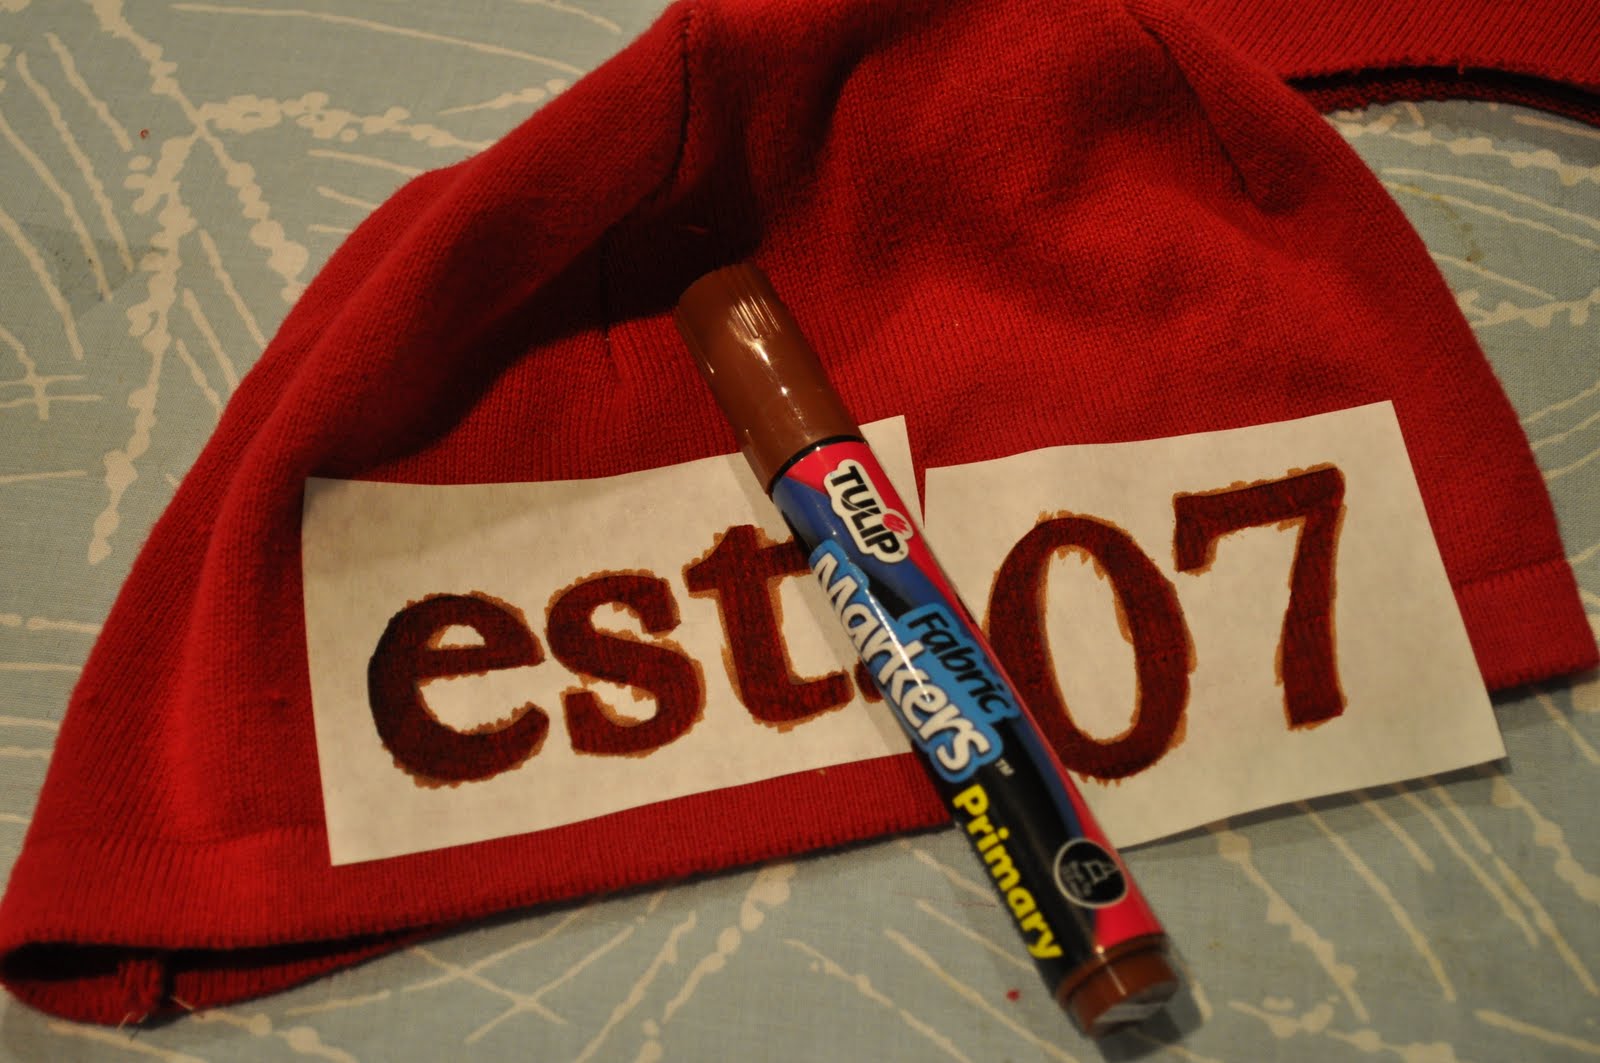
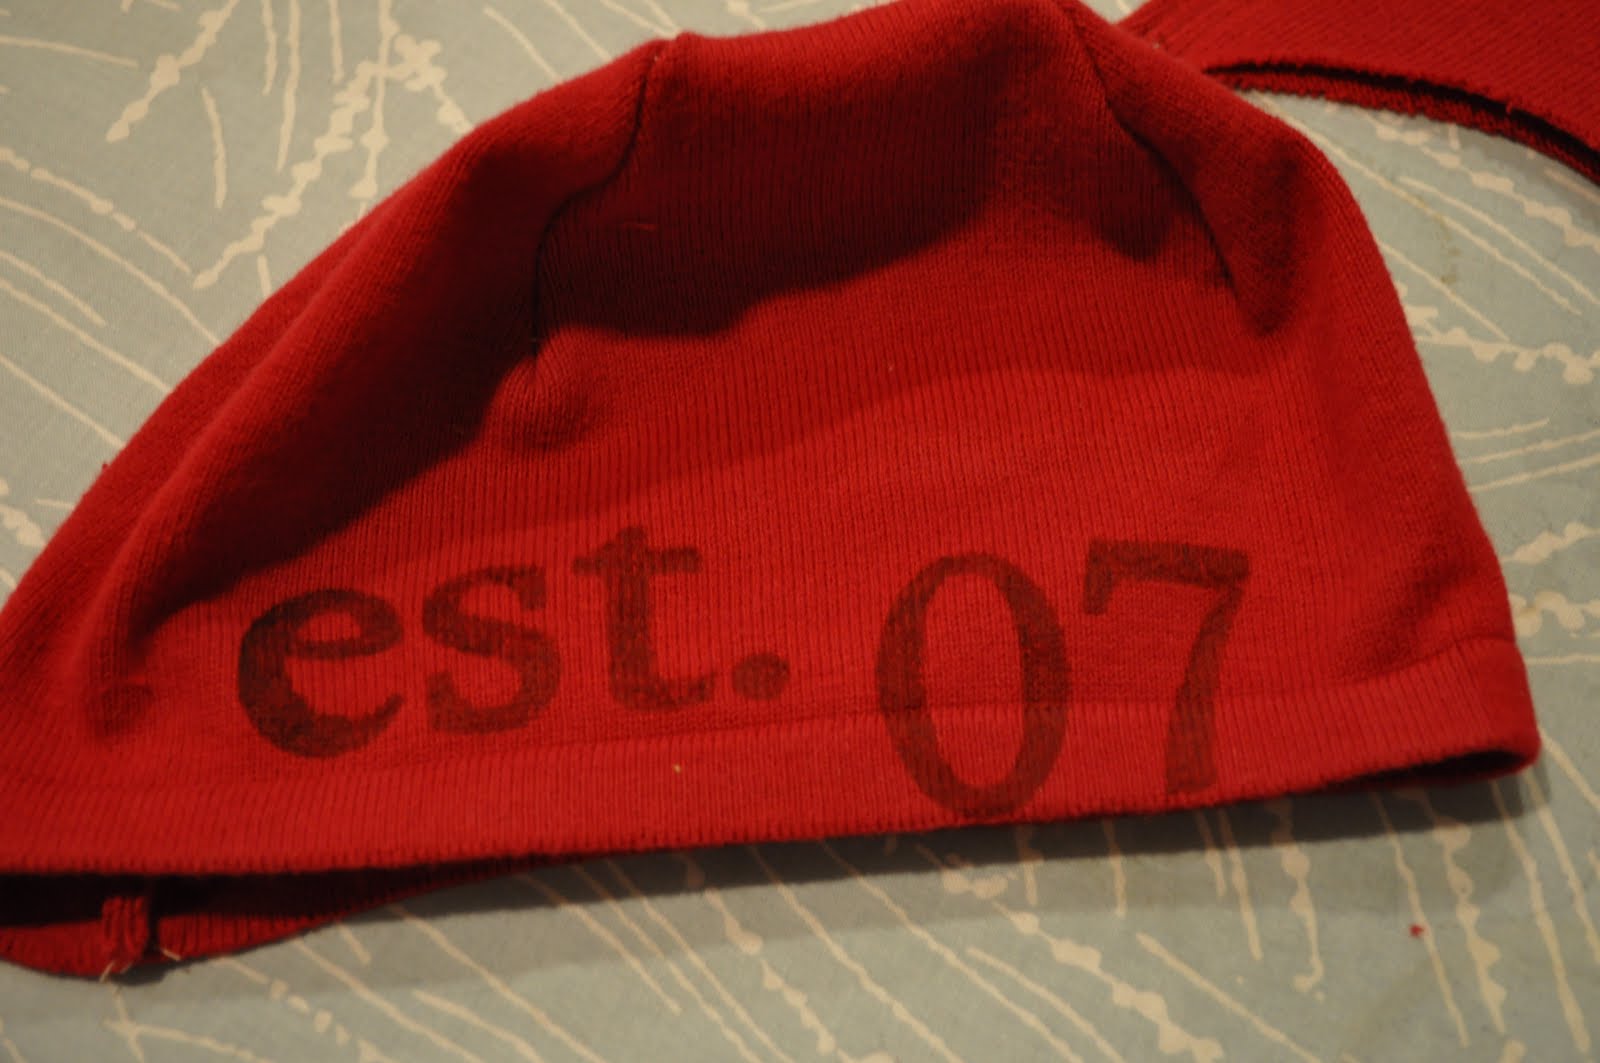
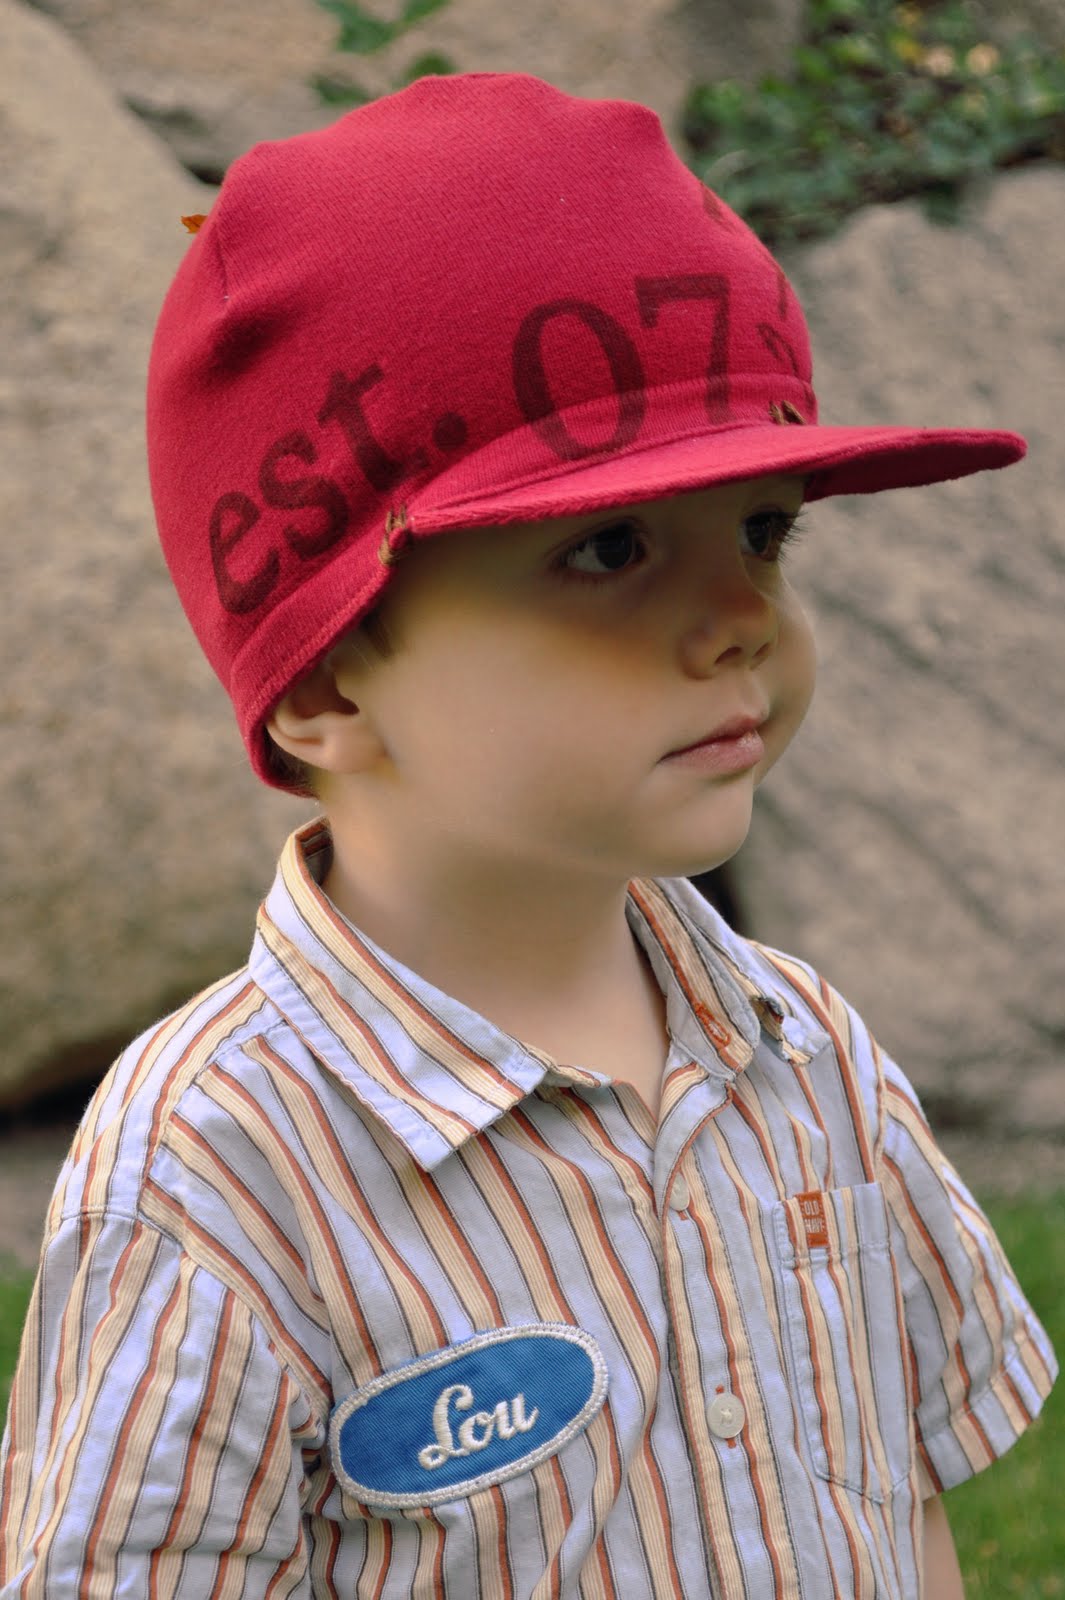
1) Freezer paper stenciling.  I love doing this.  If you’ve never tried it you can go HERE to watch my in depth video tutorial.  While I usually create a stencil and then paint it, this time I filled it in with fabric markers instead.  (I thought it would be funny to put established followed by his birth year.)


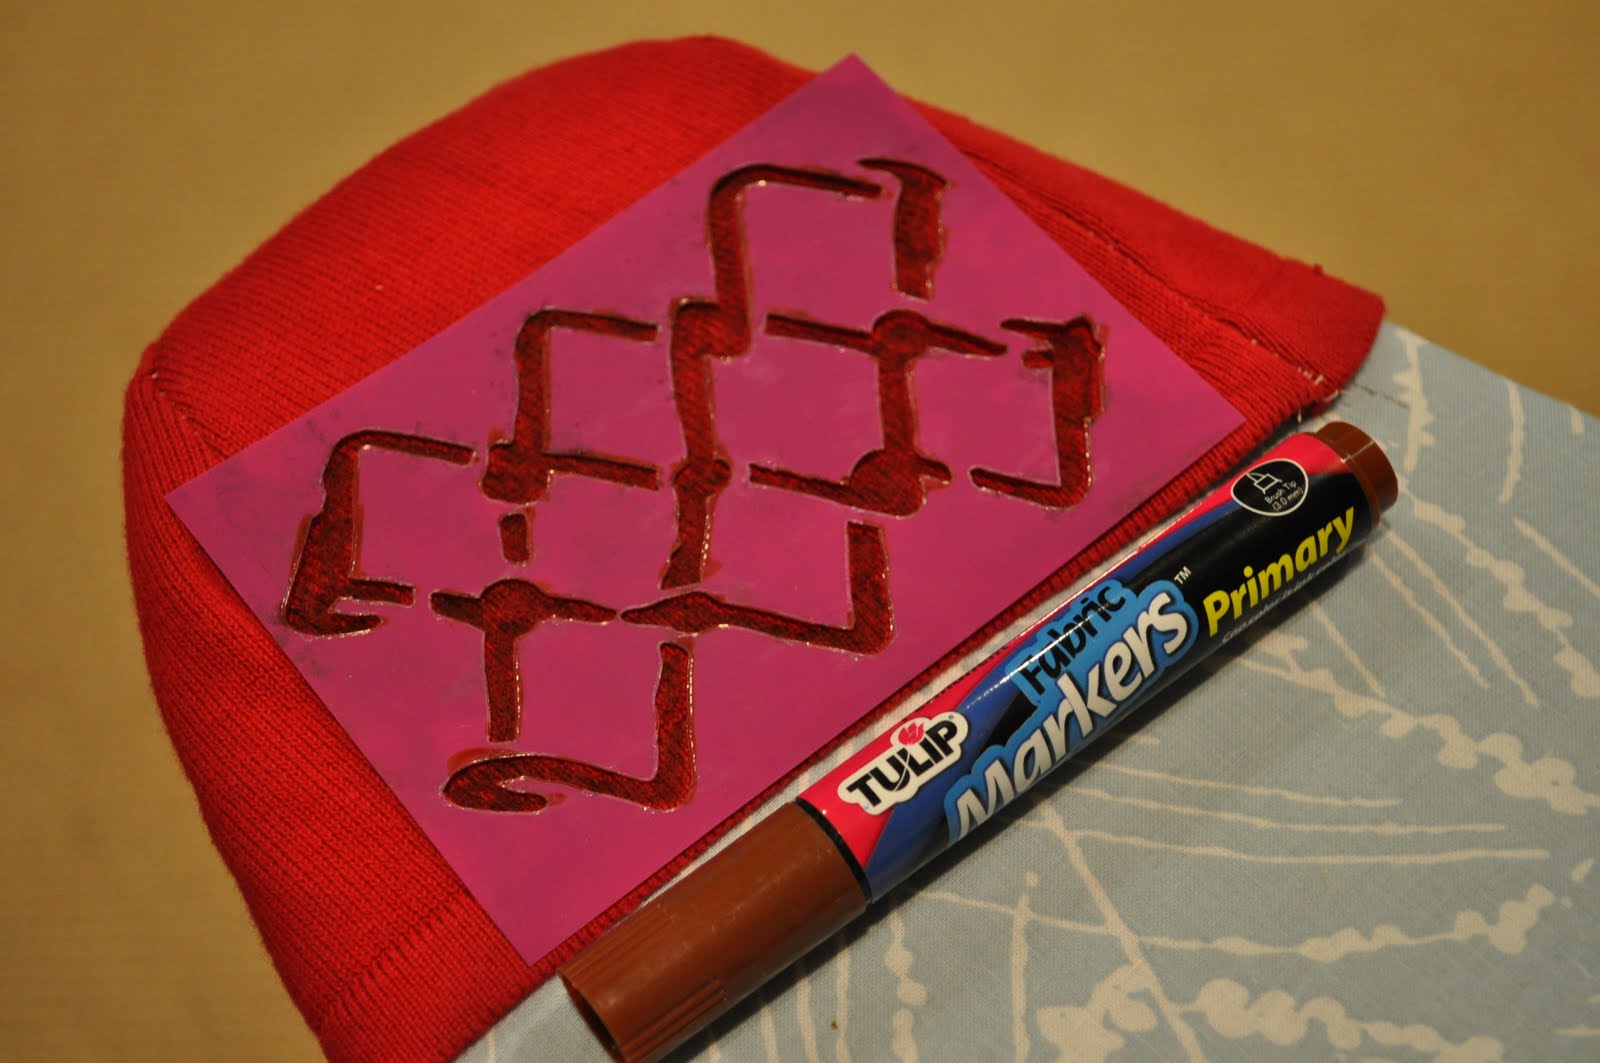
2) Premade stencils.  I used this Tulip Graffiti stencil up the side of the hat for a fun, tough look.  (It comes in a pack with other great stencils.)

 
3) Make your own patch.  I stenciled a number or letter on fabric, cut it out and sewed it on.
 
 
4) Use existing graphics from old clothing.  I cut out these cute little motorcycles from an old shirt and sewed them on.
 
 
5) Don’t forget to floss.  I love to use embroidery floss to do some random, messy stitiching here and there.  (Like on the red hat.)
 
Well, that’s it.  I think that’s all you need to know to whip up your own upcycled sweater hats.  It’s time for me to head out.  Oh, and if you’d like to see another style of an upcycled boy hat to try out I made some from t-shirts HERE. 
 

Thank you so much for having me, Kari.  You are all welcome to stop by my place anytime.  Have a fabulous day!   -Cheri


You may also like these

One Hour Bindless Baby Blanket Tutorial1-Hour Bindless Baby QuiltWhat is double gauze? Why is it so popular in sewing? Lots of beautiful free tutorials!Double Gauze TutorialsDIY Tights TutorialDIY Tights into Leggings (Video Tutorial)How to make baby leg warmersDyed Baby Onesie Tutorial
Previous Post: How to Make a Rose Tower Cake
Next Post: DIY Scratch Paper by Morena’s Corner

Comments

  1. Simone says

    September 24, 2010 at 11:51 AM

    These are awesome! Thank you for sharing your techniques!

    reply to this comment >
  2. Erin @ Crafts and Sutch says

    September 24, 2010 at 1:01 PM

    As always, another too cute craft for boys! Love it!

    reply to this comment >
  3. Anonymous says

    September 24, 2010 at 2:45 PM

    Awesome! Maybe use heavyweight fusible interfacing?

    reply to this comment >
  4. aliimberi says

    September 24, 2010 at 3:06 PM

    That is awesome! I don’t have any sweaters though 🙁 Guess it gives me an excuse to go to the thrift store!!! Thanks for sharing!

    reply to this comment >
  5. Liesel says

    September 24, 2010 at 5:24 PM

    Really really cute. I love these on little boys. Maybe I’ll pull out my machine again and give it a try for my little guy:)

    reply to this comment >
  6. Emily at Emmie Designs says

    September 24, 2010 at 6:20 PM

    very great idea, I was actually thinking about this the other day and wondering if I could make my own somehow when my 6 and 3 year old were fighting over a hat, thanks 🙂

    reply to this comment >
  7. Sabra says

    September 24, 2010 at 12:33 PM

    So cute!! i wonder if plastic canvas would give enough to use instead of cardboard?

    reply to this comment >
  8. Deidre says

    September 24, 2010 at 7:15 PM

    just a quick idea… the plastic brim should form by taking a rubber band to hold the brim in a rounded shape. leave it overnight and you should be good to go. the cardboard will weaken a lot sooner than the plastic.

    reply to this comment >
  9. Tonya says

    September 24, 2010 at 1:48 PM

    Ah, yes! Something for the boys! I will be trying this out for my little man. Thanks for sharing!!!

    reply to this comment >
  10. Tam @ Sew Dang Cute says

    September 24, 2010 at 8:12 PM

    Very cute! What a great way to use old sweaters as well!! Thanks Cheri!!

    reply to this comment >
  11. Lori Thompson says

    September 25, 2010 at 3:34 AM

    so creative! Love it!

    reply to this comment >
  12. Tauni says

    September 28, 2010 at 4:42 AM

    Finally a project for boys! Very cute 🙂

    reply to this comment >
  13. Quita says

    September 30, 2010 at 2:43 PM

    Hello…I followed a different tutorial for this a while back online and they had a good tip…again they said plastic made a brim that wouldn’t keep it’s shape, so they used cardboard and covered it in duct tape to make it weather proof. Worked great.

    reply to this comment >
  14. velcromom says

    November 12, 2010 at 2:52 PM

    Ooh! I don’t know how I missed this – I will have to give this a try in a girly version for my daughter. I made the upcycled hats a while ago and love them, too.

    reply to this comment >
  15. Katie says

    August 23, 2012 at 3:27 PM

    ahhh what an awesome tutorial! I can’t wait to make my own!

    reply to this comment >
  16. Jessie says

    August 23, 2012 at 6:31 PM

    I love this hat so much and am going to go scrounging at Good Will for old sweaters. I am so excited to see tutorials for boys!

    reply to this comment >

Leave a Comment Cancel reply

Your email address will not be published. Required fields are marked *

Recipe Rating


Popular Posts

New Year's Eve Minute to Win It games by U Create

New Year’s Eve Minute To Win It Games

Free Printable "Color Your Own" Christmas Banner

Merry Christmas Coloring Banner

Free Pattern: Fall Turkey by U Create

Fall Turkey Printable

Free Printable Pumpkin Games

Halloween Printable: Bugs and Kisses

Halloween Minute To Win It Games

  • pinterest
  • facebook
  • instagram
  • twitter
  • rss
 
Privacy Policy
Back to Top

Copyright © 2023 U-Create • All Rights Reserved • Site Design by Emily White Designs