
Hey U-Creators! I am Mandi from {Vintage Revivals}.
I am a SAHM of 2 beautiful/slightly crazy girls and I have the best husband in the world that lets me redecorate our house on a whim. I love finding crap that no one wants and making it Craptastic…which is clearly better. I loves me an amped up version of a knockoff, and just you know, creating! I have a disease where I can not do a small project. I love massive amounts of change (and the smell of fresh paint). I would love for you to jump over to Vintage Revivals sometime and say hi! I think that so many people are just plain fearful of new things, especially new crafty things. I have always been great at spray painting and sewing but never knew I could paint, until I did it for this tutorial (GAH! That’s like learning how to swim while you are in the middle of the ocean.) My 7 year old is very opinionated. If she had it her way she would have Selena Gomez and Taylor Swift room….so not happening. If I had it my way she wouldn’t even be allowed in her room. So we had to find a middle ground. And this is what we came up with. A wall mural that she could decorate. Her taste and zero mess.

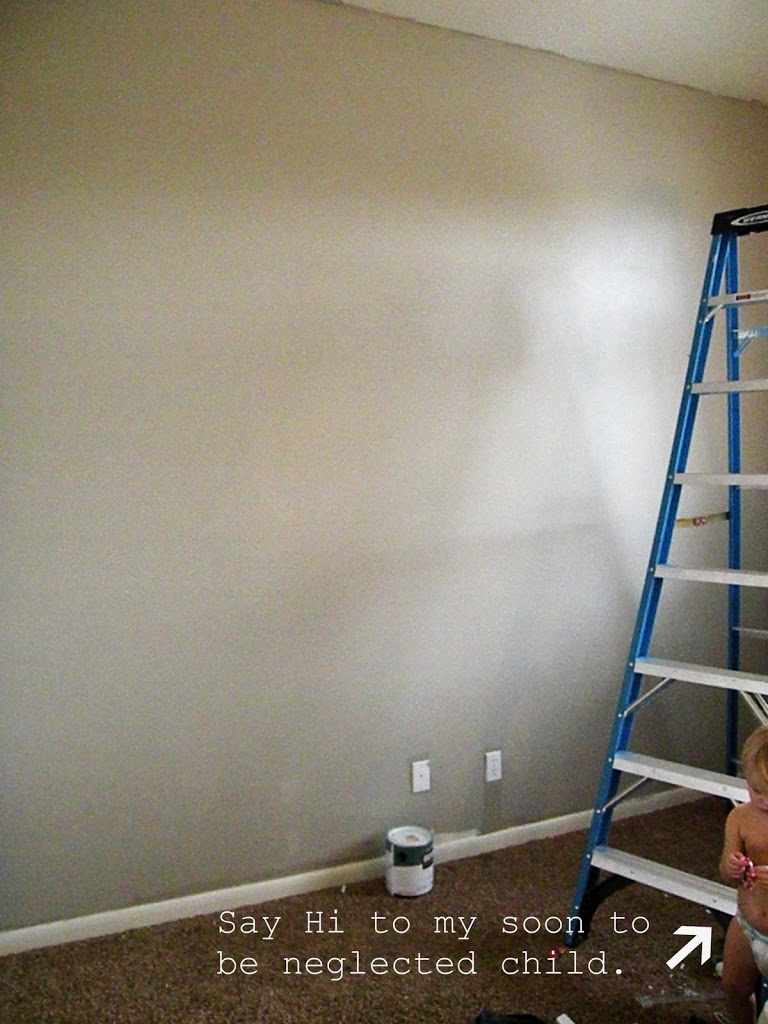
First things first, start with your blank wall.
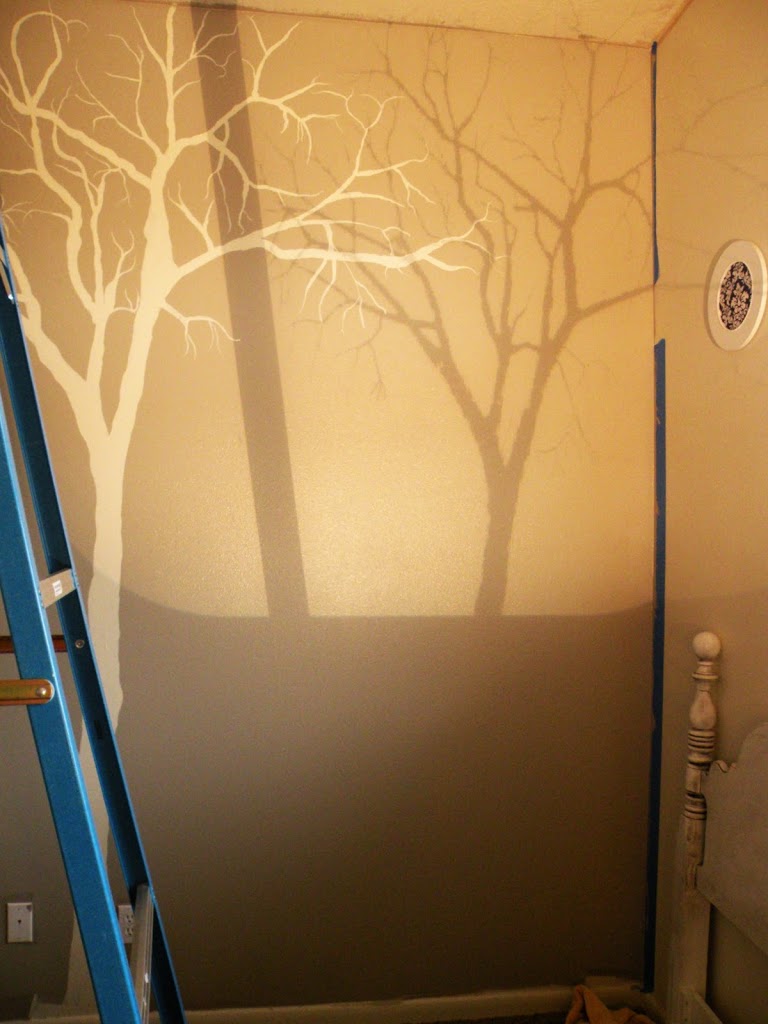
I found a clip art image online that I printed onto a transparency and then broke into borrowed an overhead projector from my daughters school.
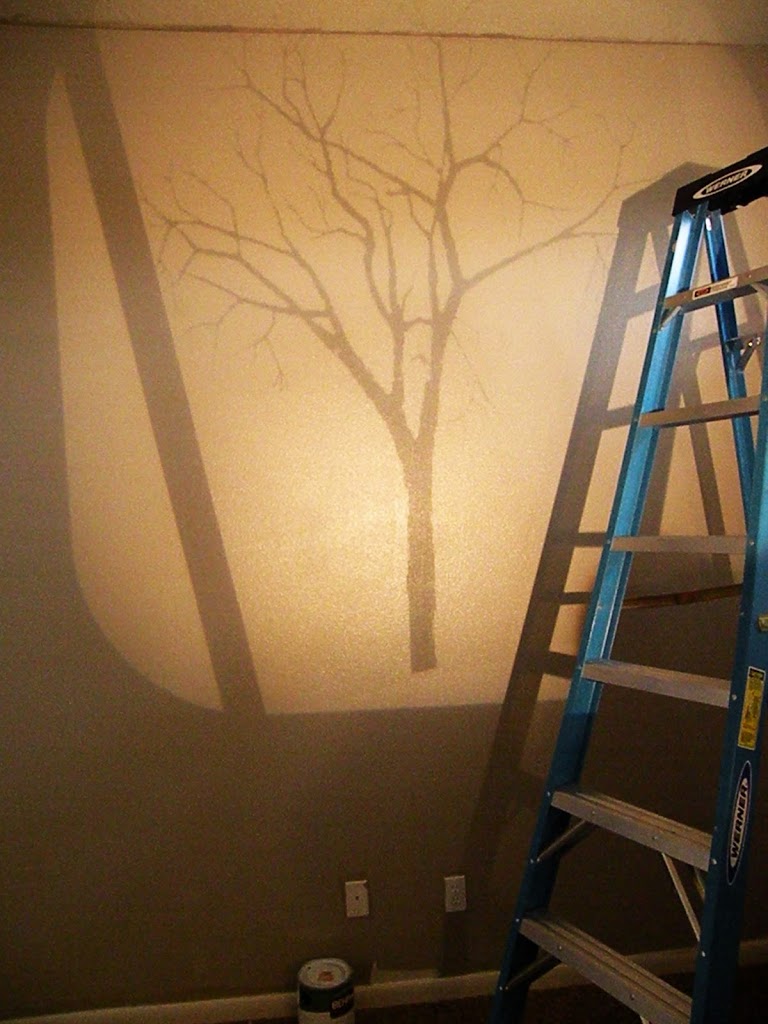
Project your image onto your wall and then take a pencil and rough sketch your tree. This doesn’t need to be perfect (unless you like that sort of thing) On the thicker branches I drew both sides of it, on the thinner wispy ones I just drew a single line to get the shape I needed.

I used some white wall paint that I had at my house and started at the trunk. I used a 1 1/2″ sponge brush to fill it in. (It left really clean lines until I got to the last tree then I had more touch up) You can use this brush to fill in the thicker branches too.

Once I got that done I switched to Brush #2. Its just a 1″ flat nylon bristle. I used this for the medium thick branches and used this technique (shown a a small scale for picture sake!!)
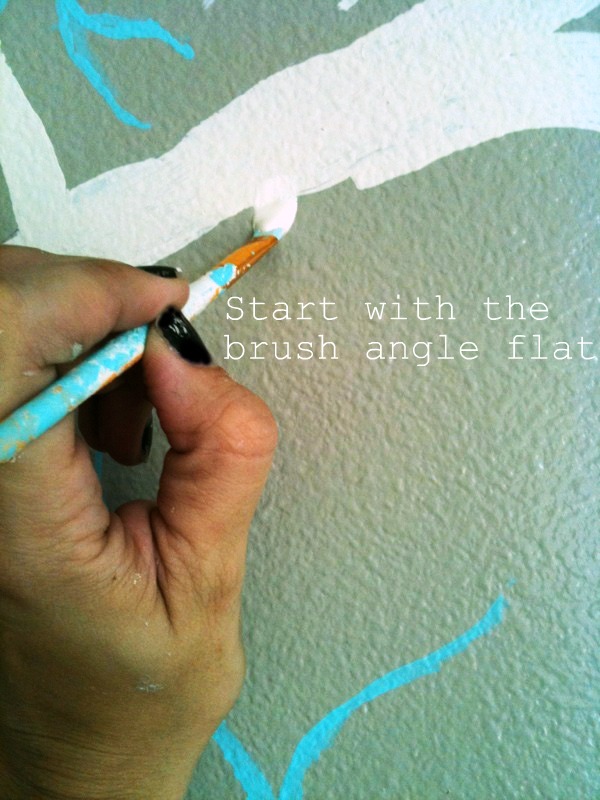
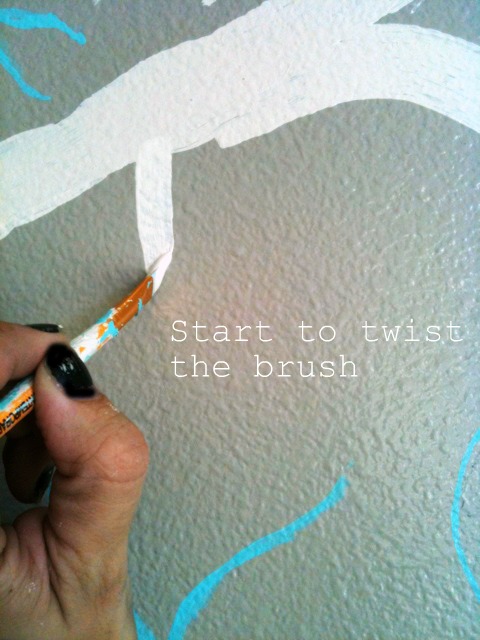
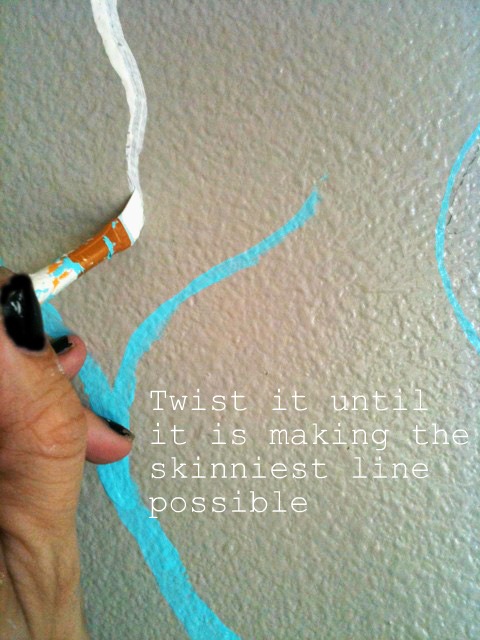
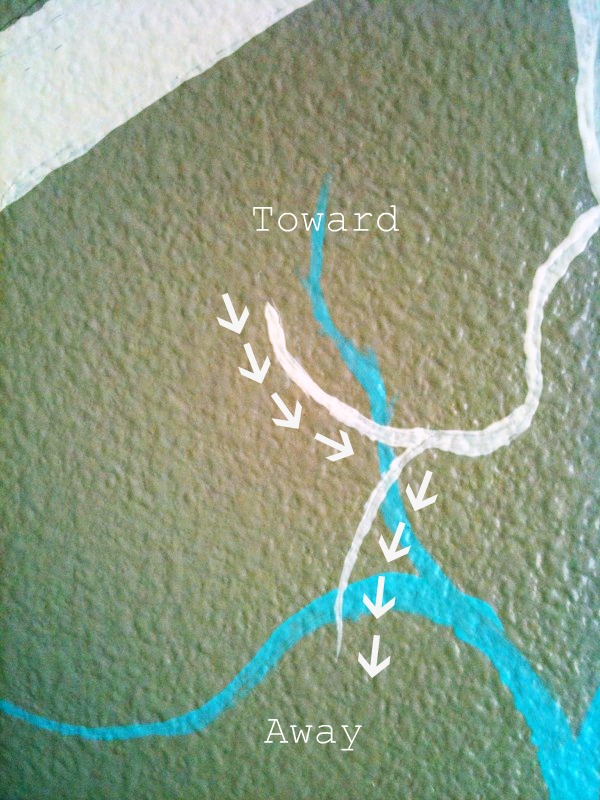
Make sure you are making the line wavy (if that’s the look you want) To finish off the end of the branch you have 2 different options depending on how you want it to look. For the more rounded edge you will start your brush and pull it toward the end of your branch. To get a more wispy tip just very lightly pull up to finish it.
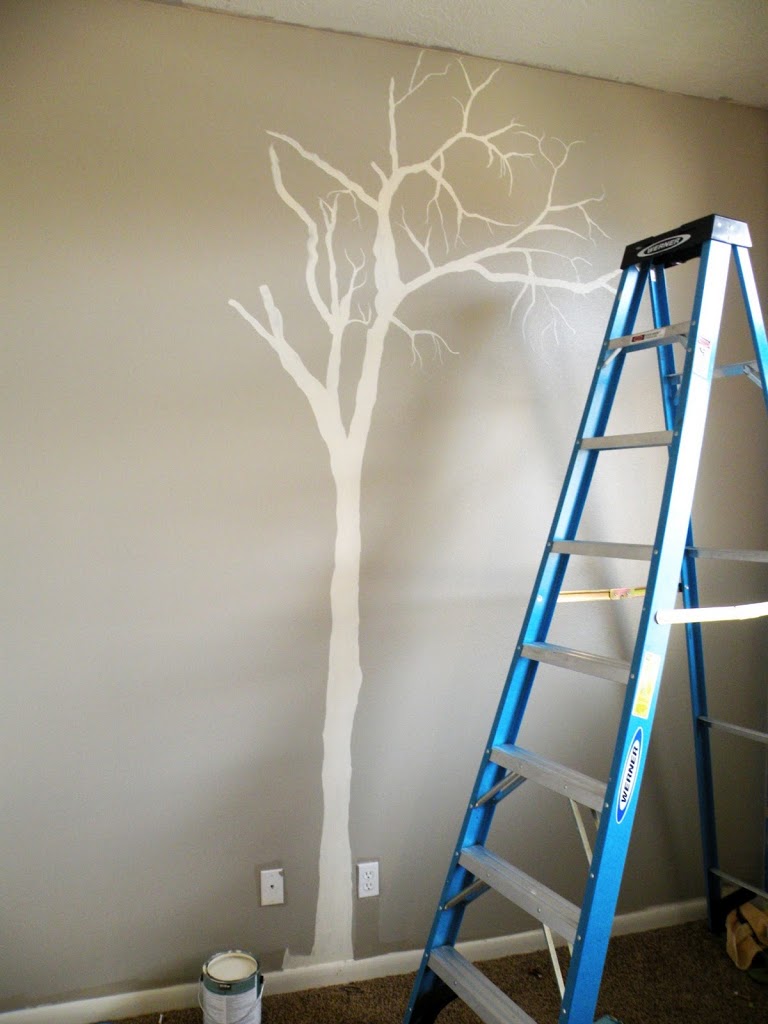
When you are done with your first tree step back and give yourself a pat on the back! It wasn’t as hard as you thought, right? Move your projector over and start again.
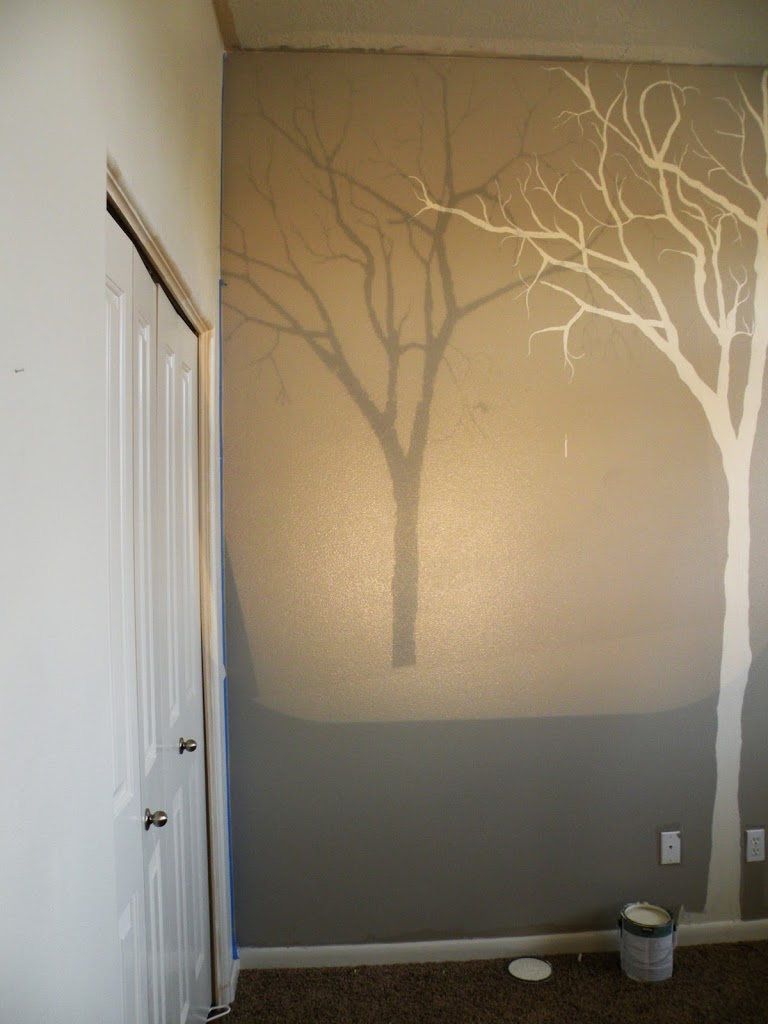
Aaannnnnd again.
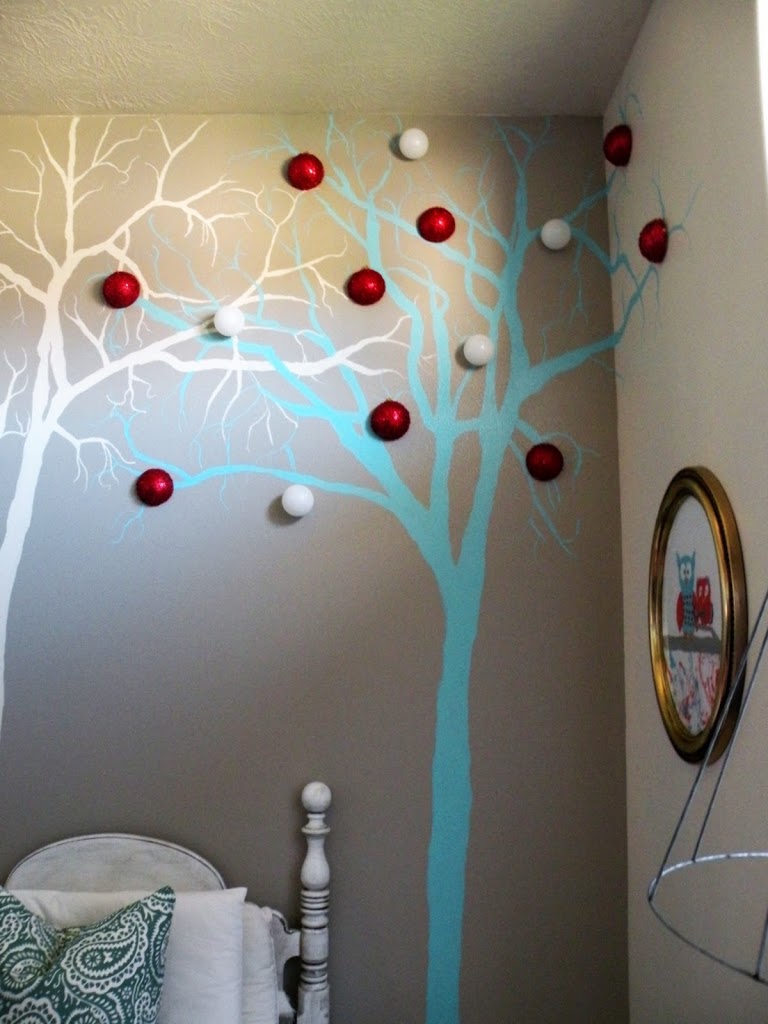
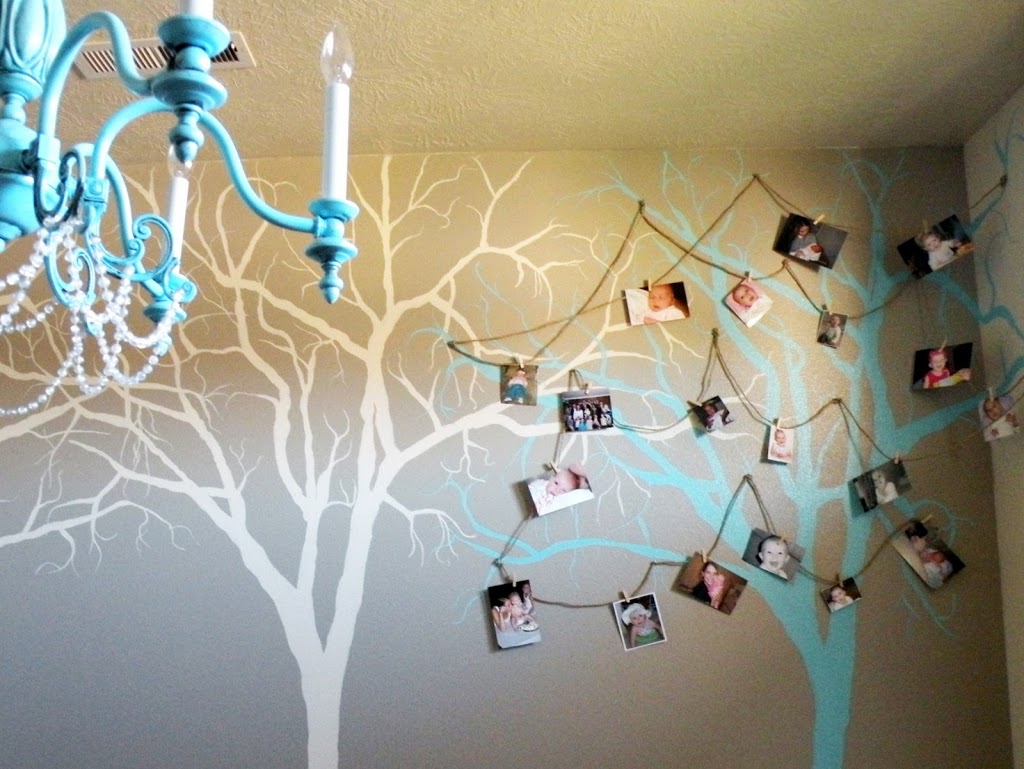
I chose to do the third tree a different color because my daughter and I came up with the ingenious idea of being able to decorate it depending on her mood or the season. I could live with that. She can put whatever she wants on this one tree….the rest of the room is mine. Muh ha ha ha! I put strategically placed nails to hold all of her treasures and she DIED over it. (well not really but you know….) So here she is all gussied up for Christmas
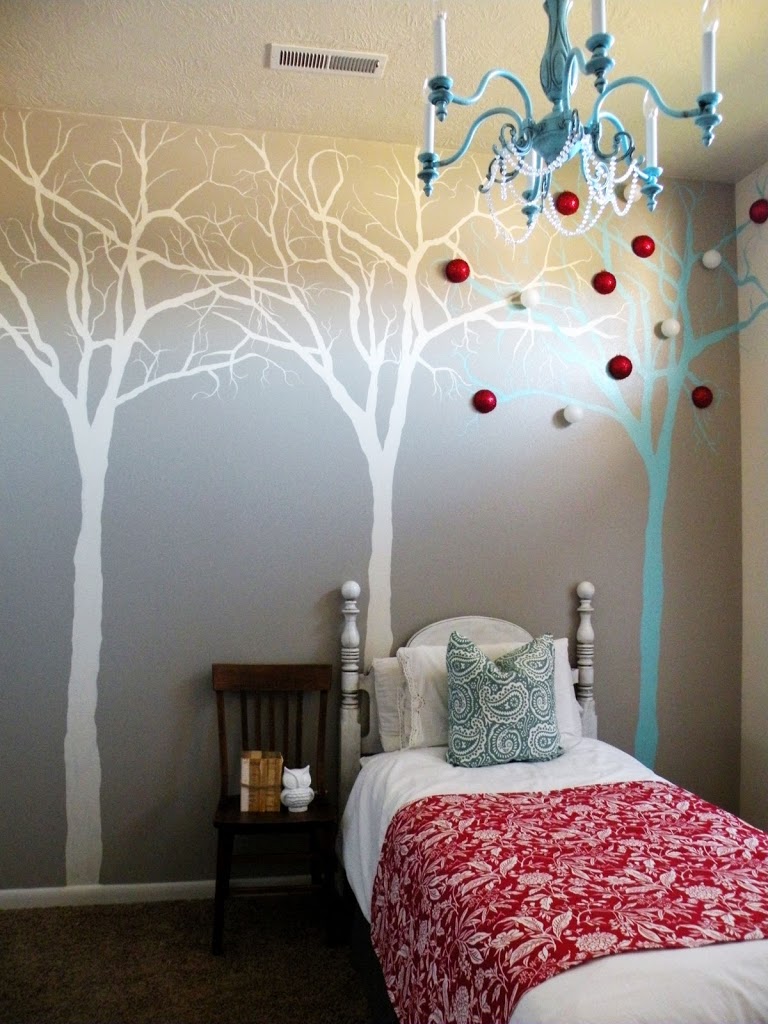
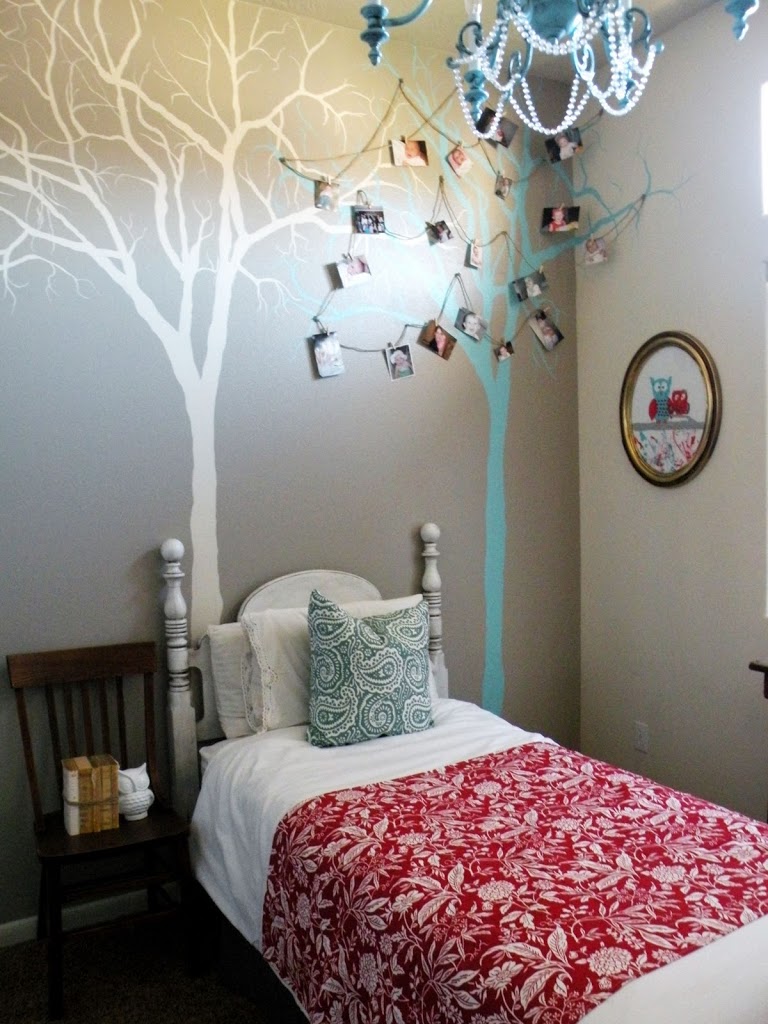
Jute and Clothespins hold all of her favorite baby pictures
If you want to see some other shots of her room you can {Click Here}
Thanks for having me Kari! You are a Rockstar!


What a great idea! I would have never thought to use a wall projector – duh!!!
I love Mandi and am so glad she shares her great ideas with us. She’s pretty much a creative GENIUS!!
Holy Cow, I love Mandi.
CUTE! CUTE! I’m starting to think maybe I’ll do turquoise and red in my girls room instead of pink. It works soo good.
What a great idea! My daughter’s are only 1 and 2 right now, but I may do this when they are older. It’s a nice creative outlet that won’t give me a headache!
Love this!! Very cute!!
WOW! Is that ever GORGEOUS!!!! If I didn’t rent, I’d do it in a second! As it is, I’ll just come over here & admire YOUR beautiful trees!
Wholly guacamole! I am doing this in my house. That is, when we buy one. LOL!
Wow!!
This is such a remarkable piece of art! I’m totally impressed at how lovely that is. Way to go!
stunning and fun.
It is just beautiful! Thanks for sharing. Such an inspiration!
Adin B
Super cool! My walls are all plain jane, and this would be a fun project! Great job, Mandi!!
I love me a tree mural, but I already have two in my house, hahaha. Love, LOVE the idea of three trees with one in a different color. Just checked her blog out and OMG it gave me the vapors. Her stuff is so beautiful I literally swooned.
That looks so amazing!;)
Lovely greetings…
Absolutely, ridiculously awesome! I love, love, LOVE how great those trees turned out!
I’ll just say WOW!!!!
That is Genius Idea I love the fact that you can decorate the tree,
This could last right into her teen years.
Awesome Job Bows head to the master.
This is gorgeous! She makes it look so easy!
This blows my mind. So amazing.
absolutely fabulous!
I can’t wait to do this project. So perfectly simple, yet no one will know when they look at it!
I’ve been wanting to do this for a while now in our spare room (my next project) but havn’t had time to give it much thought of how to do it. I LOVE this! It’s BEAUTIFUL and fresh! Awesome job!
gentrilee.blogspot.com
Congrats. Isn’ so fun being on U Create? That is so cute and so MANDI.
Cheri
Omg this is amazing
Where did you get your clip art? Those trees are perfect!
Great job, I like the 3d feeling of your decorations, your instructions are very easy to follow, I think 🙂