U Create

It's a good day to create!

  • pinterest
  • facebook
  • instagram
  • twitter
  • rss
  • crafts
    • crochet/knit
    • jewelry
    • kids crafts
    • paper crafts
    • sewing
      • bags
      • boys-clothing
      • girls-clothing
      • women-clothing
      • pillows
      • quilts
  • home decor
    • bathroom
    • build it
    • frames
    • kids
    • kitchen
    • office
  • recipes
    • desserts
    • dinner
    • snacks
    • soups
  • parties
    • baby shower
    • birthday
    • games
    • gift wrapping
    • party decor
    • party favors
  • printables
  • holidays
    • Christmas
    • Easter
    • Father’s Day
    • Halloween
    • July 4th
    • Mother’s Day
    • New Years
    • St. Patrick’s Day
    • Thanksgiving
    • Valentine’s Day
  • gifts
    • baby
    • electronics
    • graduation
    • teacher gifts
  • About
  • Be My Guest
  • Advertise
  • Contact
  • pinterest
  • facebook
  • instagram
  • twitter
  • rss

4 Sep

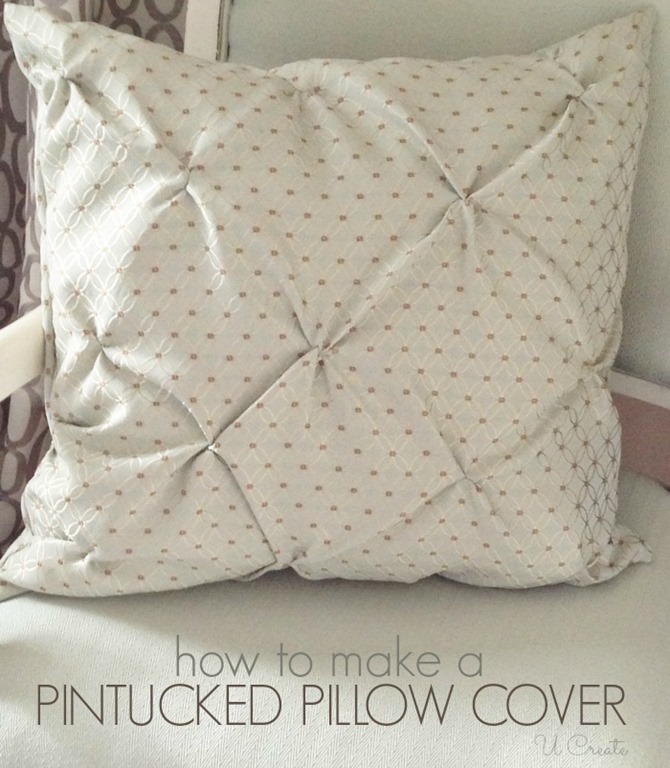
Pin Tucked Throw Pillow Tutorial

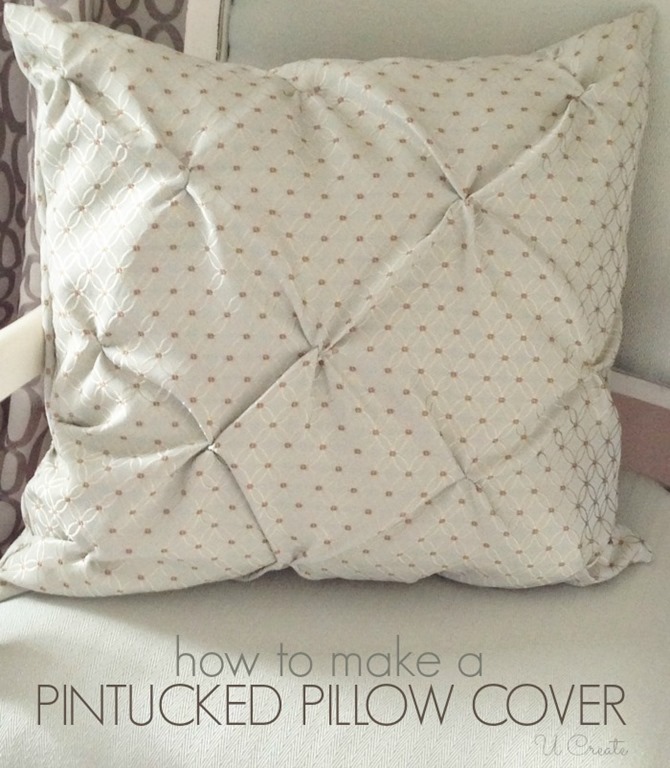
I asked many of you which was your favorite pillow in my master bedroom makeover and most of you chose this one.

How to Make a Pintucked Throw Pillow Cover

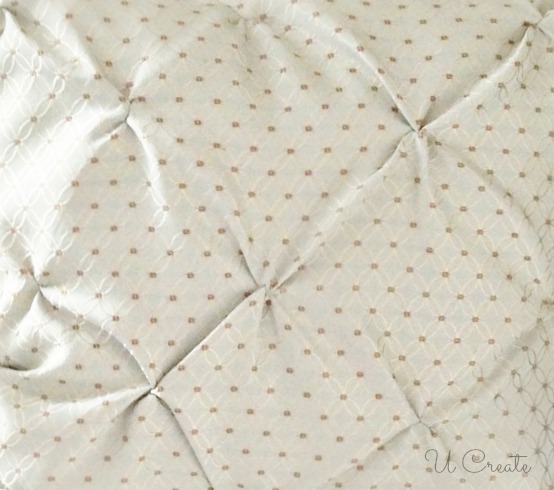
I made a pintucked duvet cover for my daughters bedroom last year and thought I would use the same concept for a pillow cover to add texture to my room.

Here are the simple details…

First we’re going to start on the front piece of the pillow. My throw pillow is a 12×12, so I cute it size 18×18 so I would have room to sew after I did my pin tucks.

Now I eyeballed my pintucks but if you’re afraid they won’t be precise you can draw a diagram like this. Put the dots on the wrong side (back side) of the fabric.

pintucked-dots

pintucked-pillow-tutorial

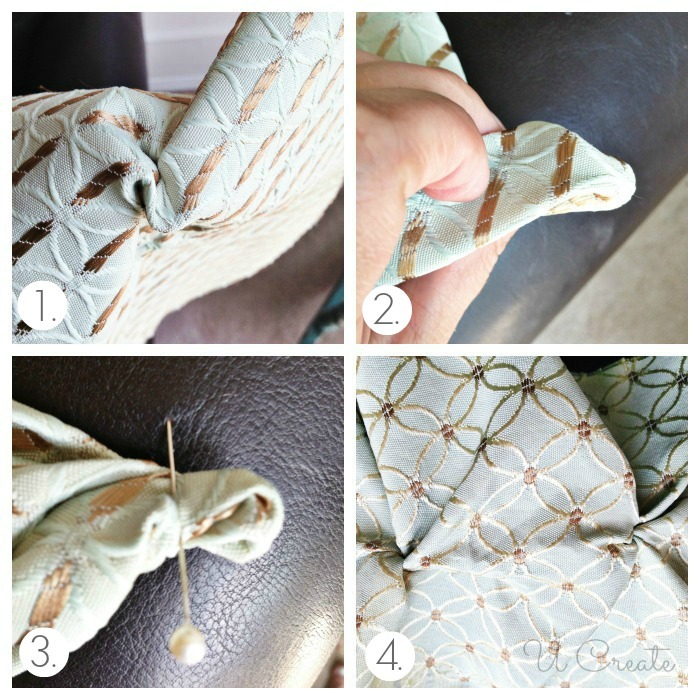
Step 1. Grab a small piece of fabric where you drew your dot.

Step 2. Twist about one 1/2” inch.

Step 3. Pin to hold and you’ll sew a straight line right where the pin is.

Step 4. Repeat steps in a diamond pattern and you will start to see beautiful pin tucks!

how to make pintucks by U Create

Now you are ready to put your pillow cover together!

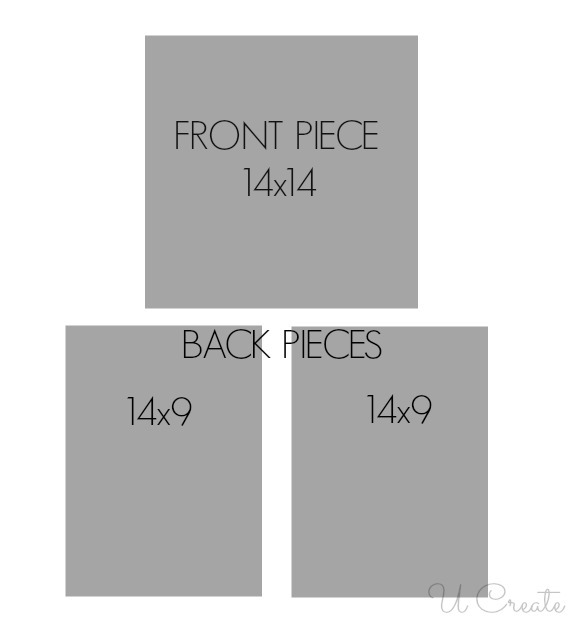
Cut your pintucked piece you just worked on size 14×14 inches for your front piece and two back pieces each 14×9 inches.

dimensions for a 12x12 pillow cover

how to make a simple throw pillow cover

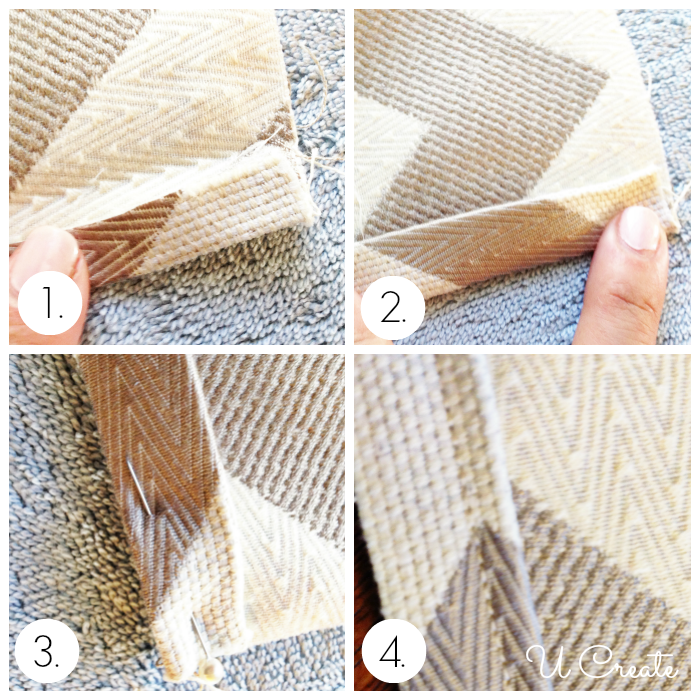
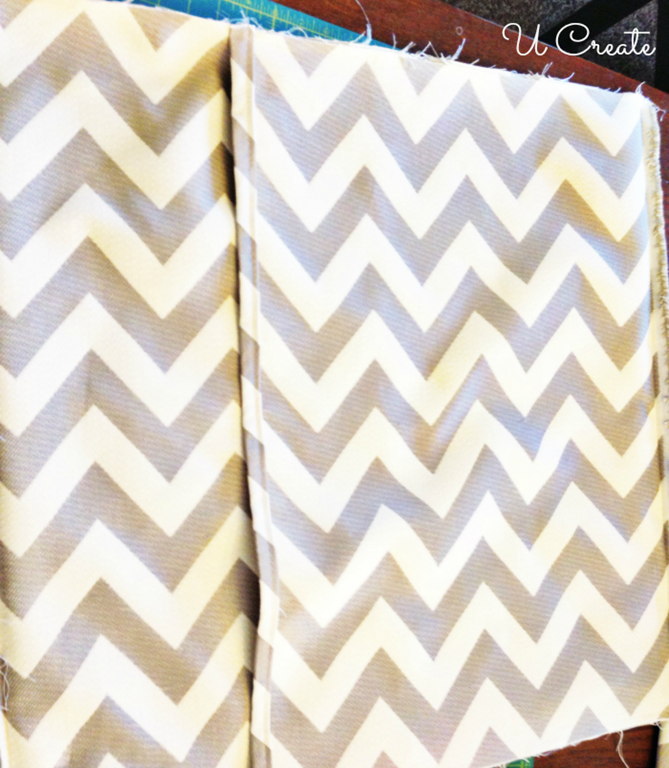
1. Grab one of the back pieces and fold & iron 1/2 inch down on one of the 28” sides.

2. Fold over another 1/2 inch and iron down.
3. Pin your iron fold to make it secure.
4. Sew a 1/4” inseam down the side.

Repeat steps 1-4 on the other back piece.

DIY-Throw-Pillow

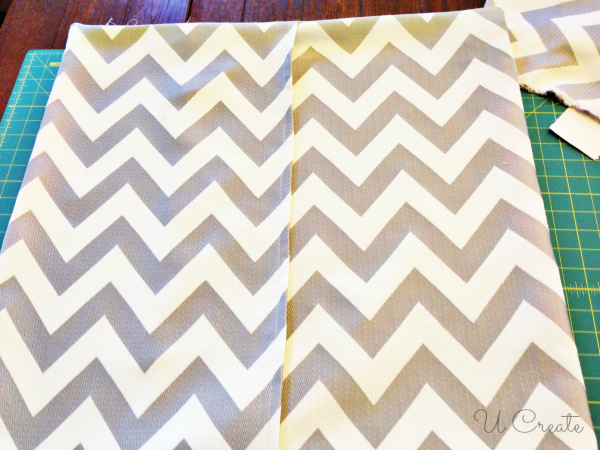
Next you will lay your back piece right side or also called patterned side facing up on your table.

Then you will lay your back pieces right side facing down like the picture above.

Pin all 4 outer sides and sew a 1/4” inseam on all 4 outer sides.

Throw Pillow Cover Tutorial

Flip right side out and stuff with your pillow and you’re finished!!

How to make a pintucked throw pillow

I love throw pillows and if you’re interested in more tutorials check out my European Sham Tutorial and my Reversible Throw Pillow Tutorial!

Post By…
Kari's Bio

You may also like these

Free Layer Cake Quilt TutorialsFree Layer Cake Quilt PatternsThe Homemade Play Dough Guide by U Create - create your very own version using this base recipe! Tons of tips and tricks, too!The Homemade Play Dough GuideDIY Summer Games - use the items you have around your house!! Fun for all ages!!5 Simple DIY Summer GamesEuropean Pillow Sham TutorialFree Printable: Easter M & M Poem Tags
Previous Post: Pumpkin Vase Tutorial
Next Post: Brown Bag Fall Scavenger Hunt by Cami at Tidbits

Comments

  1. Katie @ Made to be a Momma. says

    September 6, 2013 at 2:18 AM

    Love this pillow! Pinning!

    reply to this comment >
  2. Kari Sweeten says

    September 6, 2013 at 5:36 AM

    Thank you so much Katie!

    reply to this comment >
  3. Sarah Kenny says

    September 6, 2013 at 7:11 PM

    Great job. Love it!
    Sarah

    reply to this comment >
  4. BJewelryBox says

    September 6, 2013 at 10:08 PM

    Awesome tut! Thank you for sharing! 🙂

    reply to this comment >

Leave a Comment Cancel reply

Your email address will not be published. Required fields are marked *

Popular Posts

DIY Quilt Block Coasters

DIY Quilt Block Coasters

DIY Mason Jar Vase

DIY Mother’s Day Mason Jars

All About Mother and Grandma Free Printable

Free Stitchable Bunny Pattern at U Create - great project for the kids!

Free Stitchable Easter Bunny

Easter Perler Bead Patterns for Kids - great for stitching patterns, too!

Free Easter Perler Bead Patterns

18 Ways to Decorate Easter Eggs

  • pinterest
  • facebook
  • instagram
  • twitter
  • rss
 
Privacy Policy
Back to Top

Copyright © 2022 U-Create • All Rights Reserved • Site Design by Emily White Designs