hello all you U-CREATE-ers!
i’m Vanessa from V and Co.
Kari graciously asked me to guest blog today.
and i graciously said:
“um, are you sure? cause you have like a lot of followers and you are kind of cool…you might want to keep that going. but whatever, it’s your blog, and for the day it’s mine so take a seat and watch your pretty hard work go down the drain.”
she said:
“bring it on.”
so here i am “bringing it on” with a tutorial worthy for U-create.
shall we begin?
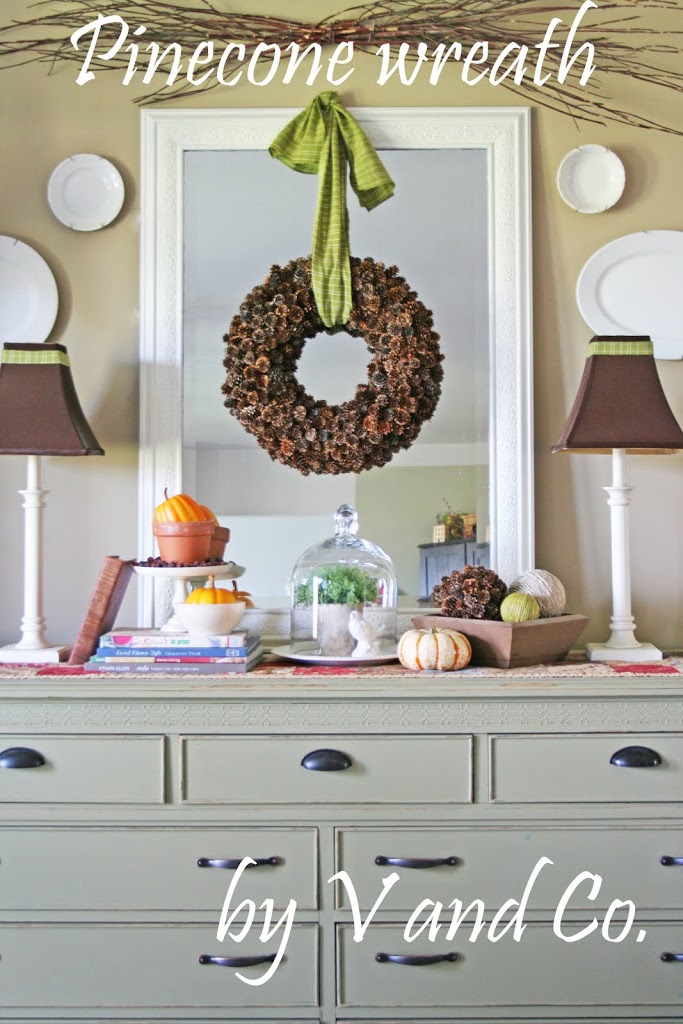
Pinecone Wreath Tutorial
beautify your home for the fall season with this super cheap and easy wreath, that looks like a million bucks!
what you will need:

a styrofoam wreath.
i bought two sizes.
for this wreath i used the larger of the two. but either one will work. (if your pine cones are big you will want to definitely use a bigger wreath)
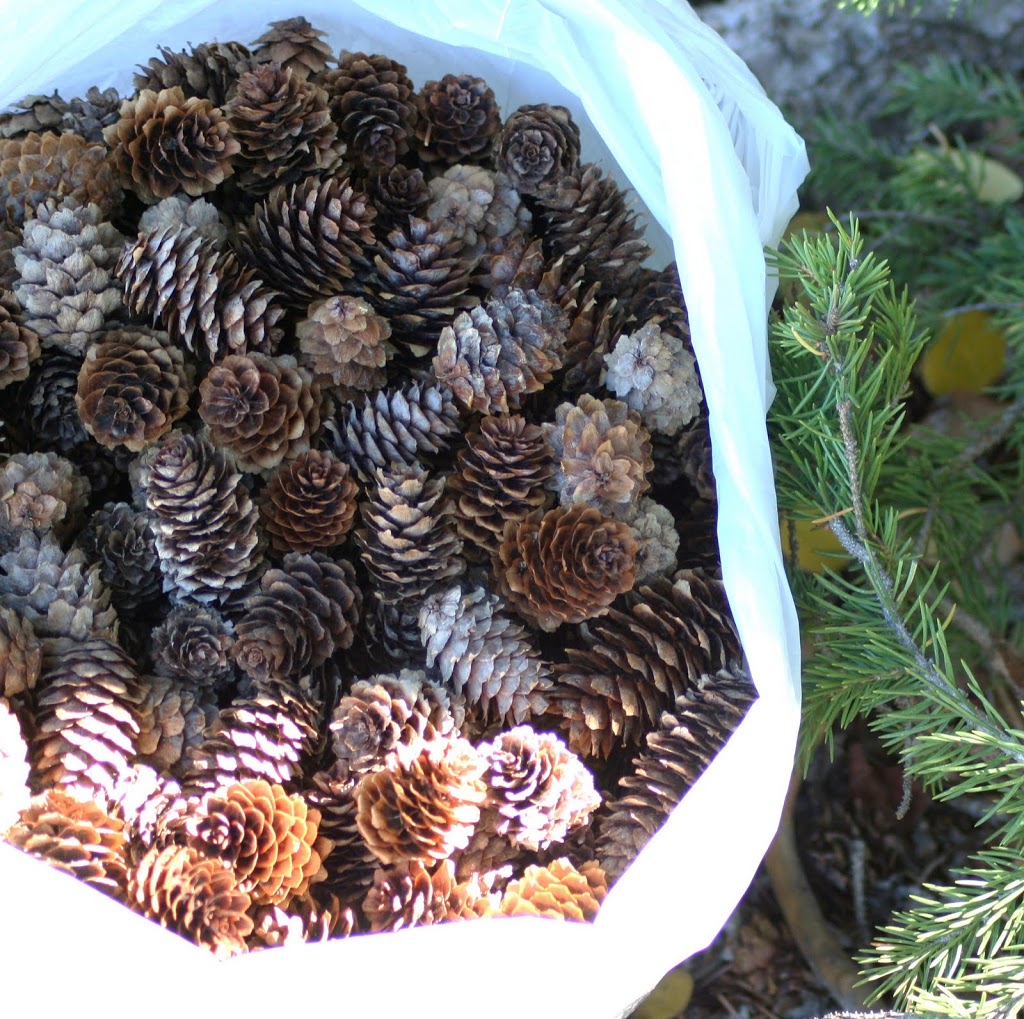 a bag full of small pine cones (we, as a family were in the woods. while my husband cut fire wood, the kids and i gathered these pine cones off the ground.)
 brown spray paint, lightly spray paint your styrofoam wreath. you don’t need to douse it, you just want to lightly cover it so no white shows through.
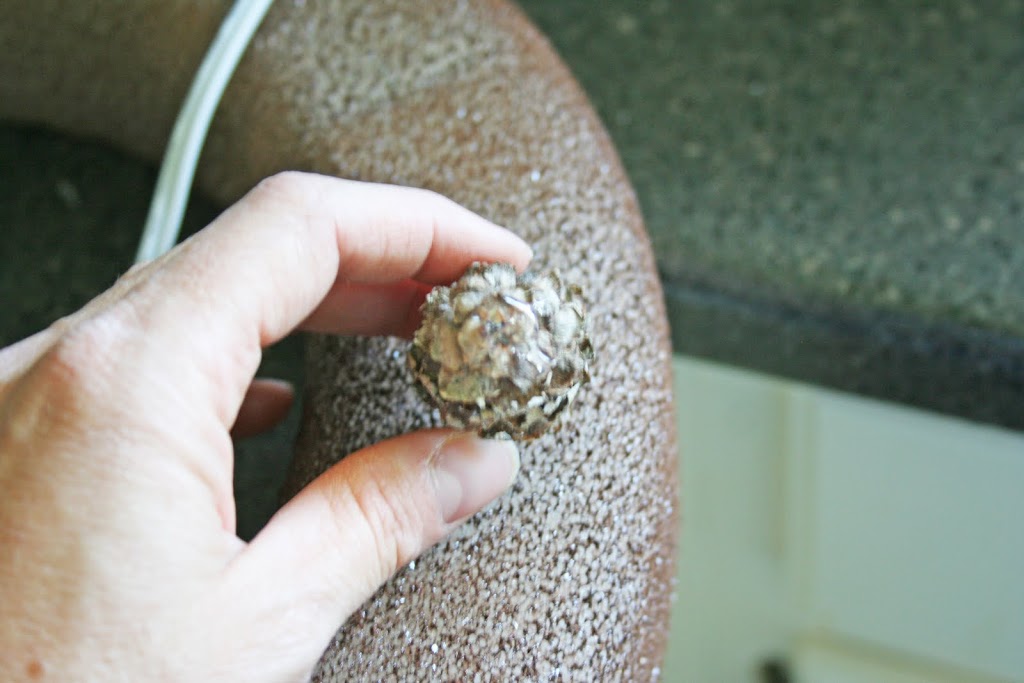 now you are going to grab your pine cone and dab a little bit of hot glue to the bottom of it.
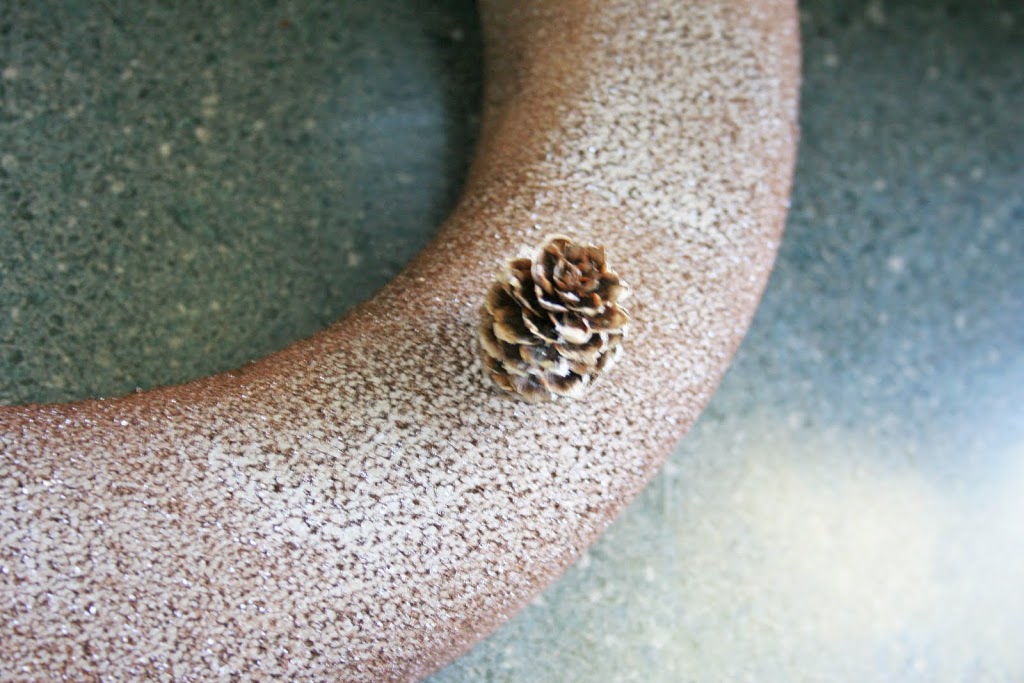 place in the middle of your styrofoam wreath.
okay we are off to a good start!
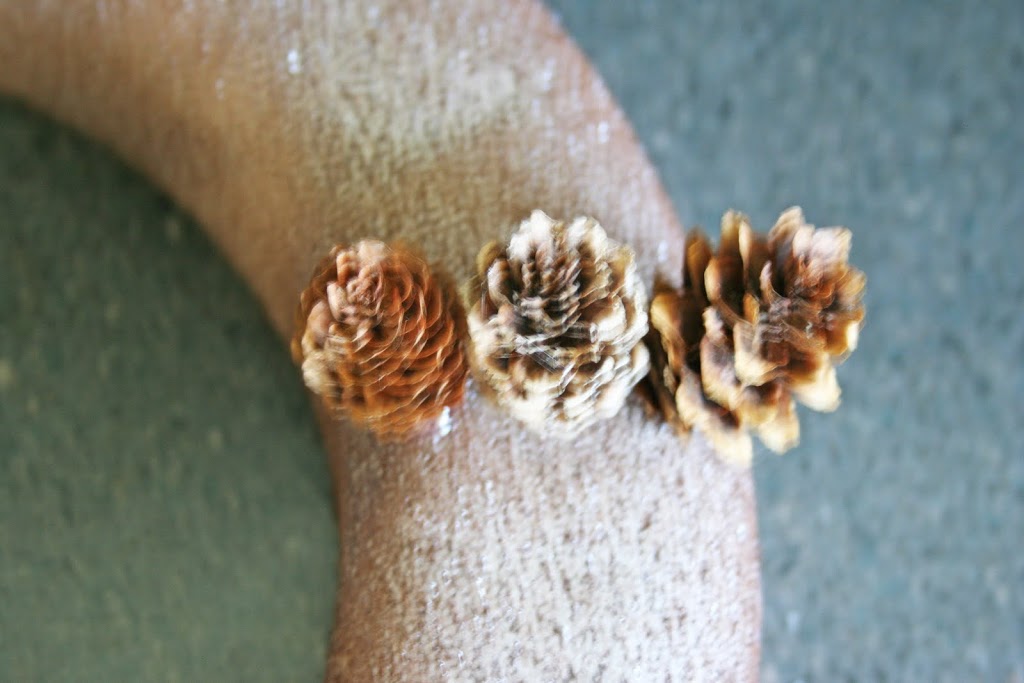 line up how ever many pine cones across the top of your wreath, my magic # was three.
(sorry about the blur)
 okay here’s an important instruction.
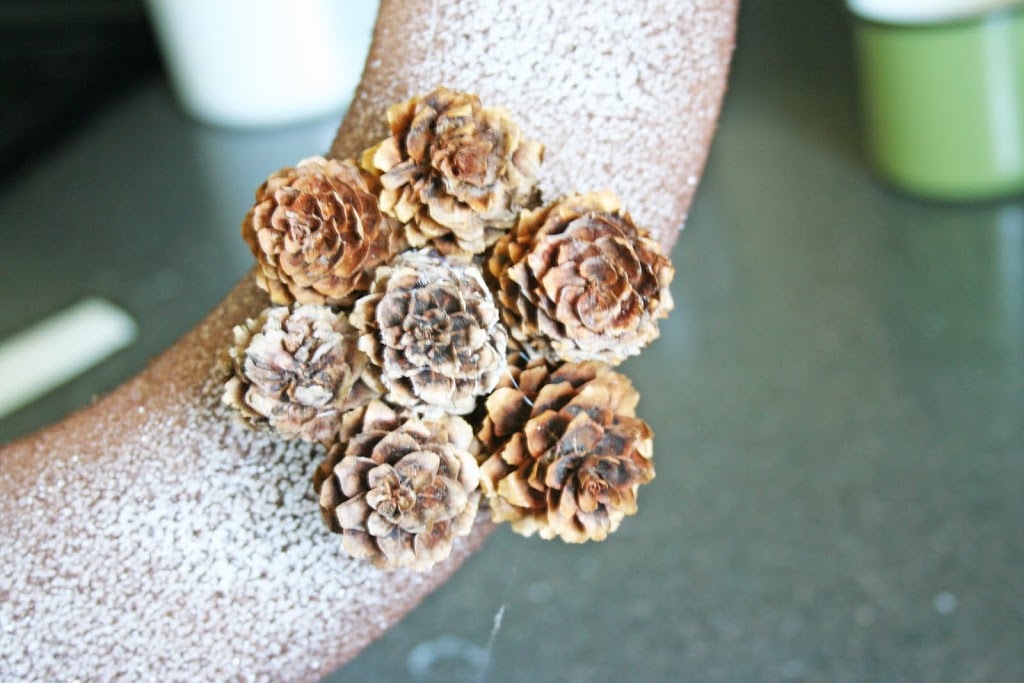
notice how i nestled the next row up in between the first row?
this is going to help cover up most of your wreath.
*let me mention that it would be good to add a little extra glue in between the pine cones so that they connect and stay together and make the wreath that much sturdier.
 see where i’m going with this?
basically this is the recipe for the whole wreath.

as you keep adding pine cones you are going to come to the edge of your wreath. i made sure that there wasn’t any corner that was bare. that meant going on the corner with some of my pine cones.
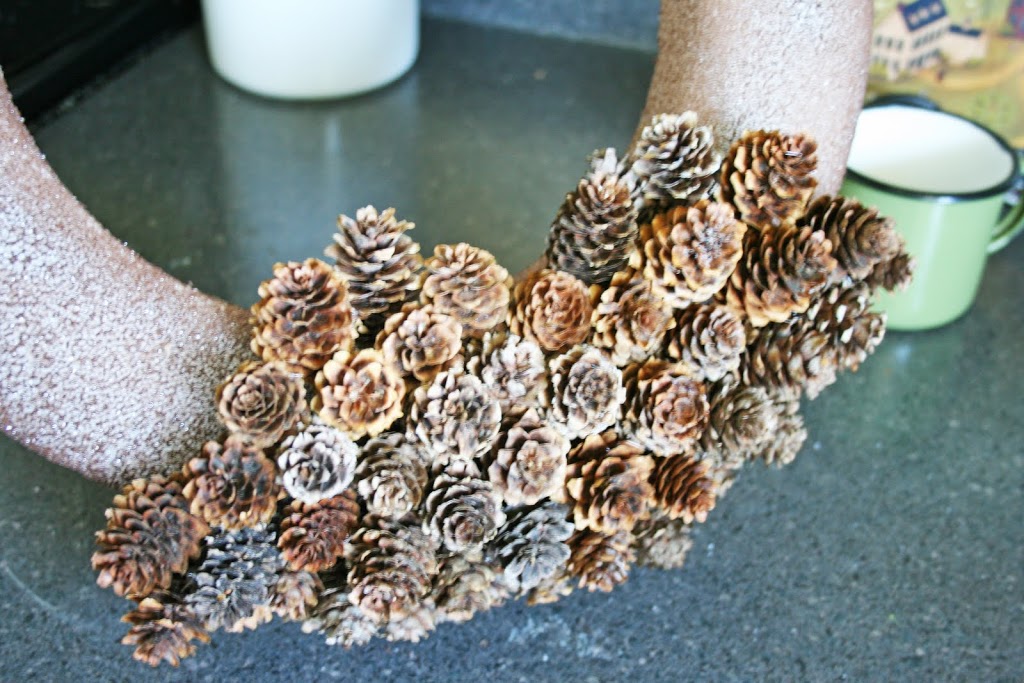 as you continue the process you will get a hint of what the final product is going to look like.
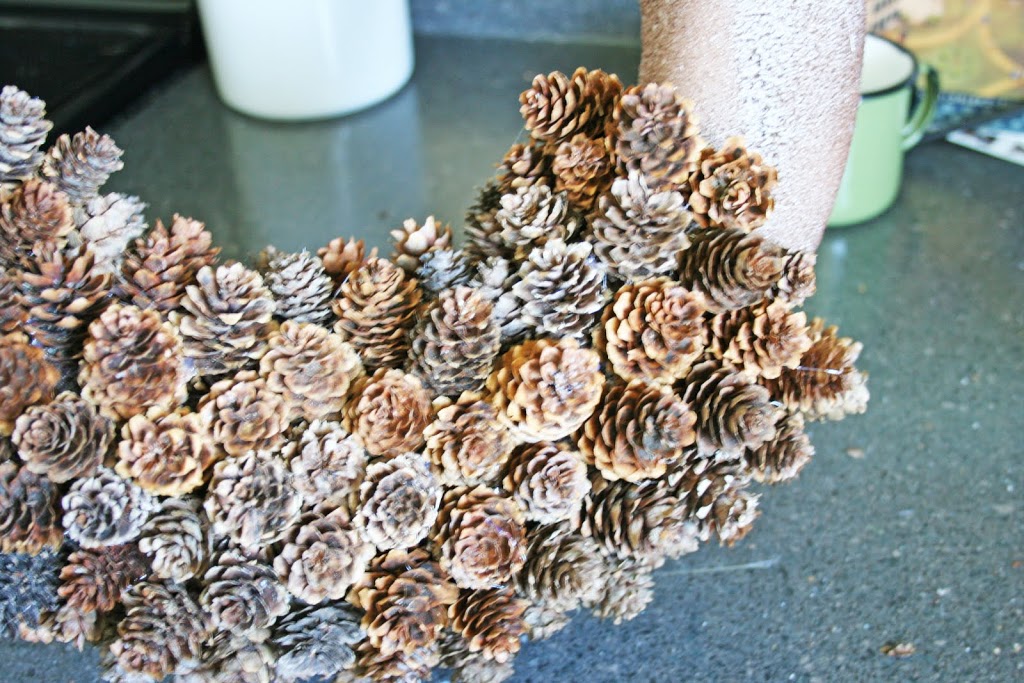 oh are you tired? keep going you’re still not done.
see this is going to take a little while but…
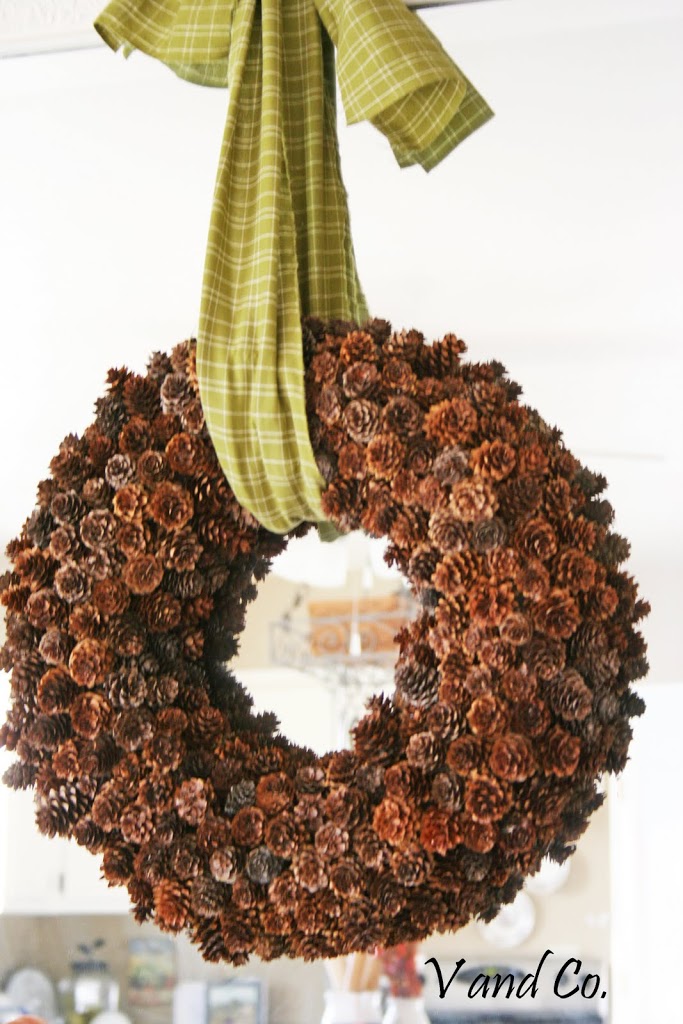
it’s so worth it when you are done! look how fantabulous it looks!
to get a feel as to how much one of these would cost i went online and i found a range of them from $59 to $110.
um… mine cost $4.25 plus spray paint i had and an afternoon with my kids picking up pine cones. yeah, i think i like my price better.
edited: because there was a question about the “ribbon” i will mention here that it was two strips of fabric(that way it makes it long enough to hang on a mirror) cut to 5 1/2 inches in width. i tied them in a knot and hid the knot behind the wreath and made a big loose knot on top of a tight knot so you can hang it off a nail either behind the mirror or right on top of the mirror. 🙂
well, thank you kari and u-create readers for letting me take a little bit of your time to give you a little taste of what you would get on my blog. make sure you check out the tutorials! thank you kari for entrusting me with your blog for the day! 😉
hope to see you soon! –V


That is a gorgeous wreath! Love it love it love it!
Seriously beautiful!!! Those are my living room colors, this is happening!
GREAT guest blog! Gorgeous wreath! One Question – did you use fabric for your ‘ribbon’? I follow both your blog and this one …so I was thrilled to see ya here.
this is beautiful!
That is wonderful!!! So elegant!
Very cool! This looks like something I could do.
Great project! Beautiful job! I’ve been wanting to make one of these for a while now. It will be great in our log home.
oh vanessa.
SUPER cute. as always.
♥
congrats on being a guest blogger!!!
All the guest bloggers rock! This is NO Letdown! Brilliant and beautiful!
This is perfect for the front door exterior or any mirror in your home. Thank you for sharing your ideas.
So pretty! Love it.
Gorgeous!
Thank you V & Co
and
Thank you Kari.
;o)
Carolyn
I will be making this as soon as I find a plethora of little pine cones
Absolutely beautiful! Now I just gotta put some black clothes on tonight and sneak into the neighbors yard with the pinecone tree…
yes the “ribbon” was fabric cut to the width of 5 and 1/2 inches.
i’ll add it to the instructions! thanks! 😉 -v
I like this so much more than the fall wreath I have right now. I think I’ll take everything off of it and to this.
Its beautiful! I made a pinecone tree a while back, and yes, it takes forever!
So pretty, and so easy! I can’t wait to try it myself. Thanks!
Absolutely fantabulous! I need to go spend some quality time with the kiddos and collect some pine cones!
I want to try this, but I don’t think I’ll find that many pine cones around here. I love V and Co. Good choice for a guest blogger!
Love it, V!
What a fabulous idea. This brings back memories of my Mom making these when I was a kid from the pine cones we’d pick up and gift to her. Thanks for the tutorial and I’ve enjoyed my visit here today.
Blessings and thanks
T
So fun!! Vanessa is awesome! I love her blog and love this tutorial. Thanks for hosting her. Your blog is one of my favorites. I am always getting great ideas here. Thanks!
Beautiful wreath!
wow, I love that! now i just need to got get some pine cones!
Very Beautiful. Wonder if I can find that many pinecones!
oh my goodness! GORGEOUS!!!!!!
i need to start collecting my pine cones!! thanks for sharinig this!!
an another suggestion is to make pine
cone balls, if you blow up the picture you will see that i made one just to make it tie all together it’s on the right hand side with my twine balls that i made (and have a tutorial for as well)
Oh memories! My mom made these all the time when I was growing one.
One tip…store wreath in a cool location. The first year my mom stored hers in our attic. During the hot summer months the hot glue warmed up again and all the pine cones fell off. So she re-glued it again the next fall/winter. The same principal applies if you are hanging this in direct sunlight.
Thanks for sharing!
Gorgeous. I never would have thought to do this. I am going to start collecting pine cones now!
I love it! I was just in Colorado collecting pine cones and wondering what I was going to do with them! Thank you thank you!
I LOVE this! Totally want to try it. Alas…I’m going to have to figure out where I can hunt down some pine cones.
Good job! So stink’in cute! I have a mini pinecone tree in my yard.Guess I have no excuses not to make one! lol Thanks for sharing!
Natalie,
Love this. I am so glad that I was directed to this blog by Vand Co on twitter. How have I not seen this blog??? YAY!
Love it when I can catch two blogs I follow with one!!! My little ones and I have been hiking on the weekends~ pickin’ up random pinecones…now, we have a good excuse to gather all that we find!!
Mahalo Vanessa ~ twice over!!
Vanessa,
You are so brilliantly creative!! I’m sure everyone who sees this will want to make it because it is so beautiful and PERFECT for Fall. I’m sooo excited to have you on Ucreate!!
Thank you again!
Suggestion for those of you who don’t think you can find enough pinecones:
Try a mini version displaying it against a smaller mirror. It would be GORGEOUS, too!
this is way cool. i saw another pinecone wreath tutorial a week or so ago, but this one looks much classier. thanks! 🙂
How cute!!!
Awesome Tutorial V! As usual you rock! And I’m ecstatic to find a new blog! love U create! Why didn’t I know about this before? Simply Awesome!
Vanessa is one of my favorite bloggers! I love this wreath! Now I just need to head to the mountains to gather pinecones.
Gorgeous wreath!! Thanks for the awesome tutorial!!
Lisa B.
okay. I’m doing this.
I have to make this and fast before it starts snowing (hello this is montana lol)
Thats so cute! Of course, all the ones I find are large!
Phenomenal job! I love this wreath. Thank you for showing how to make one. Great blog you have here! Liz =)
Nice project……one I can do with my granddaughters. Thanks.
we only have big pinecones around here. I love how this turned out! Way to go V.!
Oooh that might be just the thing for my front doors! Great tute! Thanks!
I just love this! I am going to go pinecone hunting with my daughter, she will love that!
Wow! Very beautiful! I took my boys to look for pinecones today…it was lots of fun! Thanks for the great idea!!!
This is such a fantastic idea for this time of year and to do as a family craft. Im going to have to try it out! Thanks for the idea!
-Julia DeLeeuw
LOVE IT!
I love it. Someone gave me one years ago that she made. It’s still hanging in our “cedar room”. Funny thing, she said I almost didn’t give it to you because you make things and sell them (years ago I did craft shows). She didn’t realize that all crafters prize things made with the hand! (smile)
sweetjeanette.blogspot.com
I LOVE this!
I LOVE this wreath! How many pine cones would you say you used for the big wreath? My friend and I are both going to make one but we don’t know how many we need to collect. Thanks!!
Thanks so much for taking the time to share this! I am so relieved to find a craft blog that will give me gorgeous decorations at a fraction of the cost. you are very creative and I’m heading out to the lake to get some pine cones!
I uploaded your wonderful post on my blog!
antonella
where can you buy small pinecones, all the ones in our area are large? I love it!
I will try to make one this weekend. Can’t wait. It is beautiful and matches with my living room colors!!!!
I made this wreath and put it up for the holidays-it looked so beautiful. I added a little greenery and red berries from a bush that I had in my front yard and it gave it a little pop of color. Thanks so much for the great tutorial!
This is stunning!!! I absolutely love it.
Love this wreath and love your tablescape. Just lovely 🙂
Super cute!! Thanks for sharing! 🙂
Hi there.. I just wanted to let you know that I think the pine cone wreath is stunning and I’ve featured it on my blog in a pine cone decor round-up. Hope it’s okay!! You can see it here:
http://crafteronabudget.blogspot.com/2012/11/7-easy-pine-cone-crafts-for-holidays.html
Thank you so much for sharing this.. there is nothing like some pretty pine cones for holiday and wintertime decorating 🙂
This is amazing! I love everything about this wreath! Makes me wish I lived closer to Pine trees (I live in AZ). I featured it today on my blog! So many other girls are going to AWE when they see your cute wreath! Thanks for sharing such a great tutorial!
XOXO
Tara
Salt and Pepper Moms