U Create

It's a good day to create!

  • pinterest
  • facebook
  • instagram
  • twitter
  • rss
  • crafts
    • crochet/knit
    • jewelry
    • kids crafts
    • paper crafts
    • sewing
      • bags
      • boys-clothing
      • girls-clothing
      • women-clothing
      • pillows
      • quilts
  • home decor
    • bathroom
    • build it
    • frames
    • kids
    • kitchen
    • office
  • recipes
    • desserts
    • dinner
    • snacks
    • soups
  • parties
    • baby shower
    • birthday
    • games
    • gift wrapping
    • party decor
    • party favors
  • printables
  • holidays
    • Christmas
    • Easter
    • Father’s Day
    • Halloween
    • July 4th
    • Mother’s Day
    • New Years
    • St. Patrick’s Day
    • Thanksgiving
    • Valentine’s Day
  • gifts
    • baby
    • electronics
    • graduation
    • teacher gifts
  • About
  • Be My Guest
  • Advertise
  • Contact
  • pinterest
  • facebook
  • instagram
  • twitter
  • rss

15 Oct

OLFA Cutting Mat & Rotary Costume

This month for the Michaels Makers Challenge we were asked to create a Halloween costume and share the tutorial with you!
I was trying to think of a “crafters themed” costume and decided to walk down the aisles at Michaels until something popped into my head. Well…I went down an aisle with some school supplies and found a large green display board.
It clicked. I knew I wanted to make a costume to look like two of the most-used items in any craft room (or at least any crafter that sews) and knew I had to make an Olfa Cutting Mat and Rotary Cutter costume!
SUPPLIES

  • large cardboard display board (mine was already green)
  • Yellow Sharpie paint pen
  • Black and gray Felt
  • Yellow t-shirt
  • String or ribbon
  • Ruler
  • Glue gun or spray adhesive
DIRECTIONS
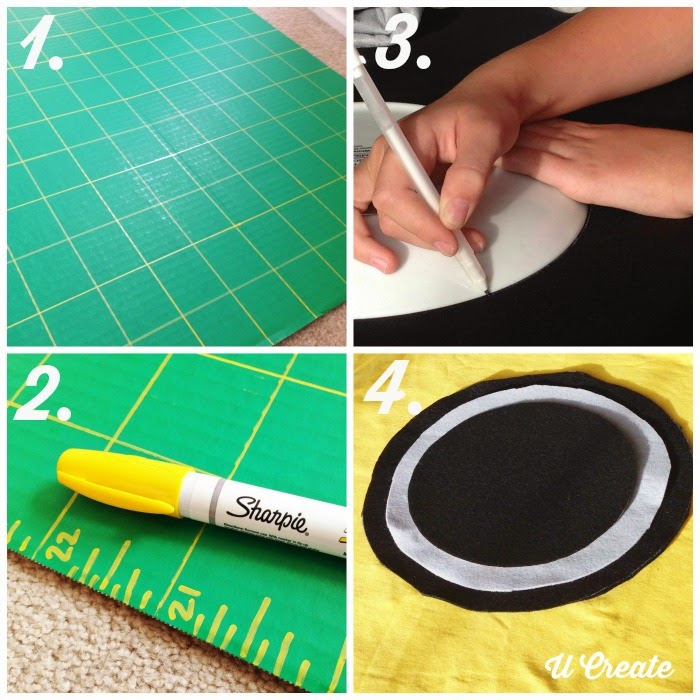
1. Draw horizontal and vertical lines on display board with yellow Sharpie.
2. Draw numbers and ruler markings, too.
3. Trace out the cutting blade on black and gray circles (I used three different sized plates).
4. Cut felt and adhere to yellow t-shirt using glue gun or spray adhesive.
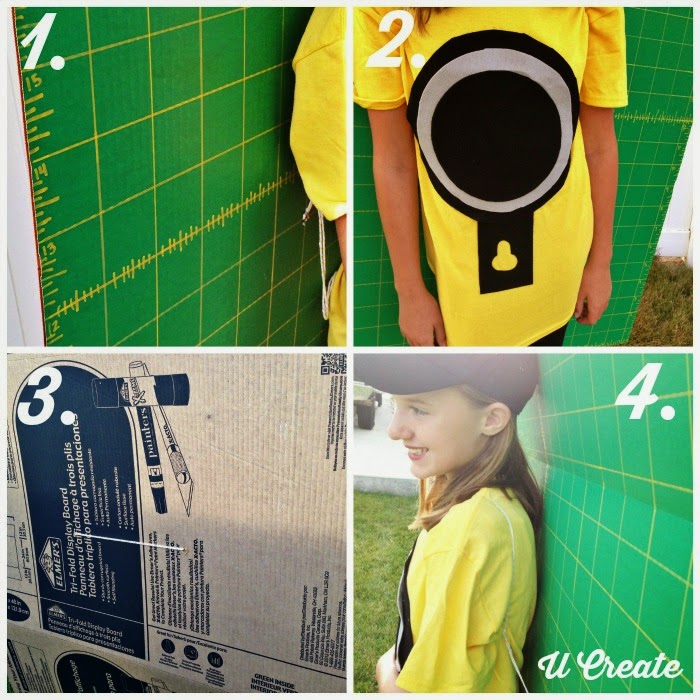
1-2. Measure the middle of the mat to your body to see where to cut holes.
3. Cut two holes in the display board and thread with ribbon or string long enough to tie to shoulders or waist.
4. Tie around shoulders or waist to secure the mat.
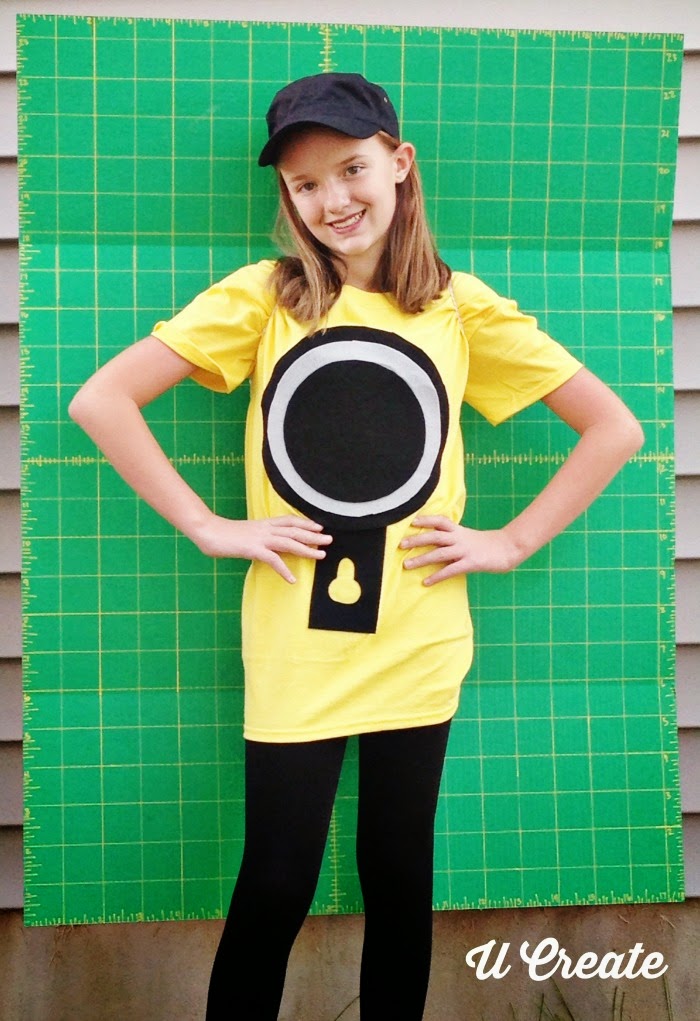
You’re finished with your “Crafty” costume!!
 
POST BY:

An InLinkz Link-up

<!– end InLinkz script —>

You may also like these

DIY Mini Stacked PotsRock Pet Printables: Zoo EditionDIY Halloween Costumes for BoysDIY Spring Floral Arrangements by U CreateDIY Spring Floral ArrangementsDIY Vinyl Polka Dot Wall and pintucked duvet tutorialDIY Vinyl Polka Dot Wall (Tween Girls Room Makeover)
Previous Post: Buy It or D.I.Y. It? Floor Cushions
Next Post: Cheat Sheets for the Crocheter

Comments

  1. Eat. Sleep. Make. says

    October 15, 2014 at 11:12 AM

    Ha! So creative. I would’ve never thought to make a rotary cutter costume. What a fun idea!

    reply to this comment >
    • Kari Sweeten says

      October 15, 2014 at 4:37 PM

      Thanks so much! It was so much fun to make, too!

      reply to this comment >
  2. Becky Marie says

    October 15, 2014 at 3:39 PM

    Coolest costume EVER!!!!

    reply to this comment >
    • Kari Sweeten says

      October 15, 2014 at 4:37 PM

      Thanks sis!!!!

      reply to this comment >

Leave a Comment Cancel reply

Your email address will not be published. Required fields are marked *

Popular Posts

How to Make a Rubiks Cube Valentine Box

Classroom Valentine Box: Rubik’s Cube

Personalized Hershey Kisses for Valentine's Day - Reasons Why I Love You

Valentine Gift – Reasons Why I Love You

Heart Pillow Tutorial by Noodlehead

Red Heart Pillow Tutorial

Free Valentine Quilt Patterns

How to organize or let go of your UFO's (unfinished craft objects)!

How to Organize your UFO’s

New Year's Eve Match Game using Hershey Kisses

New Year’s Eve Match Game

  • pinterest
  • facebook
  • instagram
  • twitter
  • rss
Back to Top

Copyright © 2019 U-Create • All Rights Reserved • Site Design by Emily White Designs