
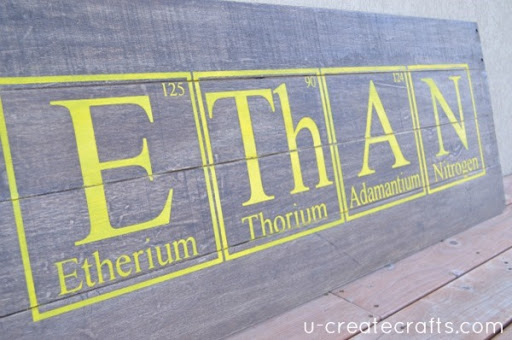
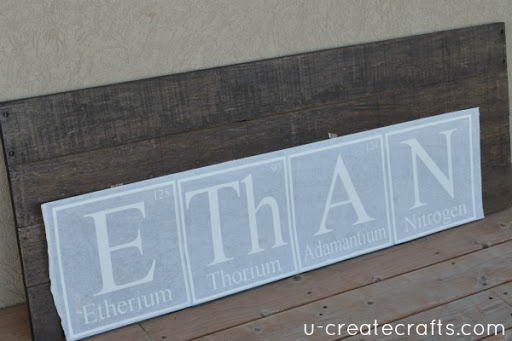
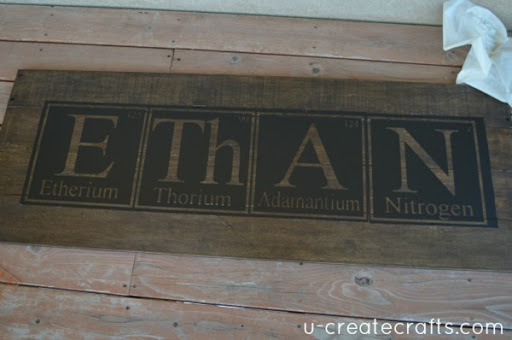
I love science and I married a man who loves science. That being said, it should come as no surprise that my children love all things science; especially my son! He was so excited about the idea of making his name using the Periodic Table. This Personalized Periodic Elements Pallet Project is such an easy project; we had a great time creating it!
The idea for this pallet project came very accidentally:
Ethan and I were Googling the Periodic Table of Elements to find a certain spelling when I came across the coolest website: LMNTOLOGY.com. You can type in any word or name and this site will make the word using the elements. AWESOME! Some letters do not have an element {E,J, X, Z, etc.} so Lmntology.com created a few fictional elements (they are in purple). I was ok with a fictional element in Ethan’s name.

Anyway, while Ethan and I were playing with LMNTOLOGY.com, it dawned on me that I could totally do this for my Sister Wars Pallet Project! I started on it right away and had it done by the end of the day.
 I took four pieces of the pallet wood from an unused pallet and sanded them down.
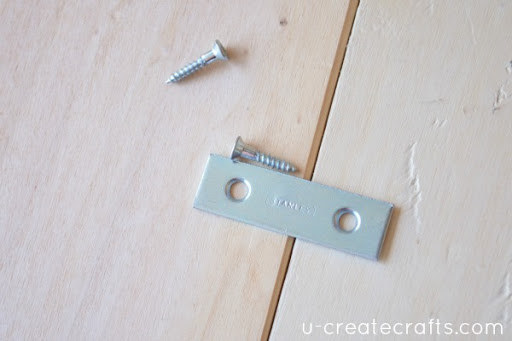 I snagged 12 of metal brackets with screws at the hardware store. This is how I connected the wood.
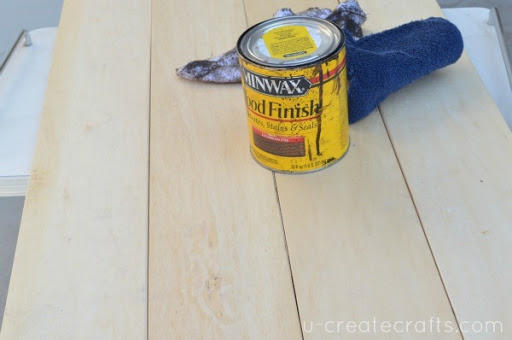 Using some leftover Minwax Wood Finish from my table makeover a couple years ago, I stained the wood really dark.
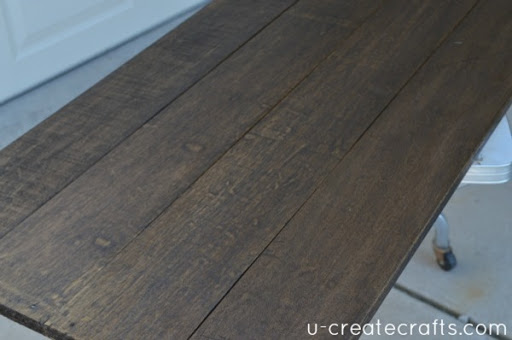 Once I had the wood the color I wanted, I left it in the sun and went inside to create the lettering.
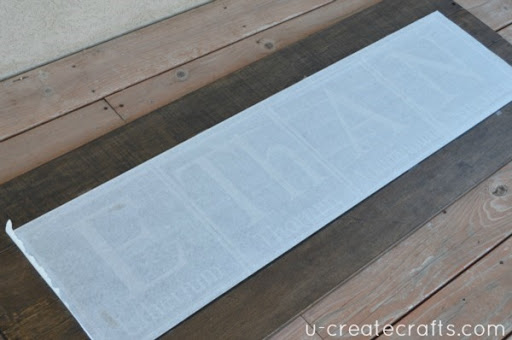
 Whenever I need a custom stencil I always use vinyl! I created the letters using the program that comes with my electronic craft cutter. I just used a box shape and create the element inside the box; the font is Times New Roman. The finished elements are 12×12 inches. After I cut the vinyl, I took out the negative. Basically, I removed whatever I wanted yellow.
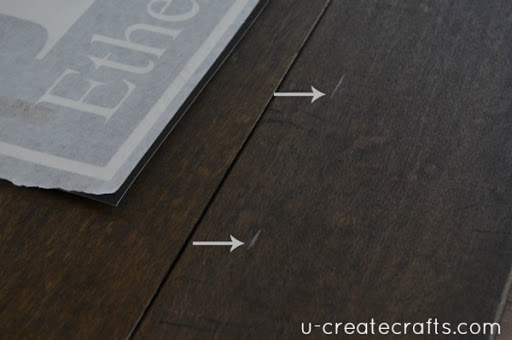 Using chalk and a ruler, I made little lines where I needed to line up the vinyl in order for it to be perfectly straight.
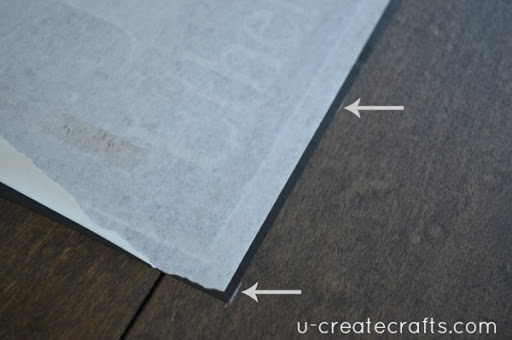
 I laid the vinyl on the chalk lines and removed the transfer tape.
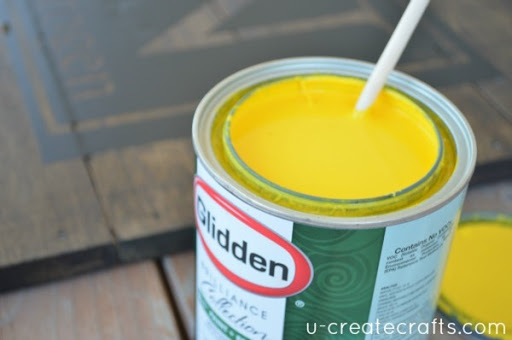
 It looks pretty cool looking using only the vinyl, but I wanted to be bold and use a bright punch of color. Bring on the yellow!
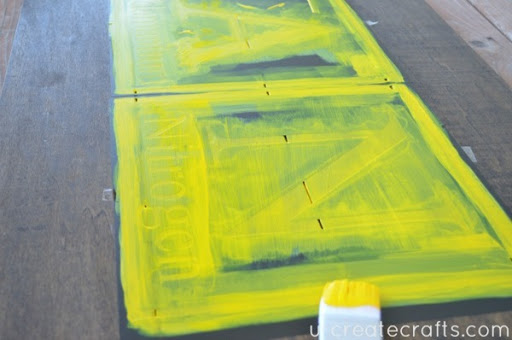 I painted a thick layer of the yellow paint over the vinyl stencil. Before it dried completely, I took all the vinyl off. At this point I thought I had a serious craft fail on my hands.
 I expected nice, clean straight lines, but the paint kind of spread through the slats of the wood. So, I set the wood up and stepped back to look at it and it didn’t look too bad.
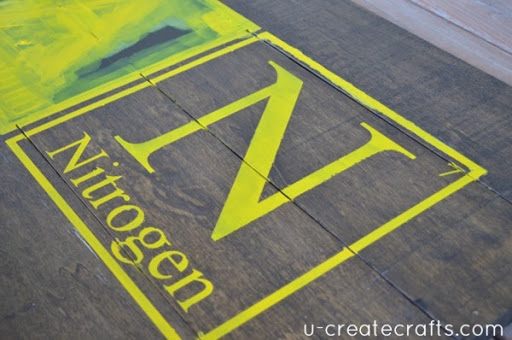
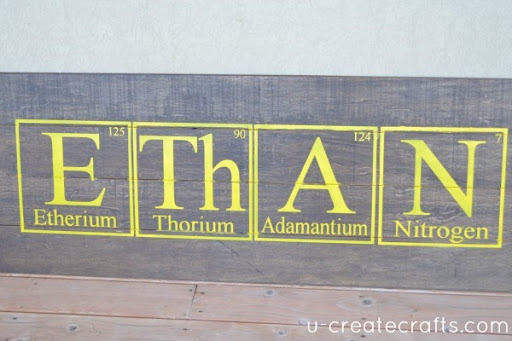 With some fine grit sandpaper, I roughed up the yellow a bit to create a more weathered look. This made the “imperfections” in the paint look less imperfect and more antique-y. The picture above is the sign fresh out of the vinyl. The one below shows the sign after I sanded it down.
I sprayed one coat of satin polyurethane over the entire sign. I attached three heavy duty sawtooth hangers to the back of the finished sign and hung it in Ethan’s room. He totally loves it!

I love that he takes everyone back to his room to show off what his mom made for him…and I also kind of love that I won the first round of Sister Wars! 🙂
OMG i love this great idea!! my son and daughter are total science geeks…i love this thanks for sharing…i see a present coming their way..
YAY! I am so glad you like the idea! I am pretty proud of it too. 🙂
This is fabulous!!! I just spent a 1/2 hour on that website as well (so much fun:). Thank you for this wonderful idea.
You are very welcome!
This is a super cute idea!
Wow this is so cool and such a genius idea, good job. If only I had the time. Maybe in the future.
OH WOW! Do you still have those stencils??? I have a son named Ethan who loves science!! A friend posted this to me on Facebook! I can’t even believe it! I need to do this NOW! LOL!
I pretty much ruined the vinyl stencil when I rip it off the board. Sorry I couldn’t be more helpful. However, I am planning to sell the 12 x 12 letters if there is plenty of interest. I am so glad you like the sign I made my son. Ethan must be a science name. 🙂
OH WOW! Do you still have those stencils??? I have a son named Ethan who loves science!! A friend posted this to me on Facebook! I can’t even believe it! I need to do this NOW! LOL!
I made the stencils out of vinyl so I just tossed them when I was done. Sorry about that. Ethan must be a scientific name. 🙂
So what do you recommend if I don’t have an electronic craft cutter?
Great question! You can use poster board stencils from the craft store. They are awesome because you can reuse them on other projects.
What type of “electronic craft cutter” did you use?
For this particular project I used the Silhouette, but I have also been able to easily replicate it with my Cricut.