If you’re looking for a meaningful way to celebrate Easter, a resurrection garden is such a beautiful project to make at home. It’s simple, symbolic, and lovely enough to display all through Holy Week and Easter Sunday.
This Christ-centered Easter project uses natural materials like moss, stones, twigs, and soil to create a small garden scene that represents the empty tomb. It’s an easy hands-on activity for families, and it’s also a thoughtful way to keep the focus on Jesus during the Easter season.
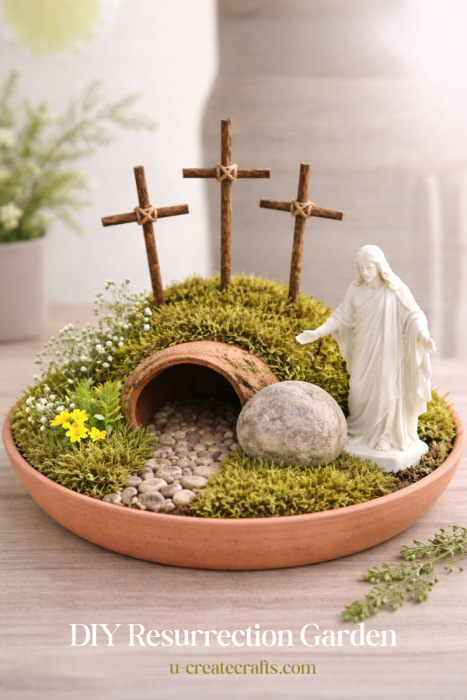
We love projects that are both beautiful and meaningful, and this one is exactly that. Whether you make it on your own, create one with your children, or use it as a centerpiece for your Easter table, a resurrection garden is a sweet reminder of the hope and joy of Easter morning.
What Is a Resurrection Garden?
A resurrection garden is a small Easter display that represents the story of Jesus’ death, burial, and resurrection. Most resurrection gardens include a tomb, a stone rolled away from the opening, and three crosses on a small hill.
It’s such a simple visual, but it carries a powerful message.
This little garden can be used as a family activity, a teaching tool for kids, or a meaningful piece of Easter decor in your home. I especially love that it combines hands-on creating with a reminder of the true meaning of Easter.
Supplies
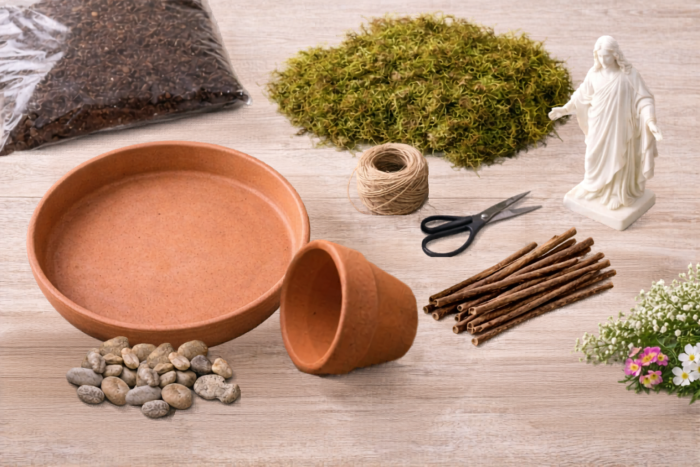
- shallow planter, dish, tray, or terracotta saucer
- potting soil
- moss or sheet moss
- small rocks and pebbles
- one larger round or flat stone
- small clay pot or cup for the tomb
- twigs or small branches for the crosses
- hot glue or twine
- optional mini Christus statue (3 inch)
- optional mini flowers, greenery, or succulents
- optional small flag or scripture tag
You can make your resurrection garden rustic and natural, or style it a little more neatly for a softer spring look!
How to Make a Resurrection Garden
1. Fill your container with soil
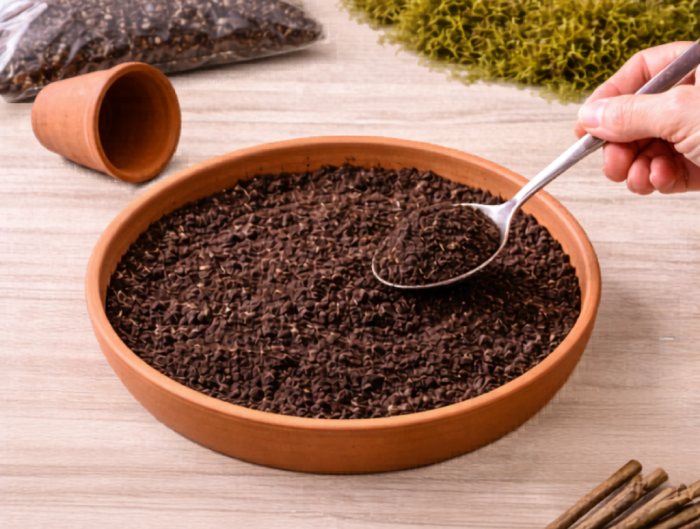
Start by filling your shallow planter or tray with potting soil. Leave a little room at the top so you can add moss, stones, and the tomb without everything spilling over. Use your hands to gently shape the soil so one side is slightly raised to create a hill.
2. Create the tomb

To make the tomb, place a small clay pot on its side against the raised area of soil. You can partially tuck it into the dirt so it looks nestled into the hill. If you don’t have a mini pot, you can also create a small cave-like tomb using stones arranged in a mound shape.
3. Cover the soil with moss
Add moss around the garden to cover the soil and create a soft, natural base. Tuck pieces in around the tomb and across the top of the hill. The moss adds so much texture and makes the whole display feel finished.
4. Make the crosses
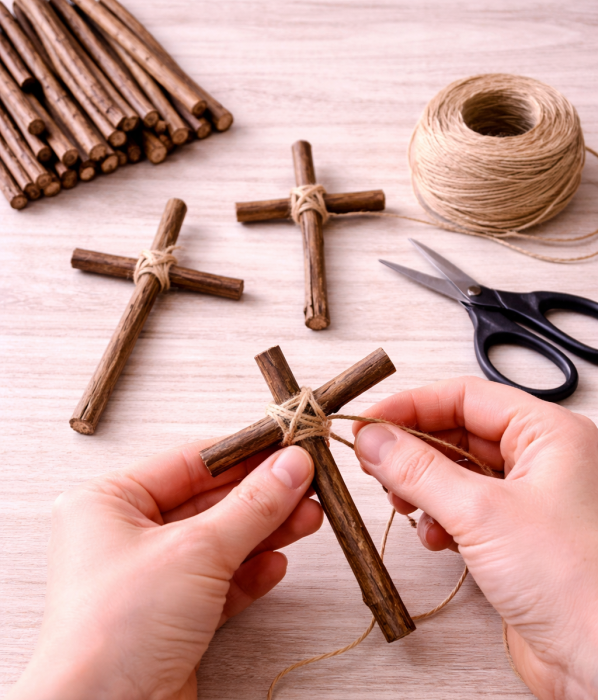
Gather three small twigs and cut them to size. Use hot glue or twine to attach the cross pieces together. Press the finished crosses into the soil on top of the hill behind the tomb. The crosses are such an important visual reminder of the Easter story, and they also add height and balance to the garden.
5. Add pebbles, stone, and finishing touches

Use small pebbles to create a path leading to the tomb, or scatter them around the base for texture. If you’d like, you can also add tiny flowers, greenery, or a small flag with a message like “He Is Risen.” Once everything is in place, gently pat down the moss and soil and adjust the stones until the garden looks complete.
The Meaning Behind Each Part of the Resurrection Garden
One of the reasons I love this Easter project so much is that every part of it points back to the story of Jesus.
- The tomb reminds us where Jesus was laid.
- The stone rolled away points to the miracle of the resurrection.
- The three crosses represent Calvary and the sacrifice Jesus made.
- The garden reflects life, hope, and renewal.
- The greenery and flowers remind us of new life in Christ.
You can place it in the center of your table, set it on a shelf, or use it as part of your Easter decor during Holy Week. If you have children, let them help add the moss, stones, and flowers while you talk about what each part means.
A beautiful verse to include with this project is Matthew 28:6:
“He is not here; for he is risen, as he said.”
You could write this verse on a small tag, tuck it into the garden, or simply read it aloud together when your project is finished.
Another meaningful idea is to build the garden earlier in the week and then move the stone away from the tomb on Easter morning. That small act can be such a special visual reminder that Jesus is risen. You could also read the Easter story together from scripture while you create the garden, or use it as a starting point for a simple family devotional.
A resurrection garden is easy to make, lovely to display, and full of meaning. I hope this inspires you to create one with your family this Easter season. If you make one, I’d love to hear how you styled it and who helped you create it.
HAPPY CREATING!



Leave a Comment