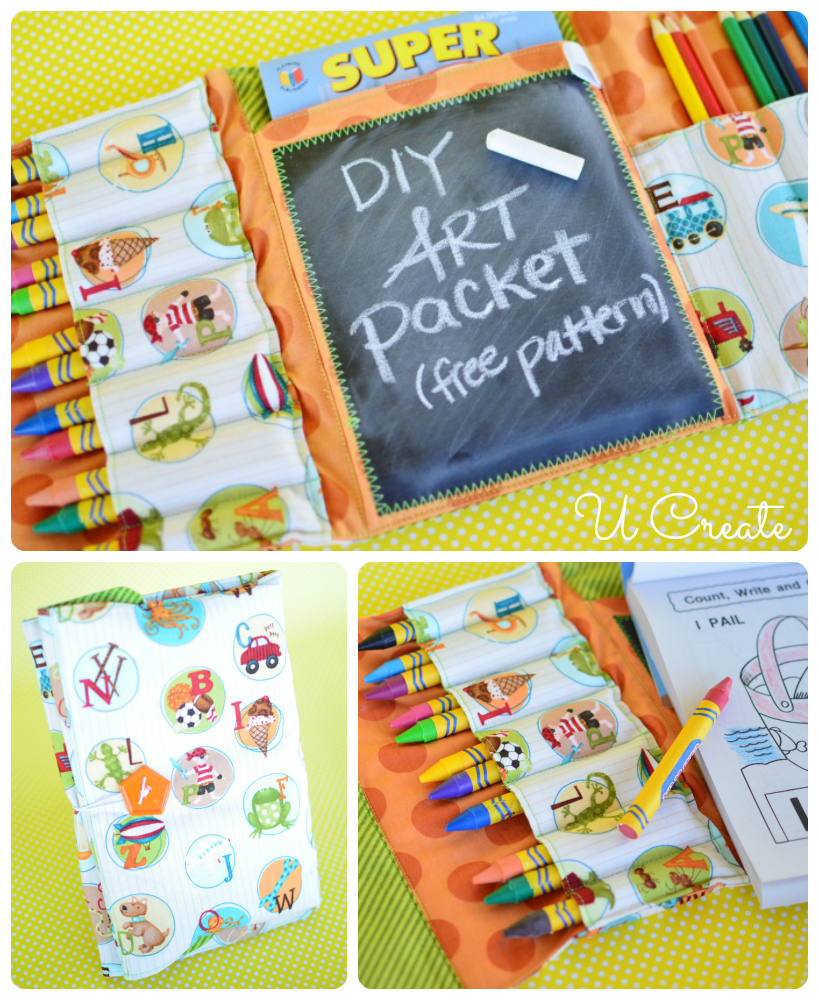
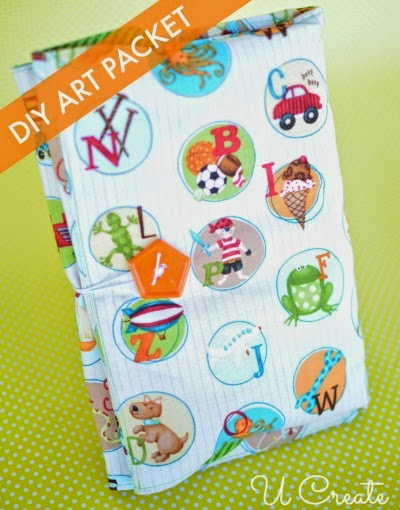
A couple of years ago, I made a Quiet Art Packet for my kids and posted the tutorial on U Create. However, something happened and the entire tutorial (pictures and pattern) disappeared. There have been so many people asking for the pattern and tutorial that I decided to create another one…new and improved with a free downloadable pattern!
My kids love their art packets! I love that the crayons, colored pencil and notebook are all in one place. I also love that, unlike some quiet books, it folds up pretty flat and it’s easy to tote three of them to church. There is no fighting over crayons and coloring books…they each have their own.
This art packet only takes about an hour to make, from start to finish. It is really quite easy and I have created a very indepth tutorial to make it easier.
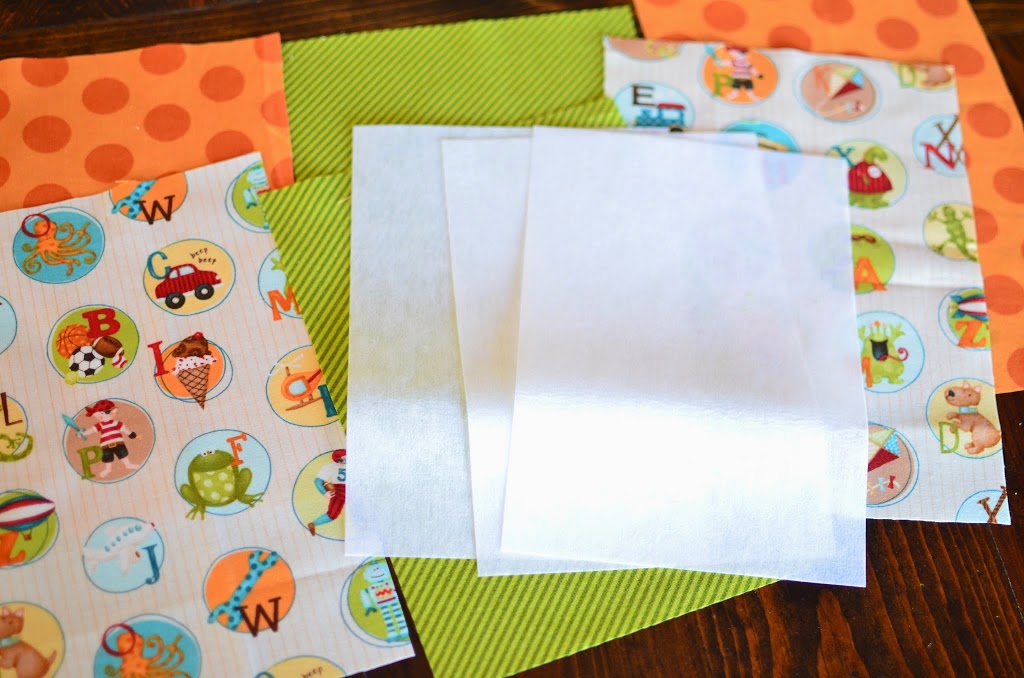
Supply List:
3 Fat Quarters
1/2 yard of light fusible interfacing
4 in length elastic cording (for button closure)
1 large button
2.5 inch length of 1 in wide elastic (for chalk)
Matching thread, sewing machine, lots of pins, hot iron!
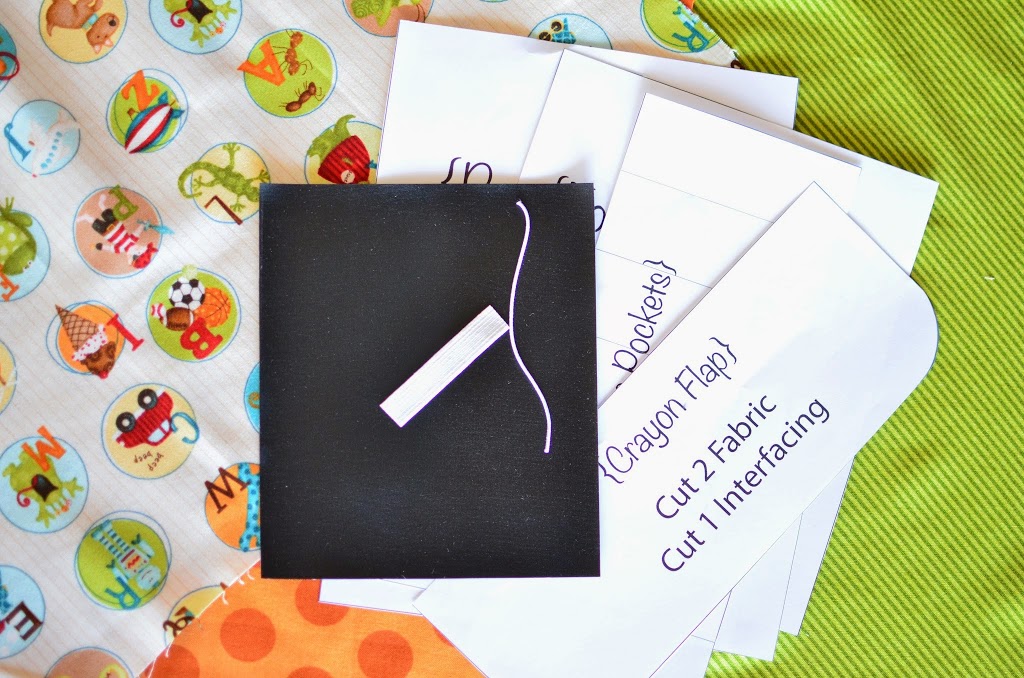
You will notice two things when you print out the pattern:
1. They are not titled in numerical order. Apparently, I don’t know how to count.
2. You are being instructed to cut the interfacing the same size as the fabric…DON’T DO THIS! Cut the interfacing smaller than the fabric. You want the interfacing to be half inch smaller all the way around because our seam allowance for the pattern is 1/2″.
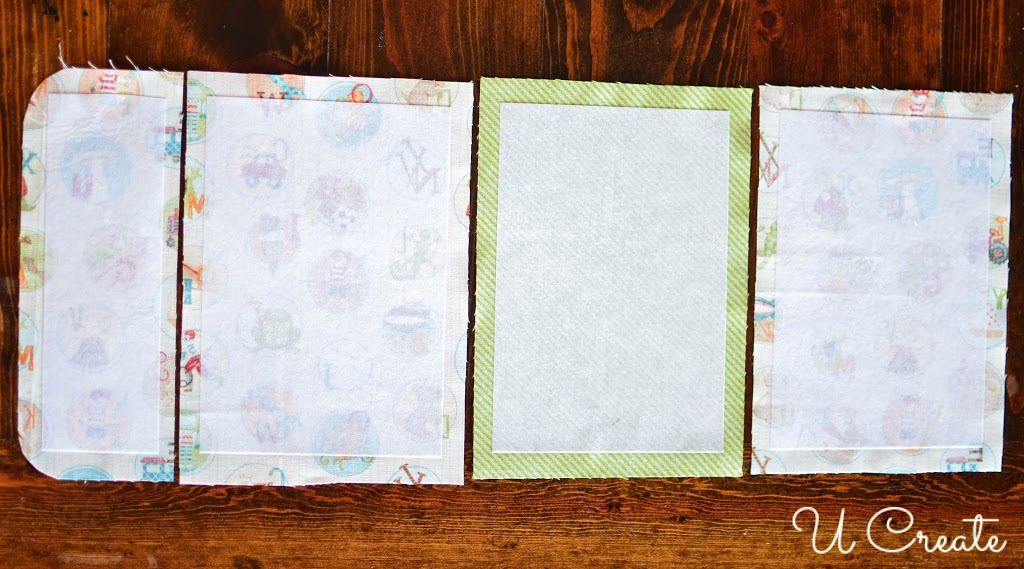
1. Cut out the pattern and iron your fabric.
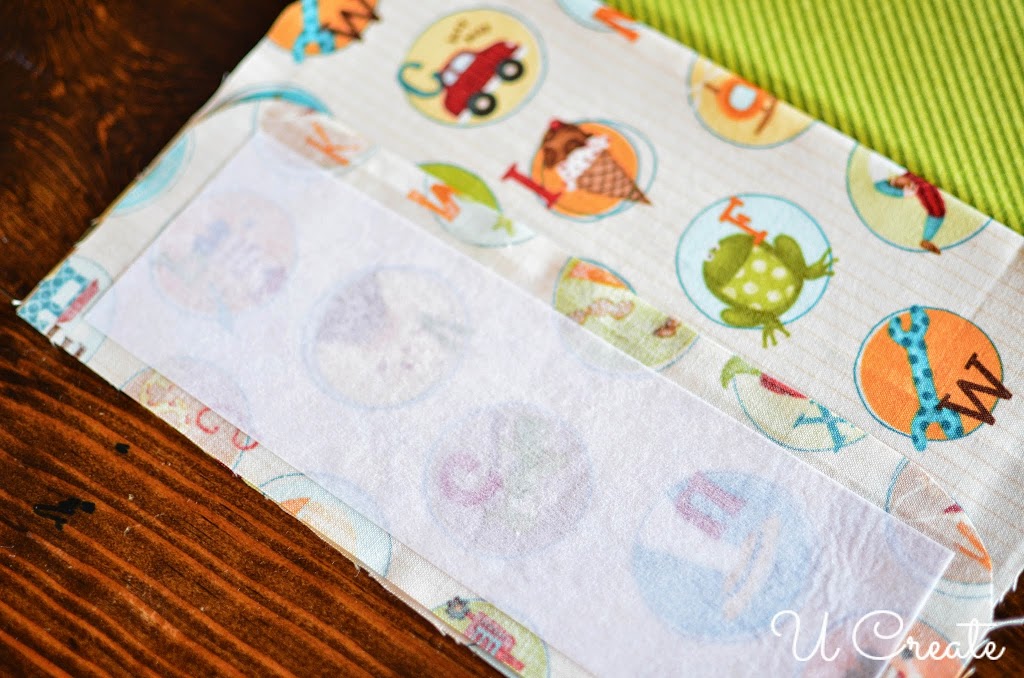
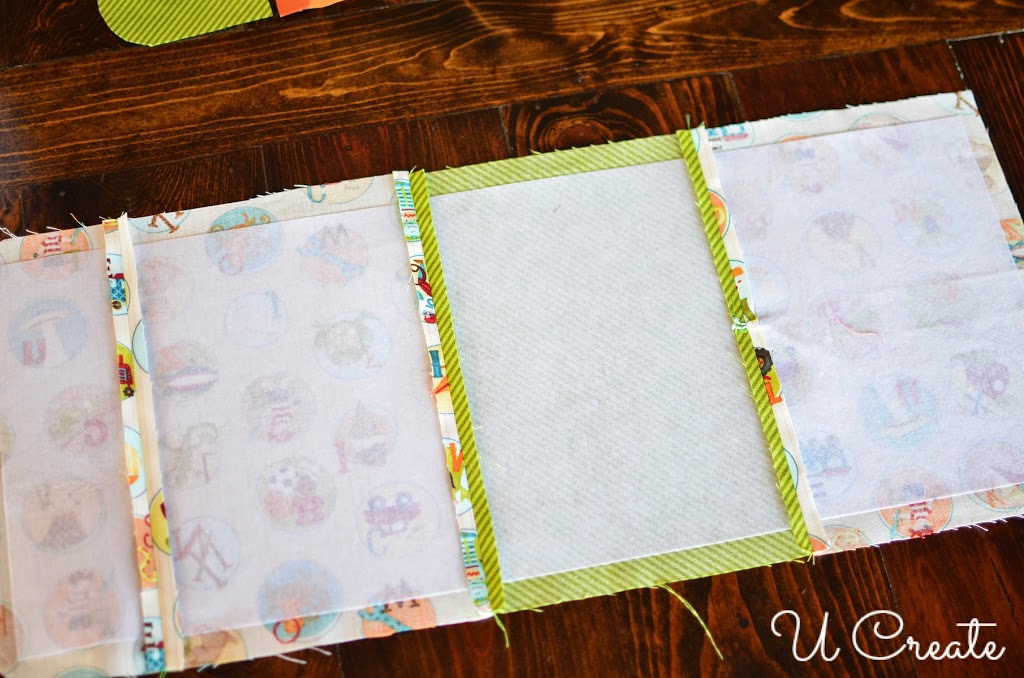
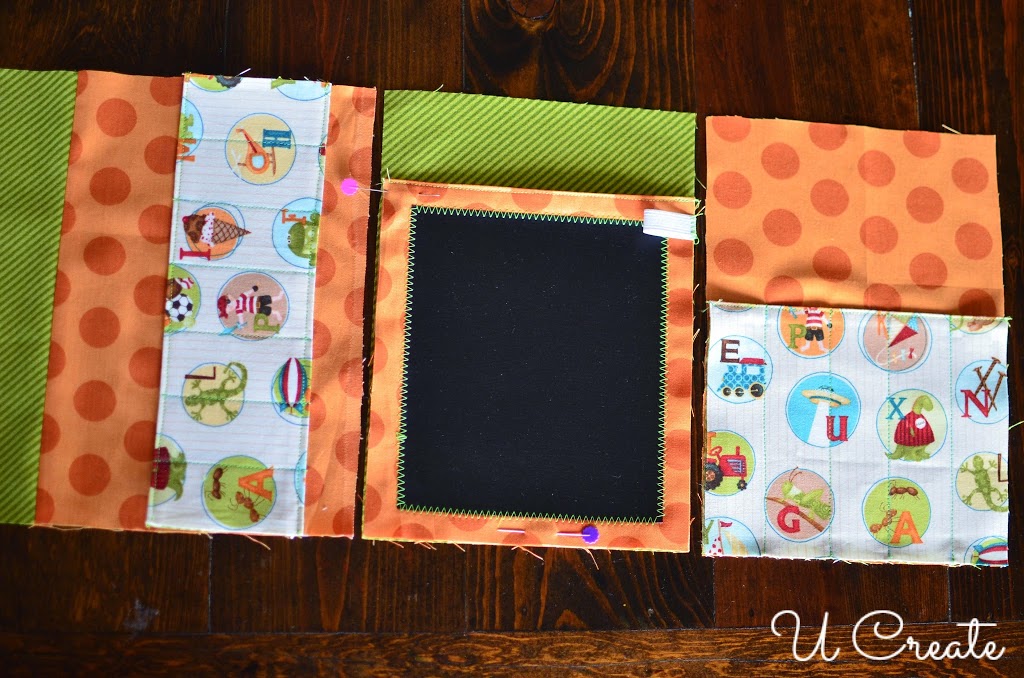
2. Cut out the fabric with the pattern. For the “6 BASE FABRIC” pieces, I always cut 2 out of each fat quarter equaling the 6 base pieces I need. See the photo above, I have 2 of each fabric and my 3 interfacings cut 1/2″ smaller on each side. Stack it all up and set it aside.

3. Cut out the other pieces of the pattern. This is all about taste. I lay out the 3 base pieces I plan to put on the inside and then determine which fabric I want the pockets made out of. After I cut the fabric and the interfacing according to the pattern, I stack them like the photo above.
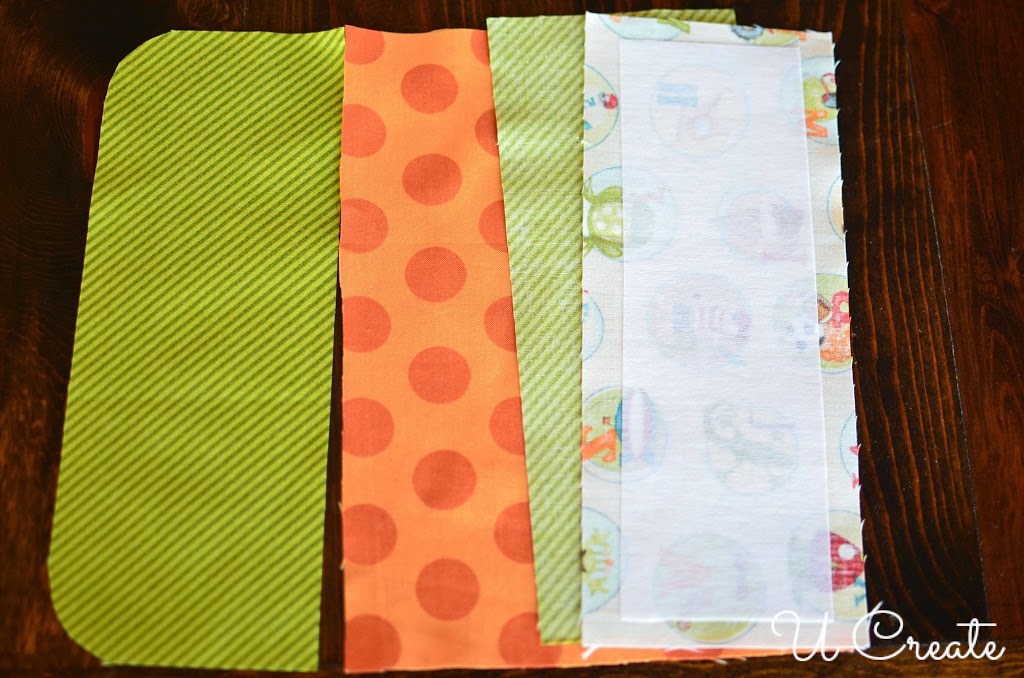
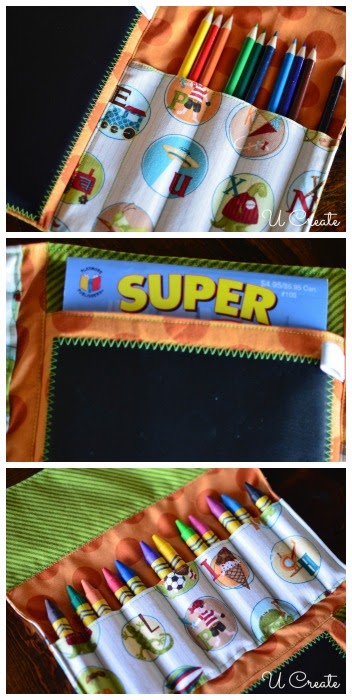
Crayon Pocket Pieces: 1 crayon flap, 1 base piece, front and back of the crayon pockets.
Notebook Pocket: 1 base piece, front and back of notebook pocket, chalkboard fabric (cut to 6.5″x5.5″), 2.5 inch length of 1 inch elastic.
Colored Pencil Pockets: 1 base piece, front and back of colored pencil pockets.
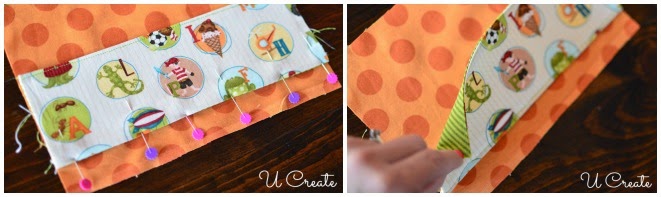
4. You are going to start with the outside of the packet first: 3 outside base pieces, 1 crayon flap, 4 matching interfacing pieces and 4 inch piece of elastic cording. Iron on the interfacing pieces.
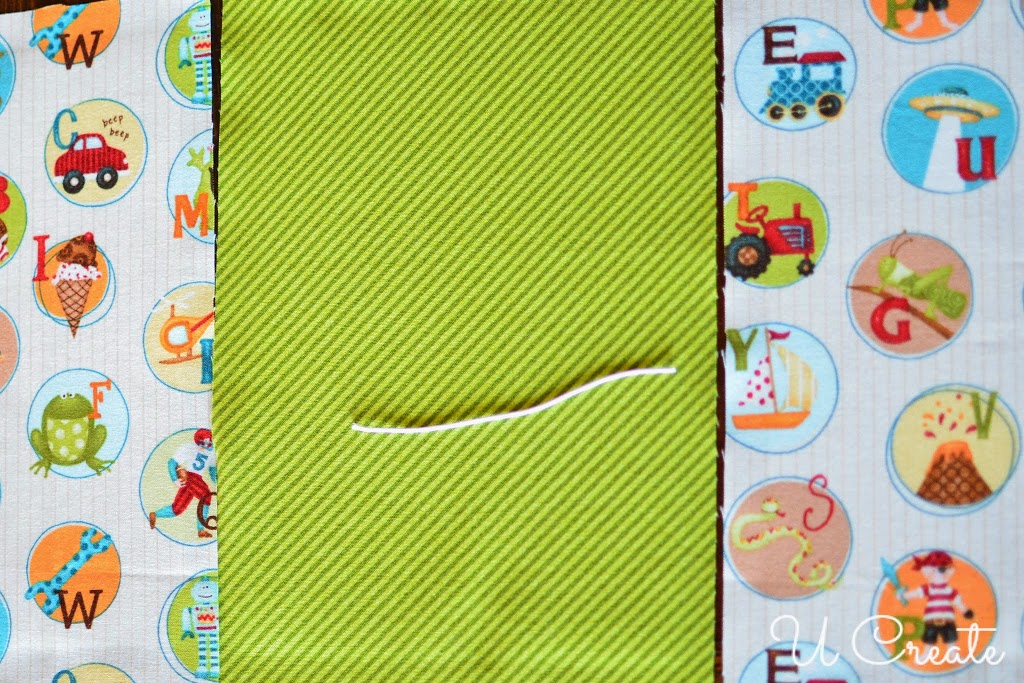
5. Turn the fabric over so the interfacing is down. You are going to sew the 4″ elastic cording to the right side of the middle base piece.
6. Find the middle of the middle piece by folding it in half and pressing firmly on the right side.
7. You now have a crease where the elastic will go.
8. Fold the elastic cording in half and place it in the crease you just created. Pin it down by putting the pin over the elastic…don’t try to put the pin through the cording, it causes stress!
9. Sew over the elastic cording making sure to backstitch a couple of times…really secure it down.
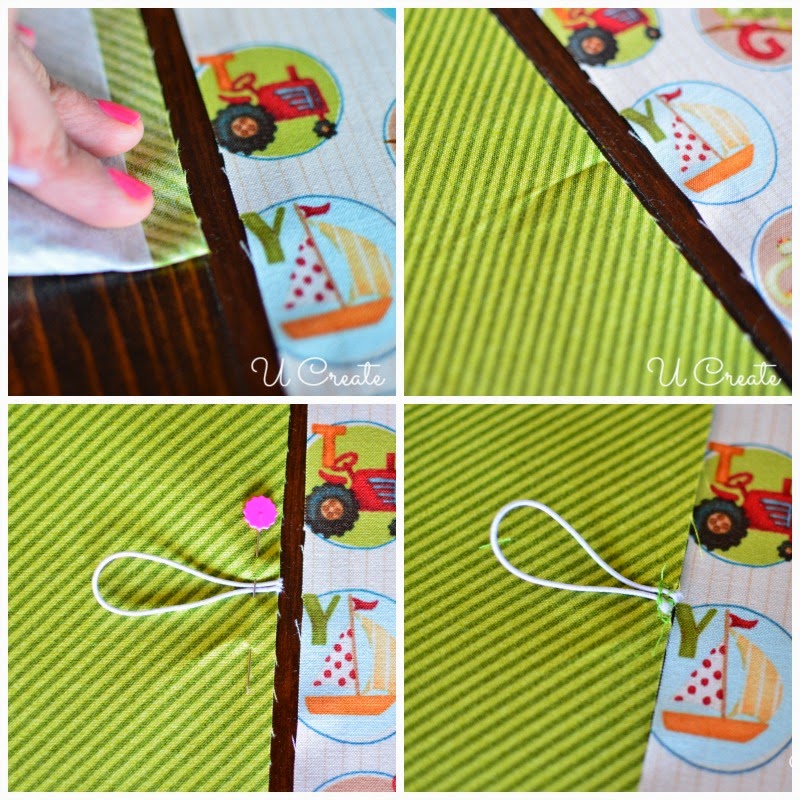
10. Now take the base piece on the right (this is the colored pencil side of the packet) and lay it right sides together on top of the elastic and middle base piece. Line up the side and pin it into place.
11. Using a 1/2 inch seam allowance, sew from top to bottom and backstitch over the elastic.

12. Open it up and press it with a hot iron. Press the seams apart.

13. Now lay the other base piece (the crayon storage side) on top of the middle base piece right sides together. Pin along the side and sew top to bottom using a 1/2″ seam allowance (this is the seam allowance you will use throughout this project).
14. Press it flat, opening the seam.
15. Now for the crayon flap. Lay it right sides together on the crayon base piece you just sewed. Pin down the side and sew top to bottom. Press the seams open.
16: Your outside piece is done. Set it aside and lets work on the inside.
CRAYON POCKETS
17. Grab all the pieces for your crayon pockets: 1 crayon flap, 1 base piece, front and back of the pockets and matching interfacing. Iron the interfacing on one of the crayon pocket pieces.
18. Take the crayon pockets and lay them right sides together.
19. Pin down both long sides.
20. Sew the top and bottom of the pockets using a 1/2″ seam allowance.
21. Turn the “tube” you have created right side out.
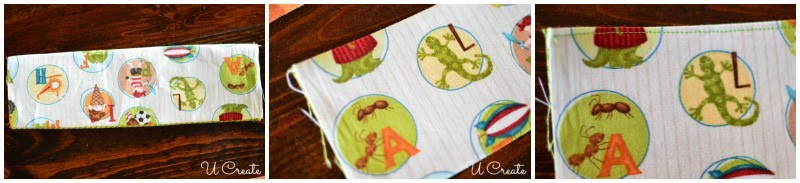
22. Iron it flat.
23. Topstitch the TOP of the pocket only; all the way across. Topstitch is just a 1/4″ stitch along the edge of the fabric. Like the above picture on the right.

24. Lay your crayon pocket 1″ from the right side of the base piece (the opposite of where the crayon flap will go).
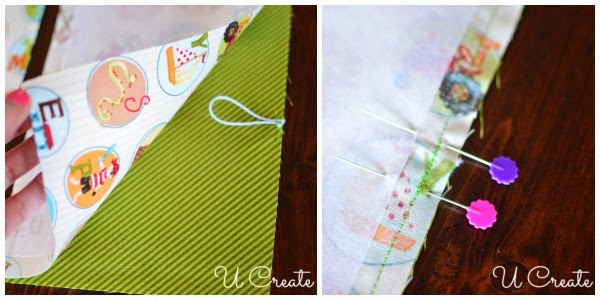
25. Pin it down and top stitch the bottom of the pocket to the base piece. Remember this is just a 1/4″ stitch. It will secure it to the base and look really finished and cute.
26. The crayon pocket should be sewn to the base only on the bottom.
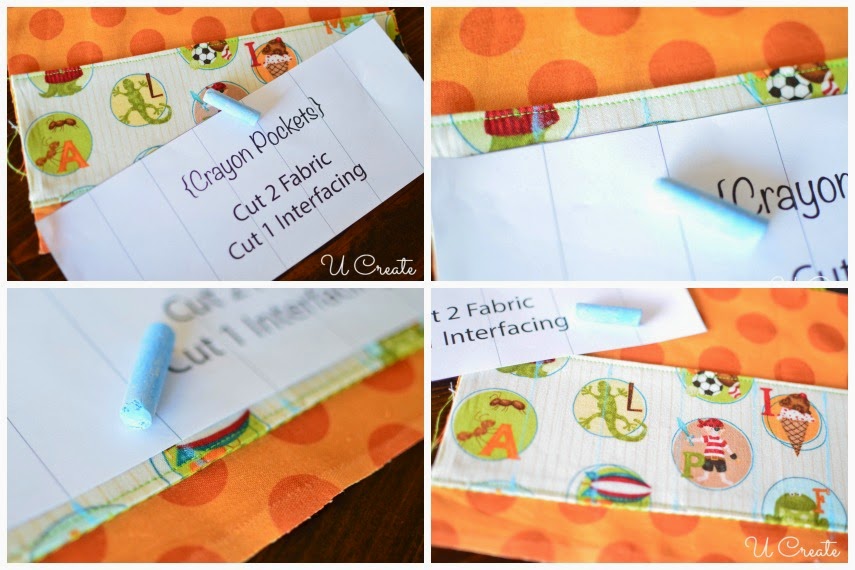
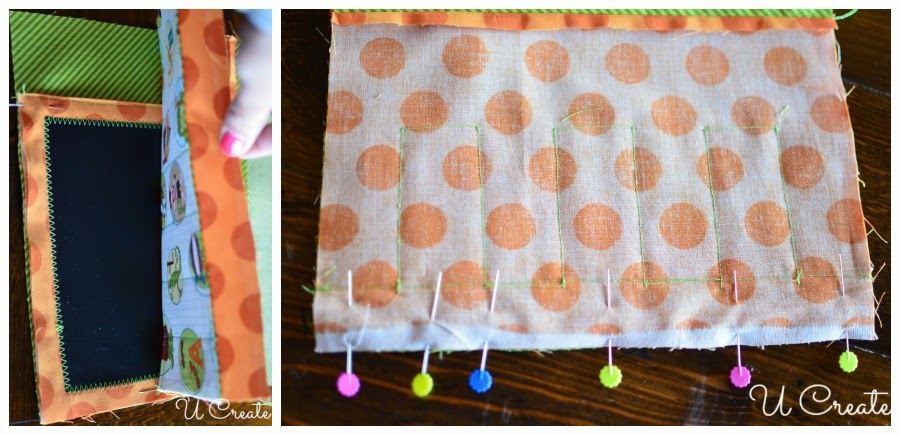
27. Grab your CRAYON POCKETS pattern piece and a piece of chalk.
28. Lay the pattern on the crayon pocket; it lines up on the left and right side. Pull the pattern down about an inch (still lining up the sides) and mark with the chalk where the lines should be on the fabric.
29. Do the same to the bottom.
30. Then using a ruler or the pattern piece and line up the top chalk mark with the corresponding bottom one and create a line with the chalk. This is where you will sew your lines to create the crayon pockets.

31. Pin the crayon pocket into place against the base piece. Starting with the first chalk line, back stitch, sew along the line and back stitch again. Do this on all the chalk lines until you are done.

32. Place the crayon flap right sides together on the base piece above the opening of your crayon pockets. Pin it down, sew from top to bottom using the 1/2″ seam allowance.
33. Press the seams outward and put it aside.
NOTEBOOK POCKET

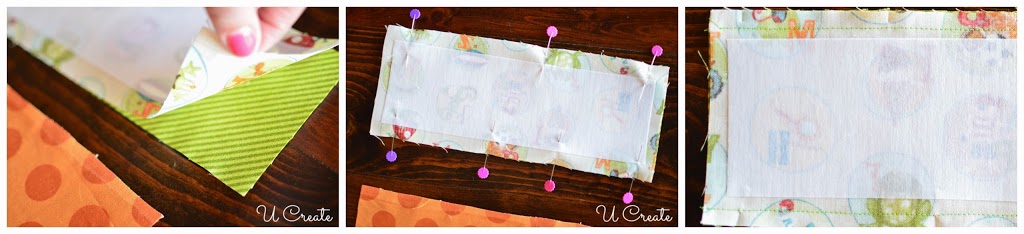
34. Grab you stack of Notebook Pocket pieces: 1 base piece, front and back of notebook pocket, chalkboard fabric (6.5″ x 5.5″), 2.5″ piece of 1 inch elastic.
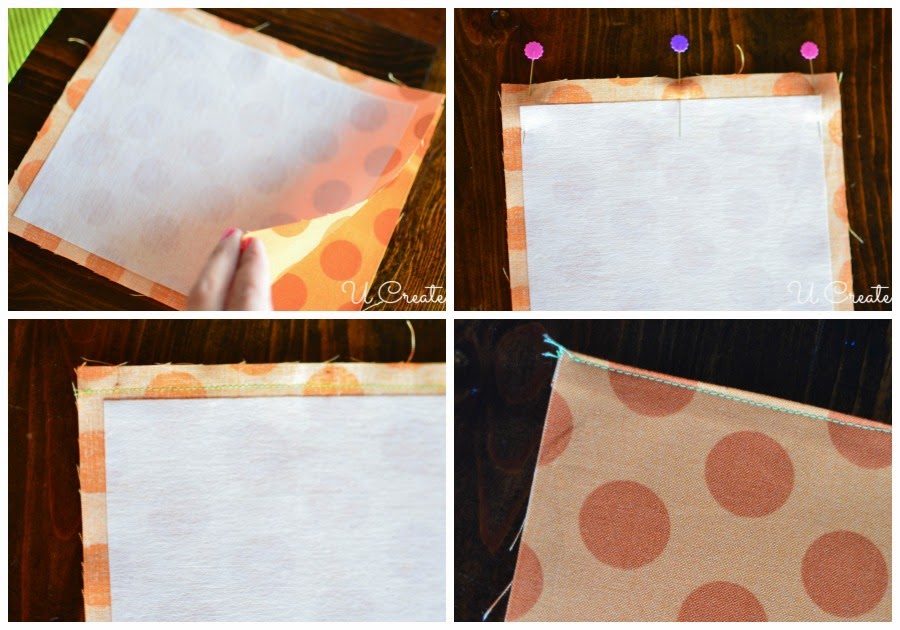
35. Take the front of the notebook pocket and iron on the interfacing. Place the two notebook pieces right sides together.
36. Line up the top and pin together.
37. Use a 1/2″ seam allowance and sew from one side to the other.
38. Open the seams, press flat, fold it right side out at the seams and press flat, Sew a 1/4″ topstitch across the top.
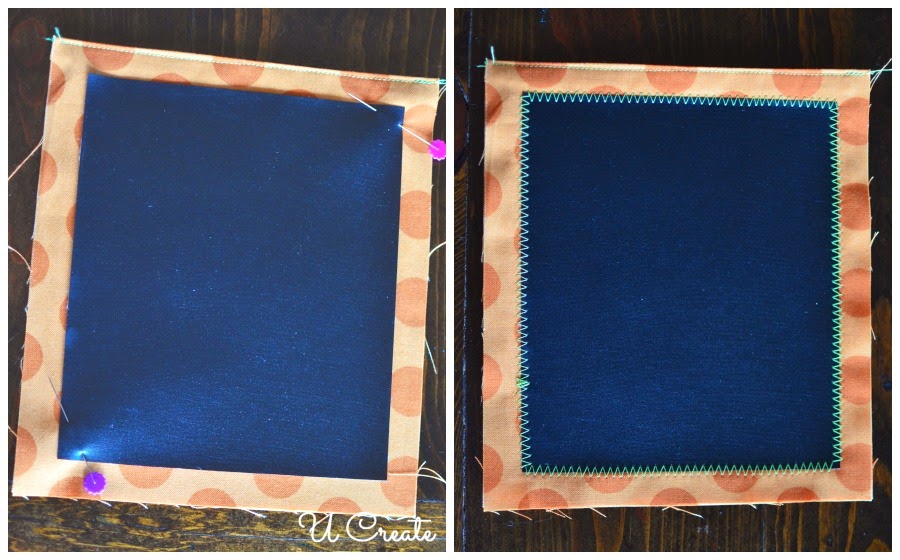
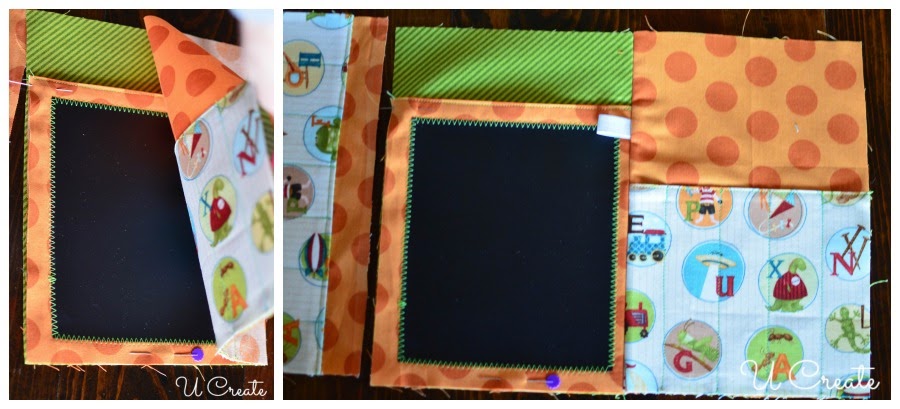
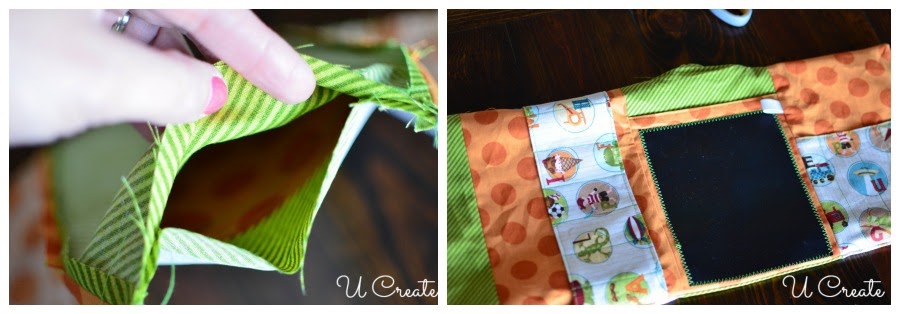
39. Grab your chalkboard fabric and pin it the middle of the notebook pocket you just made. I don’t like to pin the heck out of the chalkboard fabric because it leave holes where the pins go. So I pin very close to the edge in two opposing corners.
40. Zigzag stitch all the way around. Backstitch when you start, backstitch when you stop.

41. Lay your chalkboard/notebook pocket on the base piece, lining up the bottom edges.
42. Take your 2.5 inch length 1 inch elastic and fold it in half.
43. Using the top of the chalkboard as your guide, pin the elastic to the right side of the notebook pocket.
44. Zigzag stitch the edge of the elastic to the edge of the notebook pocket.
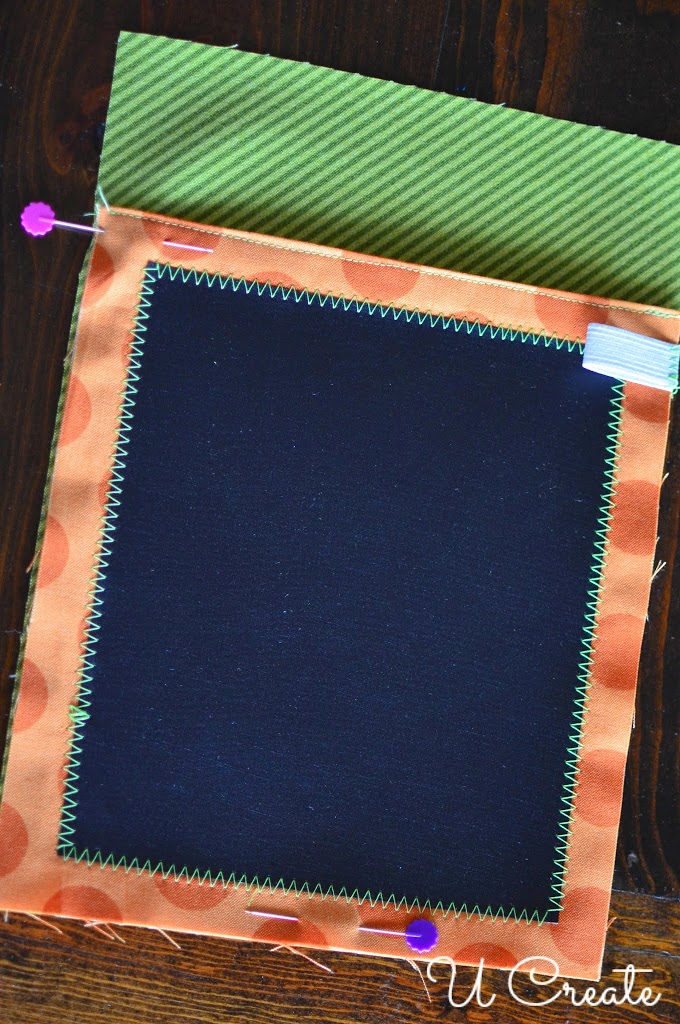
45. Pin the other side and the bottom to the base fabric so that it stay put until we sew them all together. Put this aside and lets do the colored pencil pockets.
COLORED PENCIL POCKETS
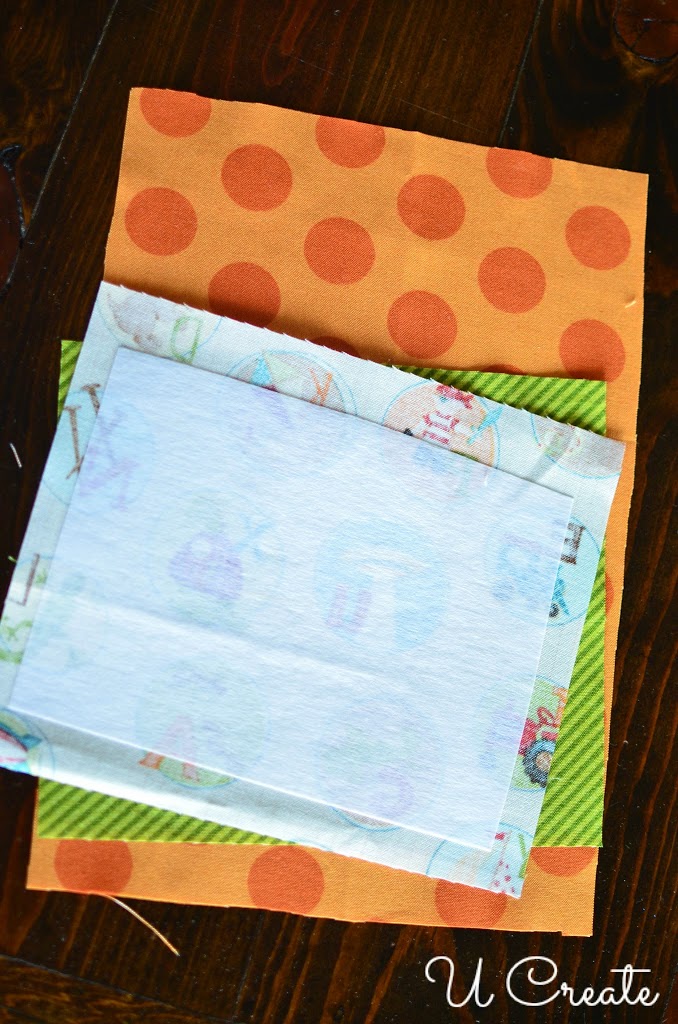
46. Grab your colored pencil stack: 1 base piece, front and back of colored pencil pockets, and matching interfacing. Iron the interfacing on the front of the colored pencil pockets.
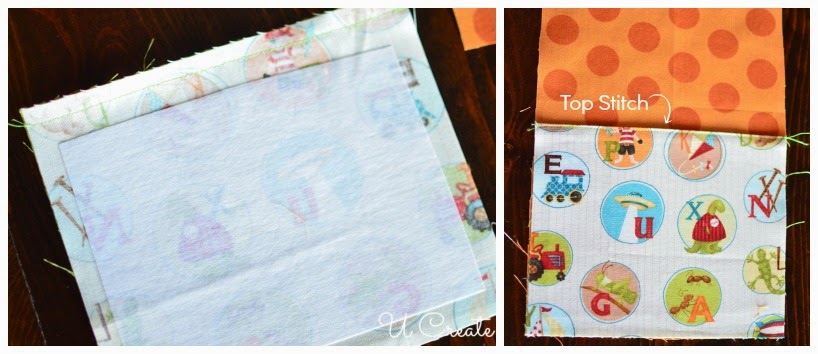
47. Place the front and back pieces right side together and pin. Sew just the top with 1/2″ seam allowance (like you did the notebook pocket).
48. Flip it right side out and press it flat. Top stitch the top with a 1/4″ stitch. Lay it on the base piece, lining up the bottom and sides.
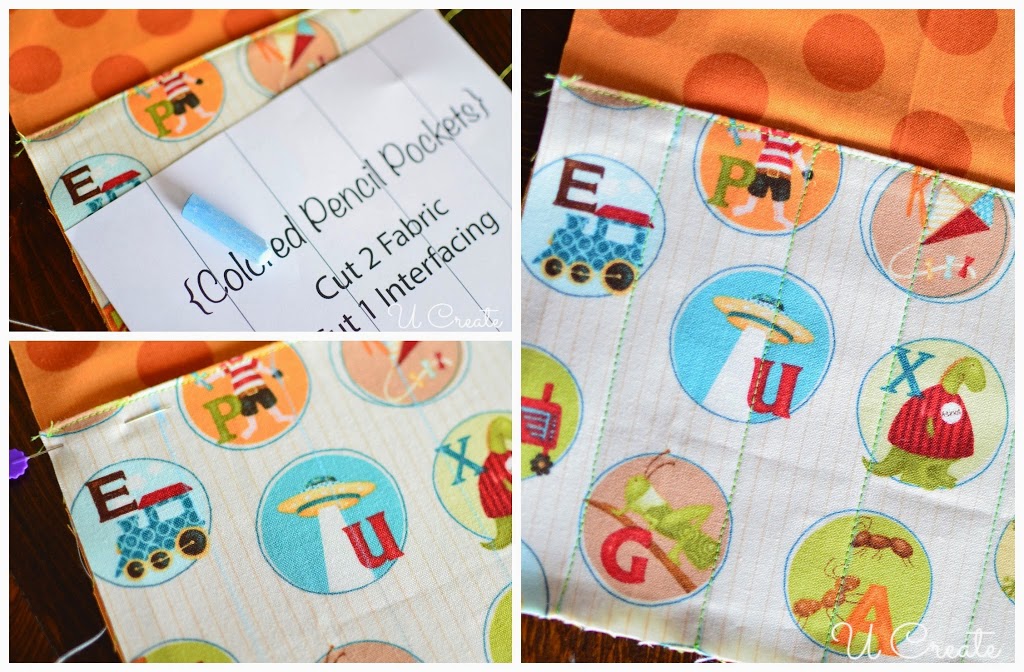
49.Grab the paper pattern for the COLORED PENCIL POCKETS and a piece of chalk. Create the lines just like you did with the crayon pockets.
50. Pin the pocket to the base piece before you start sewing your pocket lines.
TIME TO SEW IT ALL TOGETHER!
51. Place your Chalkboard/Notebook Pocket in the middle of the crayon and colored pencil pockets.
52. Lay the colored pencil pockets right side down on the chalkboard/notebook pocket. Line up the side and pin together. Sew it together from top to bottom; backstitch a couple of times over the elastic to secure that bad boy in place.
53. Open it up and iron it flat ON THE WRONG SIDE of the fabric. Trust me, you do not want to iron the chalkboard fabric…even accidentally. Remember to iron the seams open on the back.
54. Do the same thing with the Crayon Pockets. Lay it right side down on top of the chalkboard/notebook pocket.
55. Pin it really good. Sew from top to bottom using 1/2″ seam allowance. Open up and press ON THE WRONG SIDE of the fabric. Again, press the seams open.
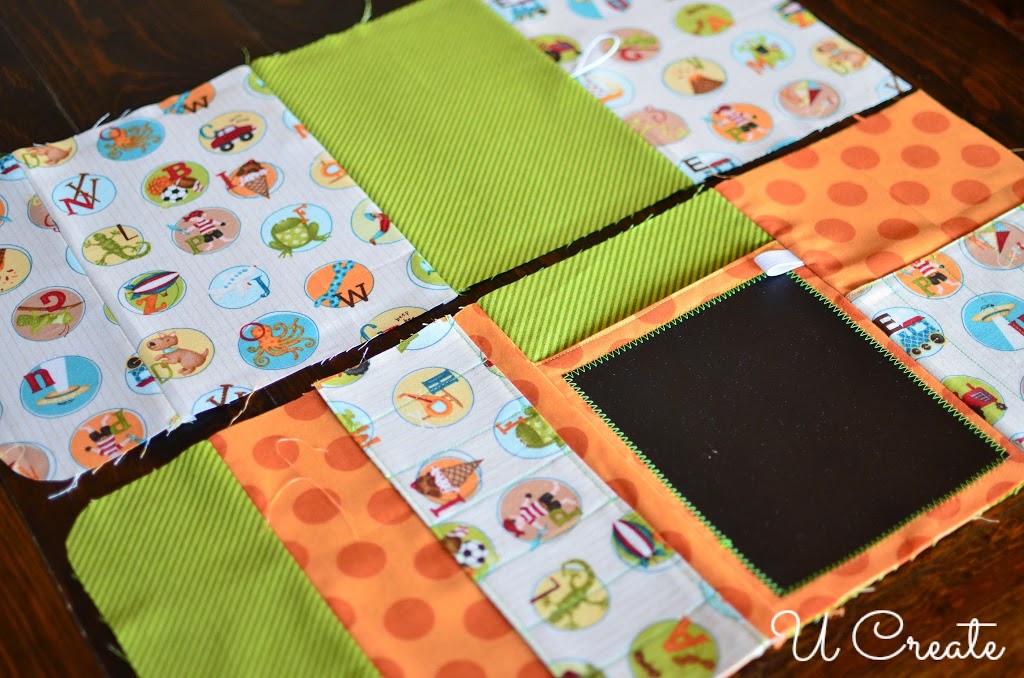
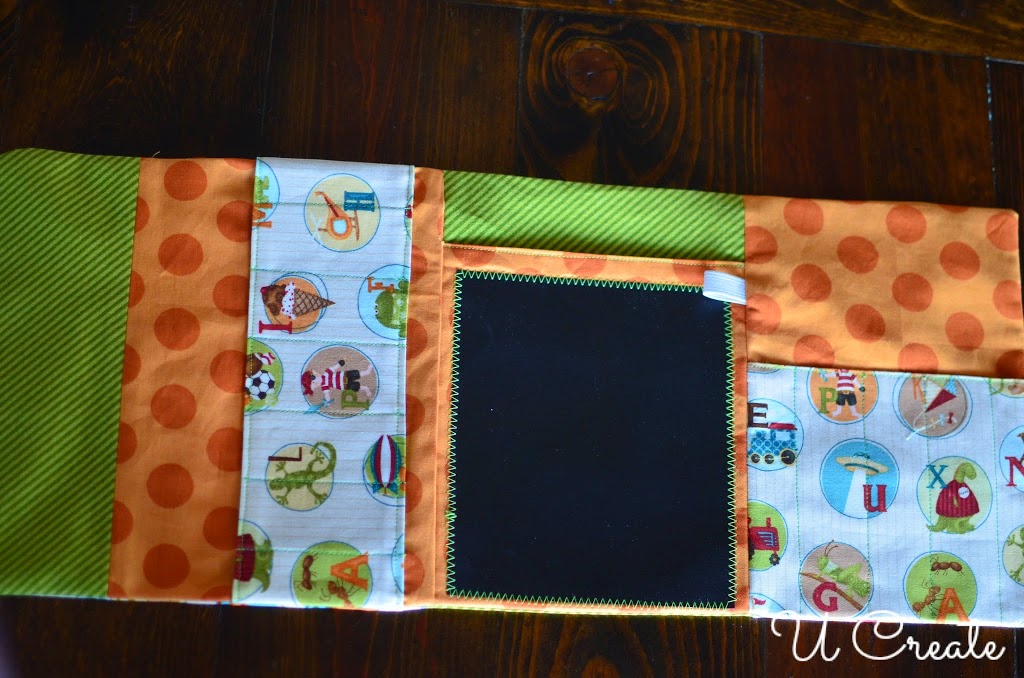
56. Check it out! You have the outside and inside done…well, almost.
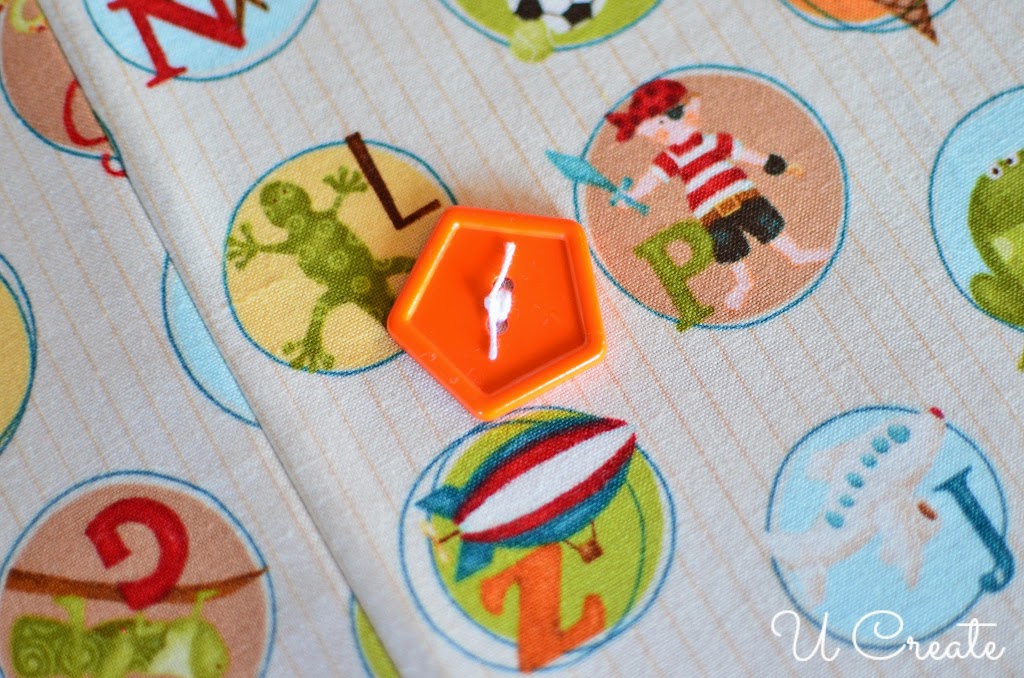
57. Sew the button on the middle of the outer base of the crayon pocket side. Mine is about an 1.5″ from the outside crayon flap. {I snagged some geometric buttons from Joann.}

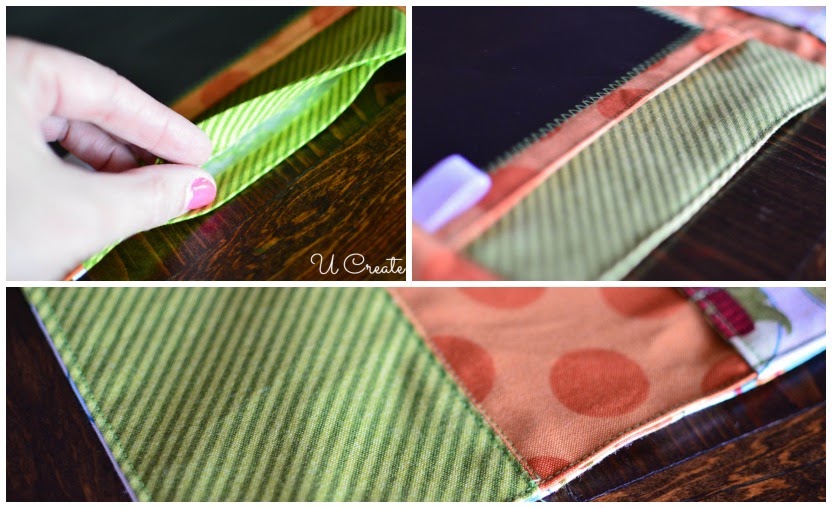
58. Place the completed outside piece on the completed inside piece right sides together.
59. Line up the seams and pin them together.
60. I start with the chalkboard/notebook pocket and pin those seams first, then go an inch in from the seams and pin.
61. Leaving the top of the pocket completely open, I start to pin around the rest of the art packet.
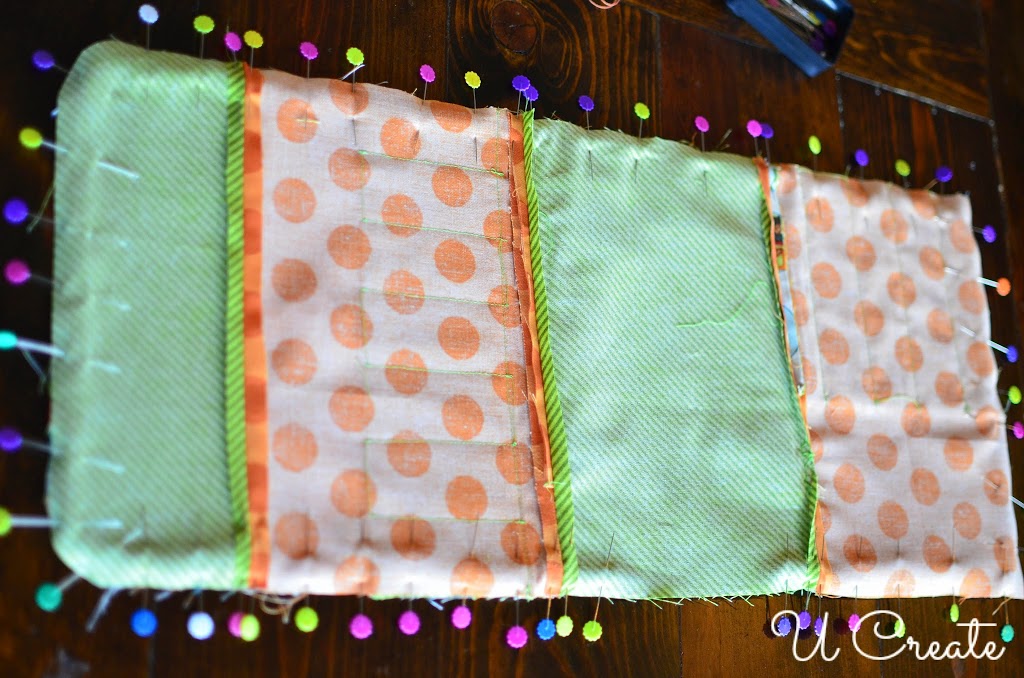
62. All pinned and ready to sew. Using a 1/2″ seam allowance, start at one side of the middle opening and end at the other side…make sure to backstitch when you start and stop.
63. Just like the picture above. You should have all sides sewn together EXCEPT this opening (top of the notebook pocket).
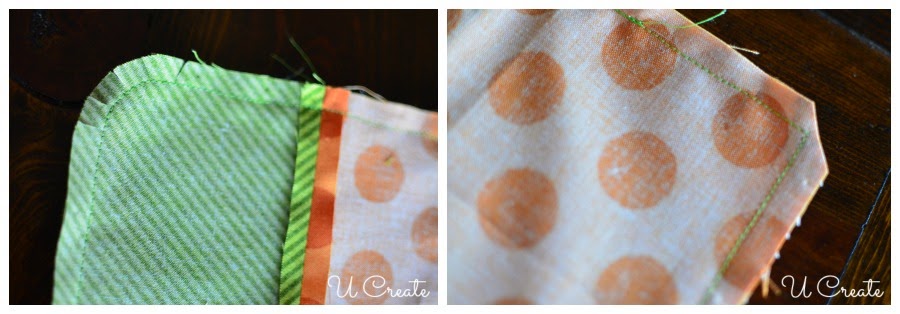
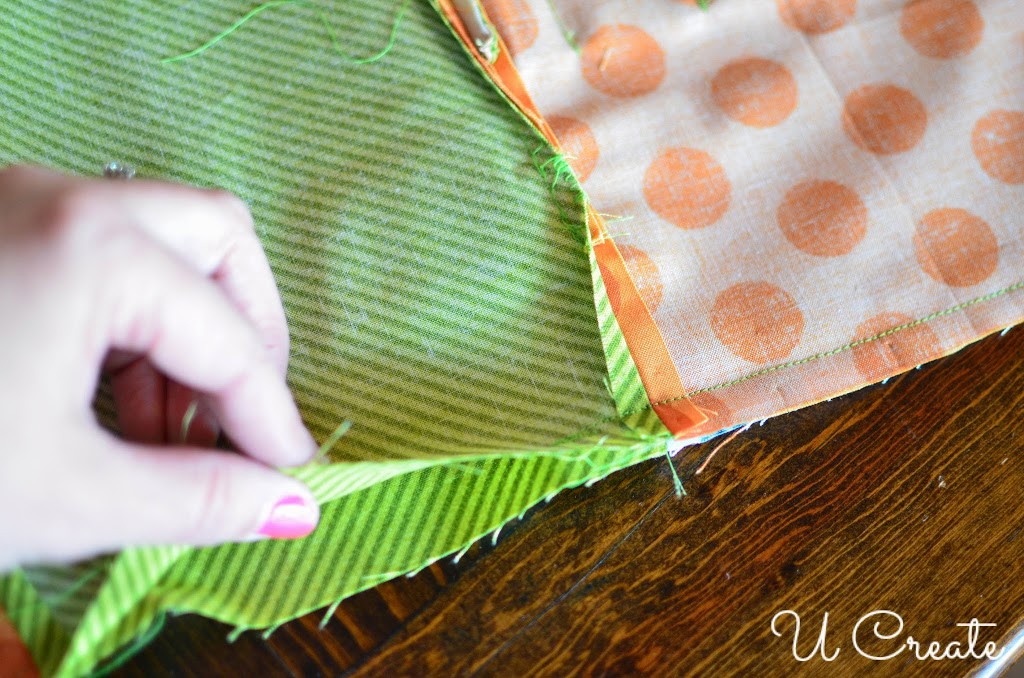
64. Cut about 6 little snips around the rounded crayon flap.
65. Clip the corners on an angle.
66. Now you need to pull the whole thing right side out through this opening you left.
67. You have a wrinkled, crumpled mess like the picture above.
68. Press it flat with a hot iron, making sure to avoid the chalkboard fabric
69. Press the opened part in 1/2″. You are going to sew this shut now.
70. Top stitch the opening shut with a 1/4″ stitch and continue sewing the top stitch ALL the way around the art packet.
71. Sew a top stitch at the seam of the crayon flap where you will fold it over the crayons. Why? It secures both inside and outside pieces to each other and makes for a really clean and beautiful look!
YOU ARE ALL DONE!
Now head to the dollar store (or stock up at a Back to School sale) and fill this awesome Quiet Art Packet with crayons, colored pencil, chalk, and a notebook…don’t forget to include a paper towel to wipe off the chalk board! My kids keep a paper towel in the notebook pocket.
Please feel free to email me: becky@u-createcrafts.com if you have any questions. Also send me the pictures of your finished art packets. I would love to show them off!


What a great tutorial, thanks!
You are very WELCOME!
That’s awesome! I’ve got a Craft Gossip post scheduled for this evening that links to your tutorial:
http://sewing.craftgossip.com/free-pattern-diy-art-packet-tri-fold-coloring-folio/2014/04/30/
—Anne
Thanks Anne! I appreciate that.
finally! When I was ready to make it the tutorial had disappeared. Thanks for putting this up again.
You are so welcome. Sorry it took so long to get back up, but this time it’s better! 🙂
So what size coloring books fit into the pocket? Are they are universal size and easy to find?
Can’t wait to make the tutorial for my daughter! She is so excited!
Hi there,
The coloring books I include in these art packets are actually the 7″ x 5″ activity books from the dollar store. They are about the size of a Steno notepad. Hope that helps. Let me know if you have any other questions! I am happy to help!
I made the book from your pattern for my grandchildren . So easy to read and sew. Had so much fun thank you for sharing.
Hi,
Just came across your pattern. Is it still available to download
I’ve been looking for something like this to make for Christmas gifts. It would be perfect.
Thanks so much for posting this as a FREE tutorial! Every other activity pack pattern online is $10 or more, and not nearly as cute and creative as the chalkboard that you add! I made a miniature version with handles for my 2 year old and she carries her ‘purse’ with her everywhere we go!
You are very welcome! I am so glad you like it!
thanks for the great pattern! I’m a beginner, can I do away without the interfacing? what else can I use? felt?
or fusible web?
you can use felt, if you’d like. I just like the fusible interfacing. Have fun!
thank you so much for your prompt response!
Hi Becky! Thanks for the tutorial. I made my 3rd one recently. This one is for my granddaughter!
I did it! I did it! I can’t believe it took so little time – while my baby was napping =) Thanks again for sharing!
YEAH! Take a pic and share it with us on Facebook! I would love to see it!
great pattern. tks for your tut. i will make one
Can you provide cut fabric dimensions in place of the pattern? It is easier for me to cut fabric and not follow a paper pattern but do not know the sizes. Really looking forward to making this!