Did you know hexagons are the new chevrons? Well, this timeless shape is used all the time in the quilting world, but hexagons are making their way into home decor.
I am sharing with you a different way to use a fat quarter, and how you can incorporate this trendy design into your space. This project caters to those who hate to sew, are intimated to sew, or just do not have the money or space to acquire sewing tools.
This project can be made to look sophisticated, even minimalistic, or it can be fun and whimsical. There can be many different variations whether it’s the size of the hexagons, the amount of hexagons used, or the fabric itself that is being used. Each variation can create a new look.

Materials:
Sheet of heavy paper. Mine was 300 lbs weight and measured 20″ x 30″.
Hexagon template
Pencil
Fabric pen
Scissors
X-ACTO knife
Permanent craft glue that dries clear (I used Aleena’s Tacky Glue)
Clock parts (available at Michael’s and Hobby Lobby)
One fat quarter (Stash Modern Fabric is a good resource for modern fabrics.)
Let’s get started on your hexagon clock!
Step 1.
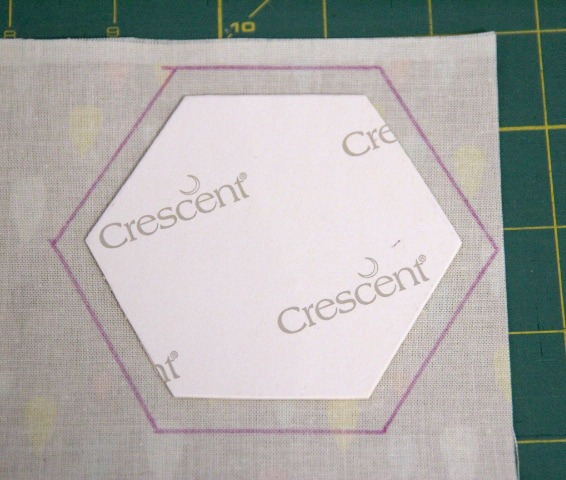
Using the hexagon template, cut out one piece and trace onto your heavy paper. This will become your new template. Mark this hexagon with a T, so you do not use it when you assemble your clock. Use the new template to make 19 hexagons. Cut out.
Step 2.
Place a hexagon onto your fabric and mark 1/4″ seam allowance lines. See photo below. Cut out. Do this for all 19 hexagons.

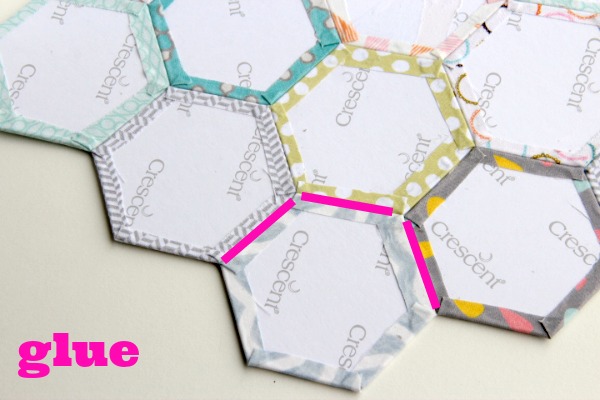
Using permanent glue, place a few tiny dots on the front of your hexagon. Place your fabric on top and press. This will help to secure the fabric as you are folding it over the paper. Place a line of glue near the edge of the hexagon. Fold over fabric. Repeat on all sides.

Place glue just on the edge of the hexagon that will be touching another hexagon. Press firmly together, and remove any excess glue. You do not need a lot of glue. Repeat until all the hexagons are glued together.
*I like to start with my center hexagon and work out.
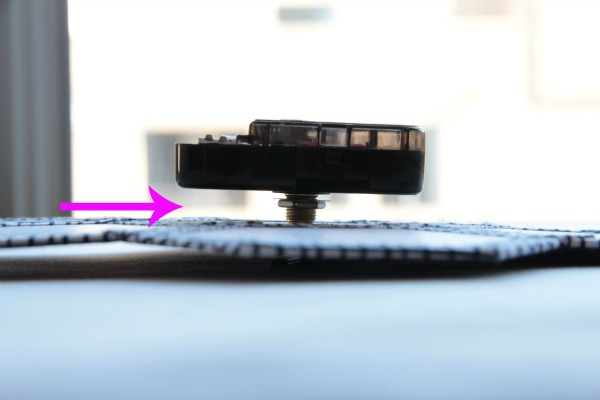
Step 5.
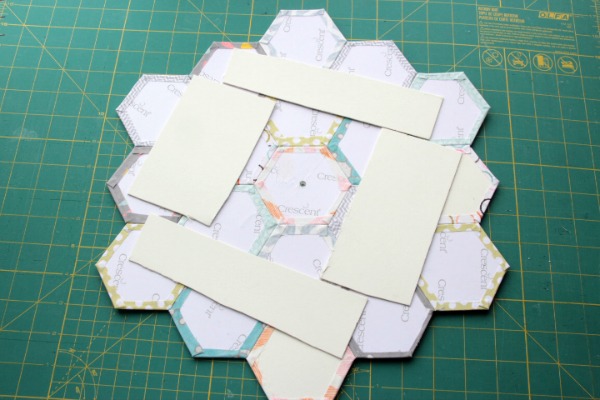
Using an X-ACTO knife, cut a hole in the center of your hexagon clock. Make sure to start small checking periodically with your clock parts to make sure they fit snuggly. You do not want it loose.

Cut a few strips from the remaining paper, and glue to the back of your hexagon making sure they do not interfere with the clock piece. This helps to stabilize the clock a little better.
Step 7.
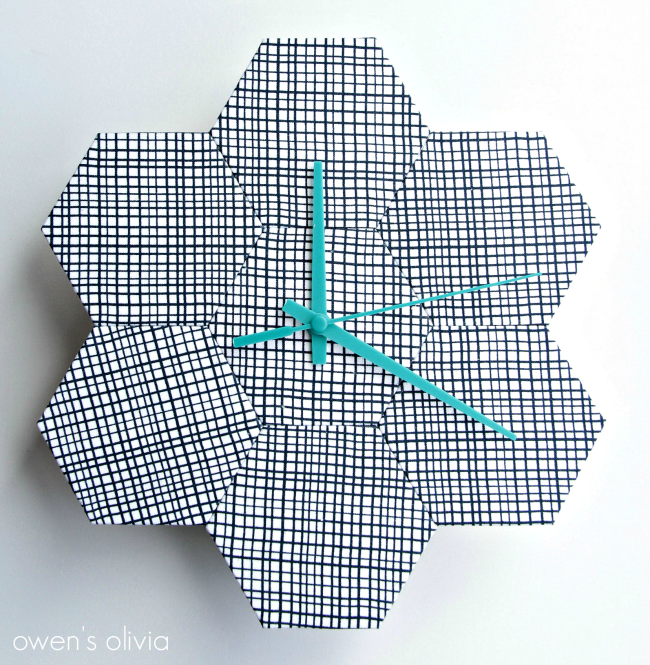
Assemble your clock, and hang. Placing your clock in direct sunlight will cause the fabric to fade over time.


Remember this is for personal use only. Please link back and give proper credit to owen’s olivia if sharing your project on the web or through any social media site.
If you do make a hexagon clock, please consider sharing it in my Flickr group. I would love to see it!
owen’s olivia is also on: Facebook, Pinterest, Etsy, Bloglovin’
xx nancy


Thanks for letting me join in on the fun!
This is adorable! I know what my next crafty project will be!
Super awesome. I love it so much!
Gorgeous. Thanks for sharing
Nancy this is THE coolest clock I’ve seen! I want this in my craft room!!! Thanks so much for sharing!!
Just love this clock. Would look nice in my sewing/craft room.
This is lovely! I love it!
A wonderful tutorial thank you for post it.
I love it! Thanks for the great tut!
I love hexagon and this idea is superb!
You are So clever Nancy! I love this idea. 🙂
Thank you everyone!
I love this project! What size of paper hexies did you use?
I am addicted to hexies! What size did you use for the clock?
Those hexies are 1.75″. There’s a printable template above.
Love it! So fun!
On the to do list…thanks!
Thus is on the to do soon list…thanks!
Thanks for this great idea. I just made one for my sewing room!