Let me start this post by saying how much I enjoyed sewing and creating these past 30 days.
One of the most rewarding remodels I’ve ever participated in! Not because of money or exposure as much as transforming a whole entire room and getting that feeling of accomplishment when I finish a large project. Also, it’s a double whammy because I was able to create with my friends! Are you kidding me? Life is good.
My sewing machine has been on overdrive and can I just tell you how wonderful it was to be sewing?!!! Honestly, I don’t have much time to sew lately and a huge thank you to JoAnn Craft Stores and HGTV Home Fabric for reminding me how much I love to sew!!
Alright, lets get down to it. Let’s start with some pillows…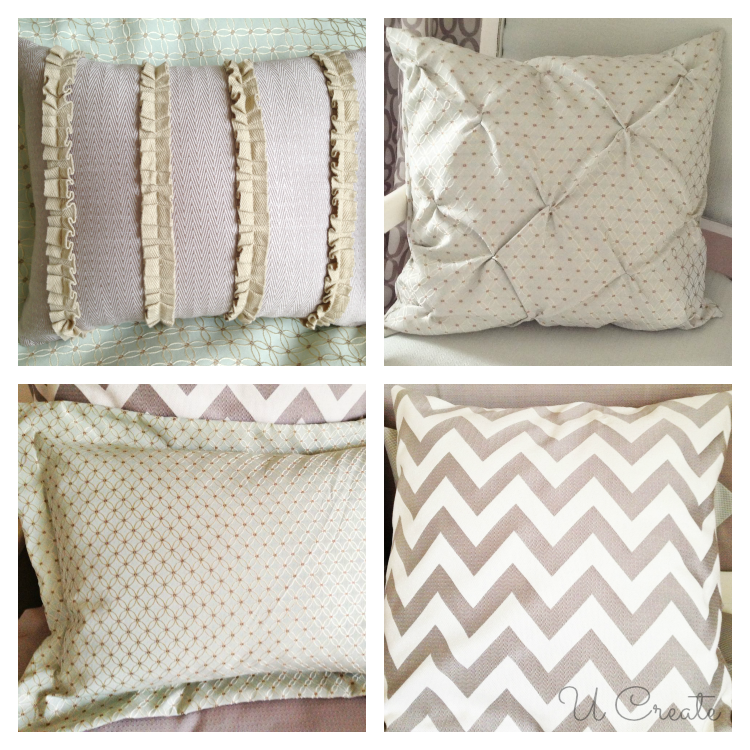
My personal style includes LOTS of pillows on the bed!! You can find the tutorial for my Reversible Throw Pillow Tutorial, and the European, standard, and pin tuck pillow are in the works and will be coming soon!
Are you ready for some BEFORE and AFTER photos?!!
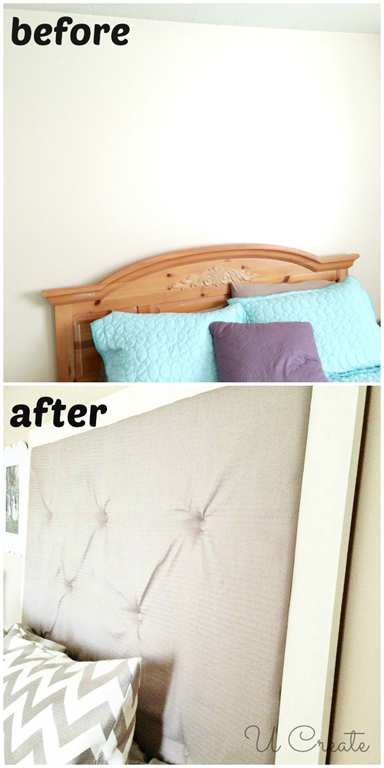
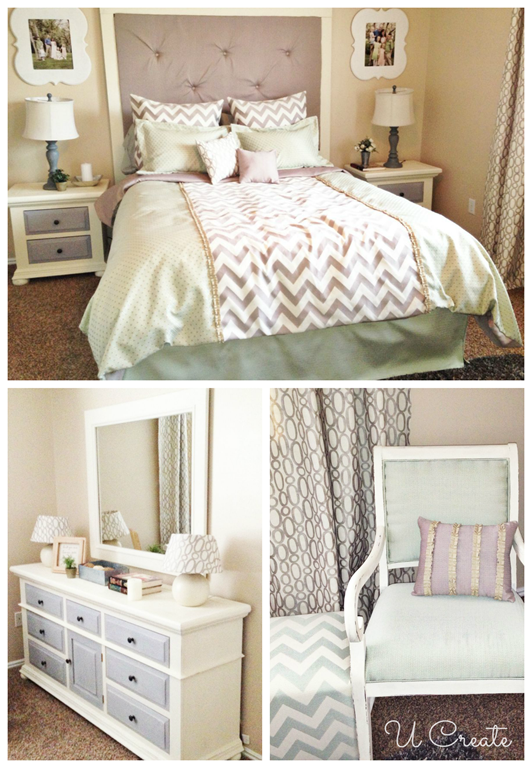
I’m so excited to show you my newly built and tufted headboard!! My fabulous husband, Michael did the building part and I did the button covers and tufting. So much fun and we love how it makes our smallish bedroom look larger!
Many of you have already asked what fabric I used for my headboard. It’s the HGTV HOME Orbit in color Quartz design. I am so in love with this solid fabric with a zig-zaggy texture!
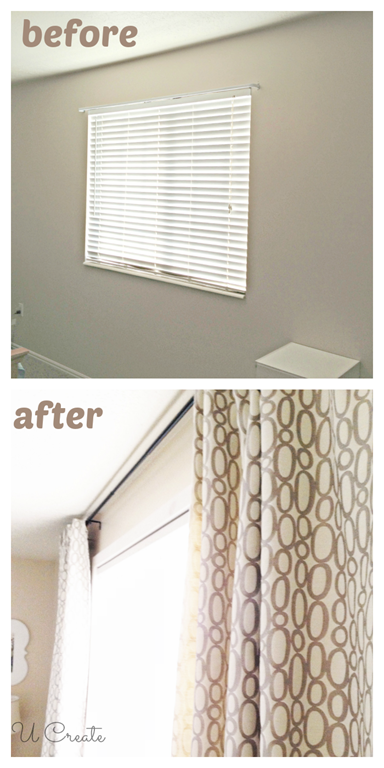
Holy Moly draperies make such a HUGE difference!! Your probably saying “duh, Kari. You should know this being a DIY/Craft Blogger!” Okay, so I did know this, but I didn’t realize how the curtains would make the whole room look brand new!
This was my very first project in this challenge and I decided I love making draperies. My house is about to get a whole drapery makeover!! So fun!
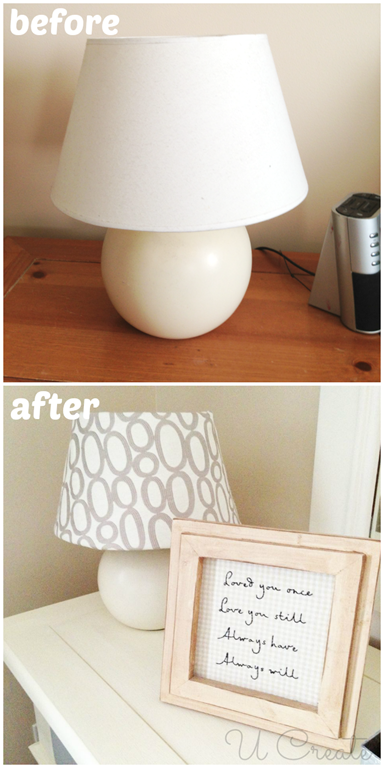
Next, I lined my lamps with the same fabric I used for my draperies. I love the loopy look and the thick, quality of this home décor!
For those interested, I used HGTV HOME Looped in the color Fog for the draperies and the lamps.
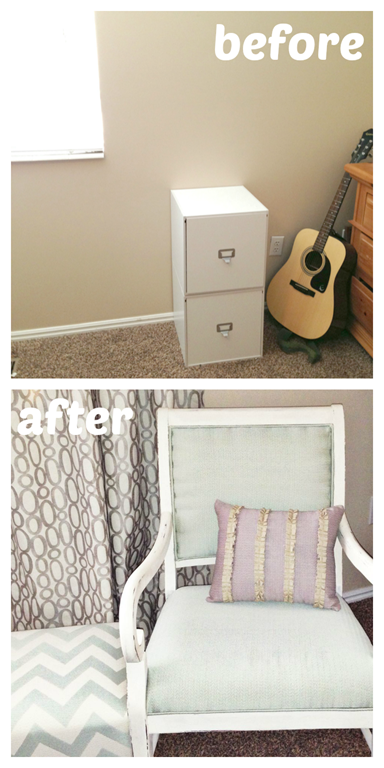
Remember this “blah” area where I had a blank wall and a filing cabinet?! I’ve always wanted a sitting area in my bedroom so we moved the filing cabinet in the basement and found an old chair at a thrift store for only 4 bucks! It’s a steal right?
I used that minty green fabric (that I’m in love with by the way!) It’s the same as the headboard fabric but in color Glacier! I love it so much that I’ll definitely be using more of it in other areas of my home!
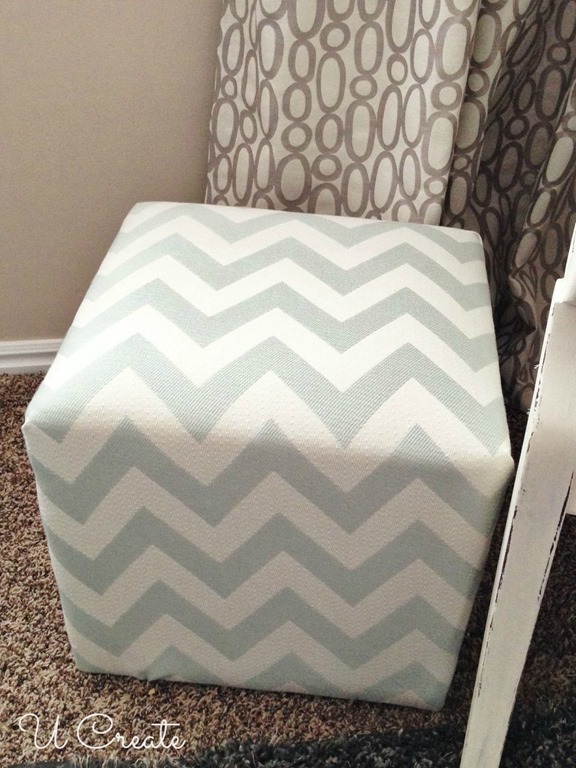
Oh, and let me give you a close up of the ottoman! A gal needs somewhere to rest her feet after a long day…
The fabric I used for this is called HGTV HOME Chevron Chic in color Glacier.
Here’s a shot of the old quilt I had and one pillow. I knew instantly that my new bedroom needed a duvet!
The pillows add so much!!! I definitely wasn’t afraid to go nuts with lots of patterns! You won’t believe how easy my new duvet was to create, too! I’ll share the tutorial with you soon and show you how super, simple it is to use that ruffle trim!
Next up? Remember this old pine dresser?! I wanted to paint it for awhile and decided to use Annie Sloan Chalk Paint in Old White and Grey. I topped it with a coat of clear wax…
…added some new knobs and I had a brand new dresser! The mirror? It’s the same mirror with the top cut off – I wanted the straight edge to be like the headboard.
I hope the photos give you a feel of warmth and peace when you look at them. It’s my new favorite room and I’m always hanging out in there, too! If you have any questions on this makeover process please feel free to email me and I’ll get back to you ASAP.
Again, a HUGE thank you to JoAnn Craft Stores and HGTVHOME for giving me this opportunity to create my dream bedroom.
Post By…
This post sponsored by Joann Craft Stores and HGTVHOME. All opinions are 100% mine.






What a DREAM bedroom! You can never have too many pillows- they’re pretty, they’re fun- they make the bed so beautiful and inviting!
Thank you Michaele! I love to be in my bedroom now! It’s my new fave room in the house!
Goodness Kari! You have done such an amazing job!! I love how bright and fresh the room looks – those fabrics are so beautiful together. The duvet is a super pretty style too. It’s all so stylish and light. I love it!
Thank so much for the compliments Bev!!!
Kari! I love your new room! What a beautiful space you have created! I bet it’s so fun to walk into! Great Job!
Thanks Kami we LOVE how it turned out. I don’t think I would’ve done one thing different. I did work my tail off though in those 30 days! lol
So happy you like it!
Hello Kari,
This looks SENSATIONAL! I LOVE what you’ve done! I love white so the theme is just perfect and the headboard fabric is great! I was meaning to ask you whether I could do a headboard fabric slipcover with a wooden bed. My bed is oak wood, so I am unsure! please give me your insight!
Keep up the GREAT work!
xoxo
Eva
Hi Eva,
First, thank you so much! My husband and I love our new bedroom!
Secondly, depending on the headboard size, shape you could definitely create a headboard slipcover! Hope on over to Tatertots and Jello and see the one she just did. It’s awesome.
Yes, thank you i did see jen’s work! she is amazing! and so are you! LOVING the overflow of ideas and inspiration you have given! thank you. Have a great day!
What color did you use for the walls? I am redoing my bedroom right now and this is just the feel I want. Great job, so relaxing!
Hi Laura,
I’m not sure what color the walls are actually! I moved into the home 3 years ago and that is the color they were painted. Thanks Laura!!
Beautifull bedroom! Congrats!!
I love your blog!
Kisses from Bahia Blanca, Argentina.-
★´¨)
¸.★´¸.★*´¨) ¸.★*¨)
(¸.★´ (¸.★` ¤Gaba♥
http://www.miscreacionesymas.blogspot.com/
http://www.facebook.com/gaba.disenosexclusivos
Thank you very much!
It’s gorgeous Kari! Fabulous transformation! And you were a sewing machine girl! I’m impressed!
Thanks Allison! It felt so good to sew everything! I actually miss being behind the sewing machine like I used to!
Kari, this room is gorgeous, great job!!Love the lamb shade;)
Thanks Kristen! The lamp shades were so simple to create, too!
Those colors are so relaxing. Lovely work.
Thank you Jane! We were going for a relaxing, peaceful feel.
How fun Kari! Great job!! I am impressed with the duvet!
I was so nervous that my fabric choices might not turn out with the duvet. I was thrilled when it the fabrics flowed so well together! Thanks Nancy!
What colors did you use on your dresser? I love the look, I might steal it and do the same to some nightstands I just bought at a yard sale. 🙂
I used Annie Sloan chalk paint in Old White for the dresser. The drawers were also Annie Sloan chalk paint in Paris Grey. Topped with the clear Annie Sloan wax. No priming or sanding involved with this type of paint – love to work with it!
Quick question…about how many cans did you need of each? Also, where can you buy Annie Sloan chalk paint. I saw they don’t sell it at Home Depot…
Thank you!
Christy
Enjoyed browsing your blog. Have you ever visited Ana White’s blog? She is a woodworking mom who shares free plans on her website. It is awesome: ana-white.com
Acutally Linda, Ana White is a great friend of mine. She is not only insanely talented, she is geniune and so kind!
Looks amazing! Now I want to make-over my master!
Thank you for commenting Linda! These compliments have made my day. I put so much hard work into this room and it’s so much fun to see this kind of reaction. Good luck on your master redo I’m sure it will turn out fabulous!
Love your master bedroom reveal!
Thank you so much Katie! I can’t tell you how much fun it was!
Wow Kari!! The room looks so great!!! Love all the details and so glad you were able to get some sewing done! LOVE the bed headboard. I think we even used the exact same fabric 🙂 Great minds!
that’s freaky cool! we do have similiar taste in lots of things Amy! LOL
Hi Kari,
This was such an inspirational blog! I have the exact same bedroom set and am looking to save a few bucks by giving it a make over much like you did! I have a couple of questions if you dont mind….
1. As I have been researching I have found that chalk paint is a huge trend. Would you recommend that over staining it a darker wood color? I am torn right now bc my current room has white furniture which I have had for about 8 years now so I am definitely ready for a change.
2. what did you use to cut the top off of the mirror and headboard? Table saw? and how did you finish the edges?
Sorry for all of the questions! I am a first timer here so I want to make sure I do it right and not ruin the furniture! It was my mom and dad’s so I would like to keep it for much longer and just give it a contemporary touch!
Thanks!
Hi Shannon,
Thanks so much for your nice words!
1. Chalk paint is a huge trend and I think so many people love it (myself included) because you do not need to sand and prime when you use certain chalk paints. Instant gratification!
If you stain the wood it would be BEAUTIFUL, too but keep in mind that it will be a lot more work. It just depends on how much time you’d like to spend on it.
2. To cut off the top of the mirror we used a table saw (my husband did that part). We didn’t do anything fancy to the edges…just sanded them so they would be smooth.
As for the headboard, we built it completely and got rid of the old headboard. I just wanted a tall headboard that was totally different. You can find a tutorial on the headboard in the search bar here on U Create.
I hope this helps!!
Happy creating!!
I have the same bedroom set. I was thinking of getting a new set, but you have inspired me to redo this old one.
I love your whole design vision for your room! I have the same furniture set, and it looks so good. Did you have to use a certain type of brush to avoid streaking? Also, I am not all that great with a sewing machine so what advice do you have when picking out different patterns and color schemes to make sure they all blend together? Thank you for the inspiration!
Amazing job!!.
Did you do something to the dresser before you painted it?
Hey Wendy,
The only thing I did was sand a few imperfections like bumps or stains, but that was it! The chalk paint covers everything! 🙂
Hi! Gorgeous update! Quick question: I’m looking to paint my wood furniture with chalk paint. What kind of sealant do you use afterwards? And is it just rubbed-on and left to dry?
Any advice is welcome – thank you! 🙂
I used the Annie Sloan clear wax as a sealant that works great!!
WOW, I am totally inspired. I love, love ,love the headboard, (the fact that you & hubby did.this together is really nice. …hey guys better take a lesson in pitching.in with DIY projects… make this husband a Super Hero
In my eyes). Classy Comfort.. job well done.
Amazing transformation! You have inspired me to redecorate my room!
I really like the paint color on the wall. What is the name of the color?
Thanks. I wish I knew the color, the previous owners painted it a very light tan. I need to go match it for touch-ups so I need to find something similiar.
Hi Kari,
I was thinking of doing the same dresser, but how did you get the drawers out?
Hi Sharon,
You just have to give them a good shake and they come right out!
Hi Kari,
Thanks for the tutorial on the Euro Shams. The instructions were clear and easy. They turned out beautiful.
Linda