U Create

It's a good day to create!

  • pinterest
  • facebook
  • instagram
  • twitter
  • rss
  • crafts
    • crochet/knit
    • jewelry
    • kids crafts
    • paper crafts
    • sewing
      • bags
      • boys-clothing
      • girls-clothing
      • women-clothing
      • pillows
      • quilts
  • home decor
    • bathroom
    • build it
    • frames
    • kids
    • kitchen
    • office
  • recipes
    • desserts
    • dinner
    • snacks
    • soups
  • parties
    • baby shower
    • birthday
    • games
    • gift wrapping
    • party decor
    • party favors
  • printables
  • holidays
    • Christmas
    • Easter
    • Father’s Day
    • Halloween
    • July 4th
    • Mother’s Day
    • New Years
    • St. Patrick’s Day
    • Thanksgiving
    • Valentine’s Day
  • gifts
    • baby
    • electronics
    • graduation
    • teacher gifts
  • About
  • Be My Guest
  • Advertise
  • Contact
  • pinterest
  • facebook
  • instagram
  • twitter
  • rss

21 Nov

Origami Star Ornament Tutorial

Star Ornament Tutorial by Tea Rose Home

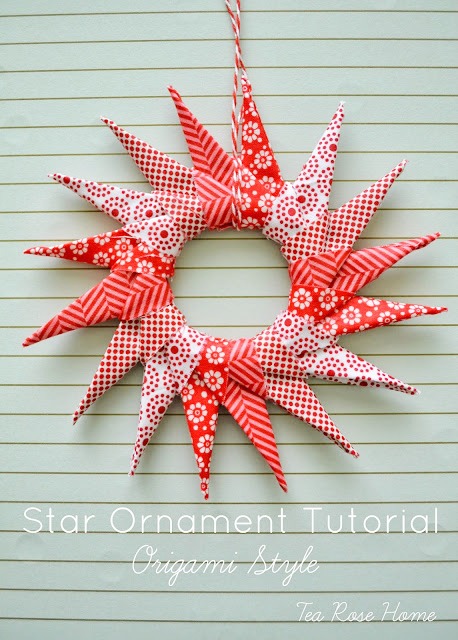
Hi there! I am Sachiko from Tea Rose Home. I love to design, sew, craft … and much more! I am very excited to share how to make a fun star ornament today. This idea came to me when I was doing some origami (the Japanese art of folding paper into decorative shapes and figures). I thought why don’t I do this with fabric instead of paper? I tried and it worked nicely, and get this … there is no sewing involved with this project.
Are you ready to start?
No Sew Star Ornament Tutorial finished size 6 3/4″ x 6 3/4″
{You will need}
4 different fabrics (if you want all different fabrics 16 scraps)
Best Press(or some other ironing starch you prefer)
Mod Podge and brush
string
{How to}
1. Cut out 4 pieces of 3 1/2″ x 3 1/2″ squares from 4 different fabrics. You need 16 squares to make one star.

2. Take one square. I found that when I sprayed best press first, the fabric kept its crease better when I folded it and it was much easier to work with. Spray, fold the square in half diagonally. Then, fold that in half again. Every time you fold, press with the iron to make a good crease.


3. Open the up the triangle to a square. Bring all four corners to the center one at the time and fold. Press with the iron.


4. Fold the sides. Use the picture as a guide.

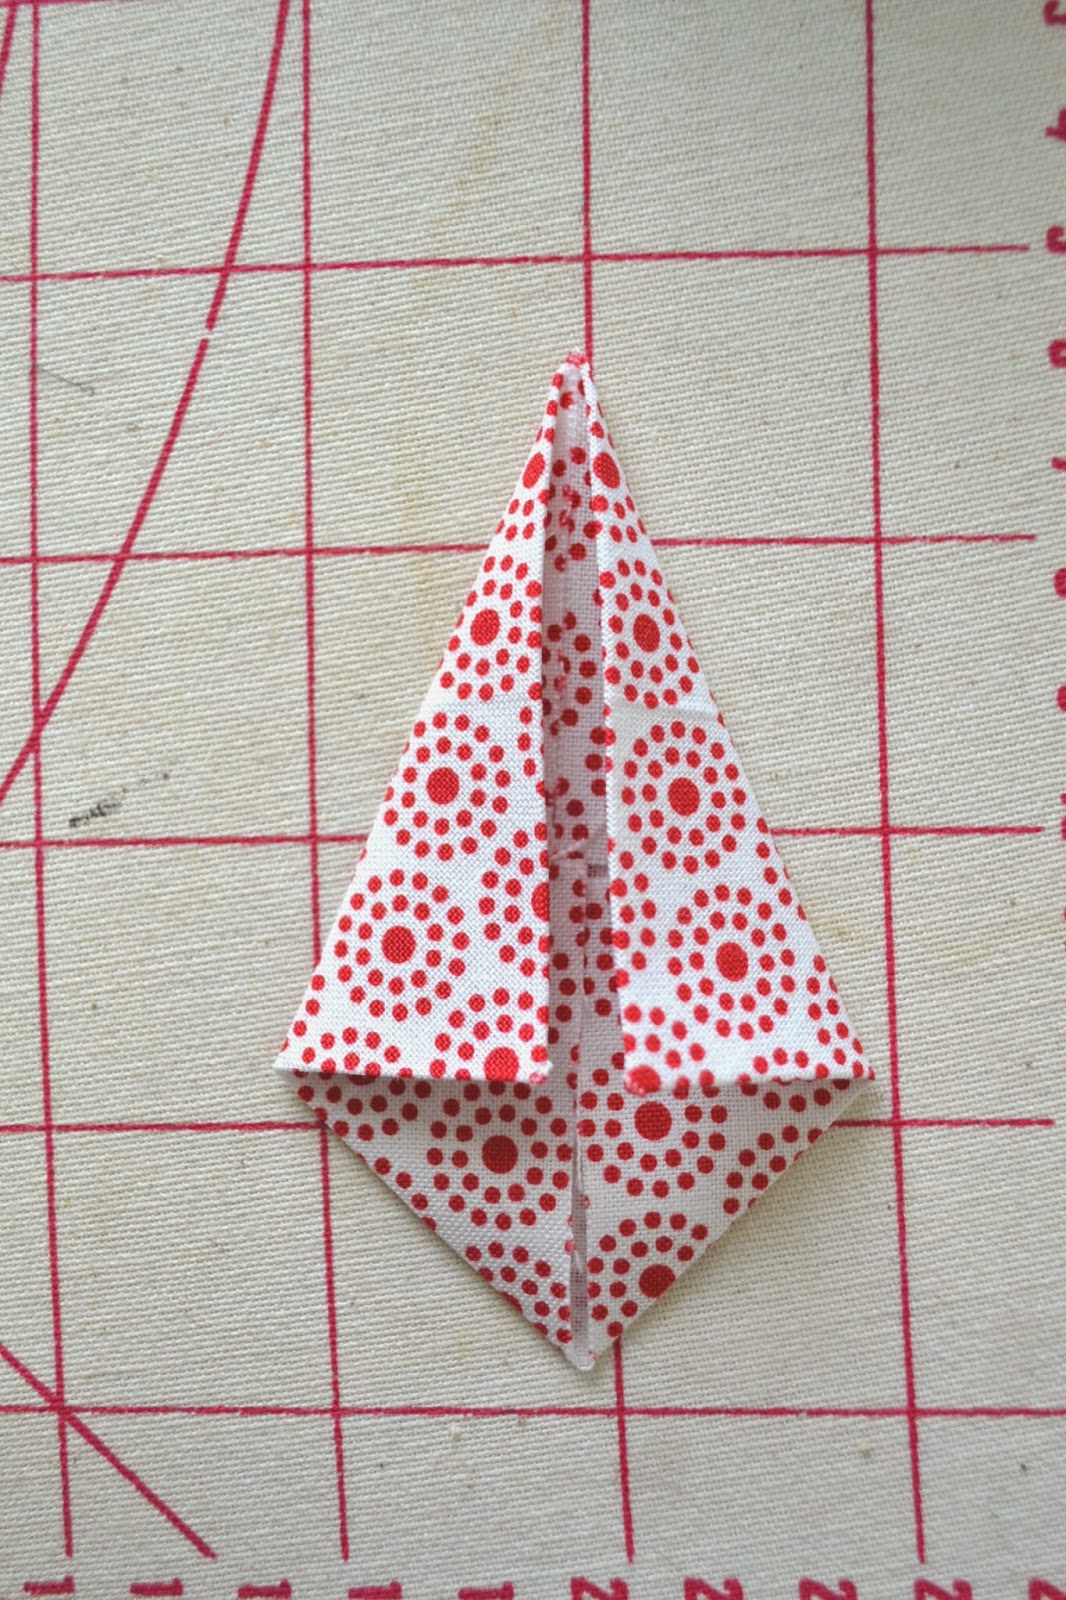
5. Flip the fabric over to the back side.

Fold the bottom tip up and fold that in half. Now you have a piece done and get to repeat 15 more times!


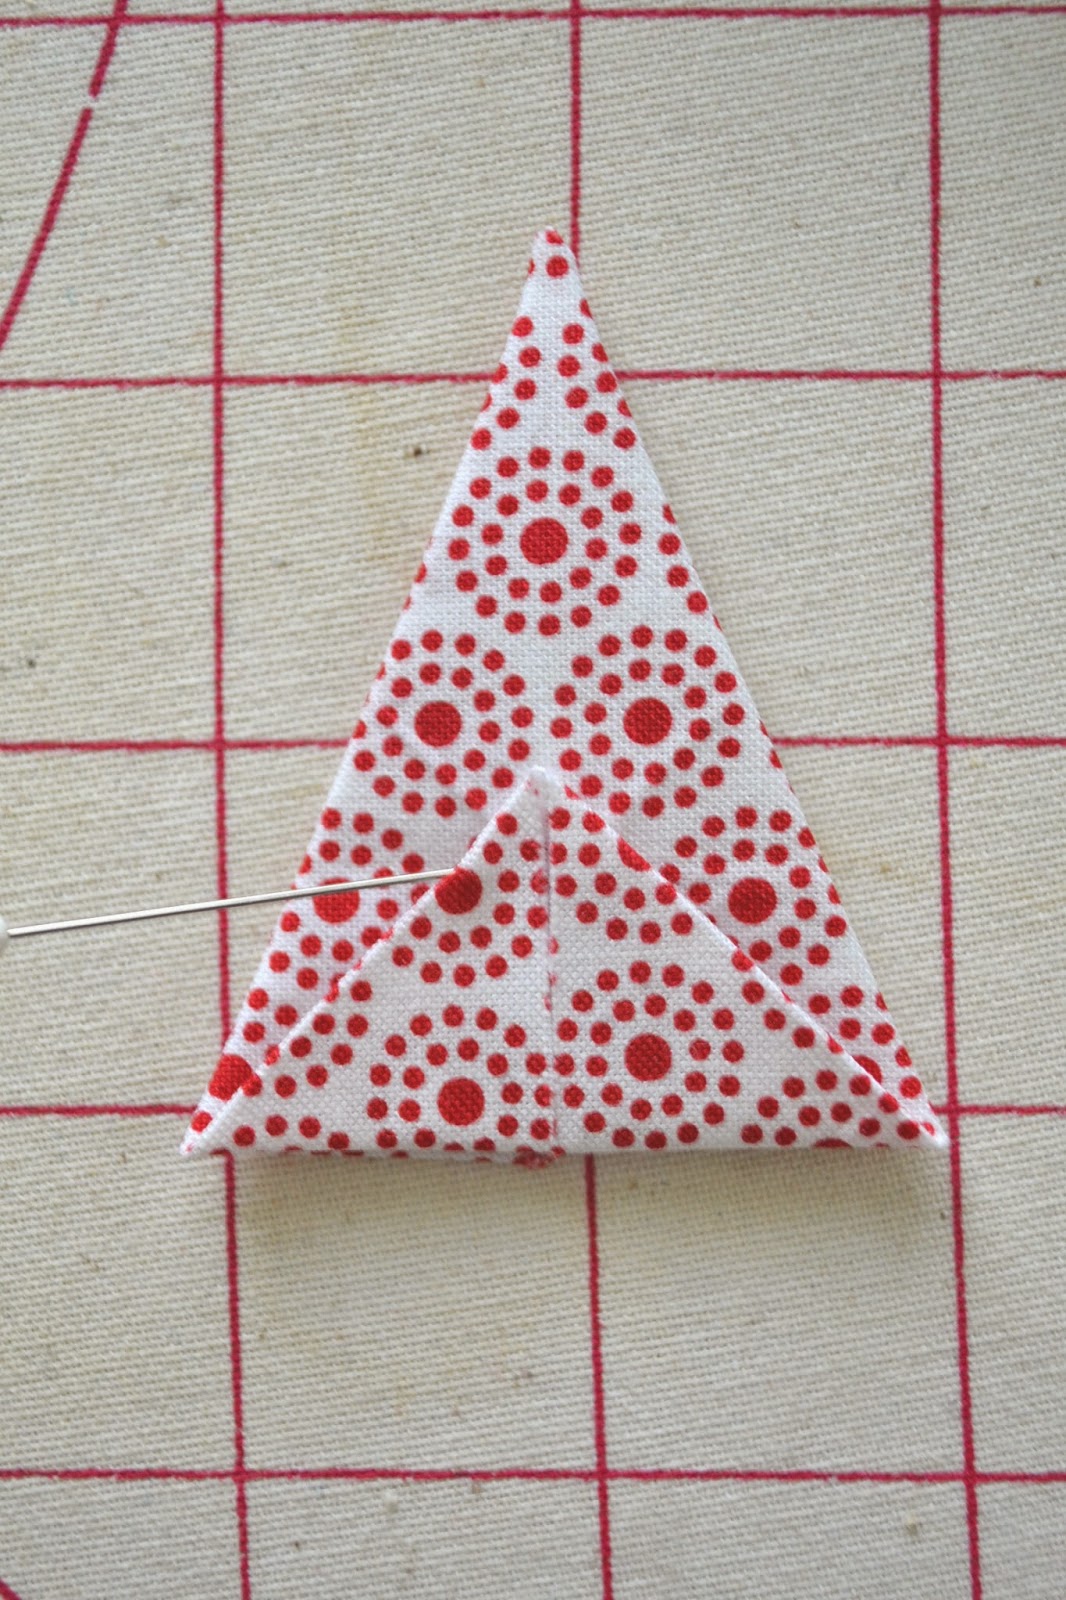
6. Push the tip of the triangle to the opening of another triangle. I used my small scissors to push the tip in deep.

7. Repeat the process until you have…

8. This!

9. You are almost done. As I was finishing up, I did a coat of Mod Podge to protect the fabric and also to secure the part that is connecting each piece.

10. Add a string when it is completely dry.

I don’t have my Christmas tree up yet, so there is no picture of the ornament up on a tree. I am so excited how it turned out though!

I hope you have enjoyed my tutorial. Thank you for having me here Kari and Becky!

25 Handmade Ornament Tutorials

You may also like these

DIY Personalized Wood Slice OrnamentDIY Wood Slice OrnamentsKnit Glove Ornaments by Design DazzleDIY Knit Gloves OrnamentDIY Rosette Christmas Tree OrnamentDIY Mod Podge OrnamentsHow to Make a Burlap and Lace TreeskirtBurlap & Lace Tree Skirt Tutorial
Previous Post: Quilted Christmas Ornament Tutorial
Next Post: Free Stitchable: Santa’s Reindeers

Comments

  1. MicheleTimms says

    November 23, 2014 at 12:04 AM

    I love this!!! One made and 5 more to go!! I will give them as gifts to my coworkers!! Did you modpodge both sides and was it just around the circle edge at the center?

    reply to this comment >
    • Jacqueline Brookshier says

      March 29, 2019 at 5:18 AM

      I love this! Thanks for such clear instructions.

      reply to this comment >
  2. Kari Sweeten says

    November 24, 2014 at 8:13 PM

    Sachiko you are always coming up with amazing ideas! LOVE this origami ornament!

    reply to this comment >
  3. Norma Morgan says

    November 28, 2016 at 3:04 PM

    Me and my 11 year old daughter are making these. Love them! Thanks for your great instructions.

    reply to this comment >
    • Anna Gallo says

      November 18, 2019 at 10:27 AM

      Lovely and simple! Thank you!

      reply to this comment >
  4. debbie says

    July 28, 2018 at 11:46 AM

    Great and very clear instructions . Thank you.

    reply to this comment >
  5. Lois Alice says

    January 2, 2019 at 11:20 AM

    Do you put the mod podge on the total ornament or just around the circle area to secure?

    reply to this comment >
  6. Dawn D. Bowie says

    December 3, 2019 at 9:53 AM

    Will be attempting this weekend – hope to make a few for the Christmas tree this year!

    reply to this comment >

Trackbacks

  1. Tutorial: Origami Star Ornament – Sewing says:
    November 23, 2014 at 12:29 AM

    […] Origami Star Ornament Tutorial, by Tea Rose Home […]

    Reply

Leave a Comment Cancel reply

Your email address will not be published. Required fields are marked *

Recipe Rating


Popular Posts

Easter VIntage Art Printables at U Create

Vintage Easter Art Prints

Spring Coloring Poster and Page

St. Patrick's Day printable games - by U Create

St. Patrick’s Day Game Printables

St. Patrick's Day printable - more precious than GOLD tag - by U Create

St. Patrick’s Day GOLD Printable

16 Easter Craft Ideas for Kids

DIY Easter Crafts for Kids

St. Patrick's Day Coloring Page by U Create

St. Patrick’s Day Coloring Page

  • pinterest
  • facebook
  • instagram
  • twitter
  • rss
 
Privacy Policy
Back to Top

Copyright © 2023 U-Create • All Rights Reserved • Site Design by Emily White Designs