If you’re a fan of Pinterest you will love this PIN IT pincushion tutorial! I’m also in love with the fact that it fits right around your machine…this exactly where I need a pincushion…super easy access! Supply List:
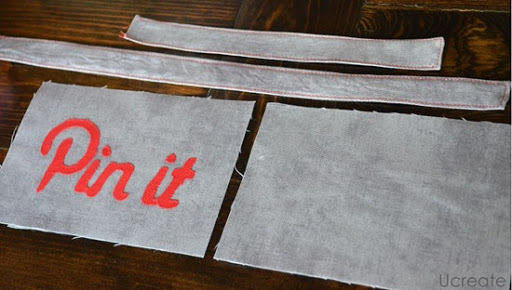
- 1 Red 4×6 piece
- 2 Gray 4×6 pieces, 14×3 strip, 7×3 strip
- Fusible Light Interfacing: 2 4×6 pieces, 14×3 strip, 7×3 strip
- Sew-on “hook and loop”
- Red thread
- Polyester filling
- optional: Silhouette Craft Cutter and Sewing Fabric Interfacing


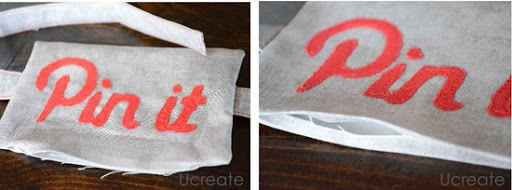
If you don’t have a craft cutter, don’t worry. You can still make the pincushion. Just print out this file (resize if needed) and cut out the PIN IT. Iron wonder-under on the red fabric (back side) and trace the image BACKWARDS on the wonder under. Cut letters out. When you flip the image over it should read correctly and be ready to iron on the gray fabric. (Follow the wonder-under directions).
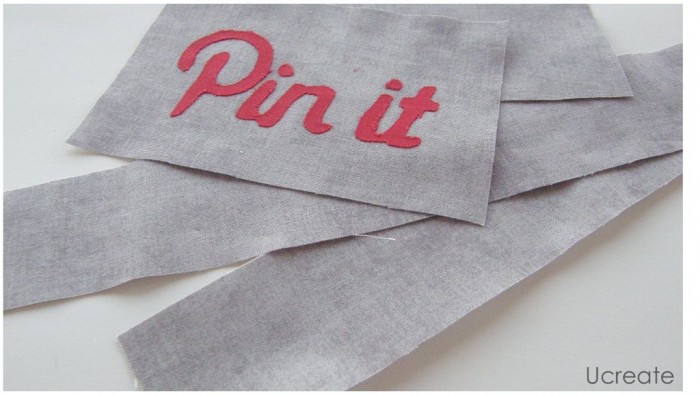
Iron “PIN IT” on one of the gray 4 x 6 pieces.
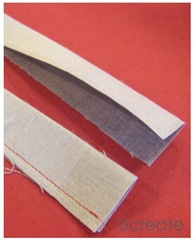
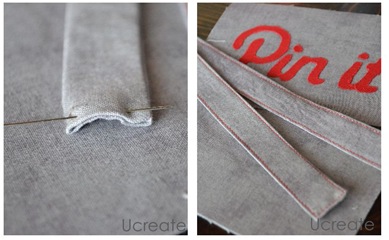
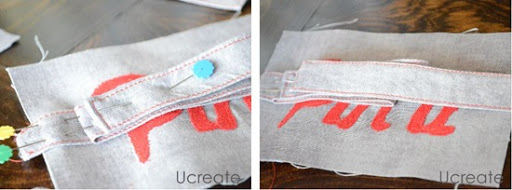
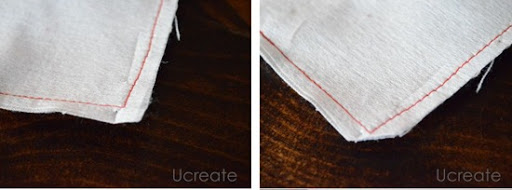
Grab the gray strips and fold the in half, right sides together. Sew up on side to create a tube. Turn tube right side out (I used Ashley’s method from Make it and Love it). Tuck a raw edge on each strap inside the tube about 1/2″. Sew a topstitch all the way around the strips. Do this to both strips and then set them aside.
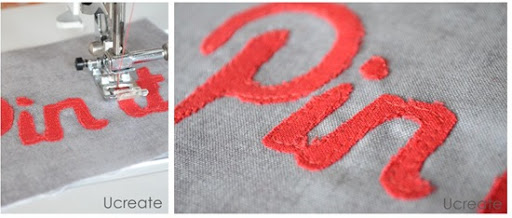
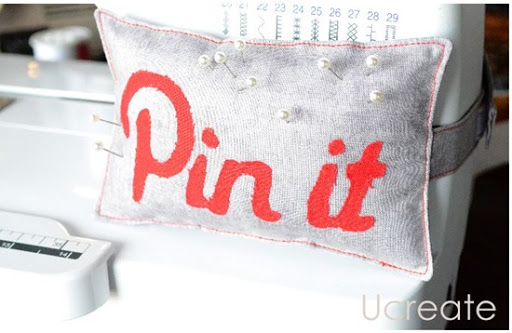
Top stitch the “PIN IT” letters that you have ironed to the gray fabric…use patience. It looks so good when you are done.
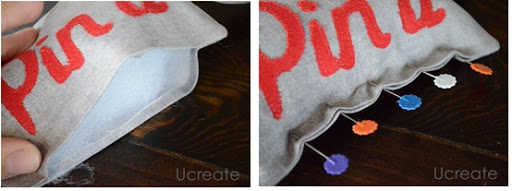
Okay, let’s put it all together. Grab all your pieces and plenty of straight pins.
Pin the long gray strip to the front of the “PIN IT” piece in the middle of the side. Because the strap is so long and we don’t want it messing with our sewing, pin the strap to itself away from the edges of the PIN IT piece. Next pin the short strap to the other side of the PIN IT gray piece and place it on top of the other strap. (This totally sounds harder than it is).
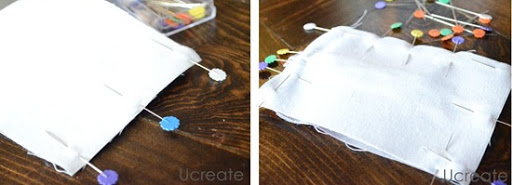
Pin the back gray piece on top of the strap and the front PIN IT piece. Make sure to leave on side open in order to turn it right side out. Start sewing 1/2″ seam allowance at one side of the open edge and end at the other side of the open edge making sure to backstitch.
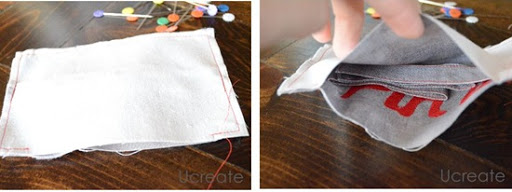
Cut the corners on a slant and turn everything right side out.
Fold the open edge in 1/2″ and iron. Then stuff your pincushion with poly-filling or stuffing of your choice and pin closed. Top stitch all the way around…make sure those straps don’t get in the way.
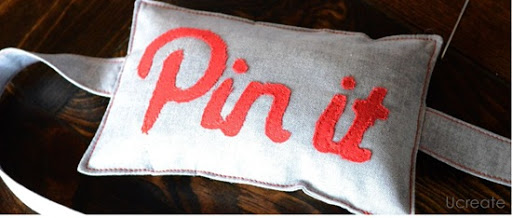 Put some hook and loop on the ends of the straps in order to secure it to your machine. You have to put the pincushion around your machine to determine where to put the hook and loop.
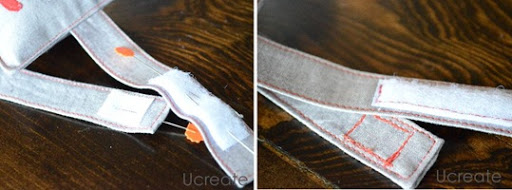

…and you’re done! ENJOY!
Fabric used: Riley Blake Designs Slate (gray) & Pepper (red).


Becky that was very clever! I have to admit it took me a few minutes (it’s early) but that is a great place to pin your pins!
Love it!
Susan
Really cute!
Oh that is Good! How very clever! love it!
Love it!
How fun! I might have to “pin it.”
Oooh, I really like this! Might have to add it to me ‘to do’ list. Pinned!
such a great idea! This is going to save me a lot of lost pins 🙂
You gals are so nice!
How cute is that!?!!
I’m a Pinterest addict.
Love it!
I freakin’ love it!
How cute! I tried to subscribe to pinterest but no luck on the waiting list so far.
Love this! I MUST make it. No more tossing pins all over my work table!
Super cute!!!
Great idea it will make crafts time easier!
featured you on my shout out sundays! http://www.kimboscrafts.blogspot.com/2012/02/shout-outsbetter-late-than-never.html
ADORABLE! “Pin-ed” it
Fabulous idea! I’m pinning it! 😉