Today is the last day in my five part Simple Quiet Book Series. I’ve had fun being here at UCreate sharing this week. Thanks Kari for inviting me!

 Growing up my sisters and I called this game “the dot game”. My husband informed me that it is called “squares”. Upon doing a little research I learned that this game goes by many names including: dots and boxes, squares, pigs in a pen, paddocks, square-it, dots and dashes, dots, smart dots, dot boxing, or simply the dot game. That’s a lot of names! It looks like both my husband and I were right. If you’re not familiar with the rules of this game you can find them here.
To make a dots and squares quiet book game you need:
1. Template (download it here)
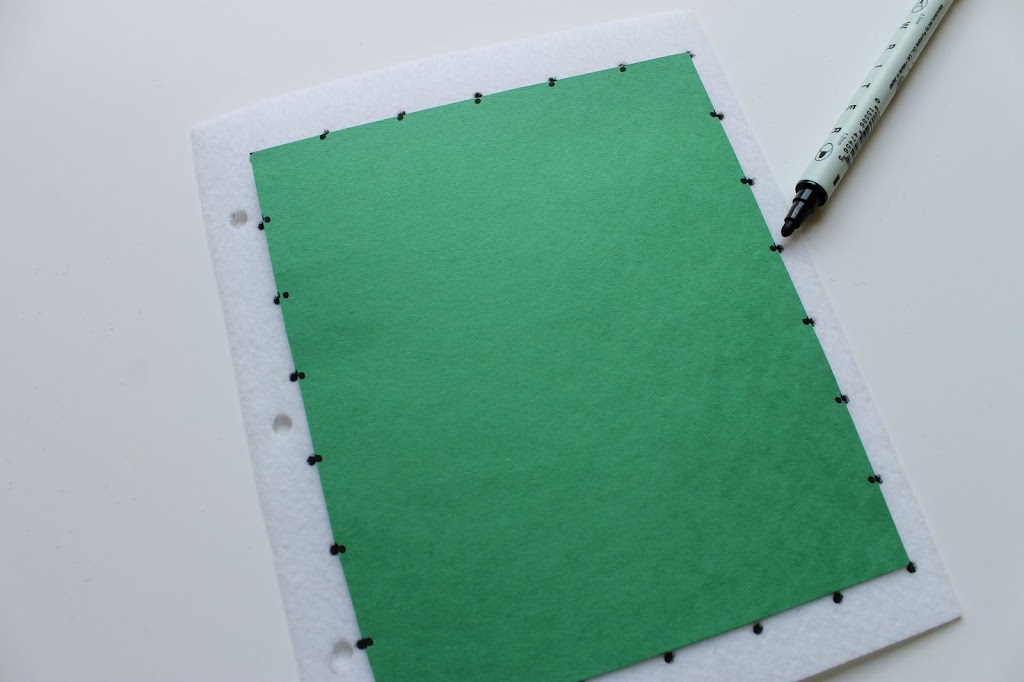
2. A pre-cut blank quiet book page. I always use Pellon peltex for my quiet book pages–it’s sturdy and you don’t have to worry about fraying edges. I make all my quiet book pages 7 x 8.5 inches.
3. A piece of 12 or 16 gauge vinyl, roughly 9 x 10 inches.
4. Acid free permanent marker
5. Dry erase marker
6. Single hole paper punch
Instructions:
Use your single hole paper punch to make the holes for binding in your quiet book page. Download the template and print it out. Cut out template and lay it on your quiet book page. Use the dots on the template as a guage for where to mark the dots on your quiet book page. Mark the dots along the right and left sides and across the top using your marker.
Slide the template down and continue to mark the dots, using the template for a guide, until you’ve reached the bottom of your page.
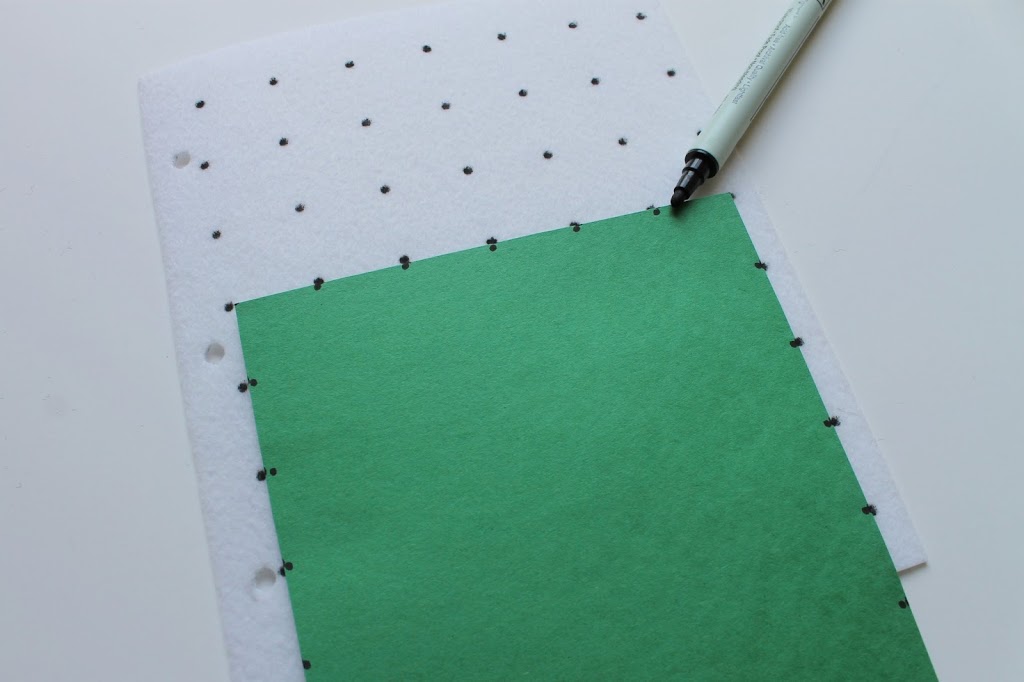
You now have a page full of dots.

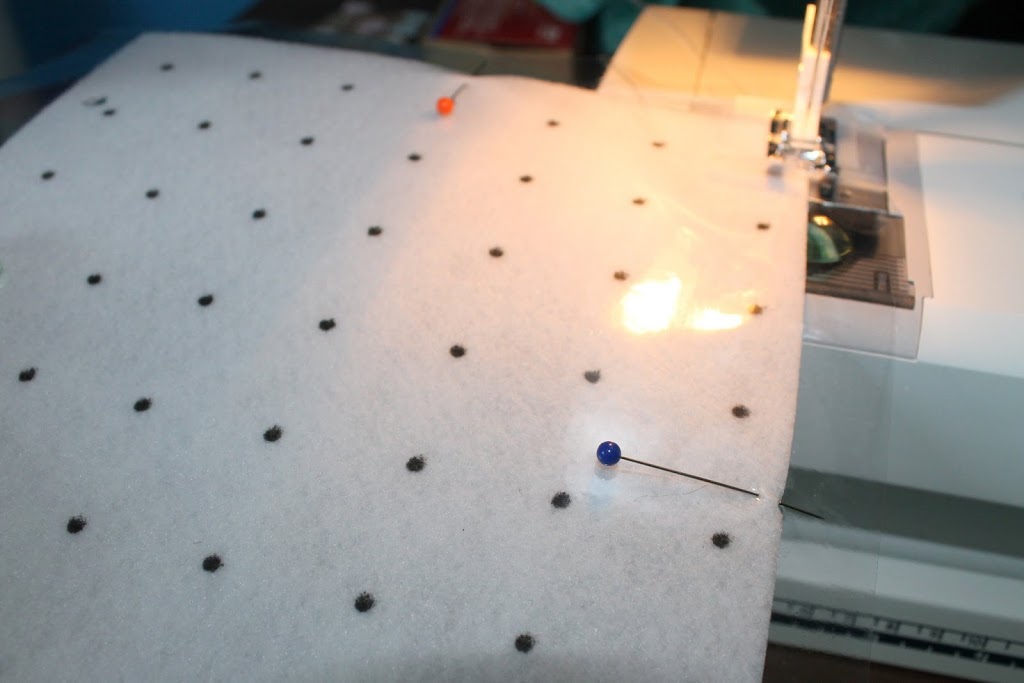
To make your game erasable you need to add a vinyl surface to the page. To do this roughly cut a 9 x 10 inch piece of vinyl–it’s easier to apply if the vinyl is slightly bigger than your quiet book page. Place the vinyl over your page and pin it along each edge and each corner. Make sure it’s pulled taught as you pin each side. Sew around all four sides at an 1/8 inch seam.
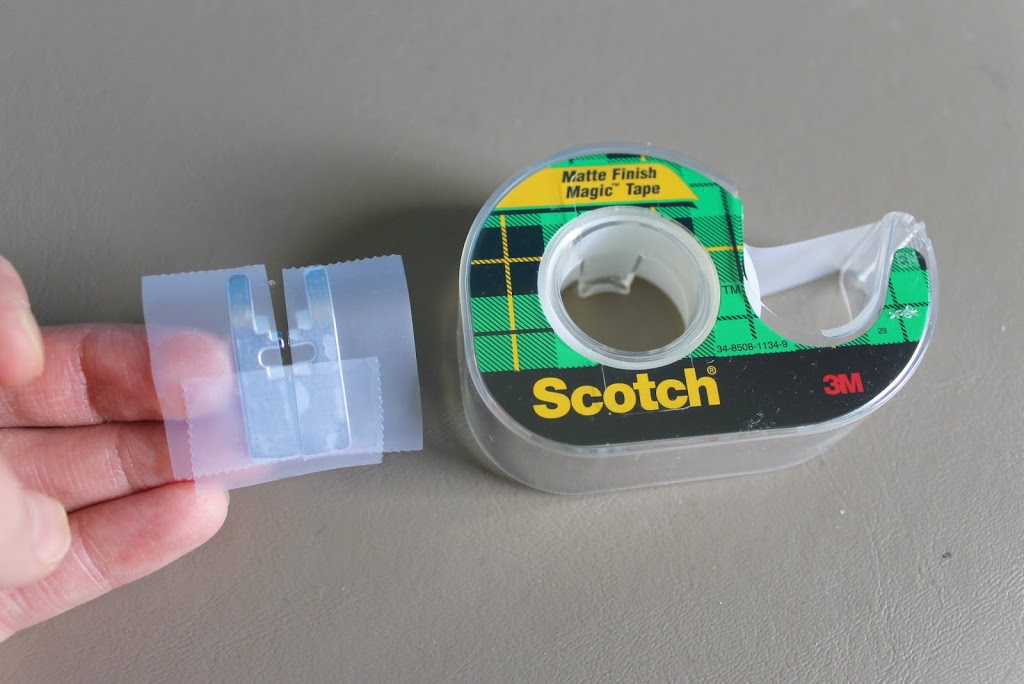
The tricky thing about sewing vinyl is the presser foot sticking to the vinyl. To help your presser foot glide along smoothly apply matte finish Scotch tape to the bottom of the presser foot as shown below. This works wonderfully (and eliminates a ton of frustration!).
Now trim off the excess vinyl that is hanging over the edge of your page. Re-punch the holes that the vinyl covered up. Your hole punch will easily cut through the vinyl.
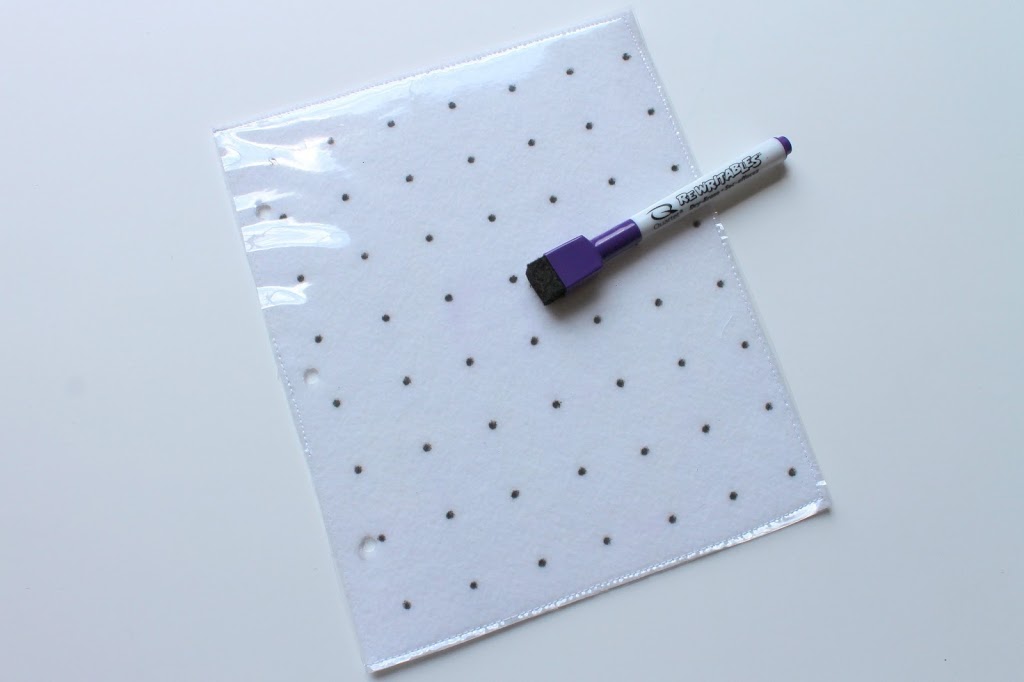
Now your game is ready to play. Use a dry erase marker when playing to easily erase the game when done–the kind with the built in erasers make for easy clean up.

Like this quiet book idea? Find more on my website Serving Pink Lemonade and in my new book Quiet Book Patterns: 25 easy-to-make activities for your children.
-Amy


Leave a Comment