U Create

It's a good day to create!

  • pinterest
  • facebook
  • instagram
  • twitter
  • rss
  • crafts
    • crochet/knit
    • jewelry
    • kids crafts
    • paper crafts
    • sewing
      • bags
      • boys-clothing
      • girls-clothing
      • women-clothing
      • pillows
      • quilts
  • home decor
    • bathroom
    • build it
    • frames
    • kids
    • kitchen
    • office
  • recipes
    • desserts
    • dinner
    • snacks
    • soups
  • parties
    • baby shower
    • birthday
    • games
    • gift wrapping
    • party decor
    • party favors
  • printables
  • holidays
    • Christmas
    • Easter
    • Father’s Day
    • Halloween
    • July 4th
    • Mother’s Day
    • New Years
    • St. Patrick’s Day
    • Thanksgiving
    • Valentine’s Day
  • gifts
    • baby
    • electronics
    • graduation
    • teacher gifts
  • About
  • Be My Guest
  • Advertise
  • Contact
  • pinterest
  • facebook
  • instagram
  • twitter
  • rss

19 Nov

Twiggy Snowflake Ornament Tutorial

Hey U Create friends! I’m Ashley from the blog Make It and Love It. I just have to say that I’m pretty excited to be hanging out on U Create today…..because I pretty much adore those Kari and Becky gals who run the show around here. So when they told me about this Ornament Series, I was happy to join in on the fun. So thanks again you two! 🙂

Anyway, my homemade ornament is a pretty simple one. And EXTREMELY cheap. As in, step outside, grab a few twigs…..and start gluing! 🙂

Twiggy Snowflake Ornament by Make It and Love It
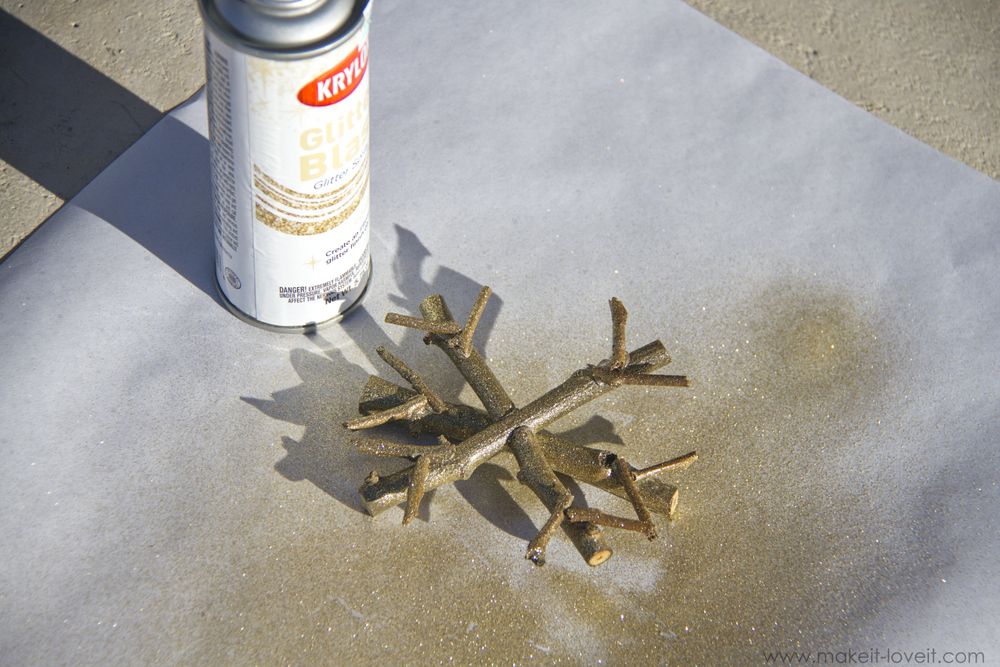
But, ahhhhh, there’s something fun and truly lovely about putting a few sad twigs together, to create a fresh and earthy little ornament for your tree. (Adding a little gold spray glitter is optional……but kinda dresses up the twiggy little snowflake. So go on, add a little glitz.)

How to Make a Twig Snowflake Ornament by Make It and Love It

Here’s how to make your own…

SUPPLIES:

  • Twigs…..3/8 inch thick on down to an 1/8 of an inch
  • Hot Glue
  • Jute String
  • Glitter Spray (optional)

**I used an electric saw to cut my thicker twigs down to size, but you could use a hand saw, or even pruning shears to cut yours.

INSTRUCTIONS:

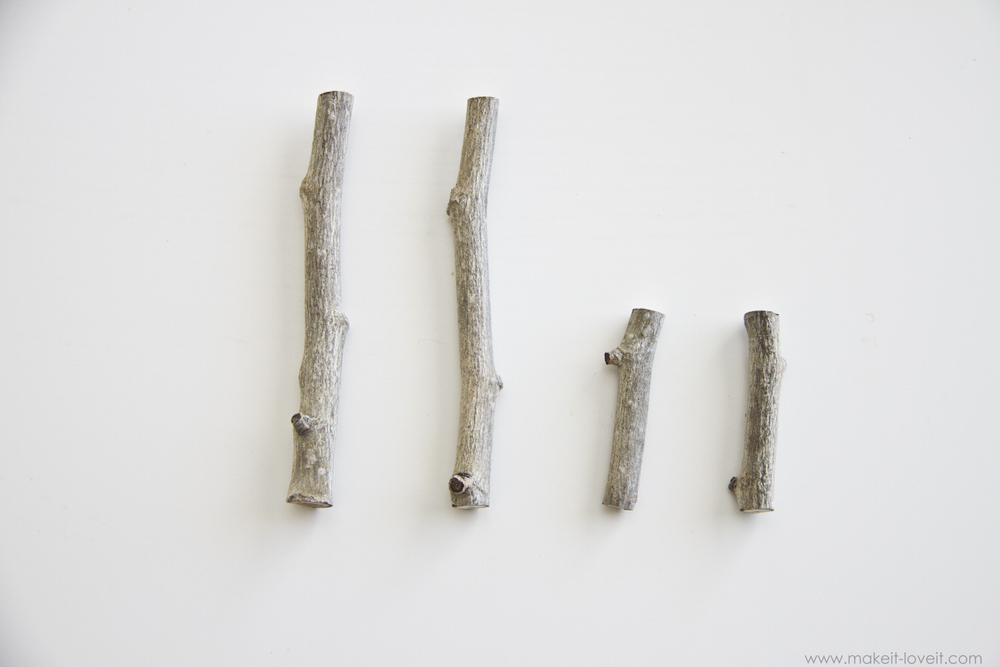
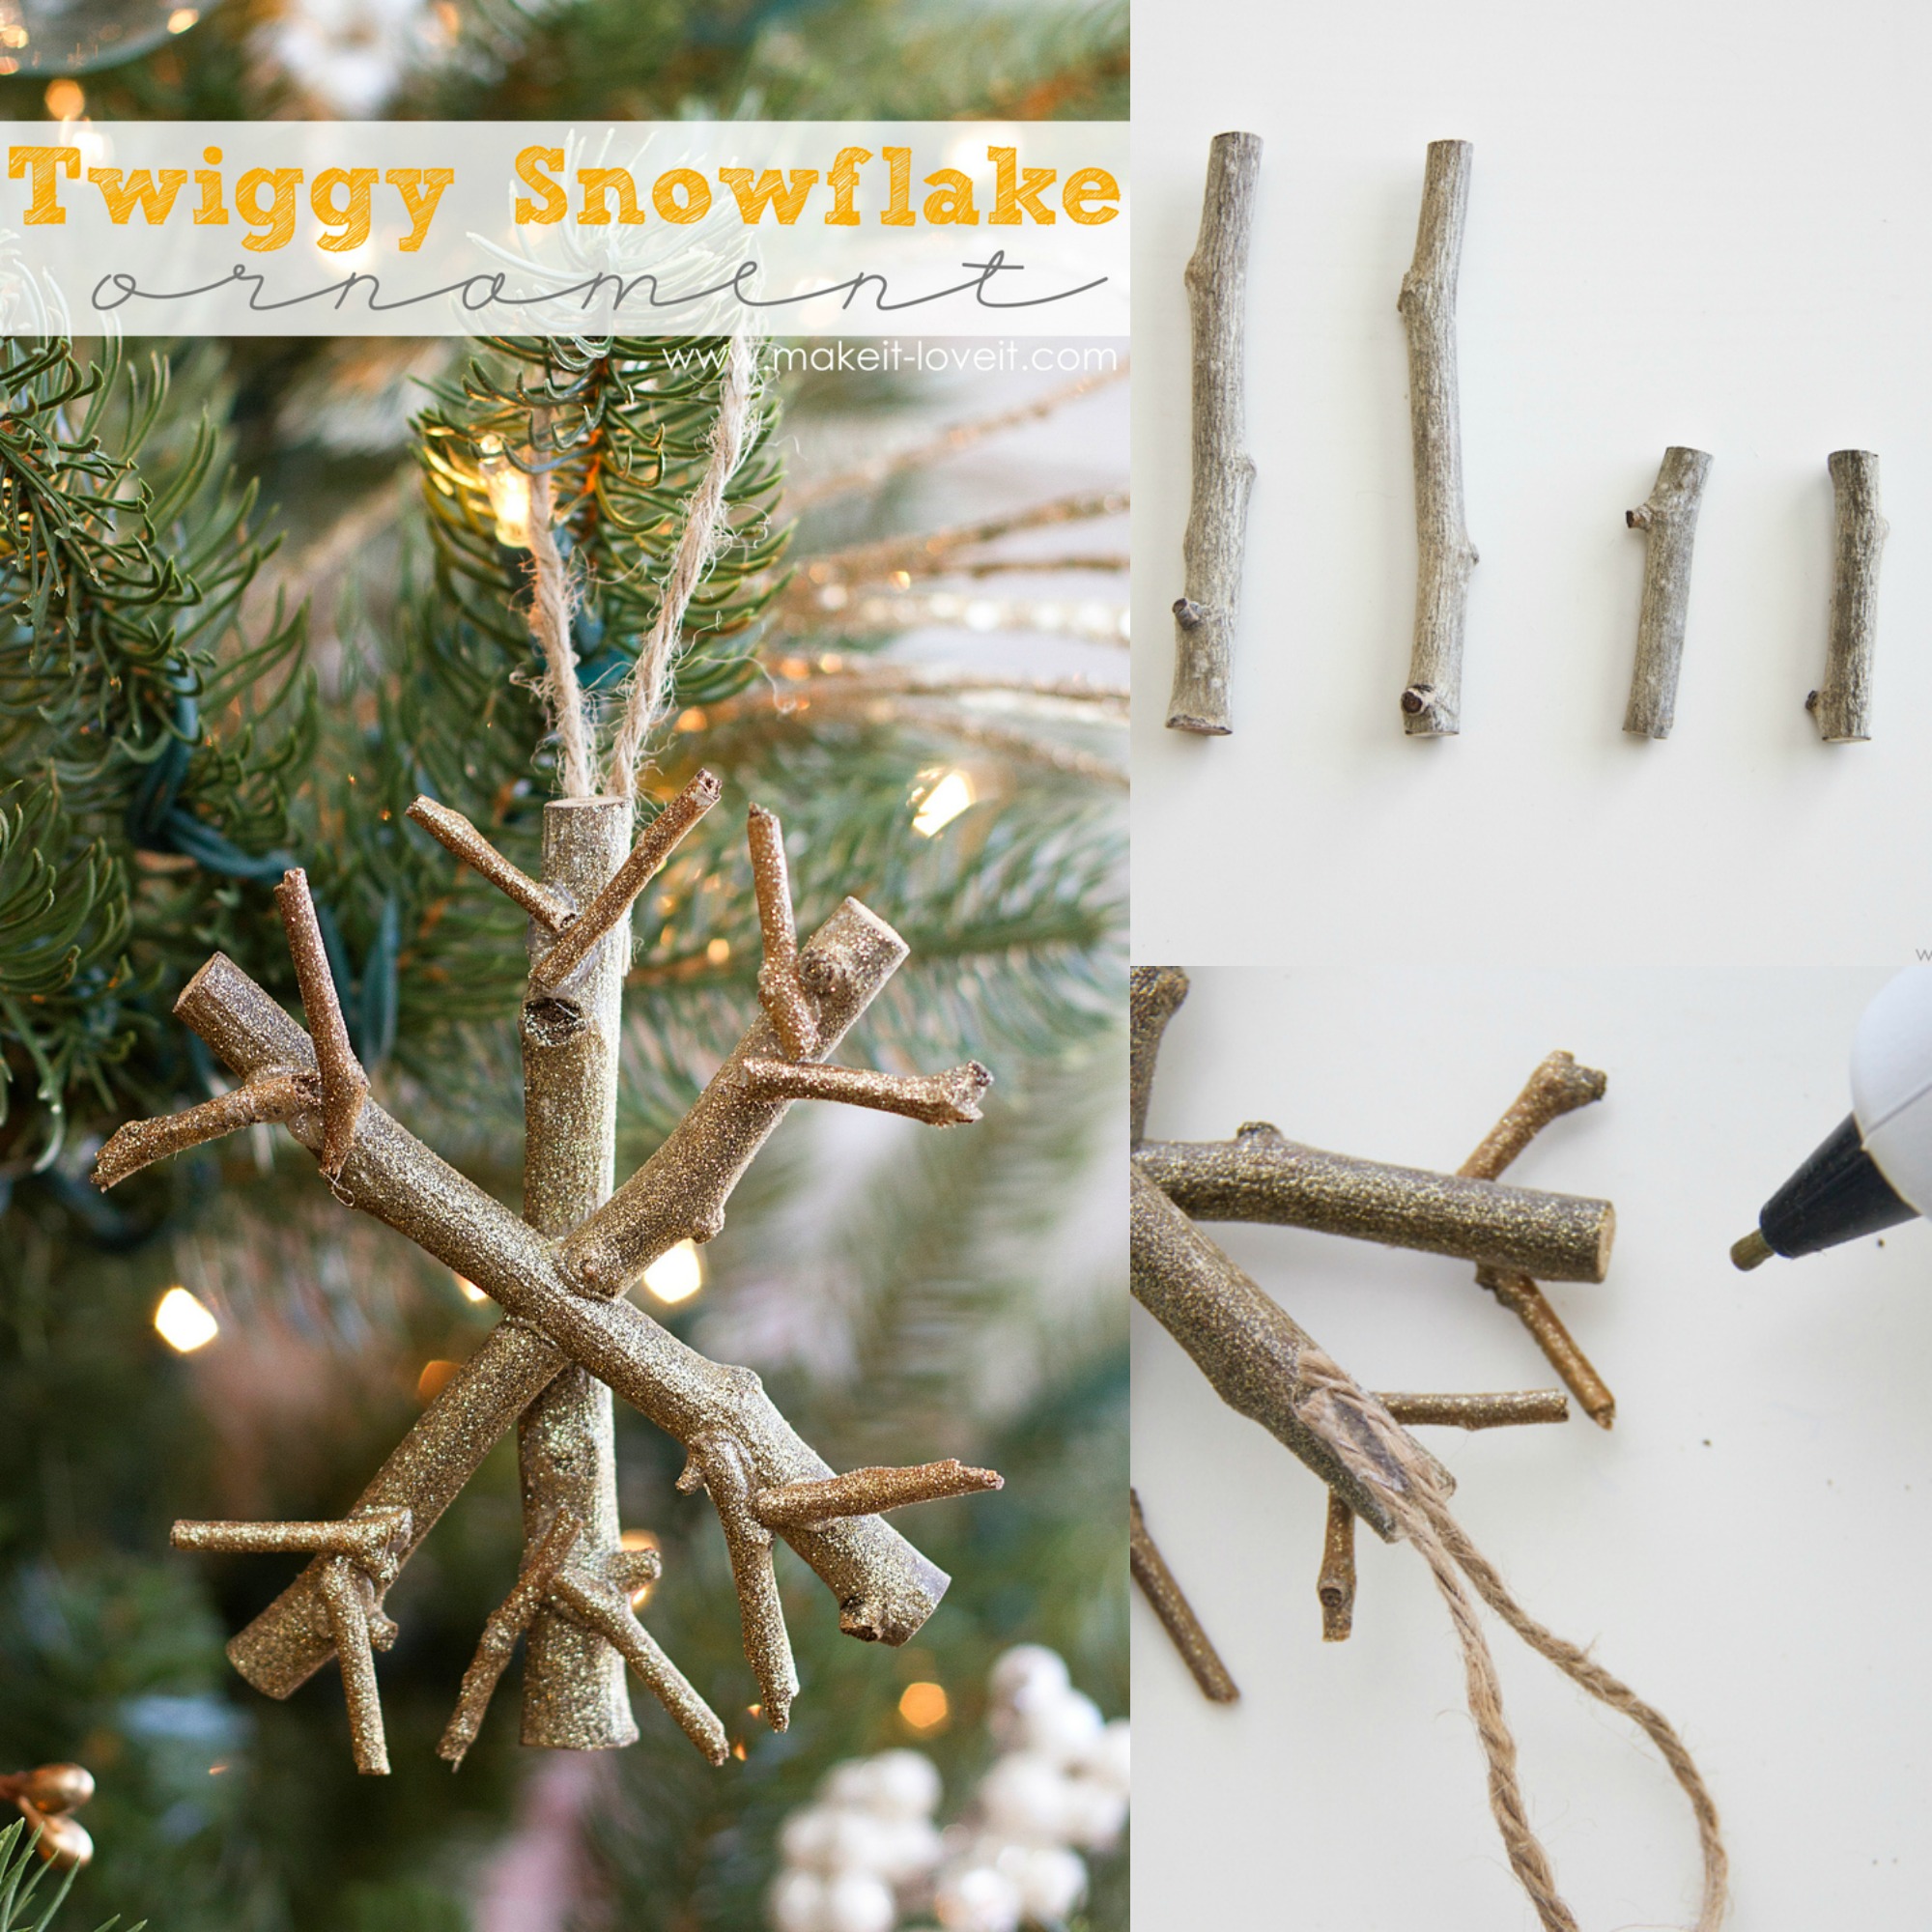
Cut 2 longer twigs that are 4 1/2 inches long. And 2 shorter twigs that are about 2 inches long. (They don’t have to be exact….but try to keep these main pieces about the same thickness, around 3/8 of an inch.)

IMG_5261

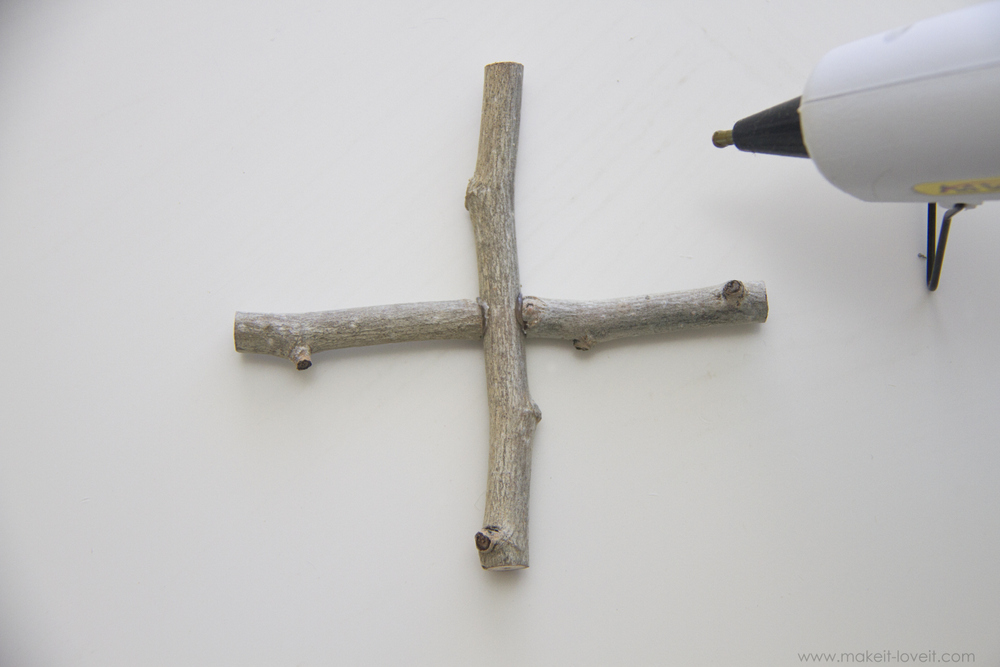
Then glue your two shorter pieces to the middle sides of one of the longer pieces, creating a “plus” sign.

IMG_5272

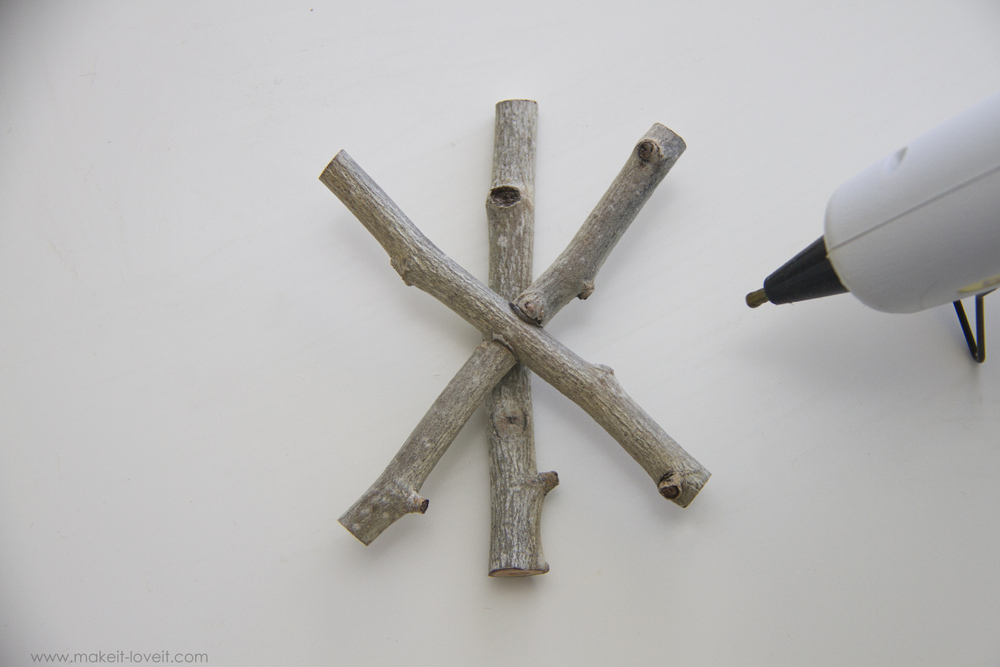
Then, place the “plus” sign on top of the other long twig, evenly spacing it behind and between the twigs of the “plus” sign that’s on top.

IMG_5274

Now, start breaking off small twig pieces that are about 1 inch long and 1/8 of an inch thick.

IMG_5277

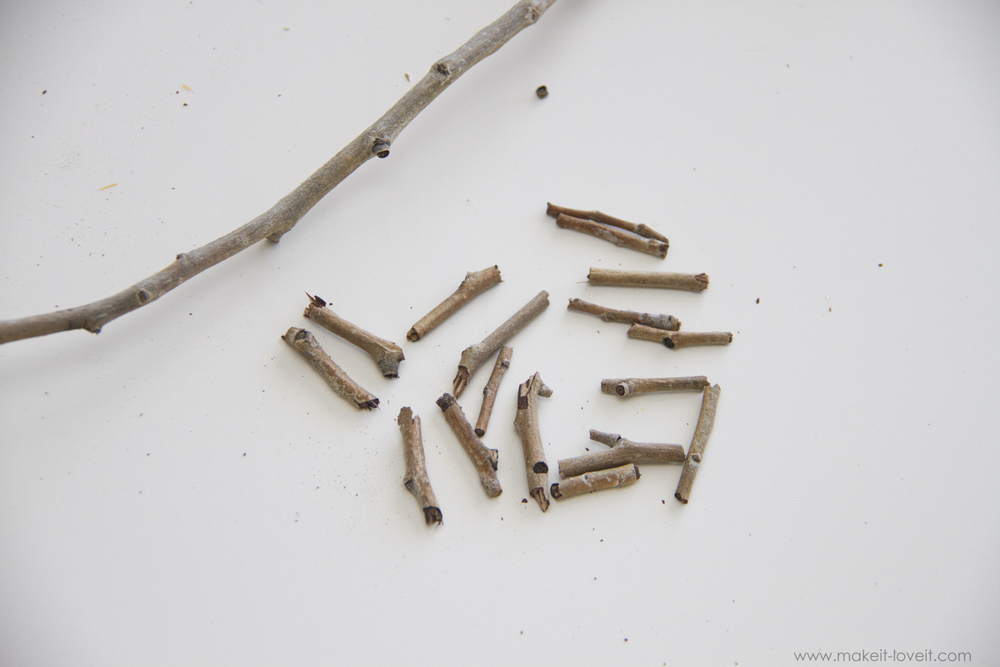
Glue them in an outward “V” shape at the tip of each of the 6 points of the main snowflake shape.

How to Make a Twig Snowflake Ornament by Make It and Love It

Spray your entire snowflake (front, back, and along all sides) with a bit of glitter spray and let dry completely.

IMG_5285

Then, attach a loop of jute string to the back of one of the tips of the snowflake.

How to Make a Twig Snowflake Ornament by Make It and Love It

And then the fun part—–hang and enjoy.

Twiggy Snowflake Ornament by Make It and Love It

That’s it. Easy peasy…..but simply perfect for any tree decorating theme. 🙂

Thanks again Kari and Becky for having me over today! You guys have such a fantastic collection of ornaments in your series thus far. Such fun! 🙂

Twig Ornament Tutorial by Make It and Love it

Again, you can find me over at Make It and Love It, for a little bit everything! 🙂
Ashley


POST BY:
ashley-makeitandloveit

You may also like these

Peppermint Ornament with Photo Inside Tutorial by Lisa StormsPeppermint Photo Ornament Tutorial by Lisa StormsFinger Knit Wreath Tutorial by Flax & TwineDIY Personalized Wood Slice OrnamentDIY Wood Slice OrnamentsFree Printable Christmas gift tags - You're the "BALM" by U CreateYou’re the BALM – Christmas PrintablesBrown Bag Gift Wrapping Ideas by Ameroonie DesignsBrown Bag Gift Wrapping
Previous Post: DIY Rudolph Ornament
Next Post: DIY Felt Ornament Tutorial

Comments

  1. Consie @ AtopSerenityHill.com says

    November 19, 2013 at 2:04 PM

    These are adorable and I love the addition of the gold! Sparkle is always a good thing!

    reply to this comment >
  2. Ursula Rosien says

    November 19, 2013 at 4:37 PM

    Cute! This would be a great craft with kids too! 😉

    reply to this comment >
  3. Brooke says

    November 19, 2013 at 6:53 PM

    Super cute! I love the gold glitter! And if I painted mine white instead they’d be perfect for a Christmas party I’m planning…Pinned!

    reply to this comment >
  4. Becky Marie says

    November 20, 2013 at 12:02 AM

    Another great craft from Ashley. I LOVE the glitter! Thanks for being here today!

    reply to this comment >
  5. Bear's mom (Life With Two) says

    November 20, 2013 at 5:26 PM

    Great idea! I just pinned it ~ simple, easy, and cheap (my kind of craft!). Thanks!

    reply to this comment >
  6. Kari Sweeten says

    November 25, 2013 at 5:39 PM

    Ashley, THANK YOU for sharing your amazing talent with us today! Leave it to you to make something gorgeous using something as simple as twigs. Thank you!

    reply to this comment >
  7. jamie @ [kreyv] says

    December 9, 2013 at 1:13 AM

    Love these!

    reply to this comment >

Leave a Comment Cancel reply

Your email address will not be published. Required fields are marked *

Recipe Rating


Popular Posts

New Year's Eve Minute to Win It games by U Create

New Year’s Eve Minute To Win It Games

Free Printable "Color Your Own" Christmas Banner

Merry Christmas Coloring Banner

Free Pattern: Fall Turkey by U Create

Fall Turkey Printable

Free Printable Pumpkin Games

Halloween Printable: Bugs and Kisses

Halloween Minute To Win It Games

  • pinterest
  • facebook
  • instagram
  • twitter
  • rss
 
Privacy Policy
Back to Top

Copyright © 2023 U-Create • All Rights Reserved • Site Design by Emily White Designs