Hi Ucreate readers.
Kari always finds the most amazing projects around. I am SO honored to be here today!
My name in Nancy, and I blog at Nancy’s Couture.
I am blessed to be a stay at home mom to a sweet boy and a little princess. I love to sew!…especially for my children. You will find tutorials and patterns for recycled and made from scratch clothes for kids over at my blog.
Today I am going to share my newest creation.
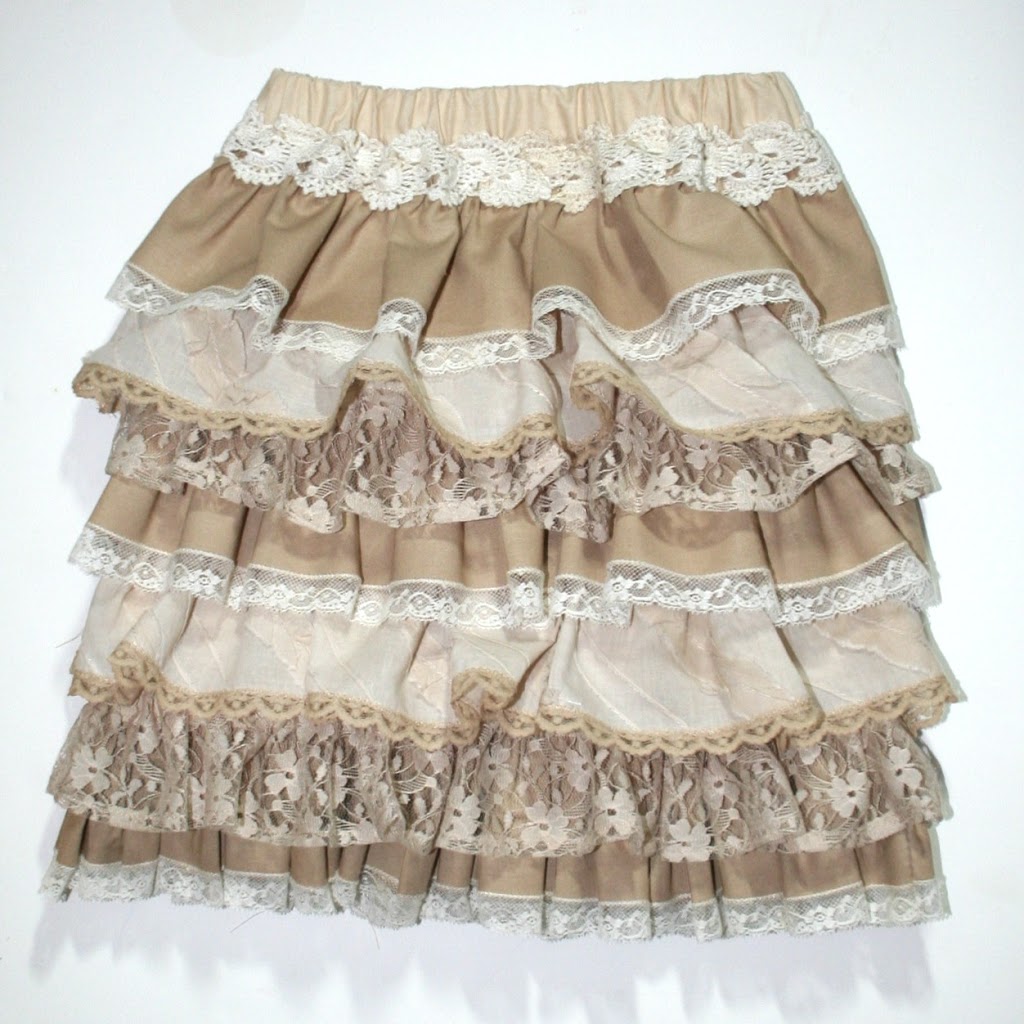
I am totally in love with this skirt!!!
Victorian Valentine Skirt

Supplies Needed:
1/2 yard each: lacy fabric, white cotton fabric, another white cotton fabric
Lace edging….lots of it
Crochet trim 29″
3/4″ non roll elastic
Thread
Scissors
Sewing Machine
First we cut the skirt pieces.
Cut 2 rectangles 14.5” x 12.5”
Now we will cut the fabric strips to make the ruffles.
*Cut 6 strips of the first fabric.
*Cut 4 strips of the second fabric and the lace fabric.
*Cut 10 pieces of lace each 28″ in length
Next we are going to make the base of the skirt.
With right sides facing stitch the sides.
Now for the elastic casing you will fold down 1/4″ and then 1″. Stitch close to the fold.
Next we need to attach the lace edging to the strips of fabric.

Lay the lace on top of the fabric. Using a short stitch. zig zag stitch over the edges of the lace and fabric as pictured above.
Fold lace down and iron flat.

We will not add lace to the bottom of the lace fabric, instead we will hem it. To hem fold the bottom up 1/4″ and then another 1/4″ and stitch.
Now grab 2 strips of the same fabric. Lay them right sides facing each other. Sew each end so that you have a big loop. Continue with the remaining fabric strips.
.
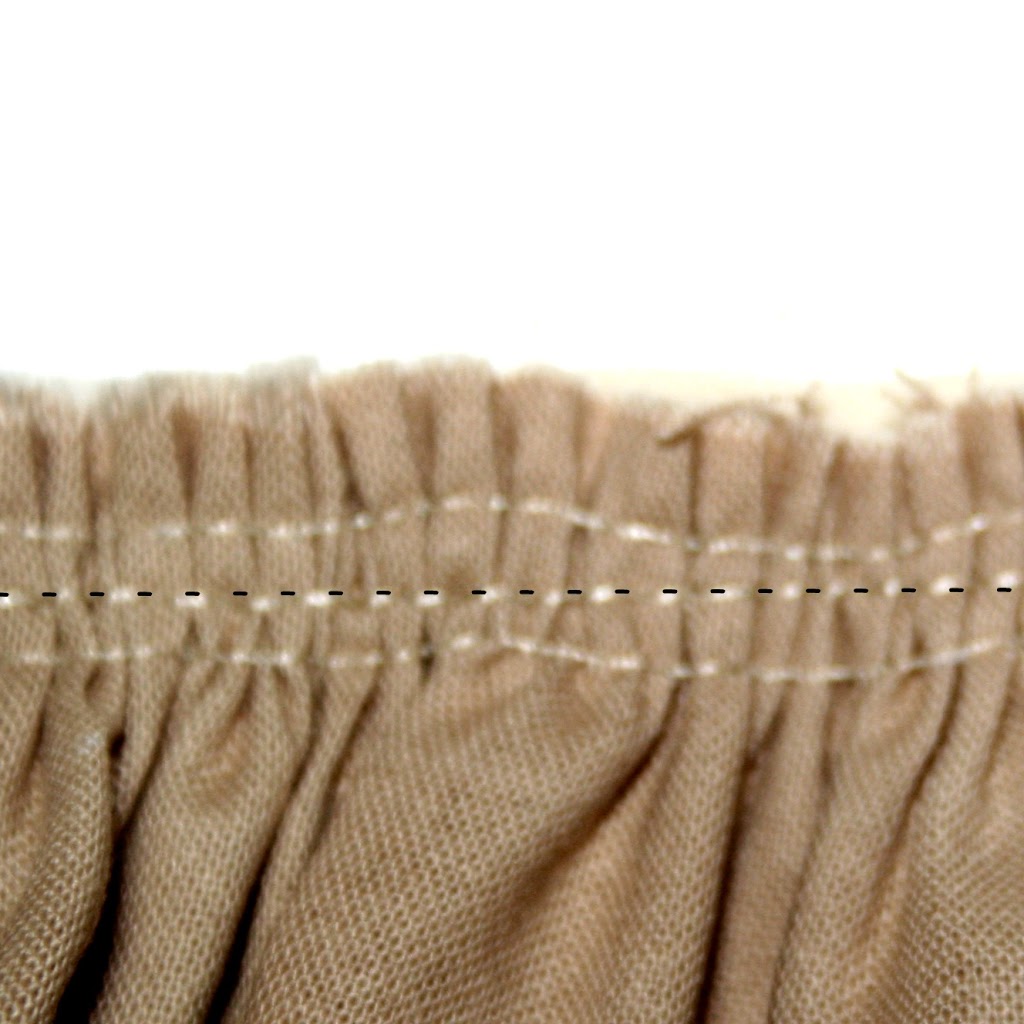
It’s time to gather all the strips for the ruffles of the skirt.

To gather you are going to stitch. using your longest stitch length, 1/4″ from the edge. Then you will stitch again 1/2″ from the edge. This will prevent puckering in the ruffle when you sew it to the skirt.

Now you are going to sew the ruffle to the bottom of the skirt.
With right sides together pin the ruffle to the skirt matching the seams. Adjust the gathers to fit.
Stitch in between the two rows of gathering stitches as shown in the above photo.

Iron the raw edge up toward the skirt.
Top stitch 1/4” from the seam.

Continue adding ruffles. I just laid the ruffles out to see how far apart I wanted them spaced.

To attach the rest of the ruffles I followed the same steps as above except I put the wrong side of the ruffle to the right side of the fabric.

I again sewed between the 2 rows of gathering stitches. Then I took out the gathering stitches and zig zag stitched the raw edge to prevent fraying.

After attaching the last ruffle you will sew on the crochet trim. This will cover up the raw edges of the top ruffle.
Put elastic in the waistband casing and you re finished!

So much ruffle-y goodness.


Kari, thank you so much for having me here today. I hope y’all have enjoyed this project.
I would love to have you come visit me at Nancy’s Couture for more fun projects!


I love the whole outfit!! I have two little girls that would look adorable in this…I may have to make one for each of them! Thanks for sharing!
harpsandollie.blogspot.com
This is absolutely lovely!
Oh so cute! And it looks really simple to do!
PolkaDot
btw I am having a giveaway at my blog barefootedintexas.blogspot.com
I’m in love:)
That’s gorgeous.
Absolutely beautiful!! I’m all about ruffles and lace!! 🙂 Just lovely!
Super cute!! Pinning for later. 🙂
Stunning! Perfect for a little princess! 🙂
Wow! Very Nice!
So Cute how Love!
Kisses!
oh wow how adorable!! just a little question..how long are the strips of fabric for the ruffles?? I couldn’t find the measure…Thanks so much for sharing this
I have wanted to make one of these Ruffled Skirts for my Granddaughter for a long time!! Thanks for the tutorial!!
Nancy
It is so cute!!! love it!