Hey U Create friends…..this is Ashley from Make It and Love It! I adore Kari who runs the show around here and am so excited they invited me back to share an ornament for their annual “Handmade Ornament” series this year. (Thanks gals!)
In case you’re feeling overwhelmed with all of the other holiday expenses that are bombarding you this year — this one ornament won’t break the bank! At. All.
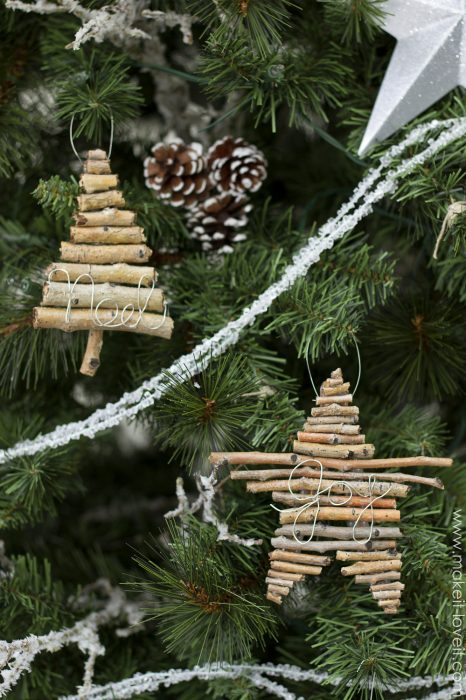
Just gather some sticks or broken branches from your yard, add a little wired message, and DONE!
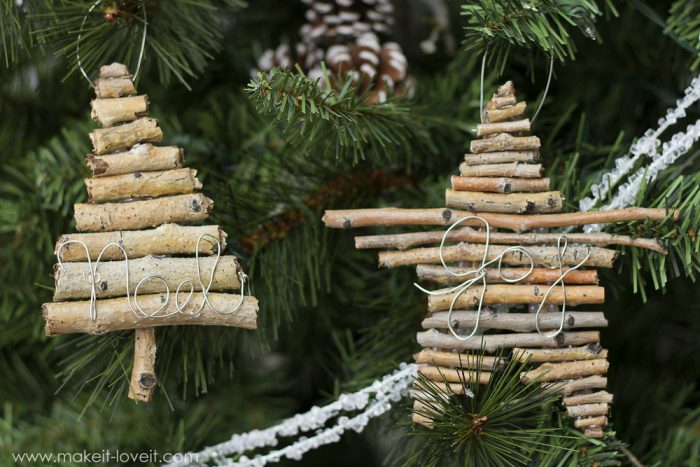
Each of the ornaments were glued together into Christmas shapes (with a support in the back). And I have to say, those little twigs give these ornaments such a simple and earthy vibe. I kinda love them!
The wire words are super simple to make and only require small amounts of wire…..but are my favorite part of the ornaments. The messages are subtle but are great reminders of the true spirit of Christmas!
These ornaments are such a fun decoration for your own tree, but would also be really cute attached to the top of a gift. Or hey, create a whole set and gift them to a neighbor…..I can’t think of a better way to spread love this time of year.

So gather a few supplies, plug in that cinnamon pumpkin air freshener……and start creating! ‘Tis the season!
Okay, enough chatting…..here’s how to put your ornaments together.
Supplies:
- Twigs, a variety of sizes (dead and dried out twigs work best)
- Hot glue gun
- Mini hand saw or branch cutter of some kind (my husband handed me the one you’ll see in the images below….but I have no clue what’s it’s called. I think it’s for wire. Haha….no laughing.)
- Wire (any gauge works but thicker wire will show up better for the wording)
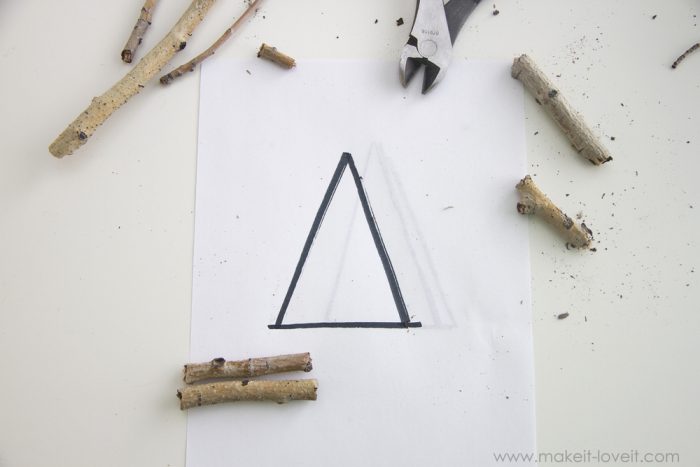
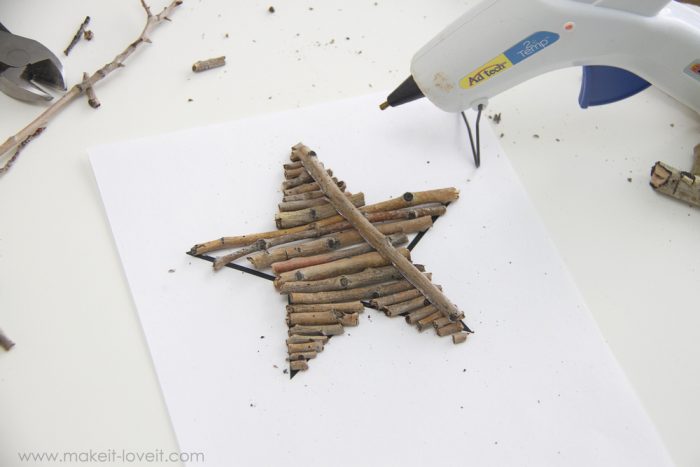
Begin by printing out your desired shape from your printer (or drawing your own shape by hand). Then cut twigs down to size to fill in your shape.
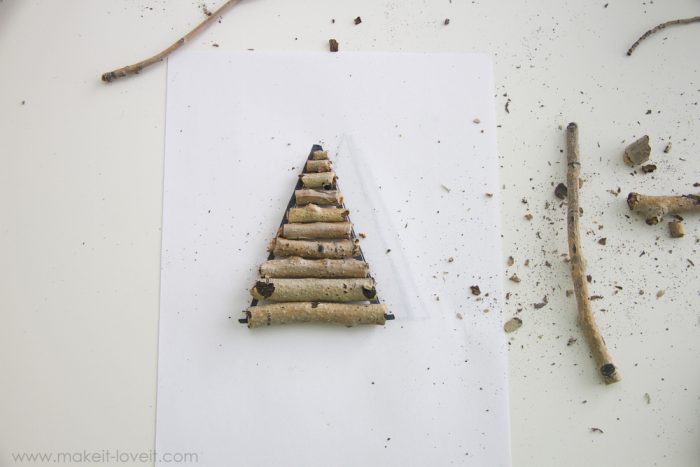
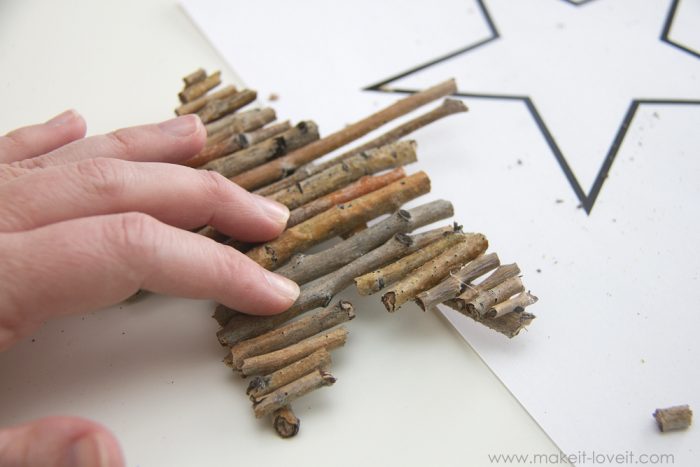
Then, stack your twigs (using straight pieces makes this easier), until you’ve reached the very top of your shape.
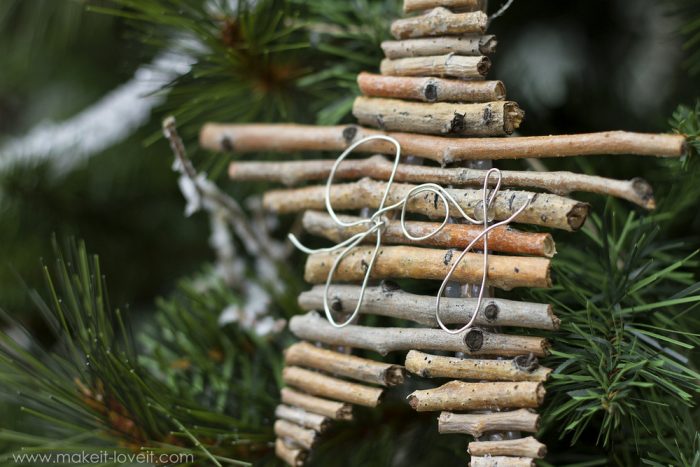
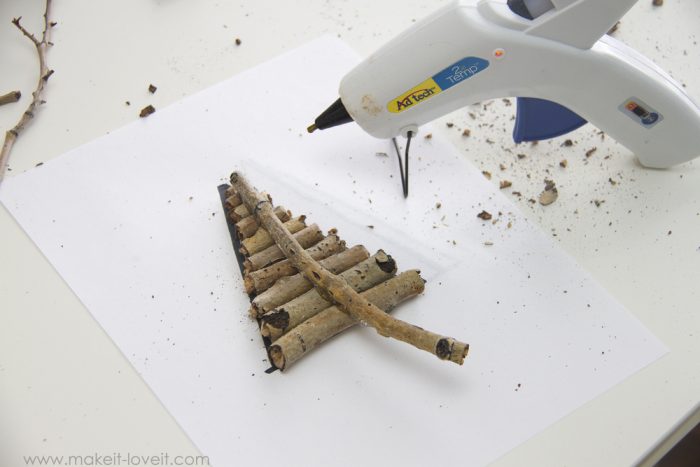
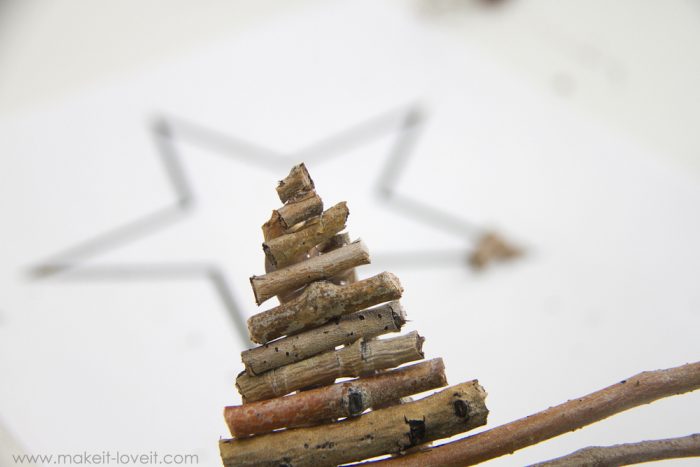
Then, hot glue a straight stick along the center of all the sticks, gluing them together and in place. (Use plenty of glue and turn up your glue gun to the higher heat setting so that you get a better bond.) Now, for this tree, I let the center stick hang down below the tree shape and used it as the “trunk” of the tree. But if you don’t want it to show, be sure and cut it down to size before gluing in place.
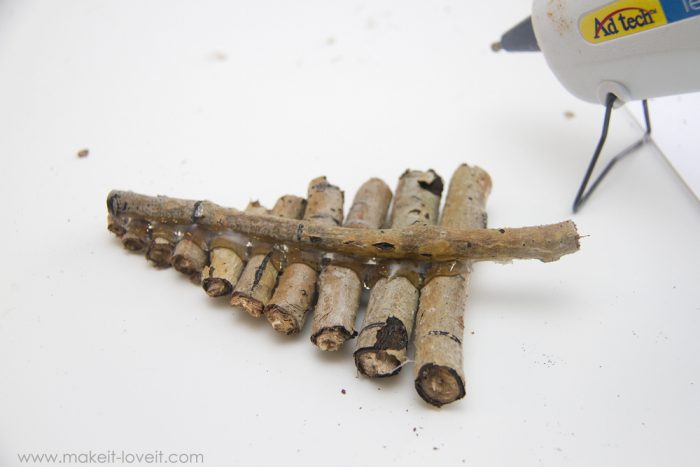
Be sure all of the sticks are firmly attached to the support stick and then run another line of glue along both sides of the support stick. And remember, the hotter the glue, the better the bond while using sticks. (Cooler glue temps tend to result in the sticks popping off once it’s cool…..and really hot glue helps keep this from happening.)
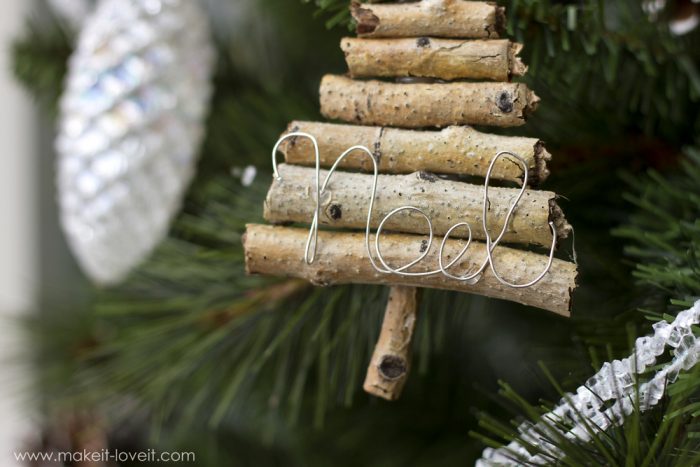
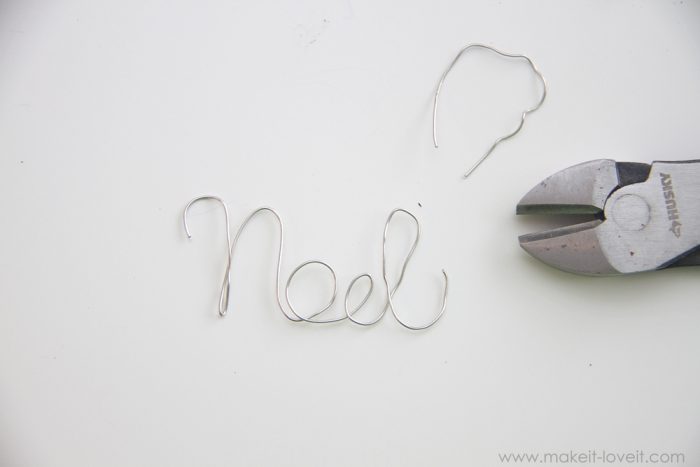
Now, create whatever word or message you’d like to attach to the front of your ornament. (If you’re struggling with free-handing your cursive letters, try printing out your word in the font you’d like and using that to trace as you’re forming your word.)
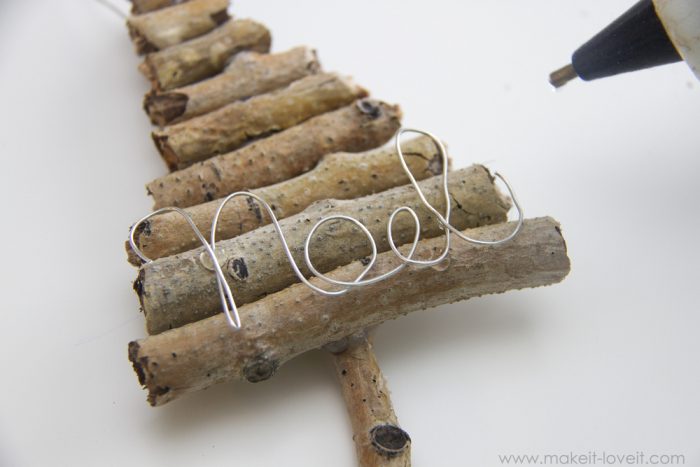
Attach your word to the front of your ornament with small dots of glue. (If you don’t mess with the glue, it will stay clear. If you mess with it a lot and find yourself moving the word a lot after you’ve placed it in the glue, the glue tends to look more white. If that happens, pull it off, pick off the glue, and try again.)
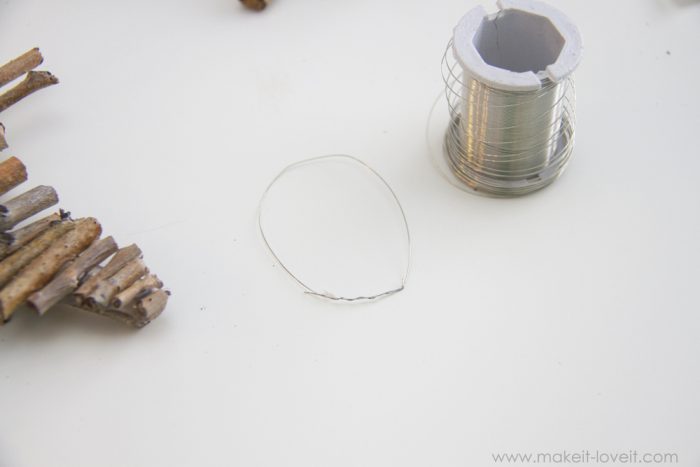
Now, I used a smaller gauge wire for the loop at the top of the ornament but that’s because I ran out of the thicker wire. However, I ended up liking the thinner wire better, so that it’s less visible. Just bend a few inches of the wire into a circle and wrap the ends around each other.
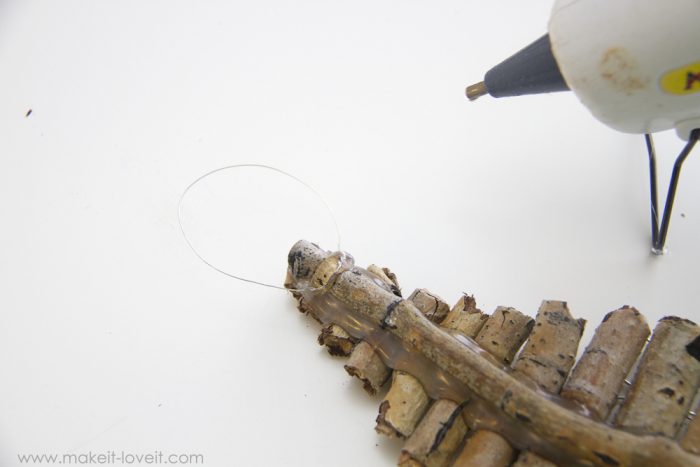
Then bend it around the back support of the ornament (or wherever else makes a good spot to attach it) and then add a generous amount of glue to keep it in place.
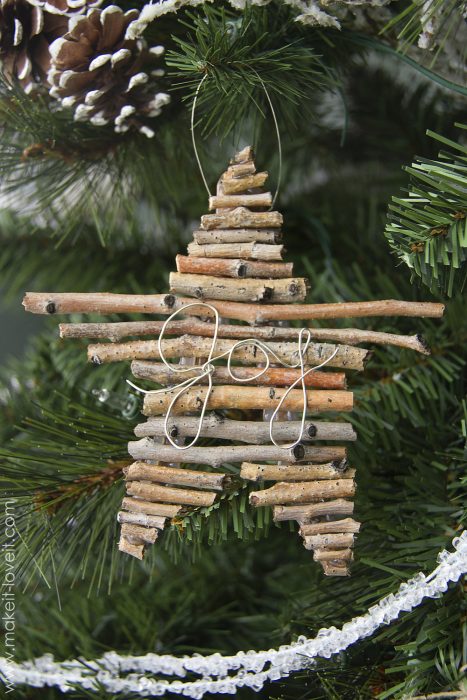
For the star, I followed the same steps. But for each point of the star, I starting using thinner and thinner branches….because that helped define the shape a little better.

I attached 2 sticks along the back. One along the right side and the other along the left side (not shown).
And because there were so many little sticks for the star that were all different thicknesses, I flipped it over and pressed all of the sticks firmly onto the support sticks on the back.
And because the very tiny twig pieces at the tips of the star were so small, I just glue them individually onto the star…..and didn’t worry about attaching them to the support stick along the back.
And here’s how my “joy” looks in cursive. I attached it the same way as the “noel” up above.

And that’s it…….new little ornaments to hang and enjoy!
Thanks again for having me, Kari! It’s always fun to join you guys…..especially this time of year! 🙂
-Ashley
P.S. If you’re the non-sewing type (or the type who hates pulling their sewing machine out for every. single project.)…..check out my book that was just released this fall, No-Sew Love. 50 projects that you can make and love, without using a needle or thread! (Also a really fun gift for your crafting friends!)

Also check out Ashley’s snowflake twig ornament…
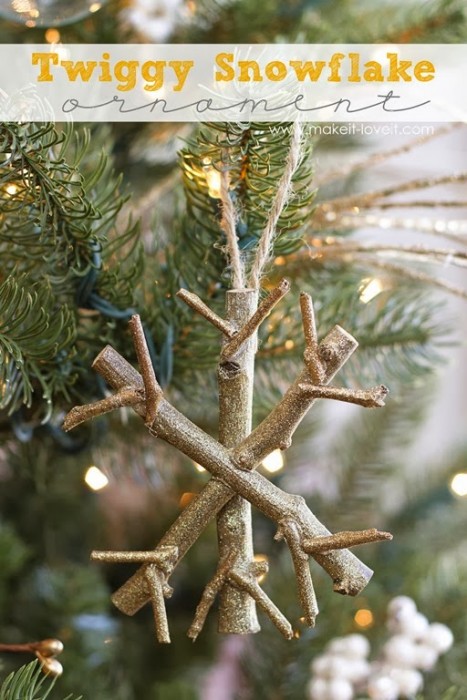
Absolutely adorable!
these are sOO cute! thanks for sharing such a great idea. My boys would love this. Pinned!
Ashley I love your ornaments! Love how you can find most of the supplies to make this around the house or yard, too. Thanks for sharing this fun ornament tutorial with us!
What cute ornaments! So easy and fun to make!