U Create

It's a good day to create!

  • pinterest
  • facebook
  • instagram
  • twitter
  • rss
  • crafts
    • crochet/knit
    • jewelry
    • kids crafts
    • paper crafts
    • sewing
      • bags
      • boys-clothing
      • girls-clothing
      • women-clothing
      • pillows
      • quilts
  • home decor
    • bathroom
    • build it
    • frames
    • kids
    • kitchen
    • office
  • recipes
    • desserts
    • dinner
    • snacks
    • soups
  • parties
    • baby shower
    • birthday
    • games
    • gift wrapping
    • party decor
    • party favors
  • printables
  • holidays
    • Christmas
    • Easter
    • Father’s Day
    • Halloween
    • July 4th
    • Mother’s Day
    • New Years
    • St. Patrick’s Day
    • Thanksgiving
    • Valentine’s Day
  • gifts
    • baby
    • electronics
    • graduation
    • teacher gifts
  • About
  • Be My Guest
  • Advertise
  • Contact
  • pinterest
  • facebook
  • instagram
  • twitter
  • rss

2 Aug

ABC Flashcard Art Tutorial by Jamie at kreyv

I ordered these vintage ABC flashcards a while ago not knowing what I was going to do with them. When it was time to design my daughter Stella’s big girl room, I knew I had to somehow incorporate them. And, since the cards were going to take up a lot of space, I needed something that wasn’t too heavy…enter ABC Flashcard art!
 ABC Flashcard Art Tutorial by Kreyv

I first decided on the size and layout I wanted. I chose a 7×4 layout (leaving just two cards on the last row).  Once I laid out the cards, I decided on a 30×60 frame, which allowed adequate room for spacing and the clothespins.
Once the frame was assembled, it was time to drill holes. (I don’t do power tools, so I just watched!) Measure for holes and drill away (or watch, like I did). Make sure the holes are big enough to thread your twine through.
I painted the assembled frame in Restoration Hardware’s Silver Sage and sanded the frame. I then drew on the pinstripes with a white Sharpie Paint Marker (love these)!  Next: the threading. This was definitely the trickiest part of the project, since I wanted the tension on the twine to be super tight. If you don’t mind a little sag, then it’s not so tricky. Thread your twine through one side, tying a knot on the end. Then thread it straight across to the other side. Mr. Hubs used some type of surgeon’s tool to keep the tension tight (he brings home all sorts of nifty tools), but a pair of pliers would probably get the job done. Tie the knot on the opposite side and repeat until all rows are complete.
DIY flashcard art
Here is the frame before the cards were placed. I like this piece, because I will be able to replace the ABC’s with photos when Miss Stella gets a little bit older, or more likely, when I get sick of the ABC cards!
ABC Flashcard Art Decor
Here’s a close-up of the flashcards pinned to the rows of twine.
ABC-252520Flashcard-252520Art-252520Tutorial-25255B4-25255D
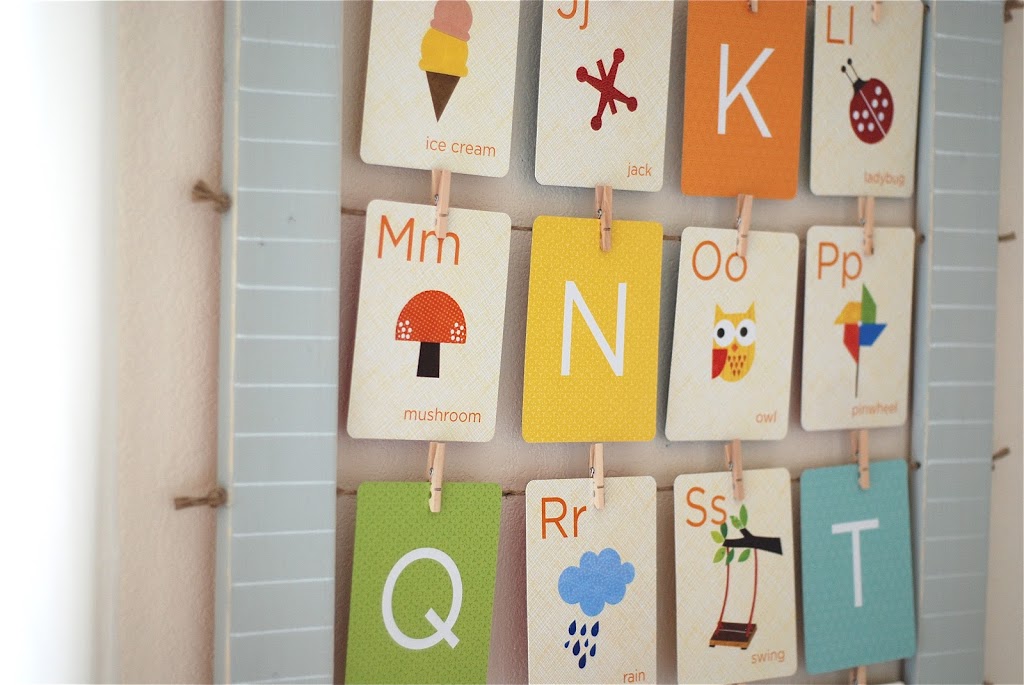
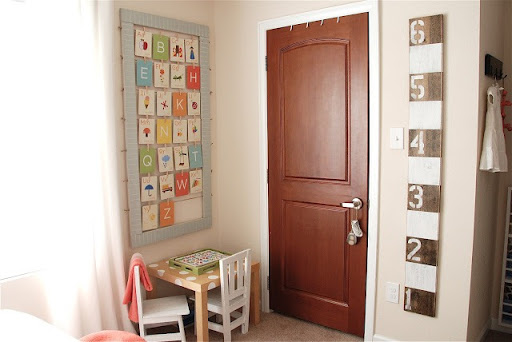
And finally, here is the ABC Flashcard art!
 stellas-252520room-252520by-252520kreyv-25255B4-25255D

You may also like these

Free Printable Dry ERASABLE Road Trip Book for Kids - by U CreateFree Printable Road Trip BookHandprint Snowman Tutorial by eighteen25Handprint Snowman Ornament TutorialDIY Fidget SpinnersCabinet Door into Art Desk TutorialHow to Make a Pillowcase CapePillowcase Cape Tutorial
Previous Post: DIY Bottle Cap Zipper Pull
Next Post: 10 Watermelon Crafts

Comments

  1. vonnie says

    August 2, 2012 at 4:09 PM

    Do you remember where you got those flashcards? They are so pretty!

    reply to this comment >
    • Kari Sweeten says

      August 2, 2012 at 9:38 PM

      Vonnie, Elizabeth purchased them on Amazon, here…http://amzn.to/N1WYGh
      So adorable!

      reply to this comment >
  2. Elizabeth says

    August 2, 2012 at 5:51 PM

    Super cute! Love it! (Especially since it’s a piece that can grow with your babe!)

    reply to this comment >
  3. Jackie @ Fred-and-Cissy says

    August 2, 2012 at 11:34 PM

    Fantastic idea, and I love the flash cards too!

    reply to this comment >
  4. srpprcrftr says

    August 3, 2012 at 4:11 AM

    LOving how you did that frame with the string between sides. So versatile and so many uses for it. Think that tool is called a hemastat. So cute with the flashcards. Gonna have to make one of those, thanks for sharing.

    reply to this comment >
  5. Michelle L. says

    August 12, 2012 at 1:18 PM

    Really charming, huge impact for such a simple set of steps – love it!

    reply to this comment >

Leave a Comment Cancel reply

Your email address will not be published. Required fields are marked *

Recipe Rating


Popular Posts

New Year's Eve Minute to Win It games by U Create

New Year’s Eve Minute To Win It Games

Free Printable "Color Your Own" Christmas Banner

Merry Christmas Coloring Banner

Free Pattern: Fall Turkey by U Create

Fall Turkey Printable

Free Printable Pumpkin Games

Halloween Printable: Bugs and Kisses

Halloween Minute To Win It Games

  • pinterest
  • facebook
  • instagram
  • twitter
  • rss
 
Privacy Policy
Back to Top

Copyright © 2023 U-Create • All Rights Reserved • Site Design by Emily White Designs