Oh! Helllllo
U Create readers! Ahem. We are EVER so excited and flattered to be the Creative Guest on U Create today. We are each a mom to two girls and we sew and craft and blog about it to maintain some sort of adult dialogue throughout the days of potties, books, snacks, naps, nap-resistance and learning about the world. Our blog is “crafterhours” because we try to get the crafting done afterhours, when kids are sleeping peacefully. When the kids aren’t sleeping peacefully, we try to fit the crafting in as we can in-between all of the family stuff. And we really, really, really try to make sure the iron is turned off when we’re not using it.
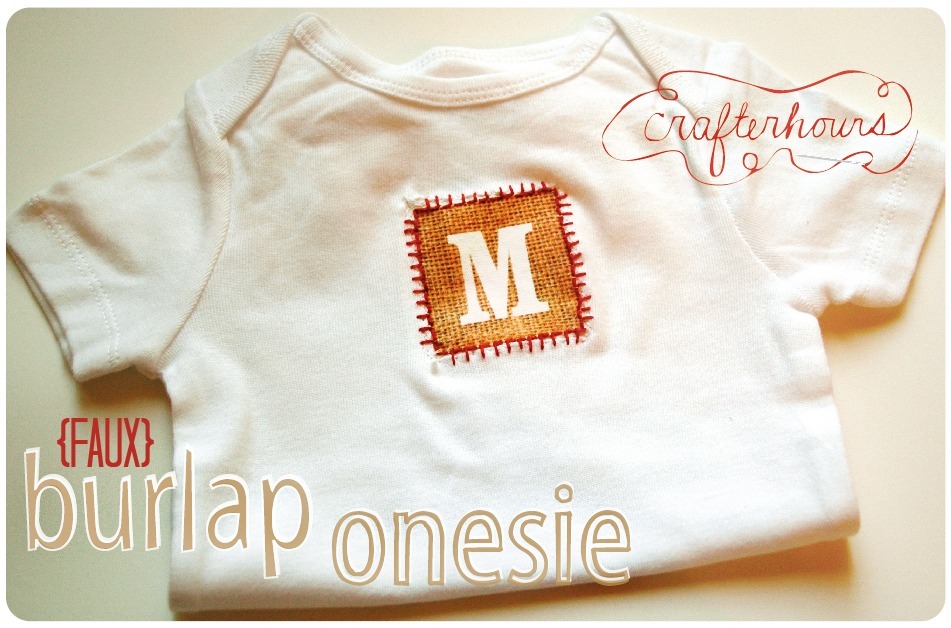
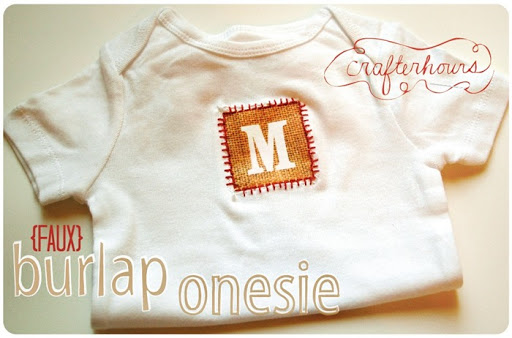
Our project today is all about burlap for babies. Yikes, right? Well, they say babies should experience lots of different textures. Burlap is very… textured. Okay, aaactually the project is just designed to LOOK like burlap for babies. And we couldn’t help but think of Kari and her love for burlap while we made this for Susan’s daughter, M. Might you like to try burlapping your baby?
Supplies Needed
-
plain onesie
-
inkjet transfer paper
-
a scrap of white knit
-
embroidery thread
-
sewing machine
-
thread
-
scissors
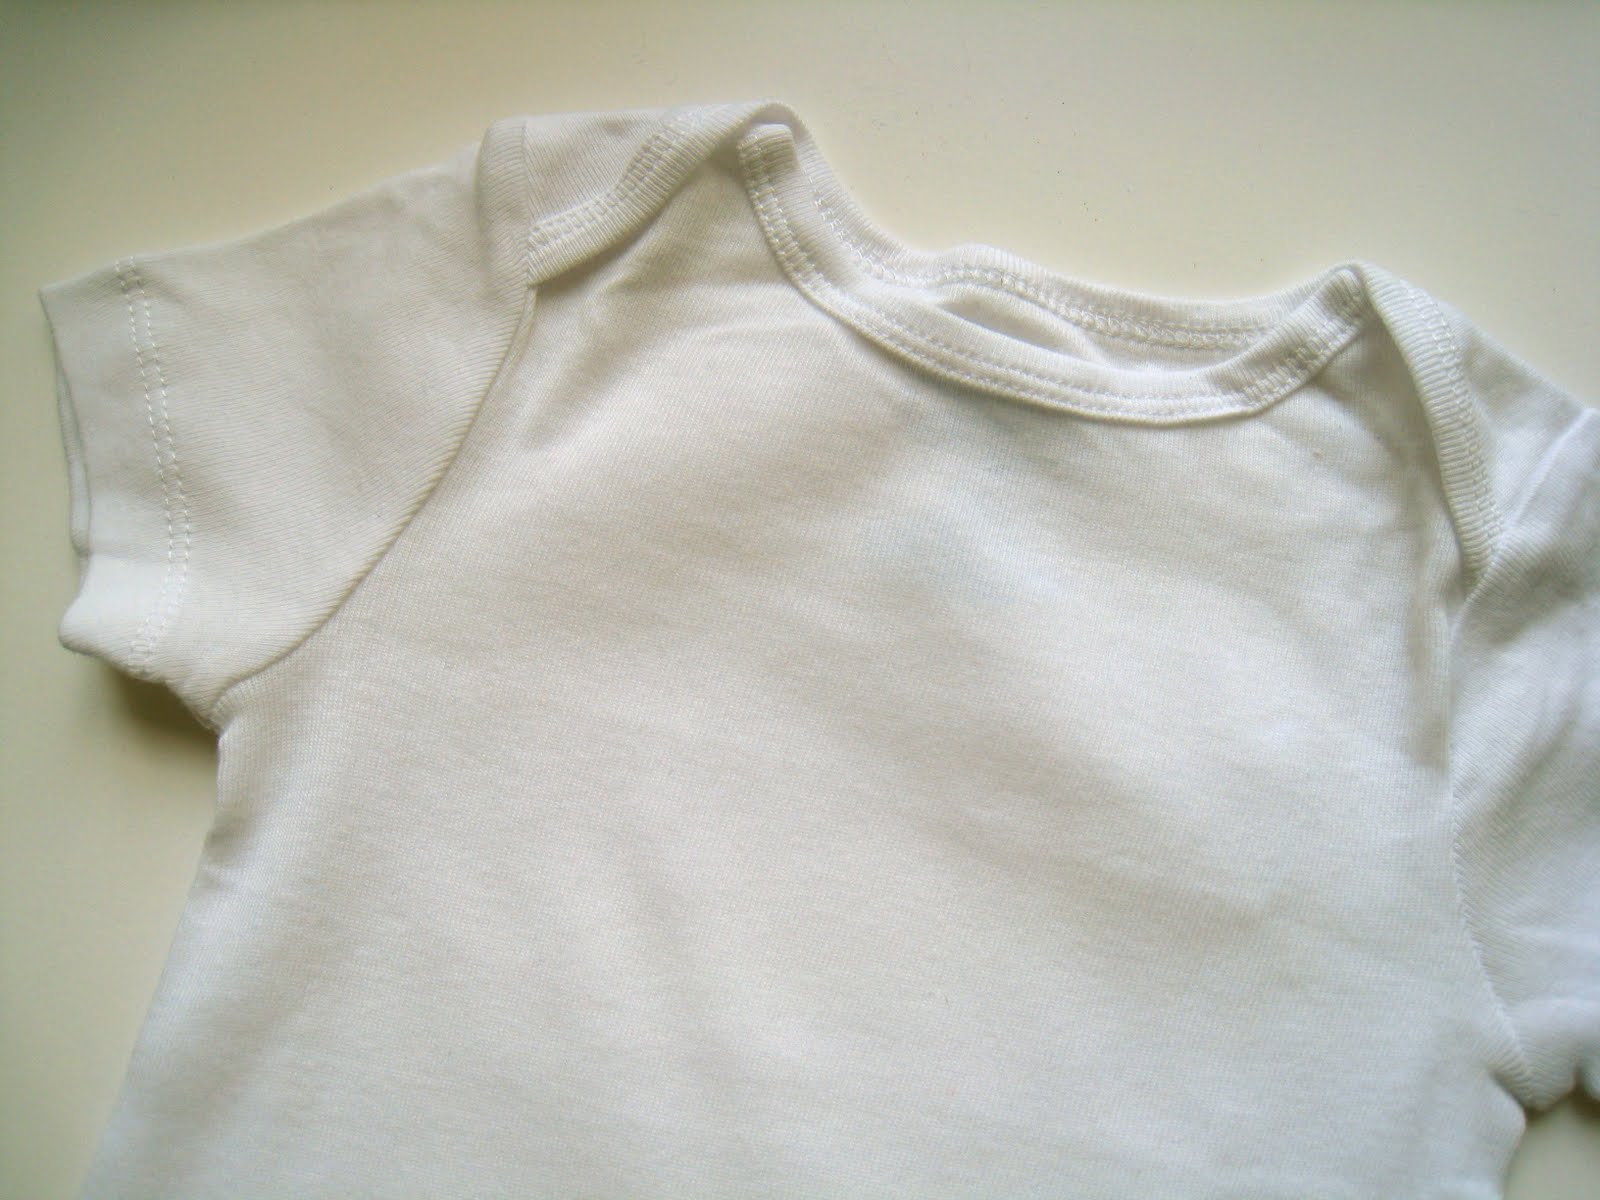
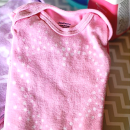
First, we found an image of burlap fabric online. We used a basic word processing program to place the burlap image in a document and then a bold letter “M” in white in the center. We reversed the letter “M” so that when we printed it it would be backward– and then when it’s ironed on to fabric it will read properly. We grabbed our blank onesie. And took a photo just to illustrate that fact. See? Blank onesie.
Trimmed the “M” burlap into a square. But it could be any simple shape. A heart? Circle?
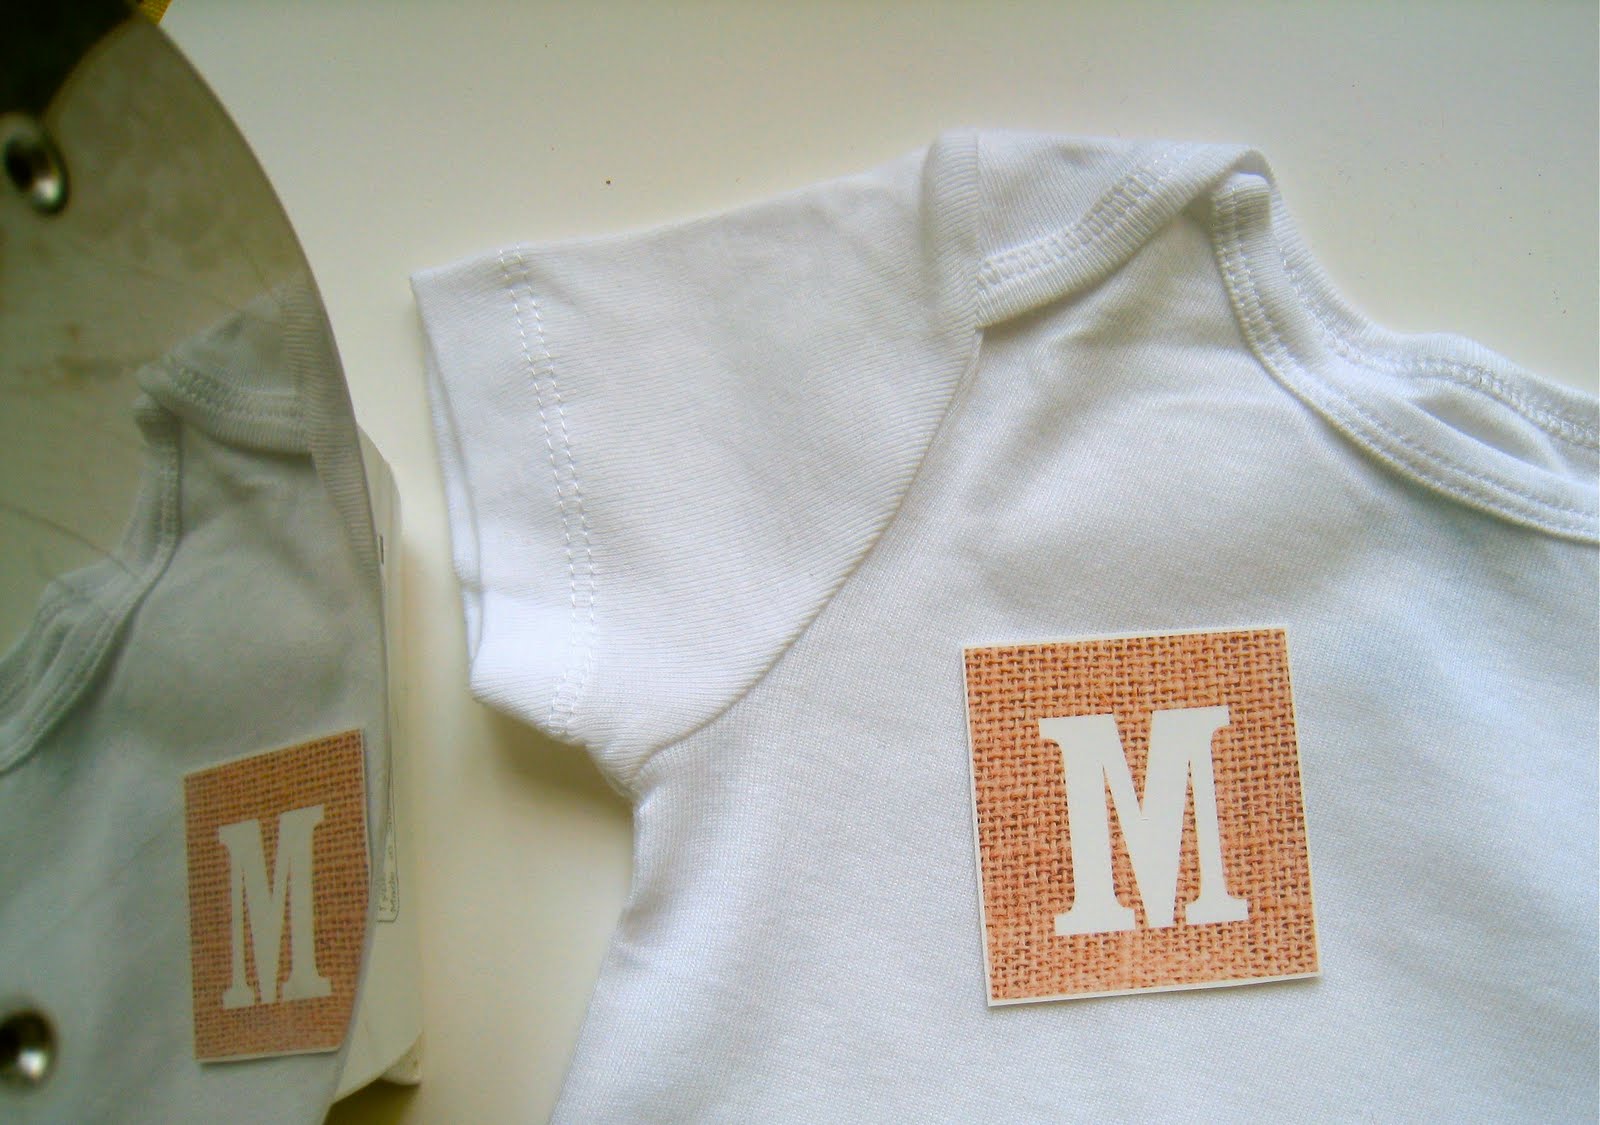
Here we got a little bit distracted. Does that occasionally happen at your house? We ironed it on. And ta-da! Doh. It wasn’t backward anymore, but it WAS upside-down. Dadgummmmmit. And it’s too late to rename her with some sort of “W” name.

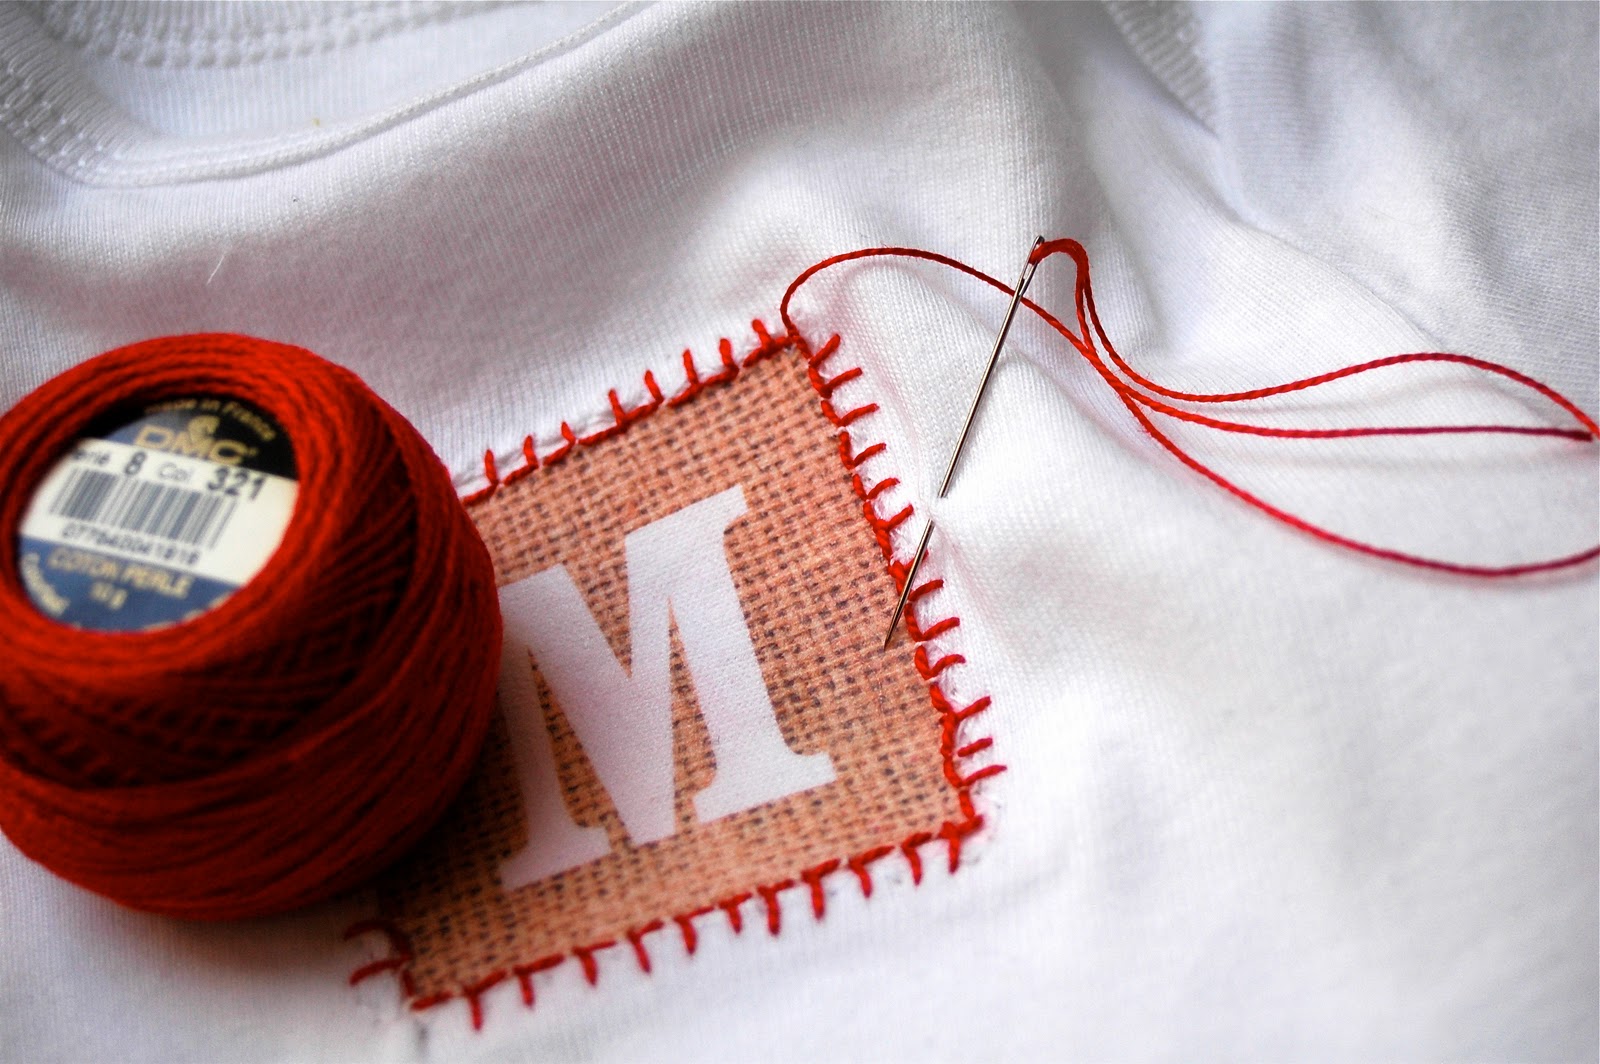
But that turned out to be a good thing, amazingly enough. Because then we were forced able to print and iron the “M” again on a scrap of white knit and reverse applique it. Reverse applique sounds fancy, but it’s not. Although it looks slightly fancy. You’re placing the fabric that you want to show behind the top layer, stitching around the edge (we do this with a machine, but if you like the hand sewing then here’s another opportunity) and then carefully trimming out the center. The knit makes a cool-looking edge without having to try to get a satin stitch to behave properly. And in this case, it only enhances the faux burlap look. After the applique was in place, we wanted to embellish the edge a bit. We used a strand of embroidery thread and a quick blanket-style stitch around the edge.
And it’s done. Gotta love when a little craft drama doesn’t spell craft disaster. Because those plain white onesies are scarce.
THANKS, Kari, for letting us hang out in UCreate wonderland today! We’re headed back to crafterhours through the back door to avoid the paparazzi!


Haha, you guys are too funny :o) I felt the same way when Kari invited me over! I love this, who would have thought of printed burlap??
Love this! and the blanket stitching detail is precious!
Just a quick note to let you know that a link to this post will be placed on CraftCrave today [17 Apr 02:00pm GMT]. Thanks, Maria
This is such a great idea – and the stitching detail – just perfect!
I’m saving this in my mental list of creative ideas. Thanks for sharing!
That is just totally adorable!!
Lindsay
You guys have me laughing so hard!! Not only are you creative, but you are HILARIOUS!
Thanks so much for sharing this cool idea with my readers!
That is so amazing!! I’m thinking you can do it even for t-shirts. Will be fun!
How fun is that? I love it!
Very cute! Great idea!
This is so cute! Thanks so much to both of you for the great idea, I’ll be linking.
Great idea! Love it! Thanks for sharing!