
Hi friends! I am Destri from The Mother Huddle, pleased to meet you. I had wrote a little ditty with what we are all about, but it became entirely too long so instead I thought I would just let the about page introduce us. Really I have been waiting for what seems like ages to share this project with you, so shall we just get on with it?!
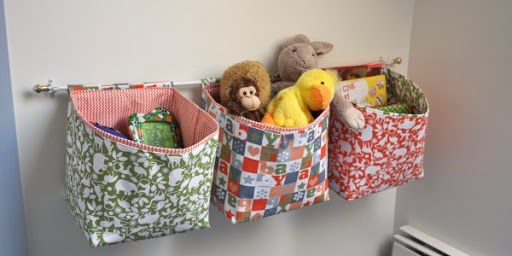
I have a great little landing at the top of my stairs that has acted as my kids toy room for years now. The thing I dislike the most is that the only soft element in the room is the carpet, everything else is hard. I wanted to bring in some more storage but thought if I put in more shelving it would just add to the “hard” look of the space. So then I remembered a project I had done for my sewing room with little hanging baskets and how if I just made them bigger they would be perfect. I knew I had to add something to hold the bottom in place, but if you are anything like me, if I have to pull out an electric saw to get a project done…it’s going to take a while :). So I found the perfect solution at Home Depot, and did some math and created a tutorial that only involved a little quality time with my seam ripper. Sweet. Let’s get started!
Hanging Fabric Storage Baskets
Supplies:
-
all your sewing stuff
-
cafe rod, or curtain rod
-
brackets to hang rod
-
three 8 x 10 Plexiglas sheets, I bought mine at Home Depot for about $4 a piece, by the window section
Materials:
-
each basket takes 1 yard of fabric, so I used three for this project.
-
each basket needs a yard of interfacing, again I used three yards. I used pellon 809 decor bond, but craft bond would work as well.
Fabric Cuts:
From your fabric cut six 18½ x 28 inch pieces, and three 4 x 10 ½ inch pieces. You will then iron them onto you interfacing per it’s instructions, and then cut out. Trust me, it’s easier than cutting out the pellon and then ironing! As a side note, the ironing is the longest part of this project…if I had a teenager I would have paid top dollar to have them do it, just sayin’!
Sewing:
Now for the fun part! You will use a ¼ inch seam allowance unless noted, and don’t forget to back stitch!
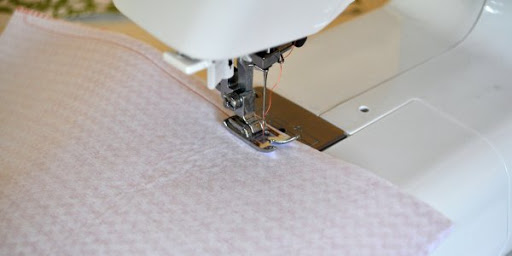
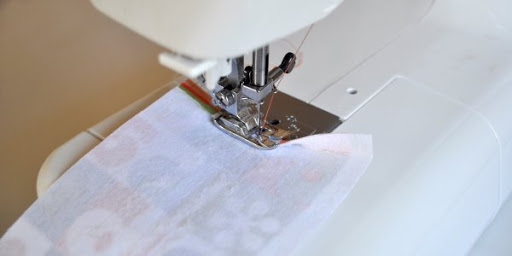
Take one of your 18 ½ x 28 inch pieces and fold it in half with right side in, short ends together. Now sew up the sides, leaving the top open. Repeat on the five left.
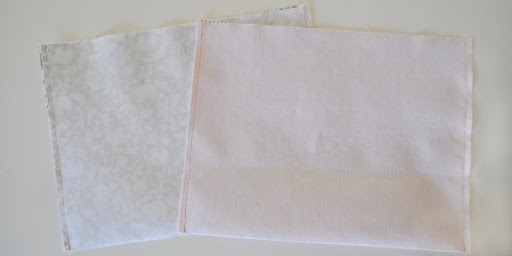
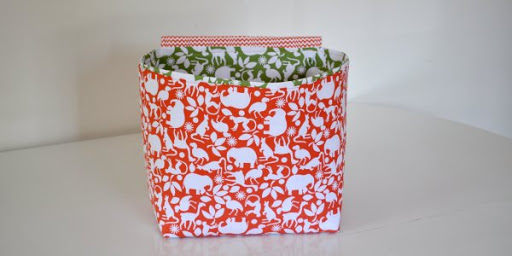
You will need two sheets for one basket, and they should look like this. I alternated them so that I had a different pattern on the inside then I did on the outside.
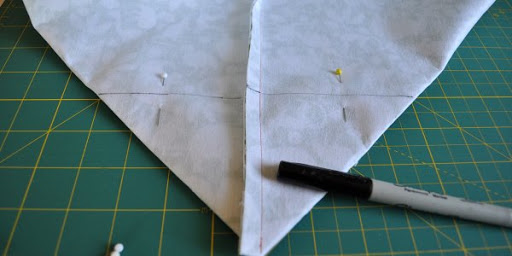
Leaving them wrong side out, take and fold your corners down like shown. To make sure that you are aligned correctly, just make a crease on the bottom fold and line that up with the seam on the inside, make sure your seam is flattened all the way out.
Take a ruler and mark a line 7½ inches long as shown and pin. After you make the line measure from the point to the line and you should get 3¾. Repeat on the other side, and do this on all of your pieces.

It does help if you have a cutting mat with measurements, you can see how I lined up the corners to make sure they were symmetrical. If you don’t, that’s fine, just eyeball it.
Now sew along the lines on each of your corners.
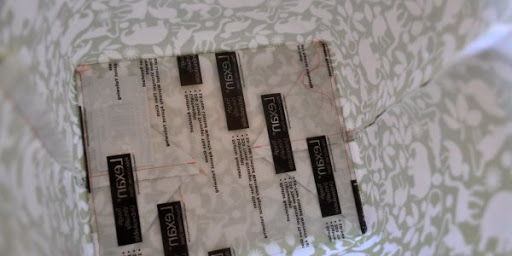
Take the pieces you want on the outside and turn them right side out, folding the corners down. Drop the Plexiglas into the bottom.

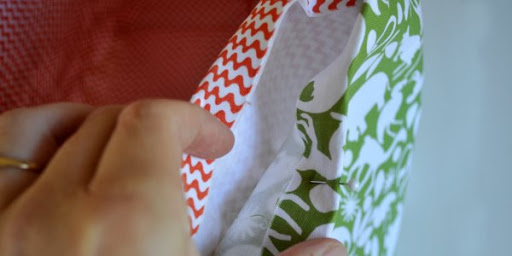
Leaving your other pieces right side in, fold your corners under and place inside of the other shell, on top of the glass.
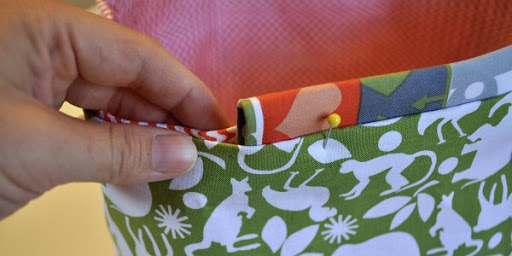
Next fold your outer shell over about a half inch and pin then repeat on the inner shell…
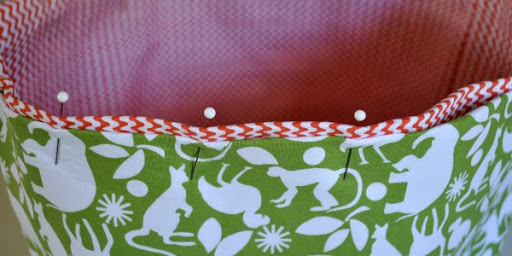
using the same pins so that you are pinning them together. Make sure the two overlap some where you will stitch together.
Take your three smaller pieces and fold the ends over a ¼ inch and sew both ends.
Fold in half and insert on what you would like to be the backside of the basket. Pin in place, making sure that whatever rod you use will fit through. I tested mine now to make sure.
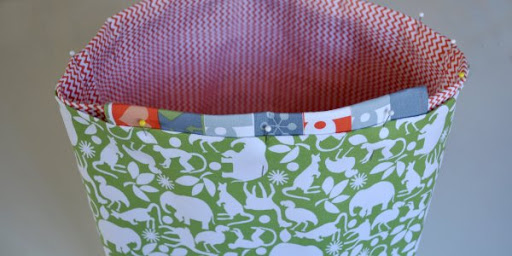
To make sure that I had it centered, I just pulled the basket straight at the seams and eyeballed it.
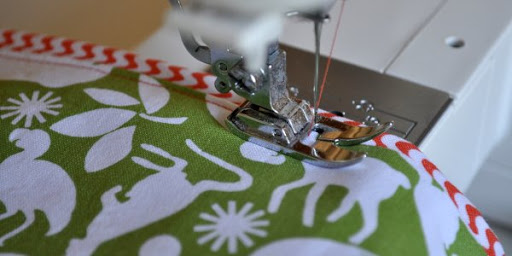
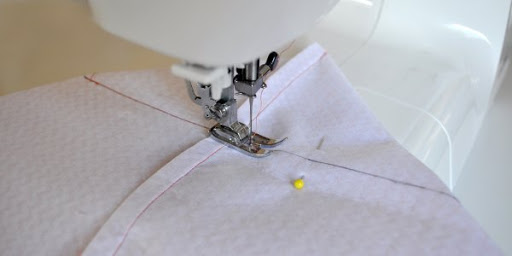
Now with a little longer stitch length just sew all around the top, making sure to get all the layers included in the stitch.
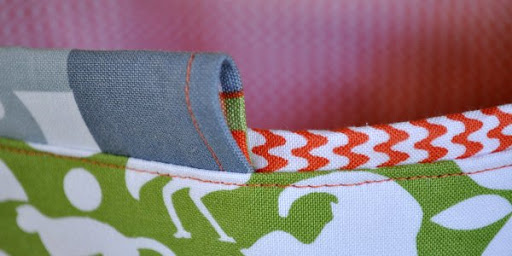
See, one nice and clean seam.
And you done! Now just hang them!
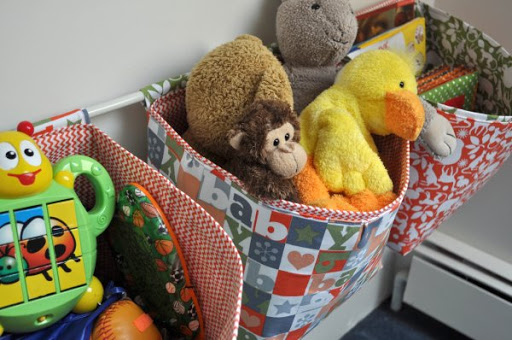
Then fill ’em up!
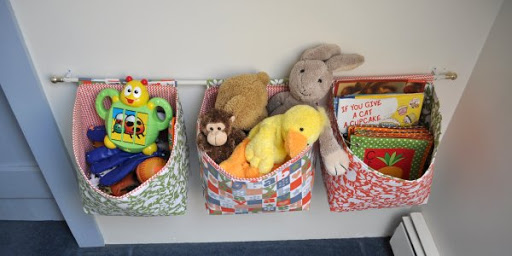
They really are super easy, and the possible uses are endless. I have this post that explains how to make them different sizes and if you make them smaller they should need nothing in the bottom. You can use any kind of curtain rod, just make sure your piece that the basket will hang from is big enough. Let me know if you have any questions!
I hope you will come join us in “The Huddle”, we love having new friends to share with, and no you don’t have to be a mom…we all just happen to be.


That is such a cute idea! I have an awesome rod that I got at Rod Works and I am kinda bored with hanging frames from it so this will be perfect! Thanks!
Brilliant! This is one of the best ideas I’ve ever seen. I am certainly going to try it!
Thanks!
I am L-O-V-I-N-G this! Seriously! What a great idea. Now I just have to think of a place that I need it. (and which space warrants me spending time on it…hmmmm….)
I also had to laugh because we totally have that duck (Bubbie Duck) and that Monkey (Monkey. Original, I know) And if that bear is one from Build a Bear…we have him too…but I can’t quite tell.
Thanks so much for the idea and the tutorial!!
Oh so excited to see this.. I just made similar one for under my girls bed, but to hang on the wall…. perfect. thanks for sharing.. and what is the diffence between decor bond or craft bond? the lady at the fabric store just said the color and the price.. hmmmm
Great idea!!! Very cute.
Wow this is a great idea. Love it!! Thanks for sharing this!
what a great idea! I love these, they would also be great in a nursery with baby stuff like diapers and wipes, so fun!
This is a great idea. I may use it for my classroom! Thank you for sharing.
I love this idea and the fabric. Can you tell me what brand it is?
Wow. I had Destri’s smaller version on my to-do list…now I’m thinking of many more possibilities. Thank you Destri and Kari.
great idea!! I LOVE them and I am sure I can find a spot for them around my house.
That is a very cute idea!! Thanks so much for sharing it!!
Just hope my daughter wouldn’t get too rough and tear it off the wall! lol
Super cute idea!
love it! You seem to have worked all the kinks out. I recently made a bunch of fabric totes and hanging book caddy for my boys toys but it was so frustrating that it may take awhile to get back into the fabric storage mode. Your tutorial will be the first I use when i do get back into it though! thanks!
That is adorable! I love the colors you chose and this is a unique storage idea for items. So great!!!
Very cute!Beautifully sewn, as well!
LOVE IT! Thanks for sharing. 🙂
You might check a hardware store for plexiglass, and they can cut it any size you need it. Cardboard might work too…
Just a quick note to let you know that a link to this post will be placed on CraftCrave today [09 Jul 01:25pm GMT]. Thanks, Maria
These are fantastic! Love them!
I love these. I’ve been looking for something to do for books that will make it easy for the little ones to put away. I like the wood library type shelves, but I think this will hold more and that is a good thing.
Thanks for the tut!
Thanks everyone!
Tee…
Decor bond for me seems to just be a little stiffer, but not much, also it tends to come with quite a bit more in a yard but is normally about $1 more a yard. But I didn’t know it came in colors!
Nancy…
I did make some smaller ones for a nursery and they looked adorable. You can make the baskets any size and really you don’t need anything in the bottom for 8×8 or smaller because the corners offer enough support. Send me pics if you make them!
Anonymous…
I bought this fabric over a year ago at a fabric sale for $3 a yard! I love it too, but the funny part is I didn’t look closely enough at the letters, I thought it was the alphabet, but it just spells baby! Oh well. My sister will know the brand I can let you know! Also if you live in Utah I know the quilt store in springville has some.
Famr_4evr…
I like the pocket style of these baskets better for books, if you click on the link to the other project on The Mother Huddle.
This is a great idea. I just cleaned out my girls’ toy storage organizer thingy. It’s three levels with plastic baskets that hook over wood dowels. The plastic baskets cracked so I threw them away. I wanted to use the storage frame and put in woven baskets or something. But I didn’t know how I would keep the woven baskets from falling because they don’t have a lip to hang over the wood dowels. This fabric basket is great because I can sew tabs on both sides for the wood dowels to go through and also sew on snaps because I can’t take the wood dowels out to put through the tabs.
Sorry, that was long, but I’m so excited that I now have a solution to my problem! Thank you so much!!
genial j adore bises jojo
These are awesome!! I linked to your tutorial over at Craft Gossip Sewing.
–Anne
Great idea. Very informative. Well written instructions!
Awesome Idea, love the fabric!
I love these! They seem so much simpler to make than other storage boxes I’ve seen. Thank you for sharing!
I am definitely going to do this for my daughter’s room! We need more storage in there, and this idea is so cute. Love it!
I’m so excited, I almost spent $15 for a pattern that doesn’t hang when this is exactly what I was looking for for the kids and myself. Thank you so so so much for sharing!
This is so cute!!! I’m adding it to my “to make” list!
Very cool!
This is a great way to store stuff. I’ve made fabric box/buckets before but hanging them? That’s fabulous.
And another thing… There’s an ‘if you give a cat a cupcake’ book? I love all the others, why did i miss this one? Next stop, Amazon.
lore
I LOVE this! Now I just have to find someone who knows how to sew to help me! 🙂
What a GREAT project!!!
So cute! Thanks for the tutorial, it’s going in my project folder!
Wow, this is cute. I’m in college and this would be great for dorm room storage. Great tutorial.
These are beyond darling and so useful! I just linked to this post from my organization site. Thanks!
these are super, shared on facebook…..thanks!
I really like the idea of hanging baskets, and very cute. What a wonderful idea!
Brilliant idea I liked it hope to try it soon.
anandhirajansartsncrafts.blogspot.com
They are so nice! I hope you don’t mind, I linked your tutorial on my blog. http://bit.ly/fbTYce
This is so cute and a super idea. Your instructions look super easy to follow.
I just need clarification on one thing. When you say that it took you 1 yard of each material, was that 1 yard would do an inside and an outside of 1 basket? So would you need 6 yards total or 3 yards total of material?
Thanks!!!
These are super cute. And so functional!
e süpperr.
These are adorable and I think would be great in a mudroom….and a sewing studio….and my office….
This is the only way I think I’m going to get exactly what I want for cloth diaper storage in the space I need it.
AMeei as suas dicas! valeu.
These are brilliant – I want to make some for my nursery but also my sewing room.
I like them so much I just mentioned your tutorial in a blog post I wrote about Christmas gift ideas – hope that’s ok with you 🙂
Wow nice storage! Perfect for kids stuff…I could use about a zillion of them {wink!}
You can create a set of baskets from any material you like, and you can easily adjust their size.