Hello crafty ladies, I’m Kara from Creations by Kara! I am totally excited to be here today. I’ve always loved U Create, and when I met Kari at CBC, I was thrilled to discover that she is an absolute sweetheart. Thanks for having me Kari! If I hadn’t met you in real life I would be nervous to share my Frayed Edge Bibs because your blog is utterly fantabulous!!
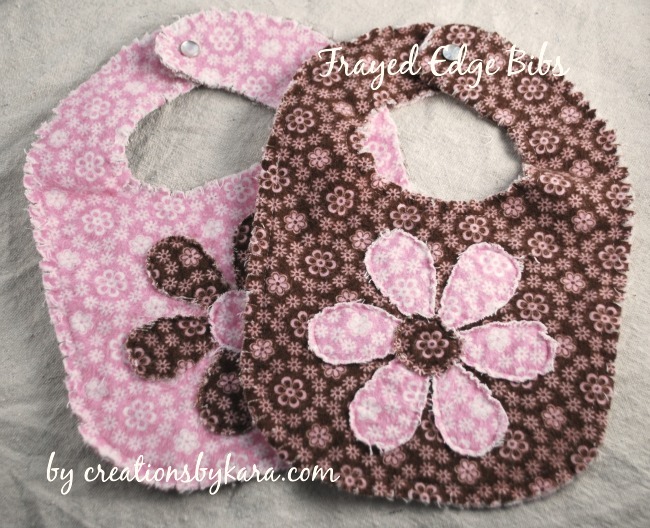
I am a SAHM that loves sewing, cooking, home decorating, trash to treasure projects, refinishing furniture, and all things crafty. We are in the process of trying to adopt a baby girl. Today I will be sharing one of the projects from my adoption hope chest. After I made my rag quilt, I had lots of leftover fabric, so I decided to put it to good use. I made some frayed edge bibs. Wanna learn how?
Here’s what you need:
-Fabric, enough for the back, front, and flower. I used about 1/4 yard.
-Bib pattern or old bib to trace. I traced a bib I already had.
-Sewing machine and thread
-A pair of sharp scissors
-A snap, and a hammer to attach it. (Or you could use the sew on variety.)
-A glue stick
Alrighty, here we go!!
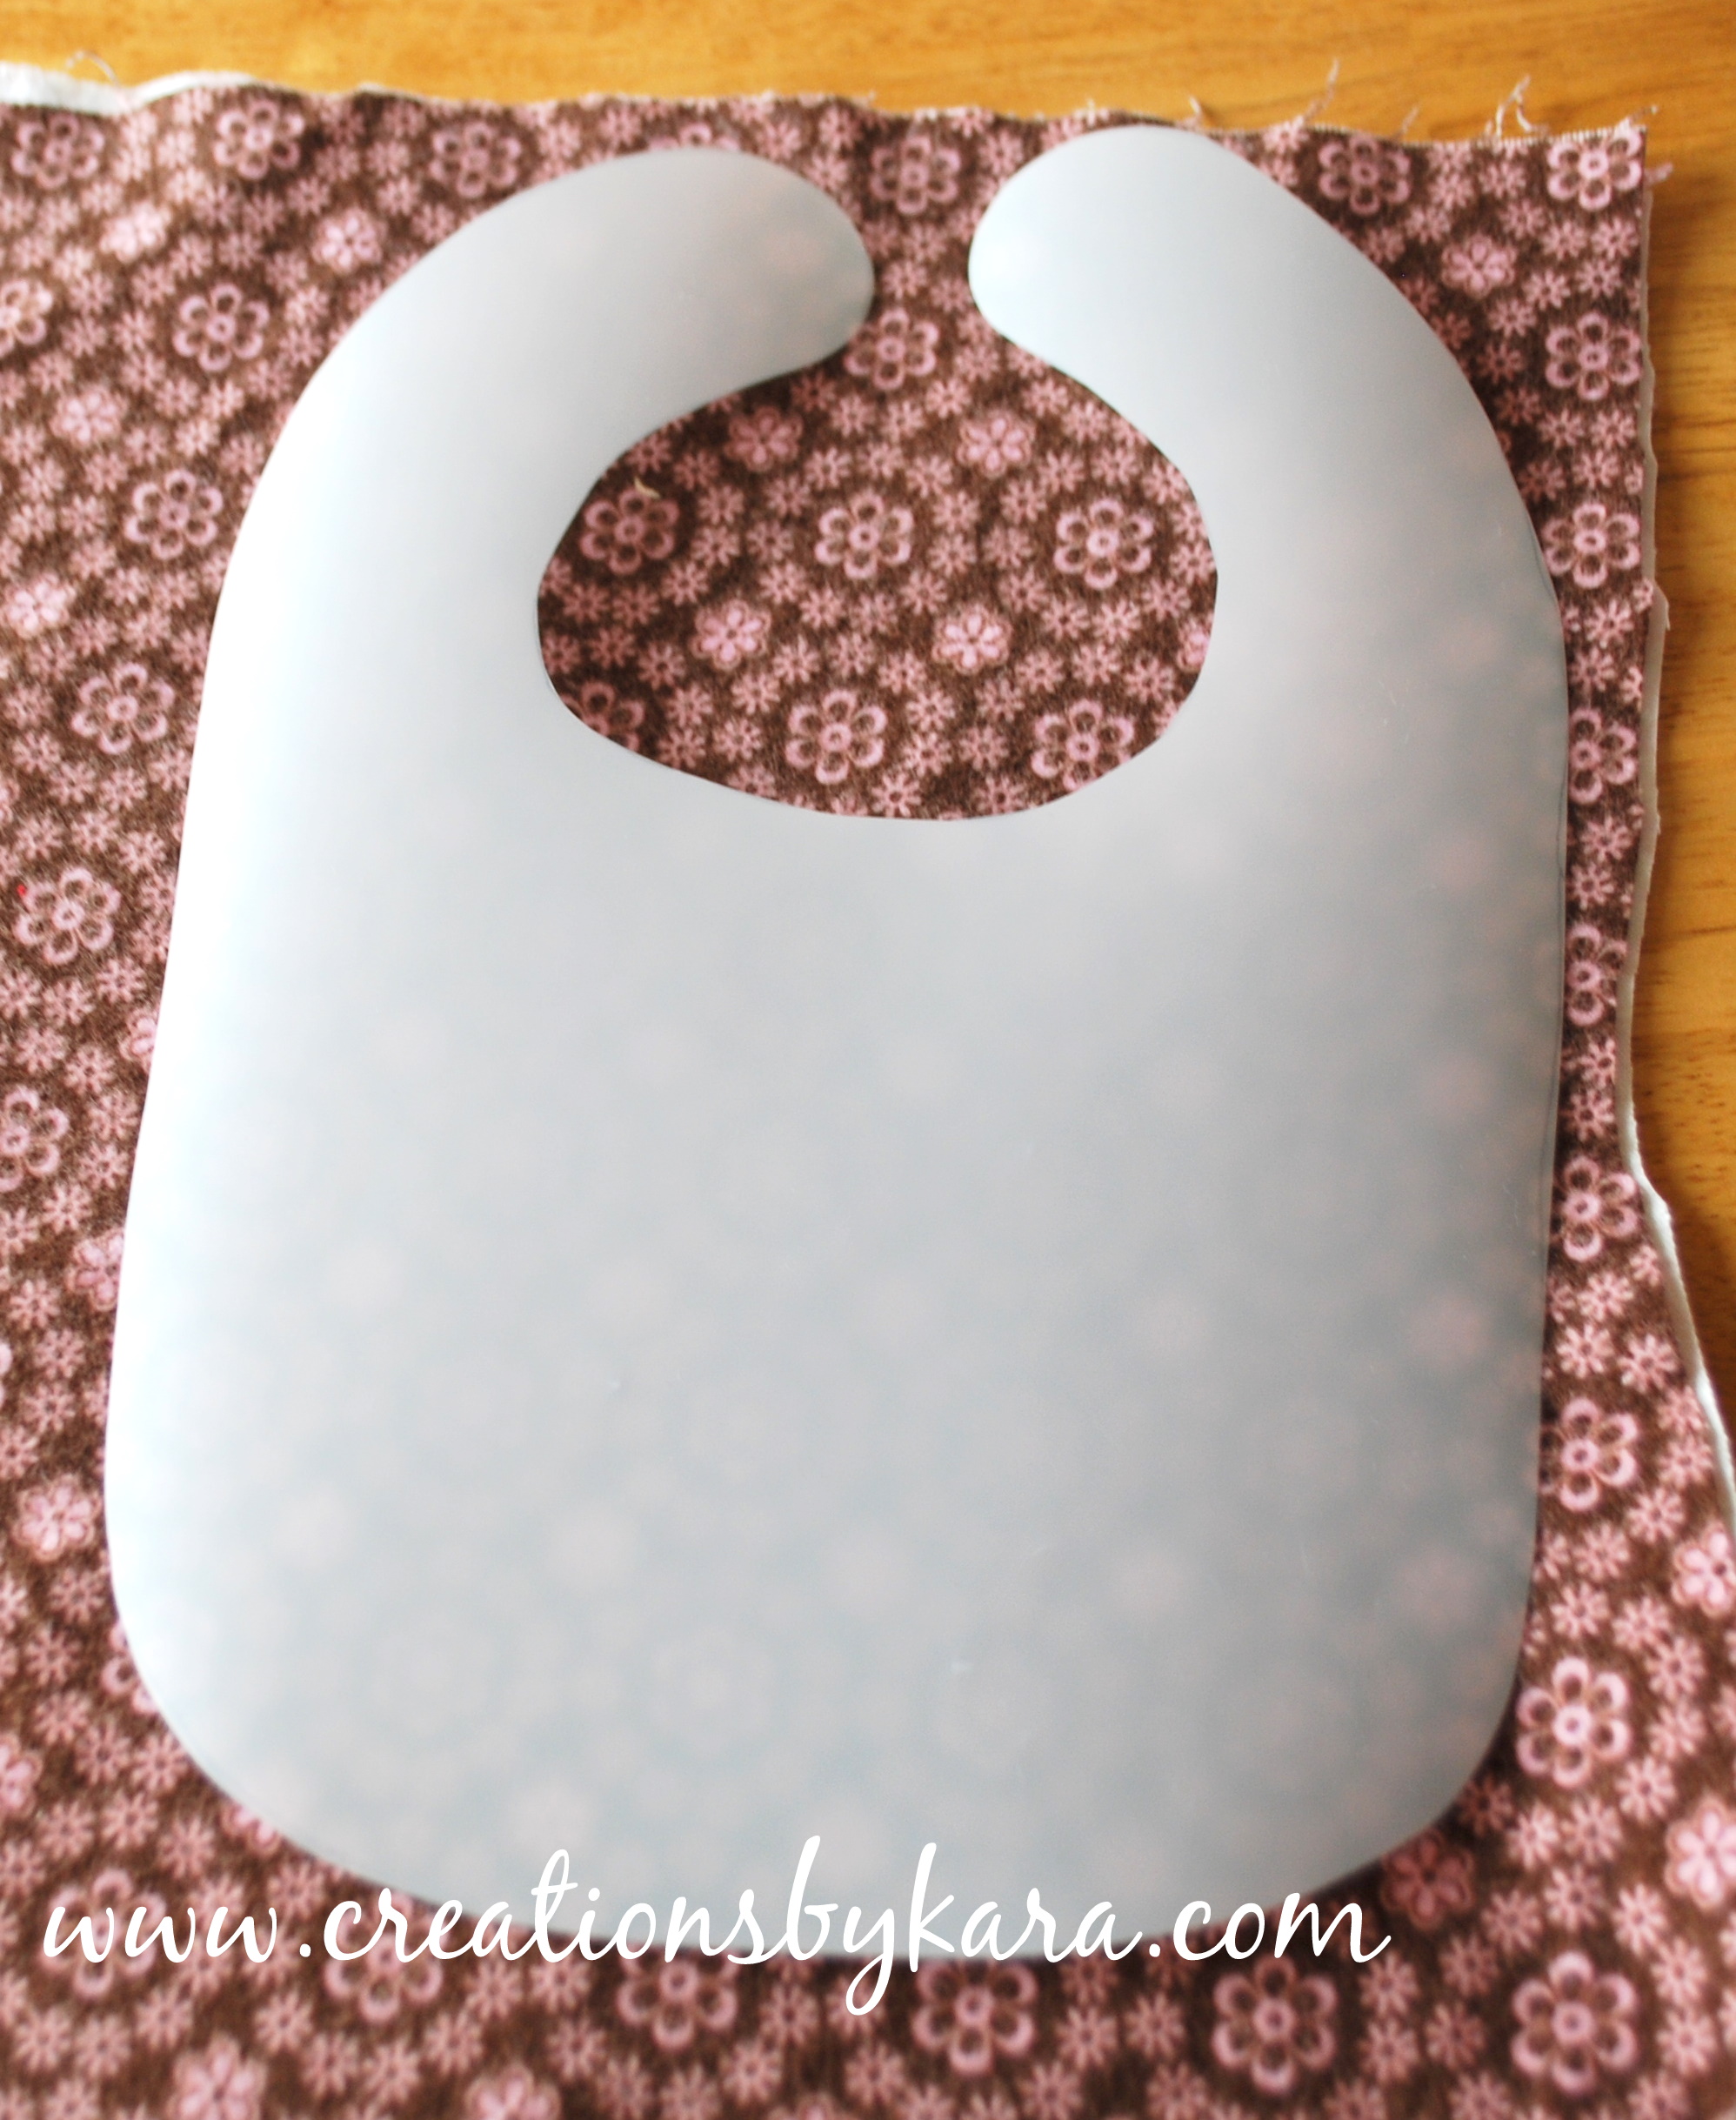
First you need to make a pattern by tracing a bib, or downloading one.
Take your two pieces of fabric and place them wrong sides together. I used two coordinating prints, but you could use the same fabric on the front and back.
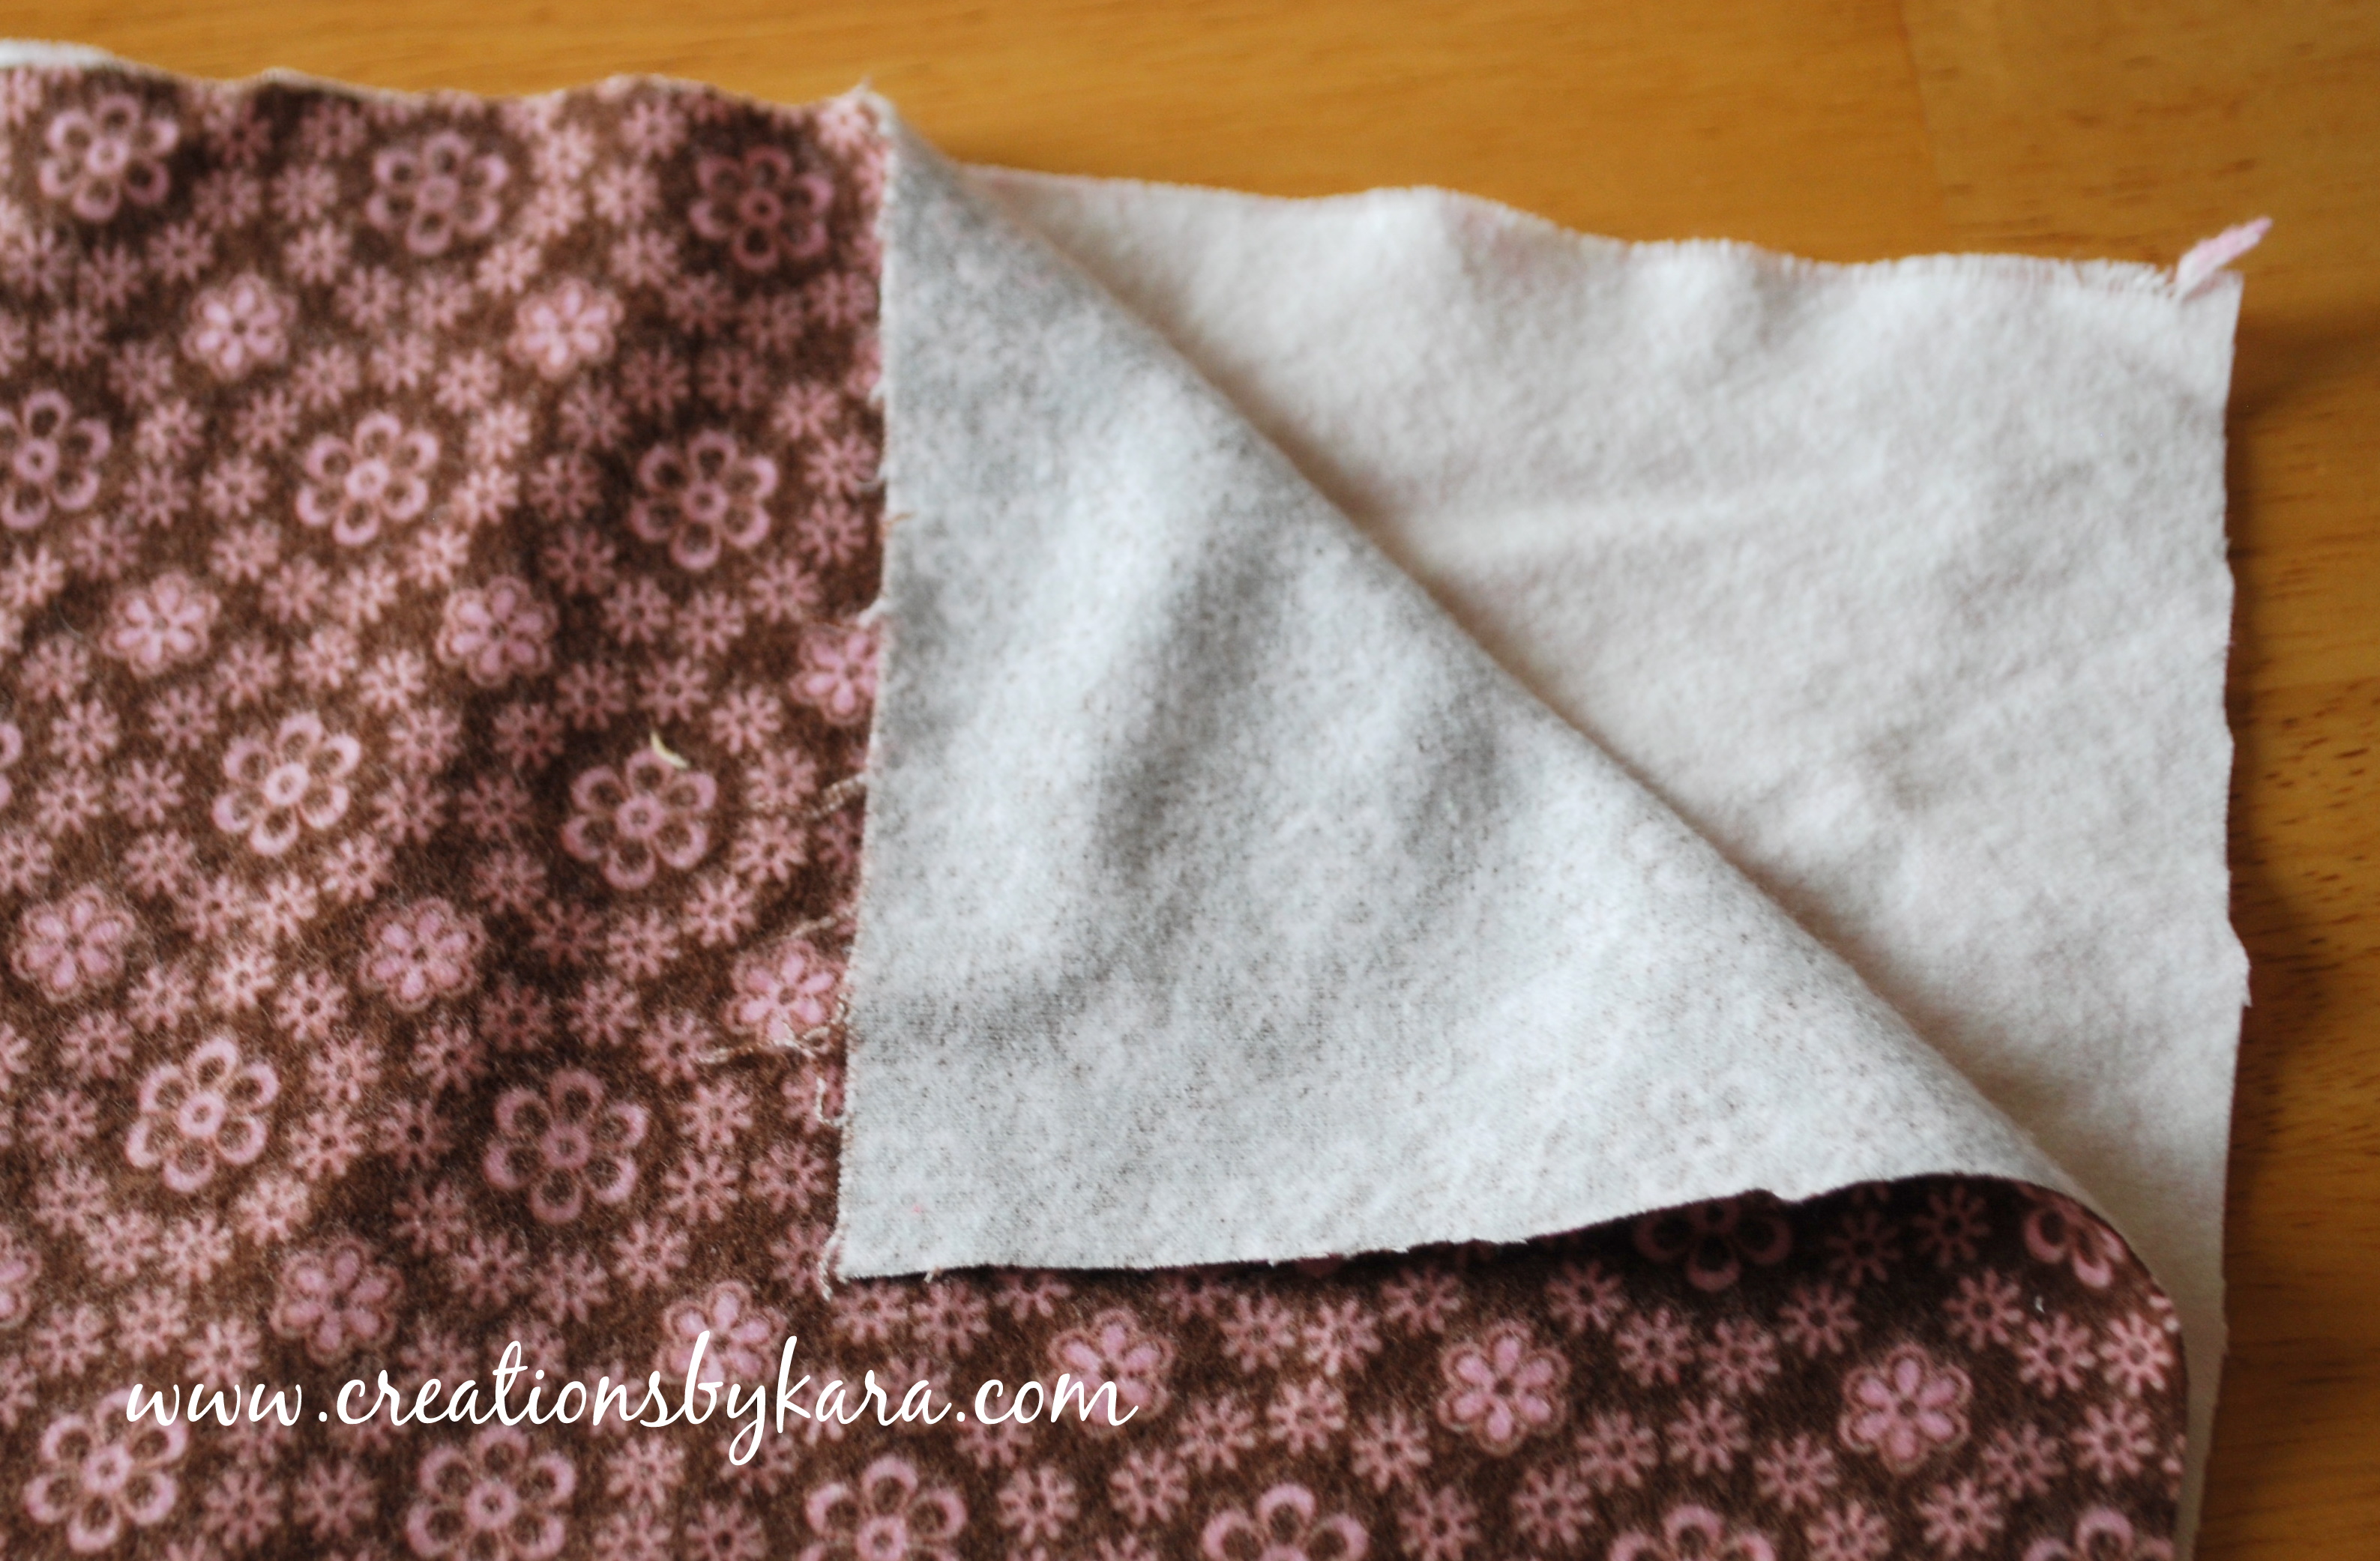
Place the pattern on top of the fabric and cut through both layers.
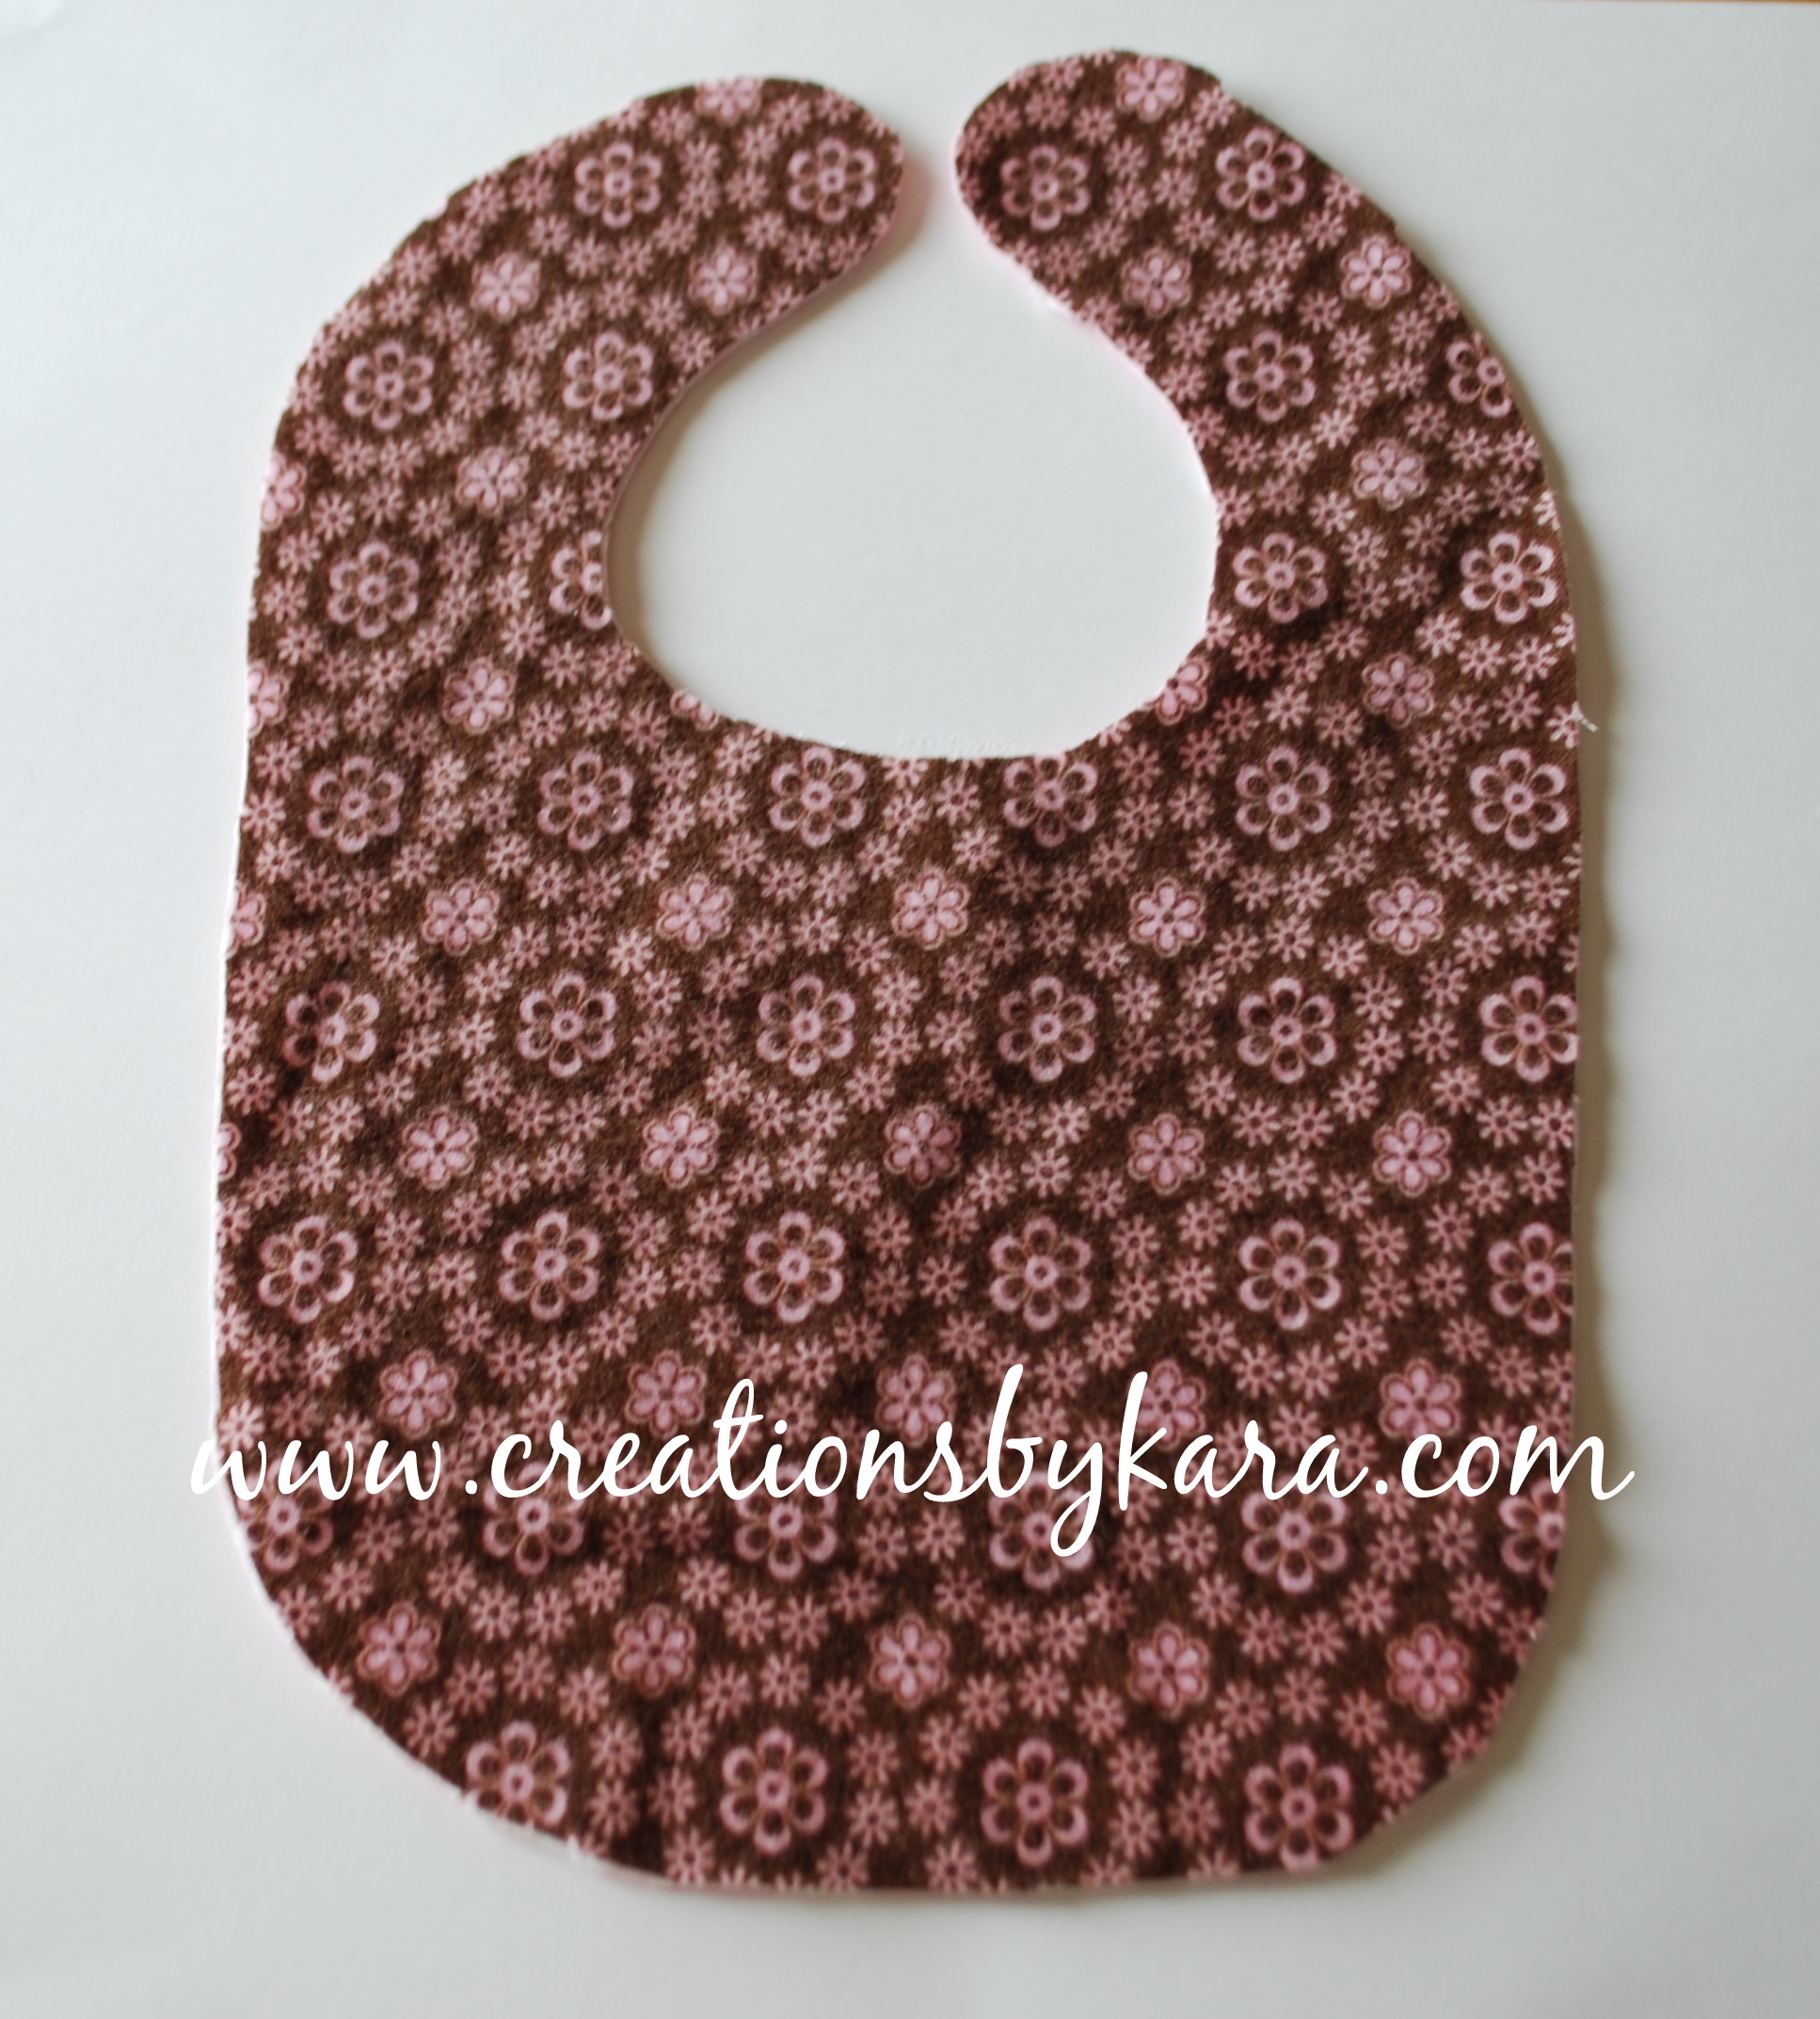
Machine stitch both pieces together, about 1/2″ from the edge. You will not be turning it inside out, so go all the way around.
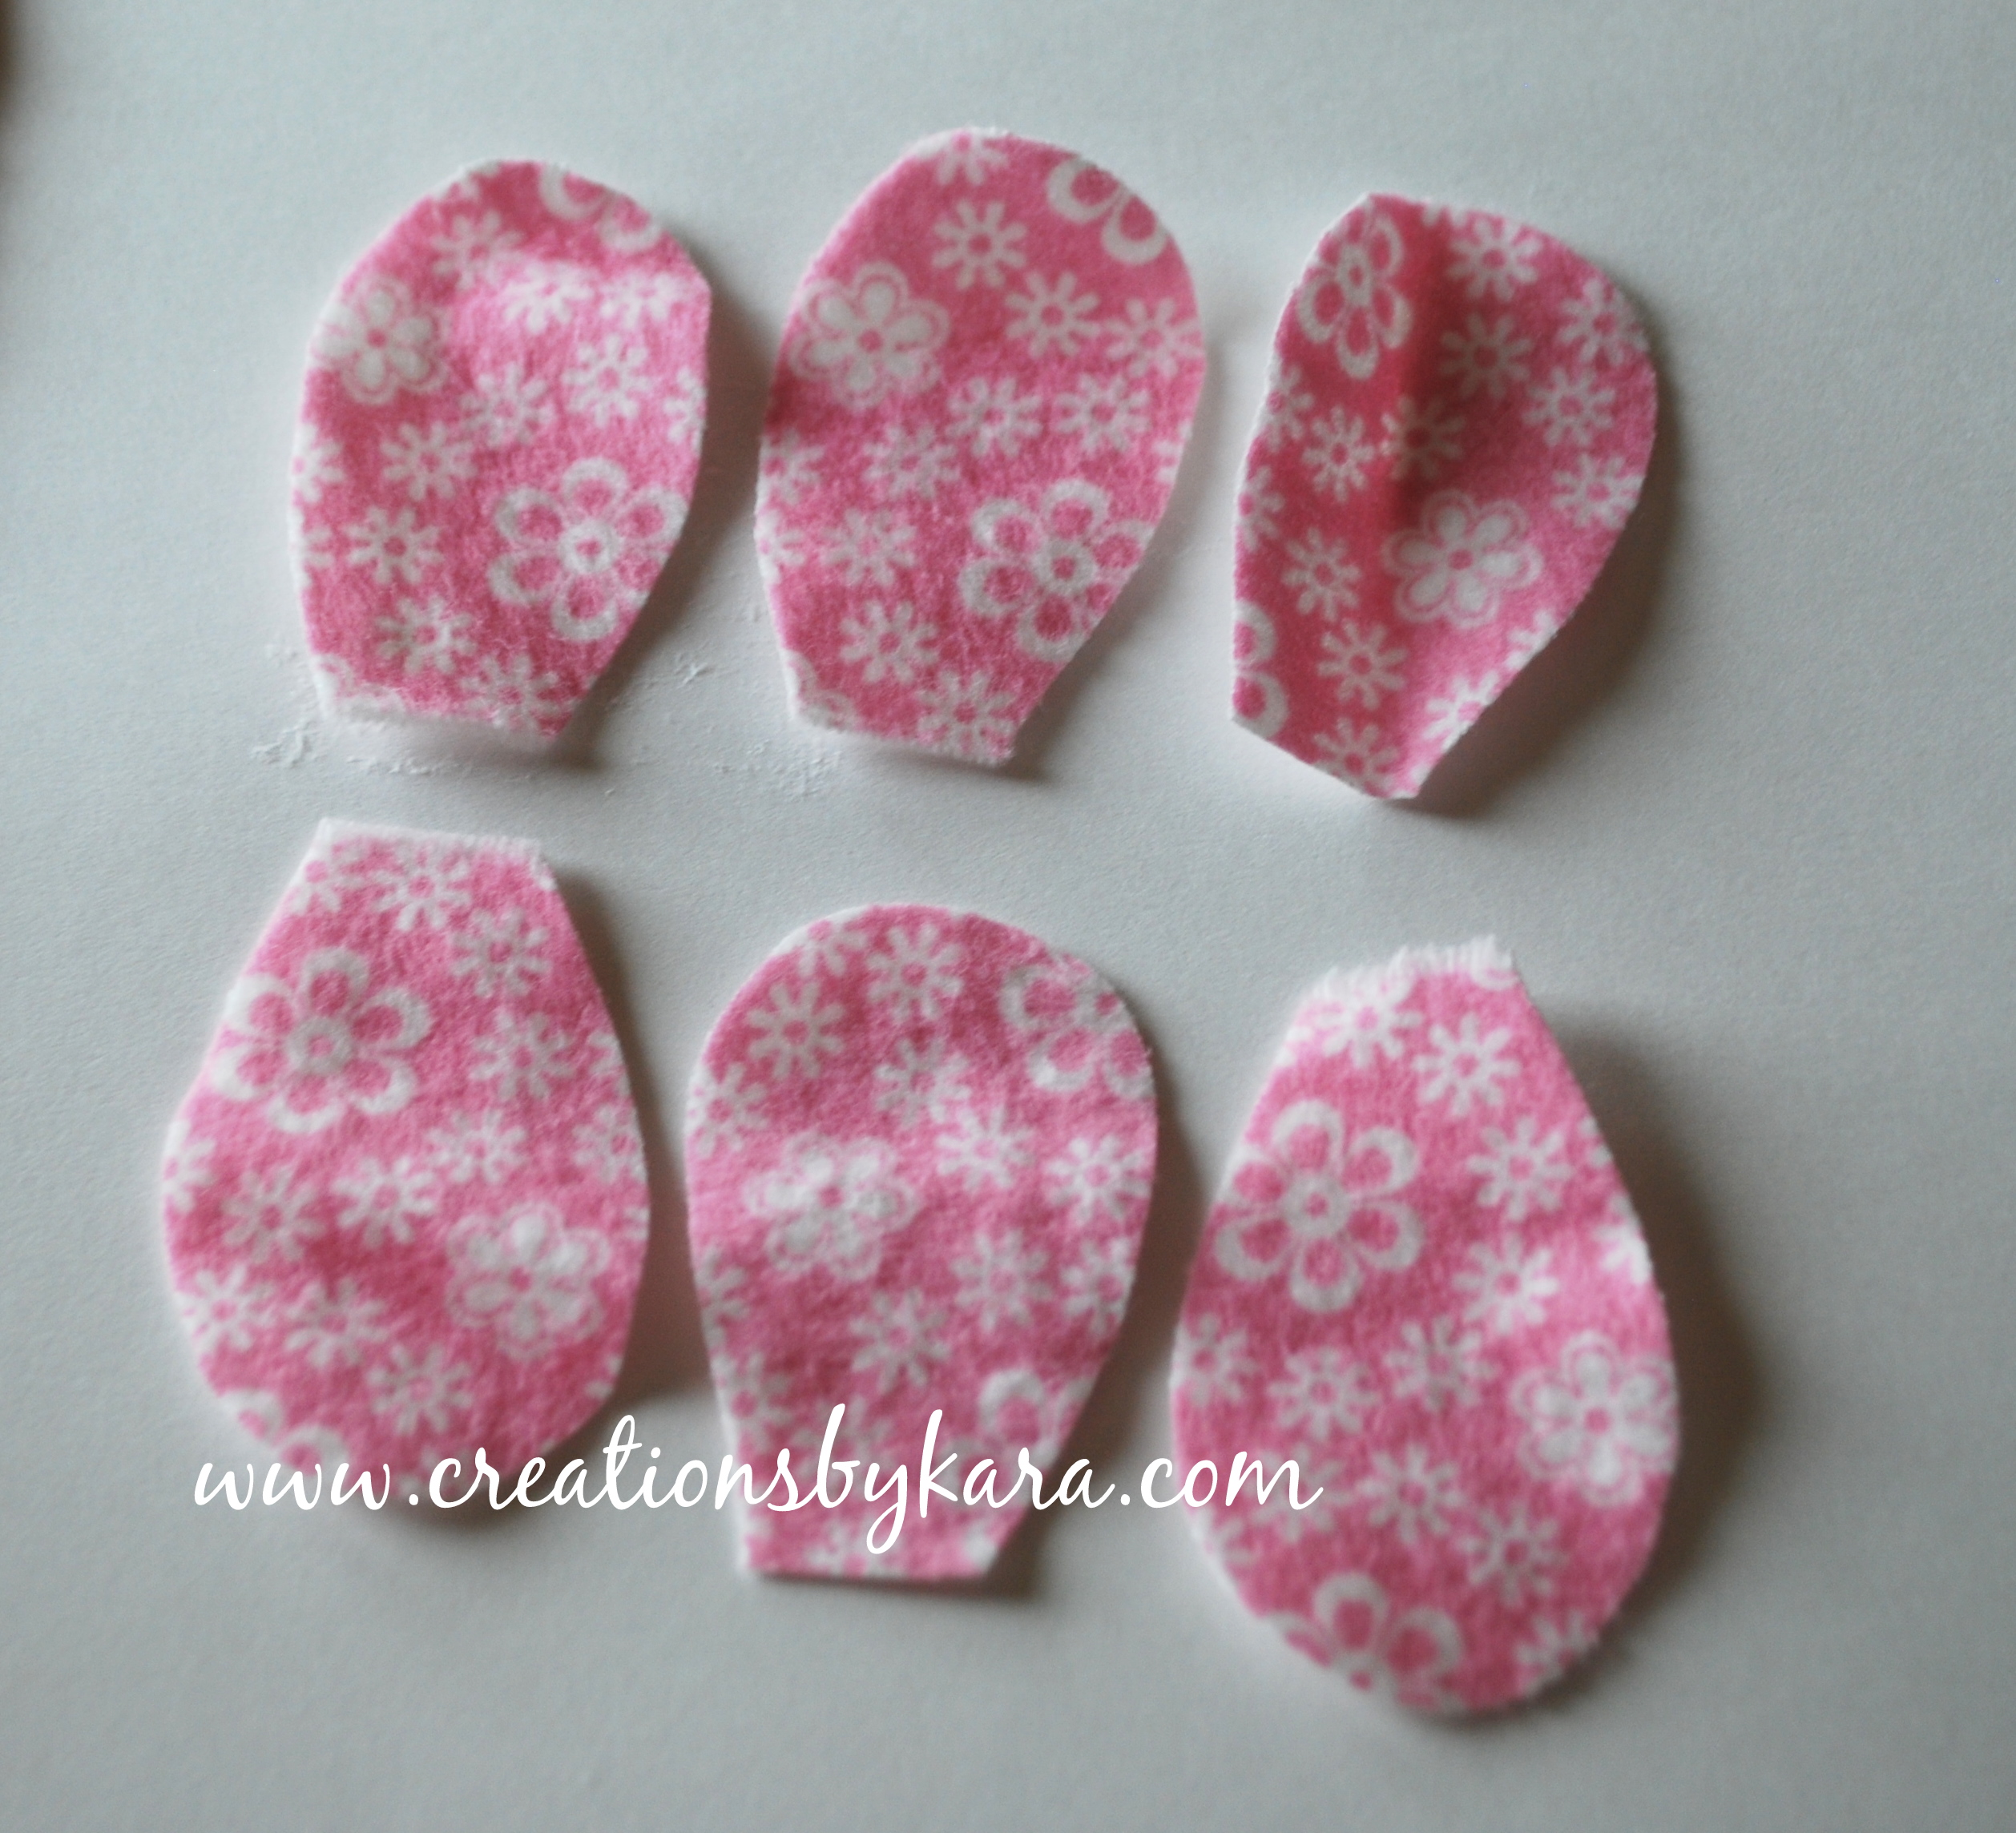
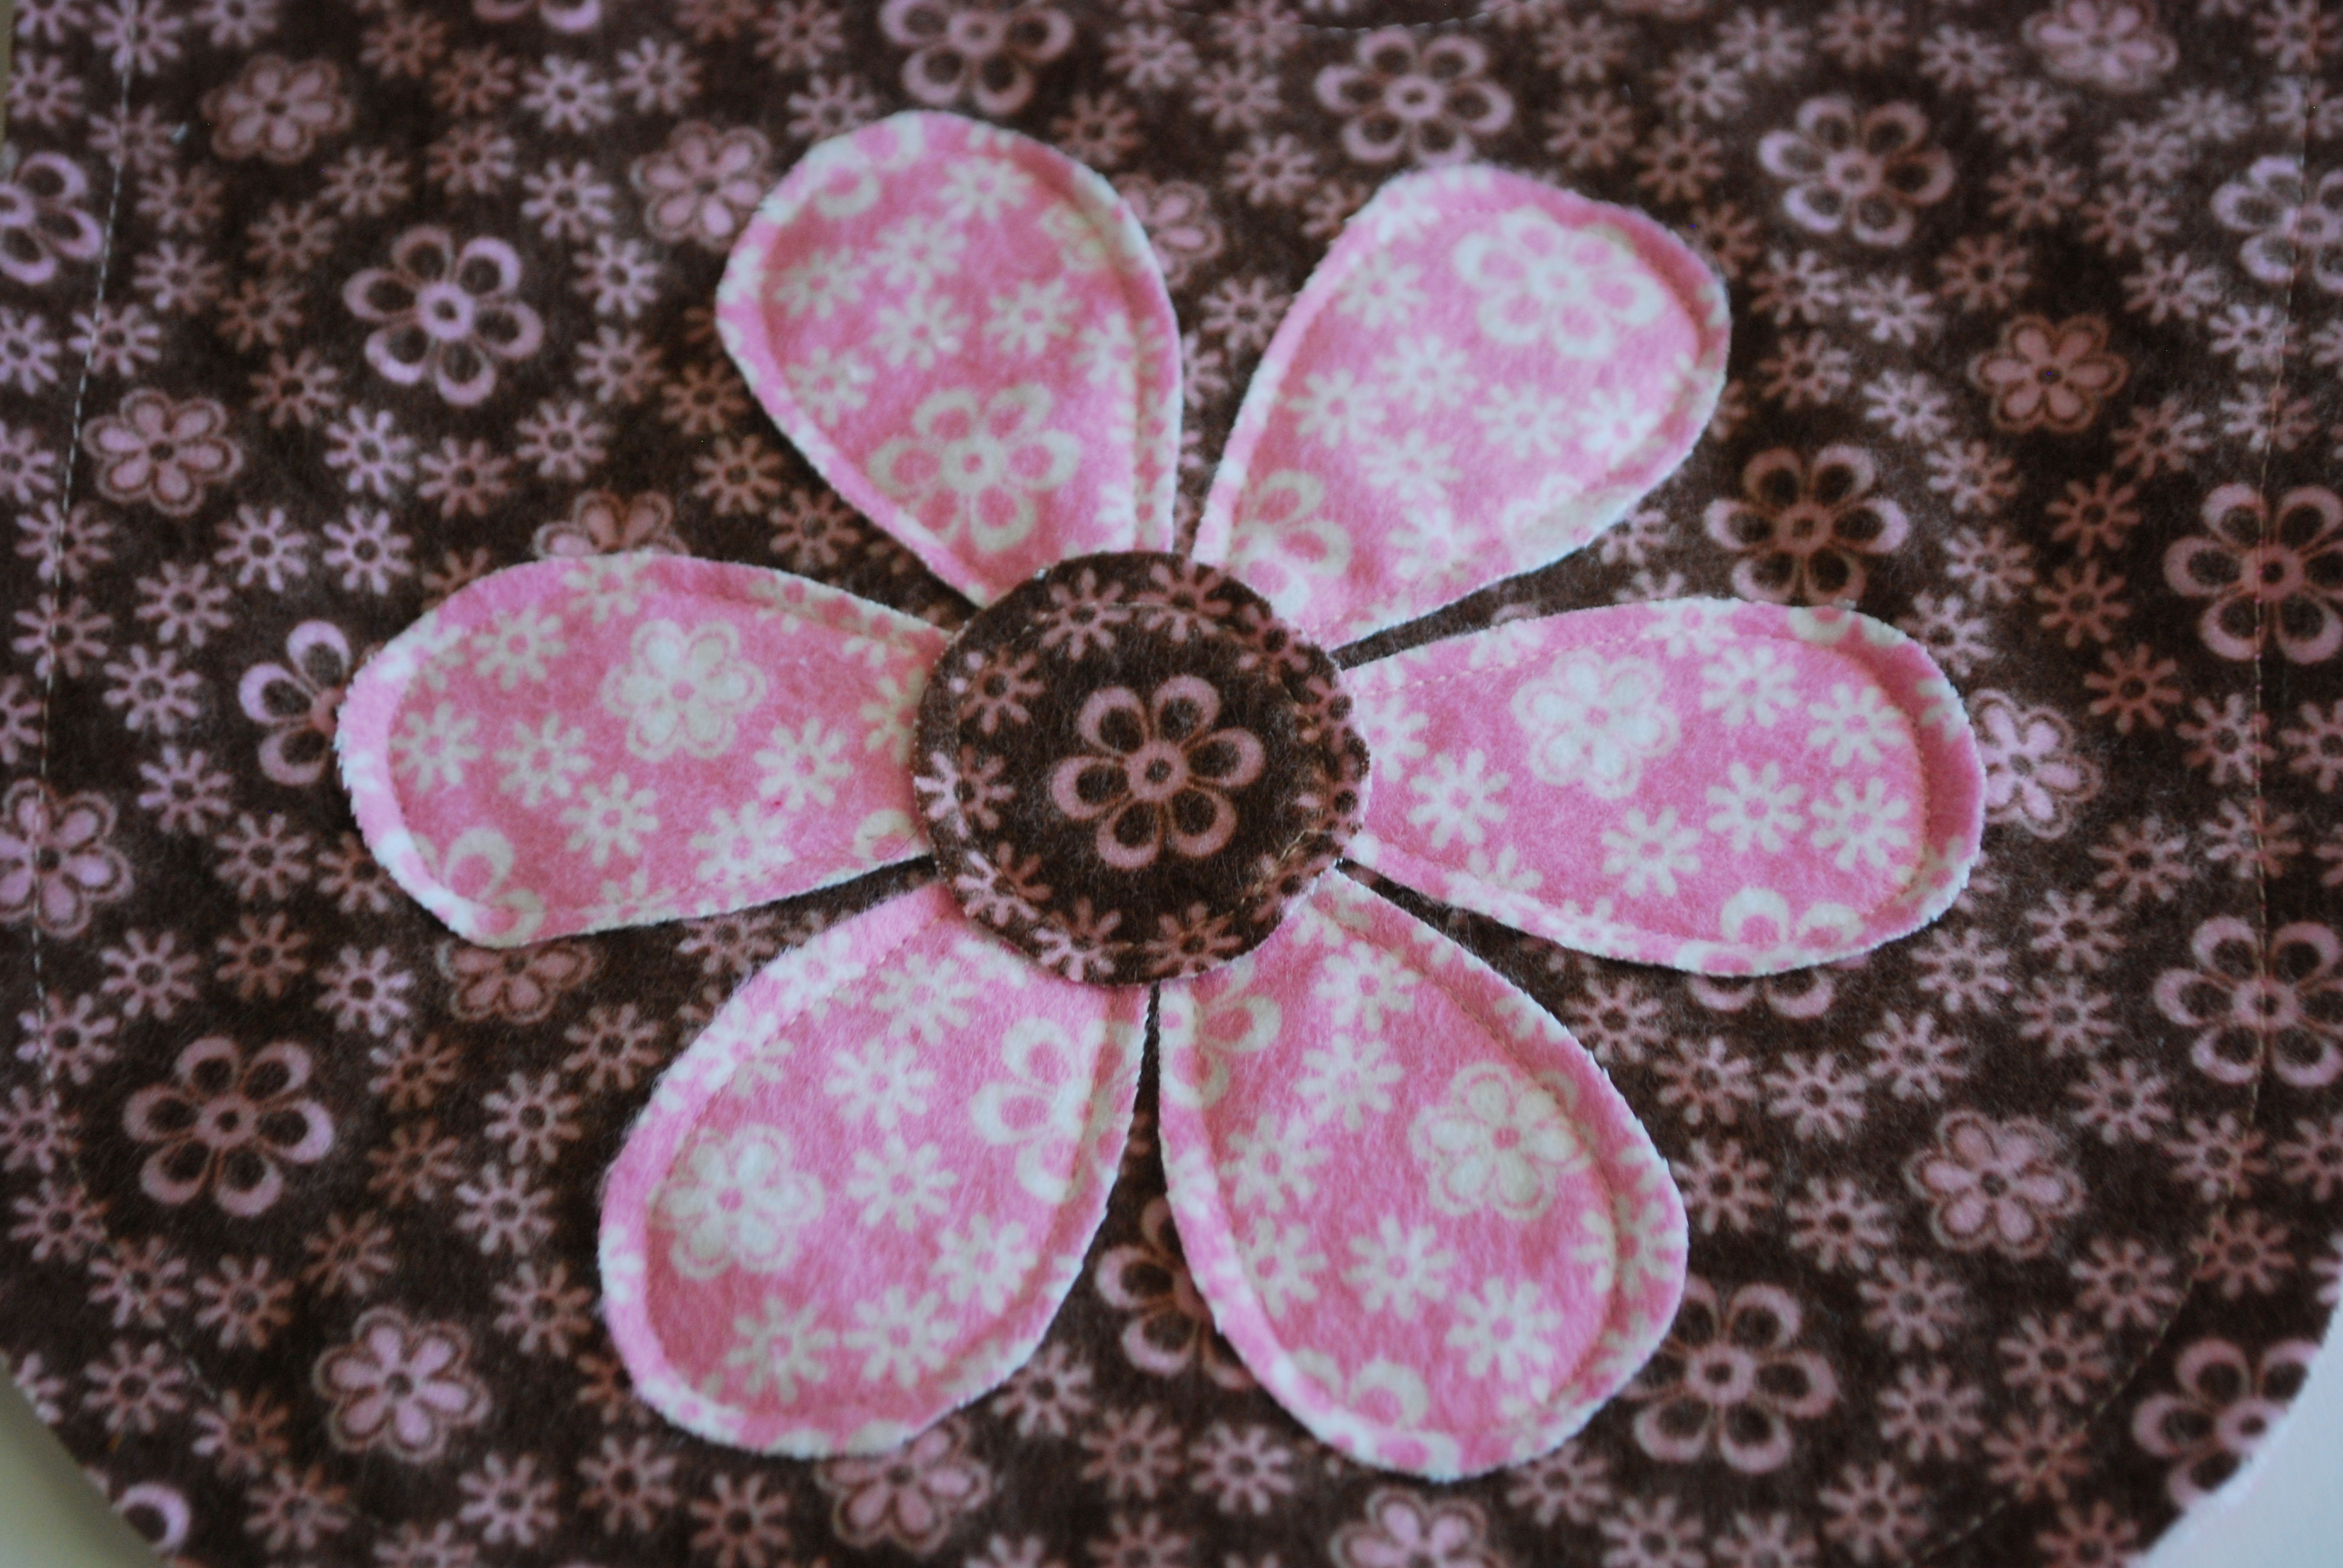
Now it’s time to add an embellishment. I did a flower, but you can use any design your heart desires.
Cut out your six petals.
Arrange them on the bib the way you like them. I like to secure mine with glue stick. It helps them stay in place white I am sewing.
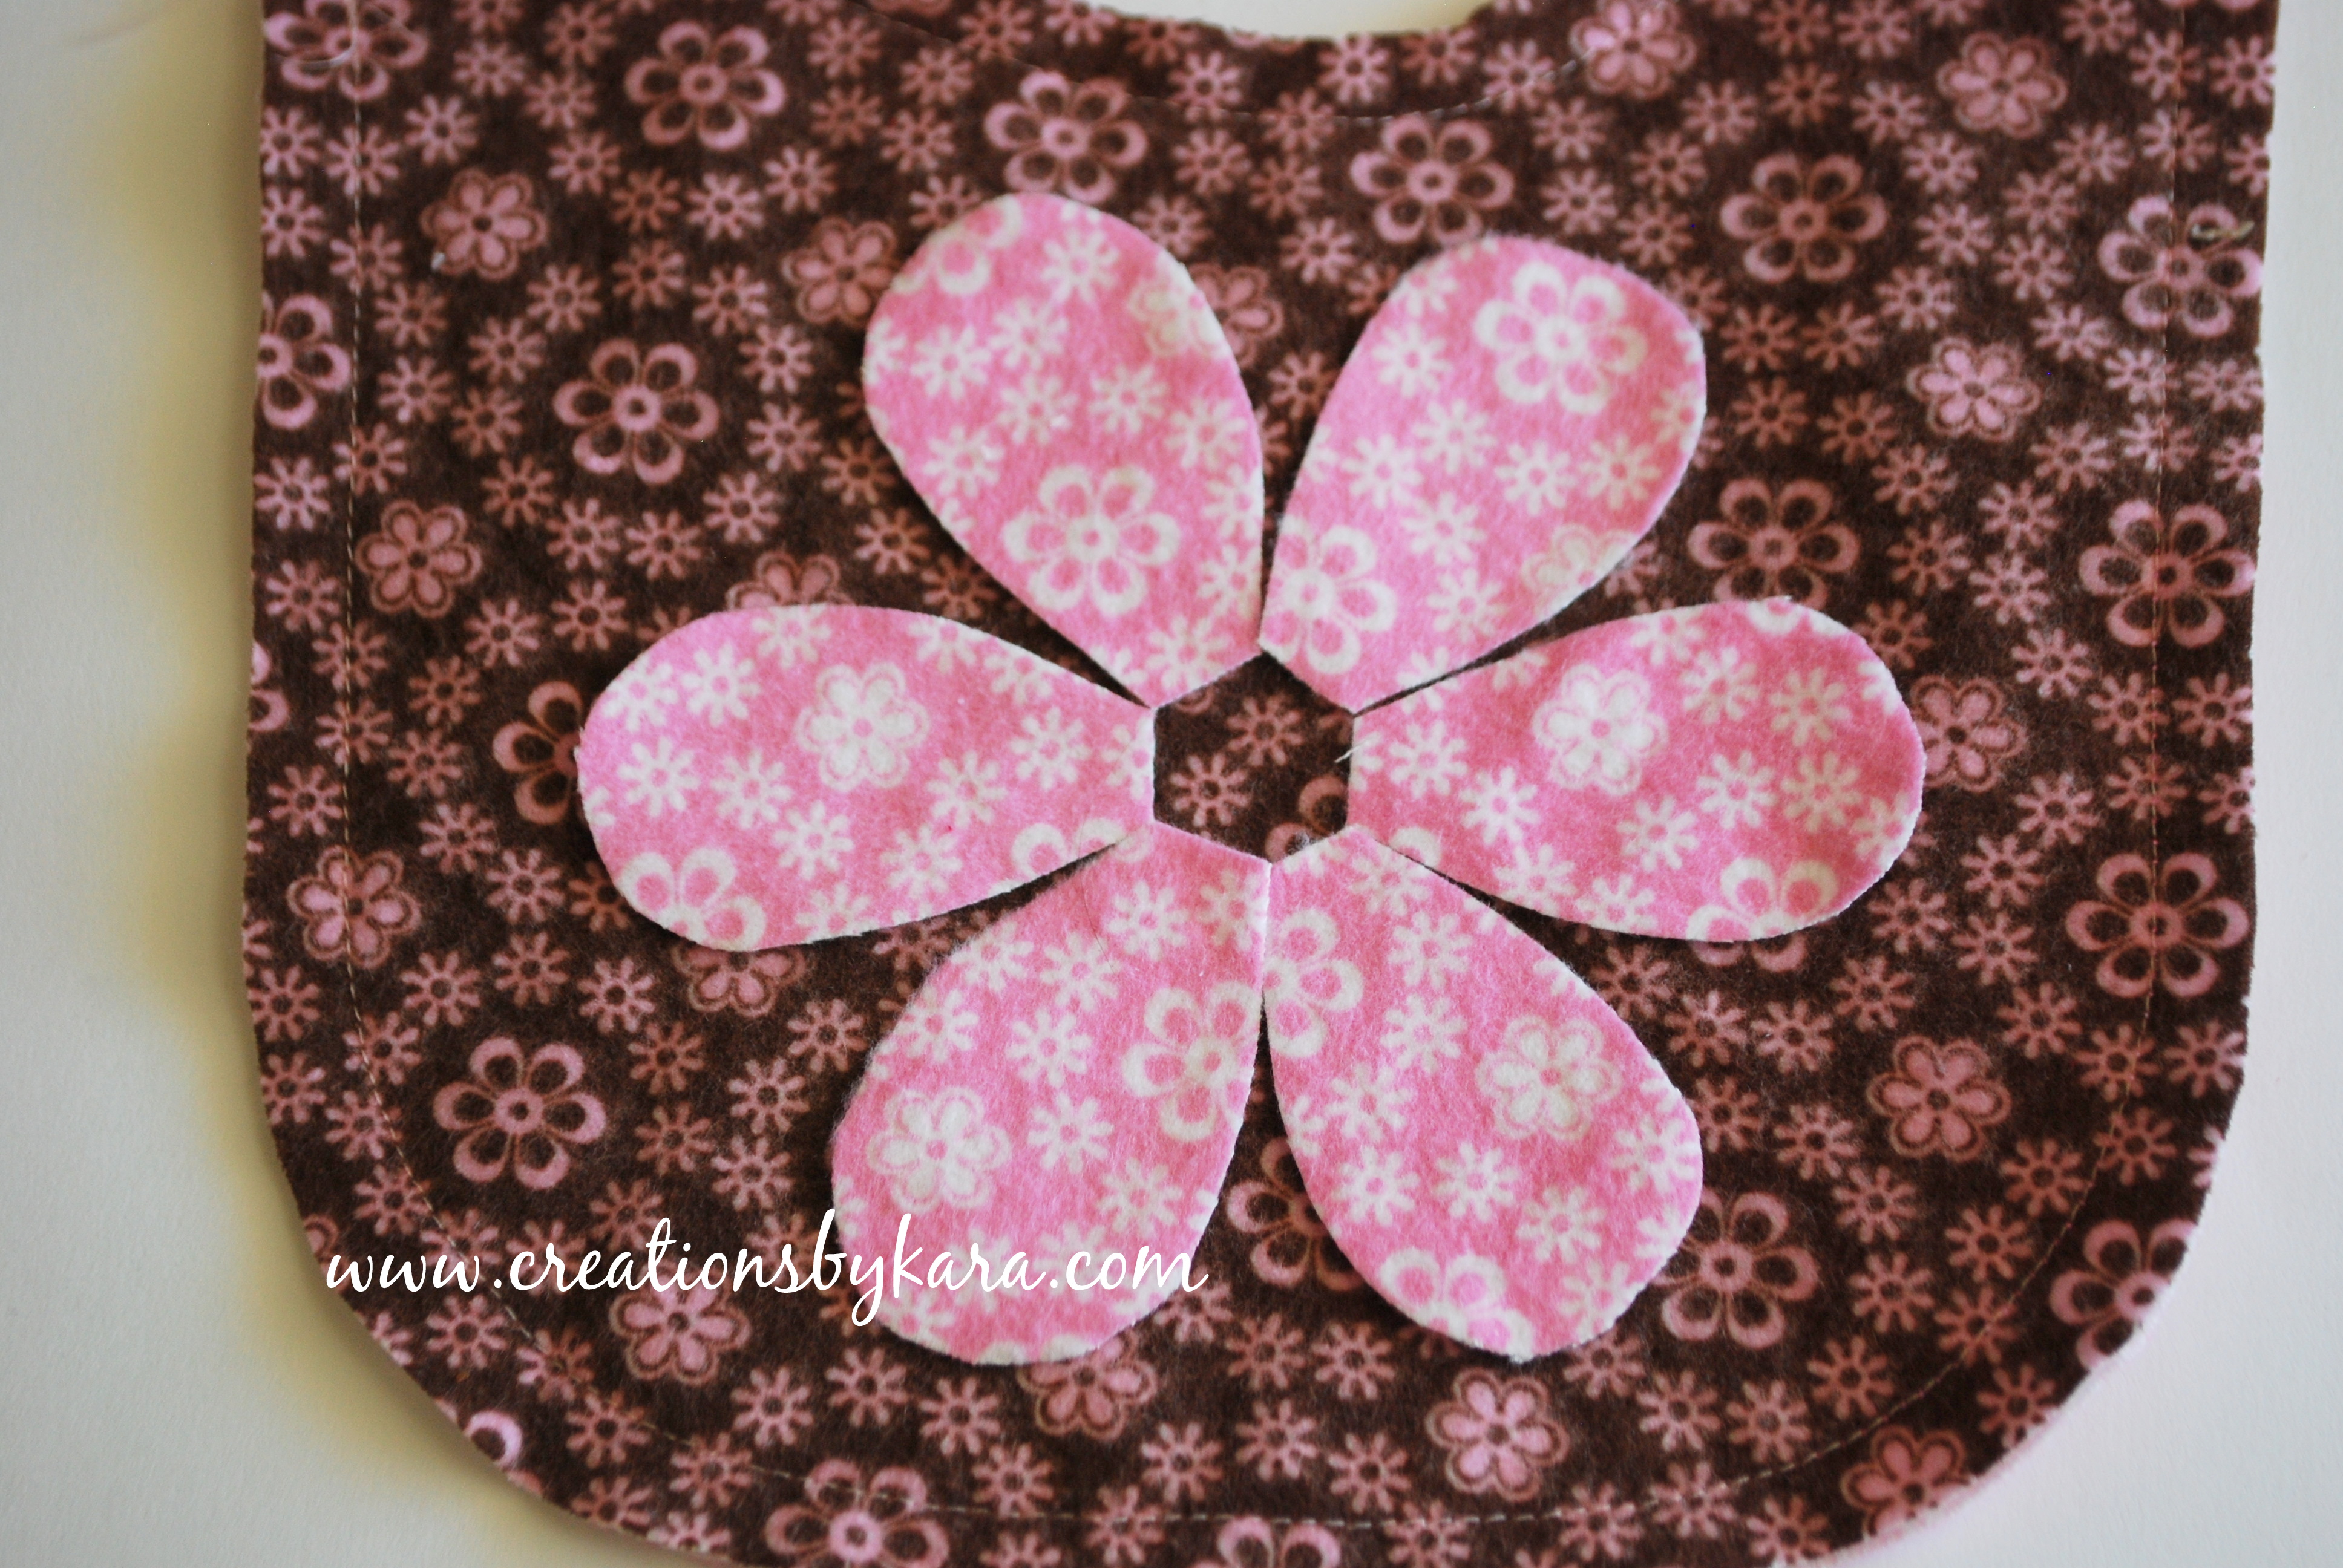
Now stitch around all of the petals.
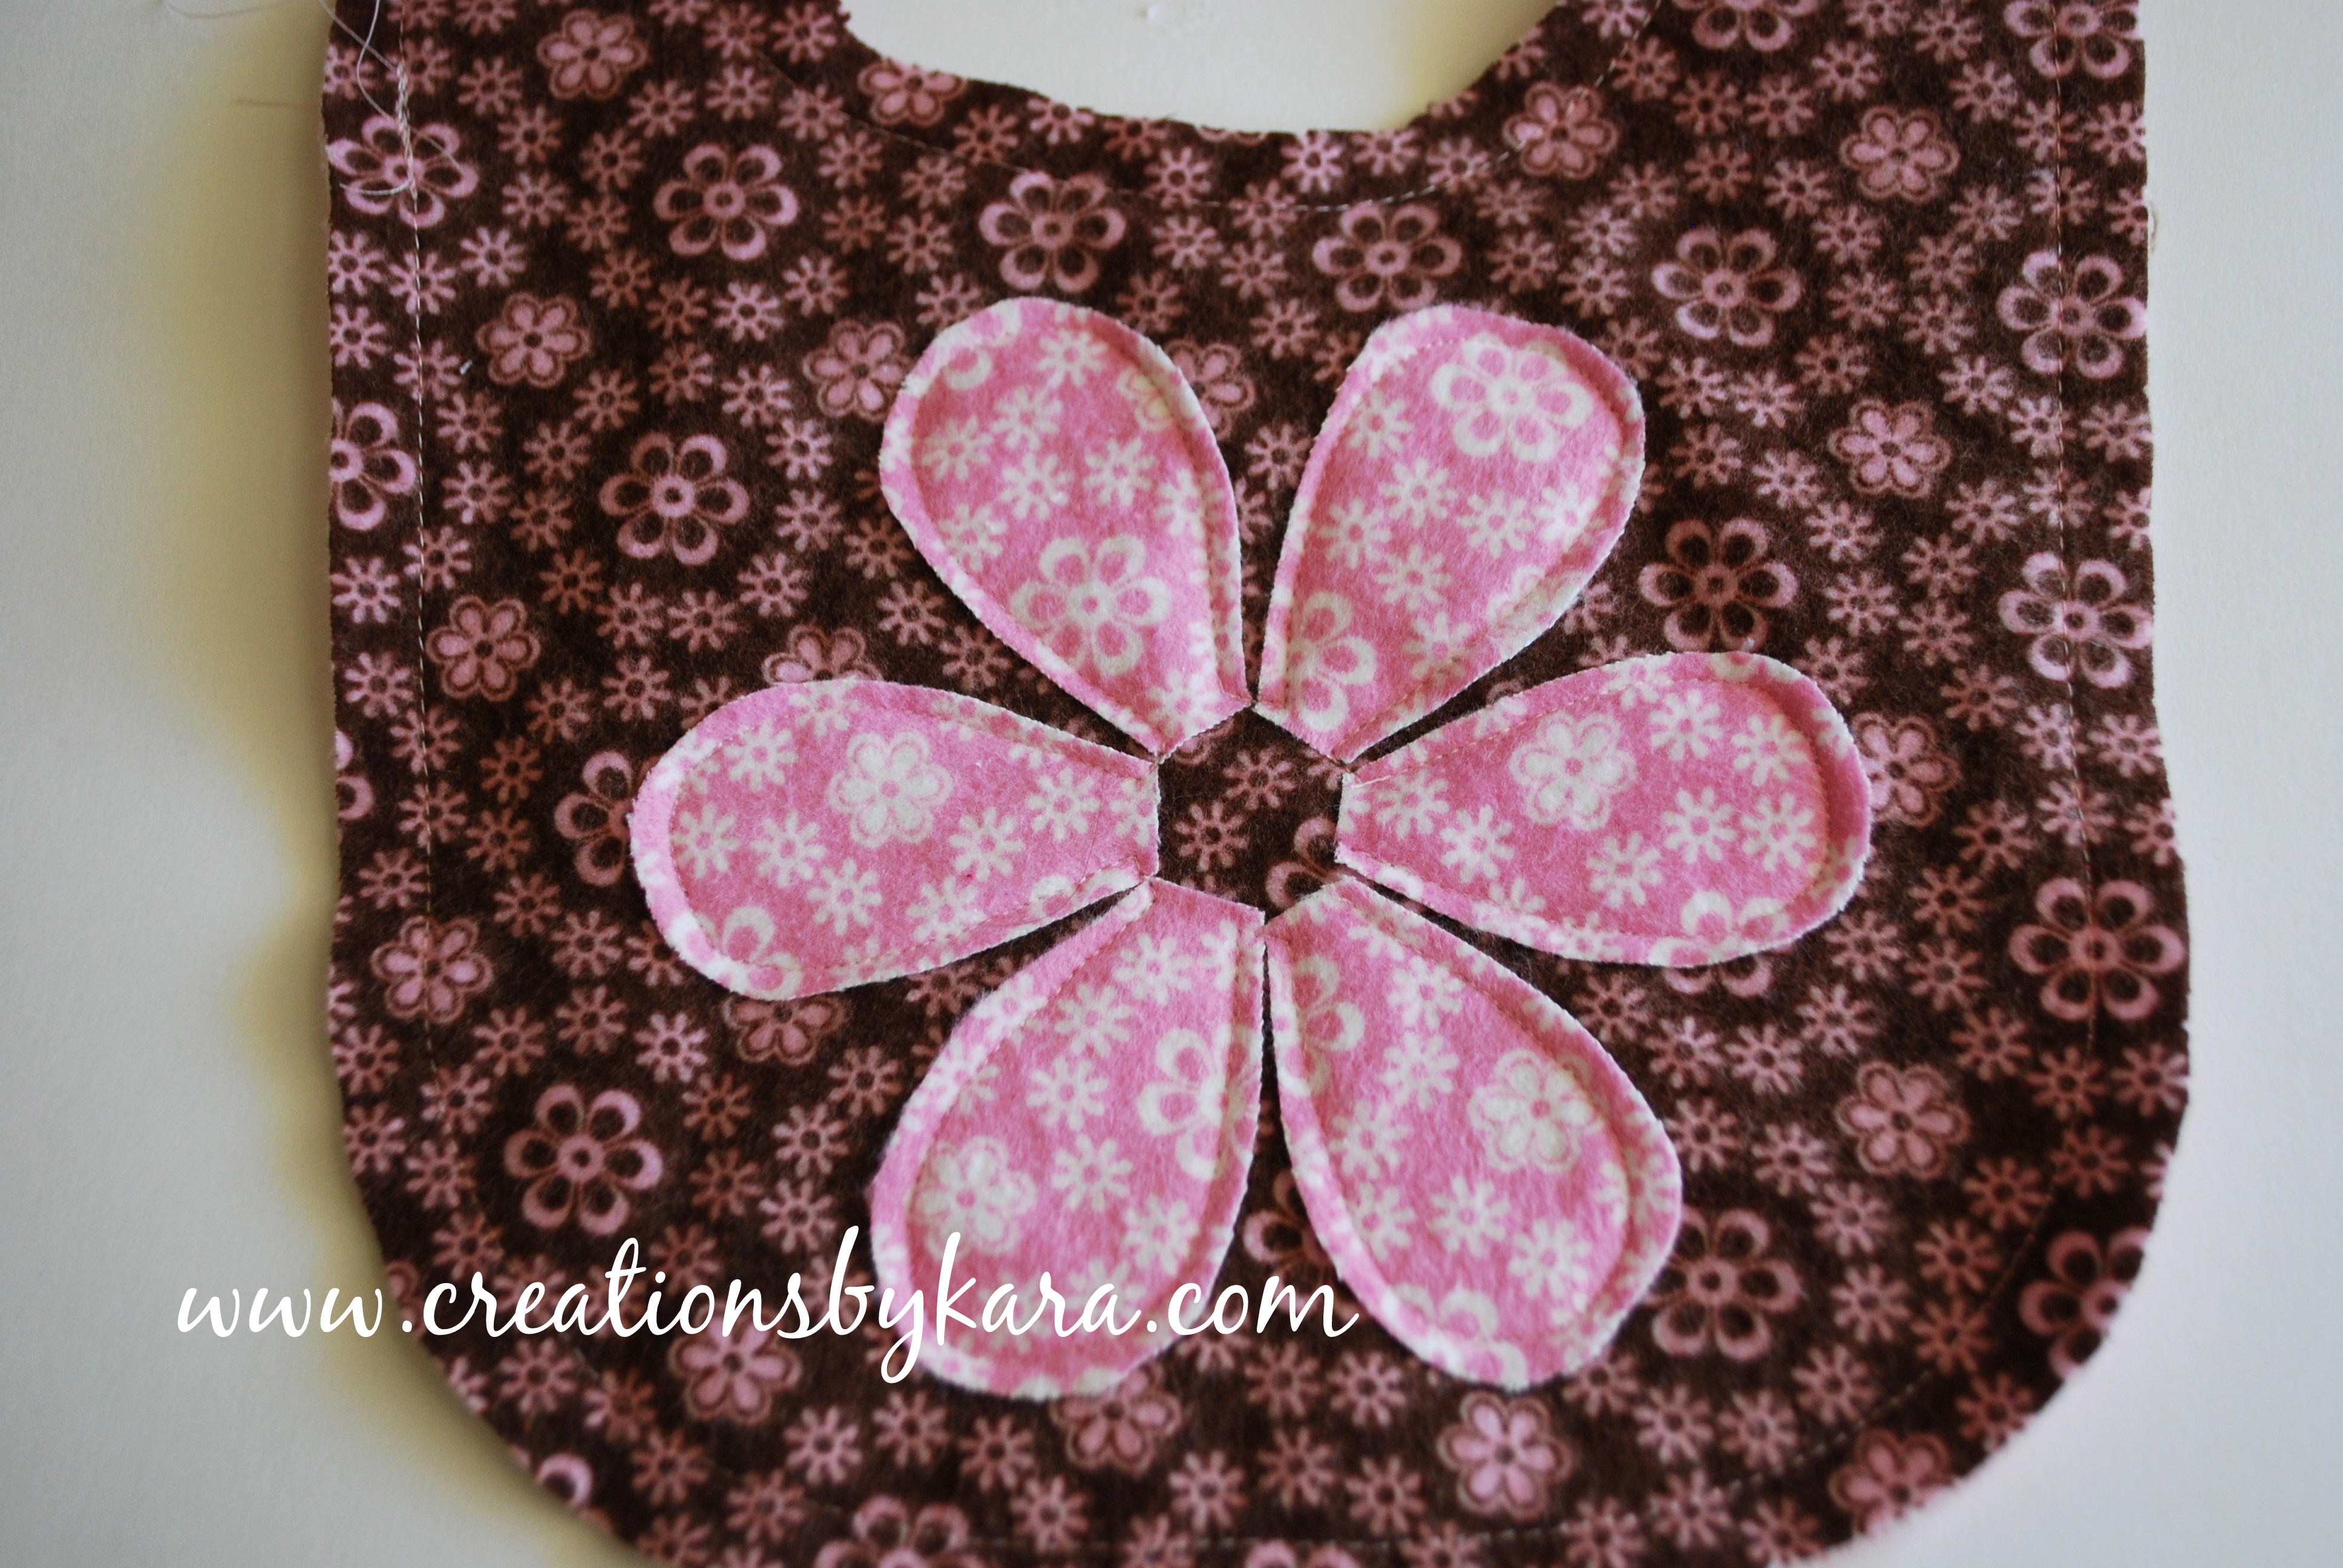
Cut out a circle, glue it in the center, and stitch around it just like you did the petals. Isn’t that cute?
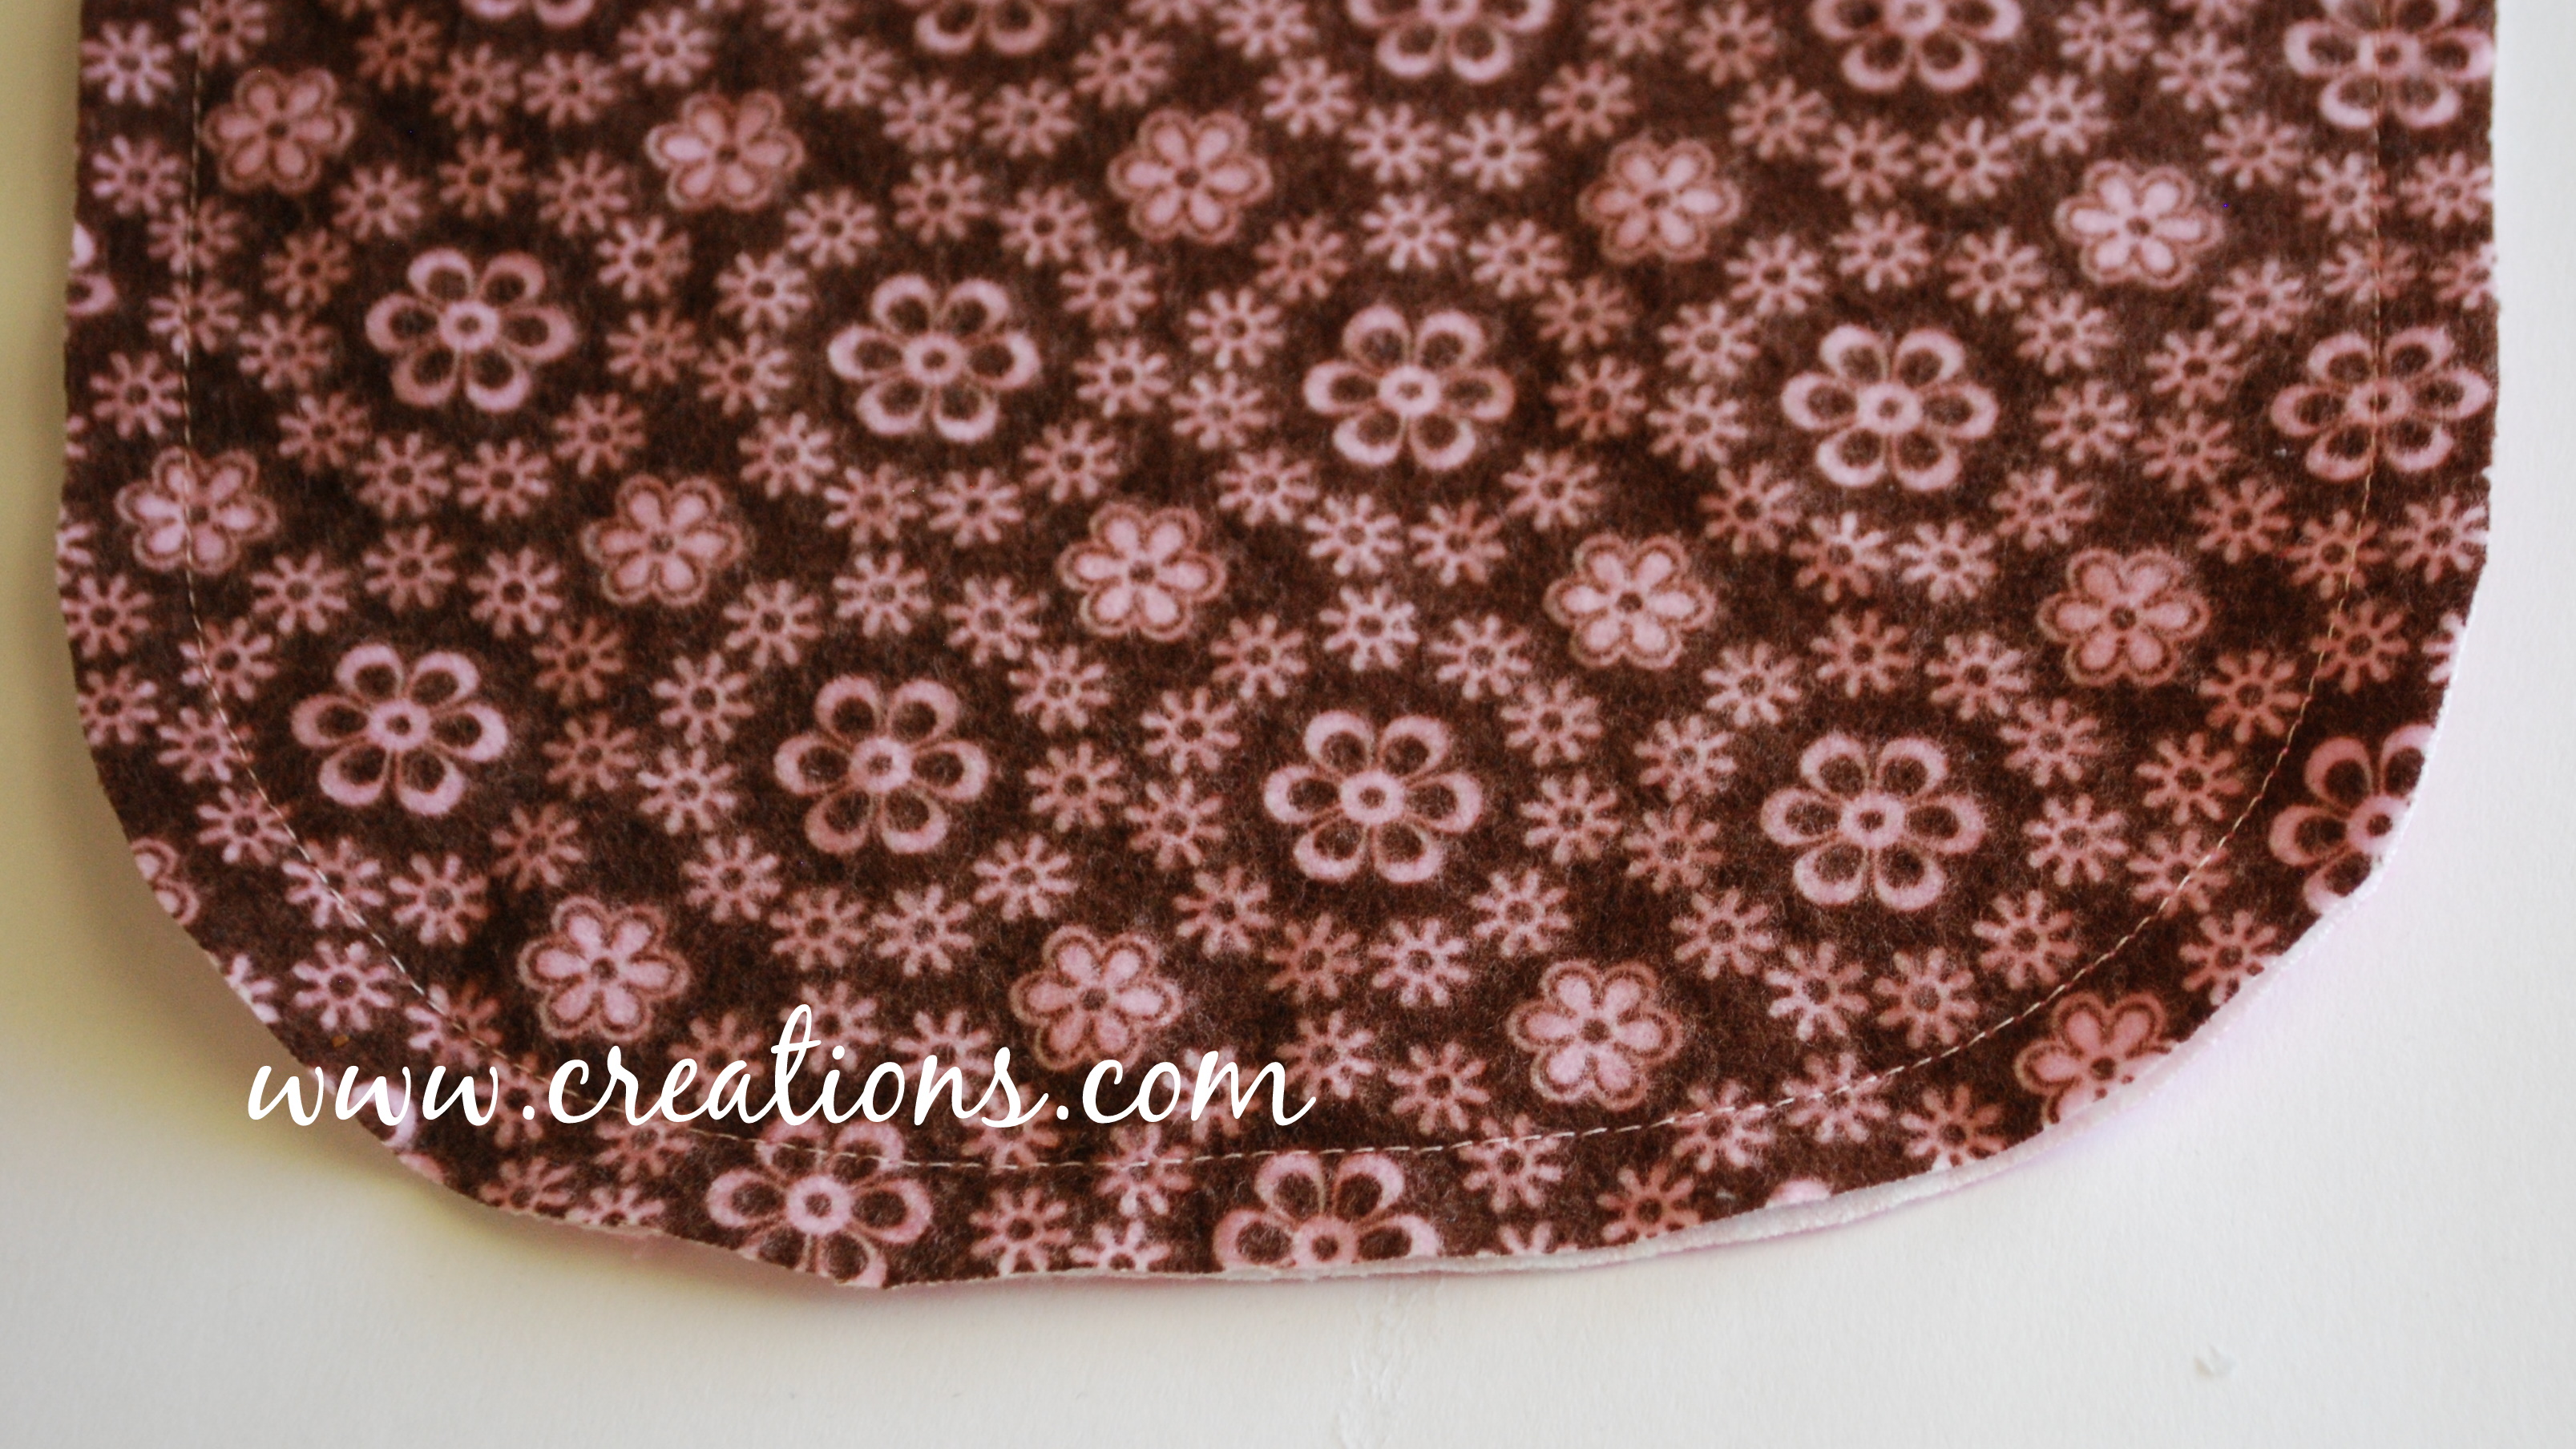
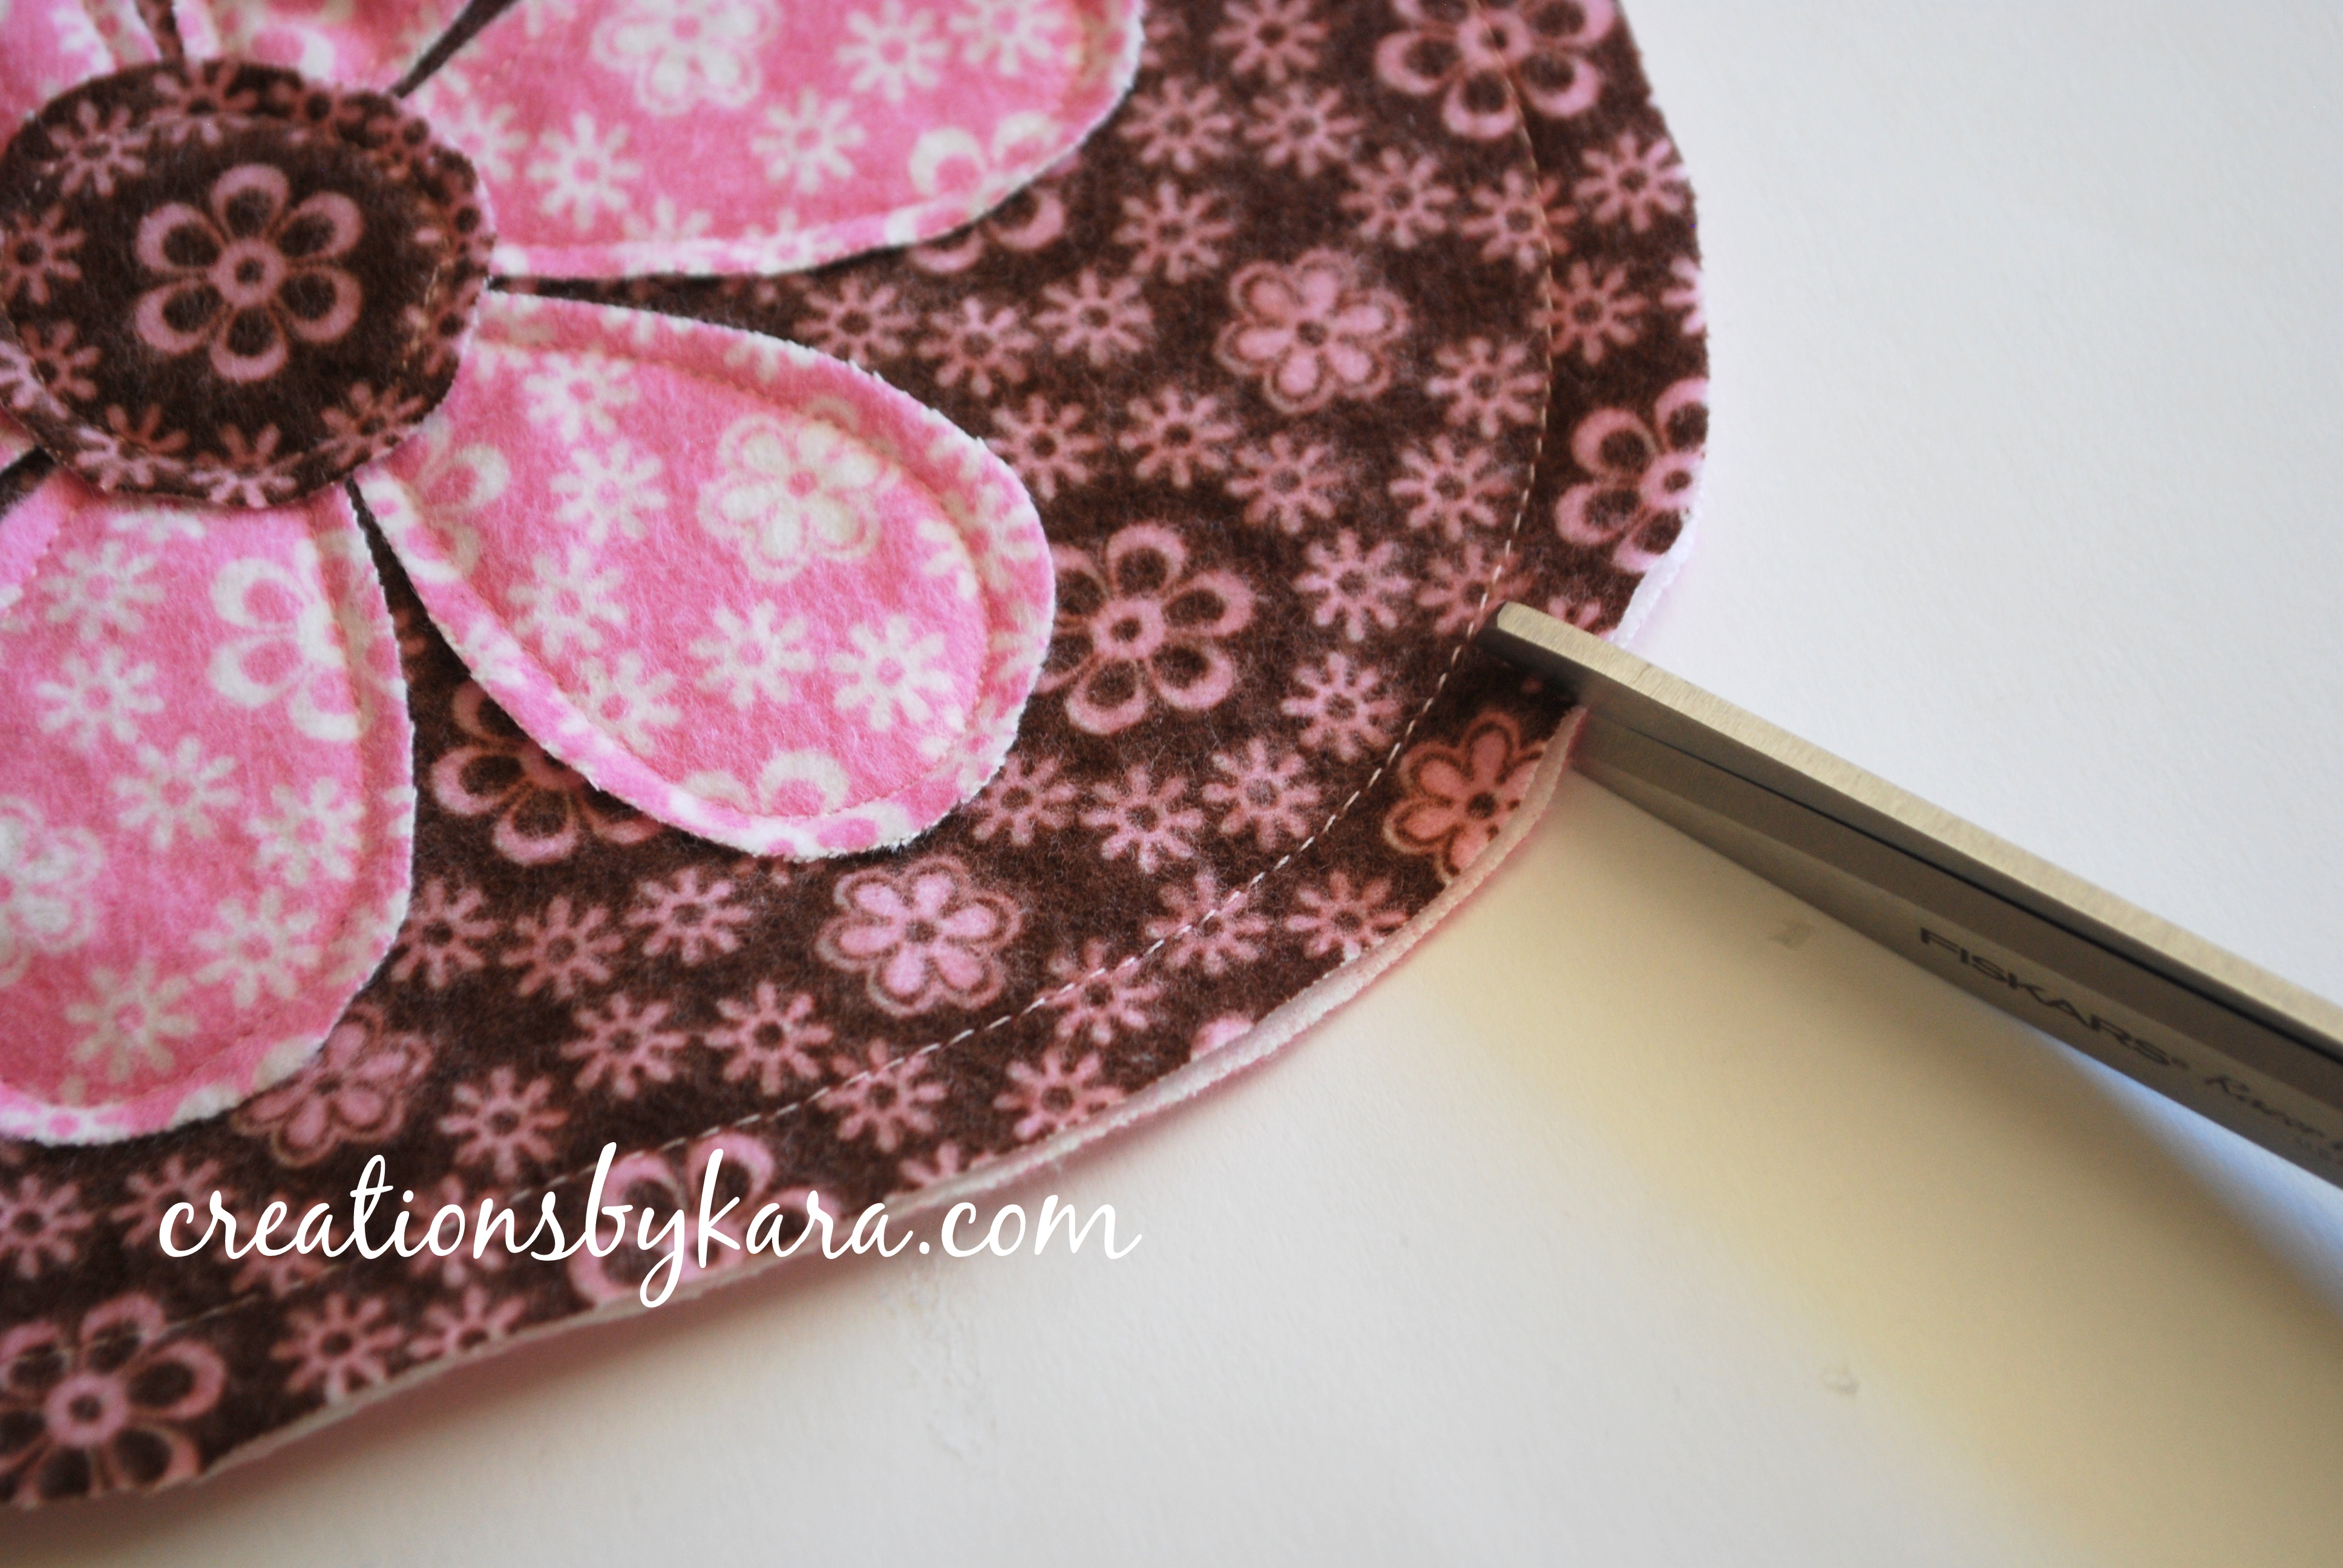
We’re almost finished. Now take your scissors and cut slits about 1/2″ apart all around the edge of the bib. Make sure you don’t cut through the thread!
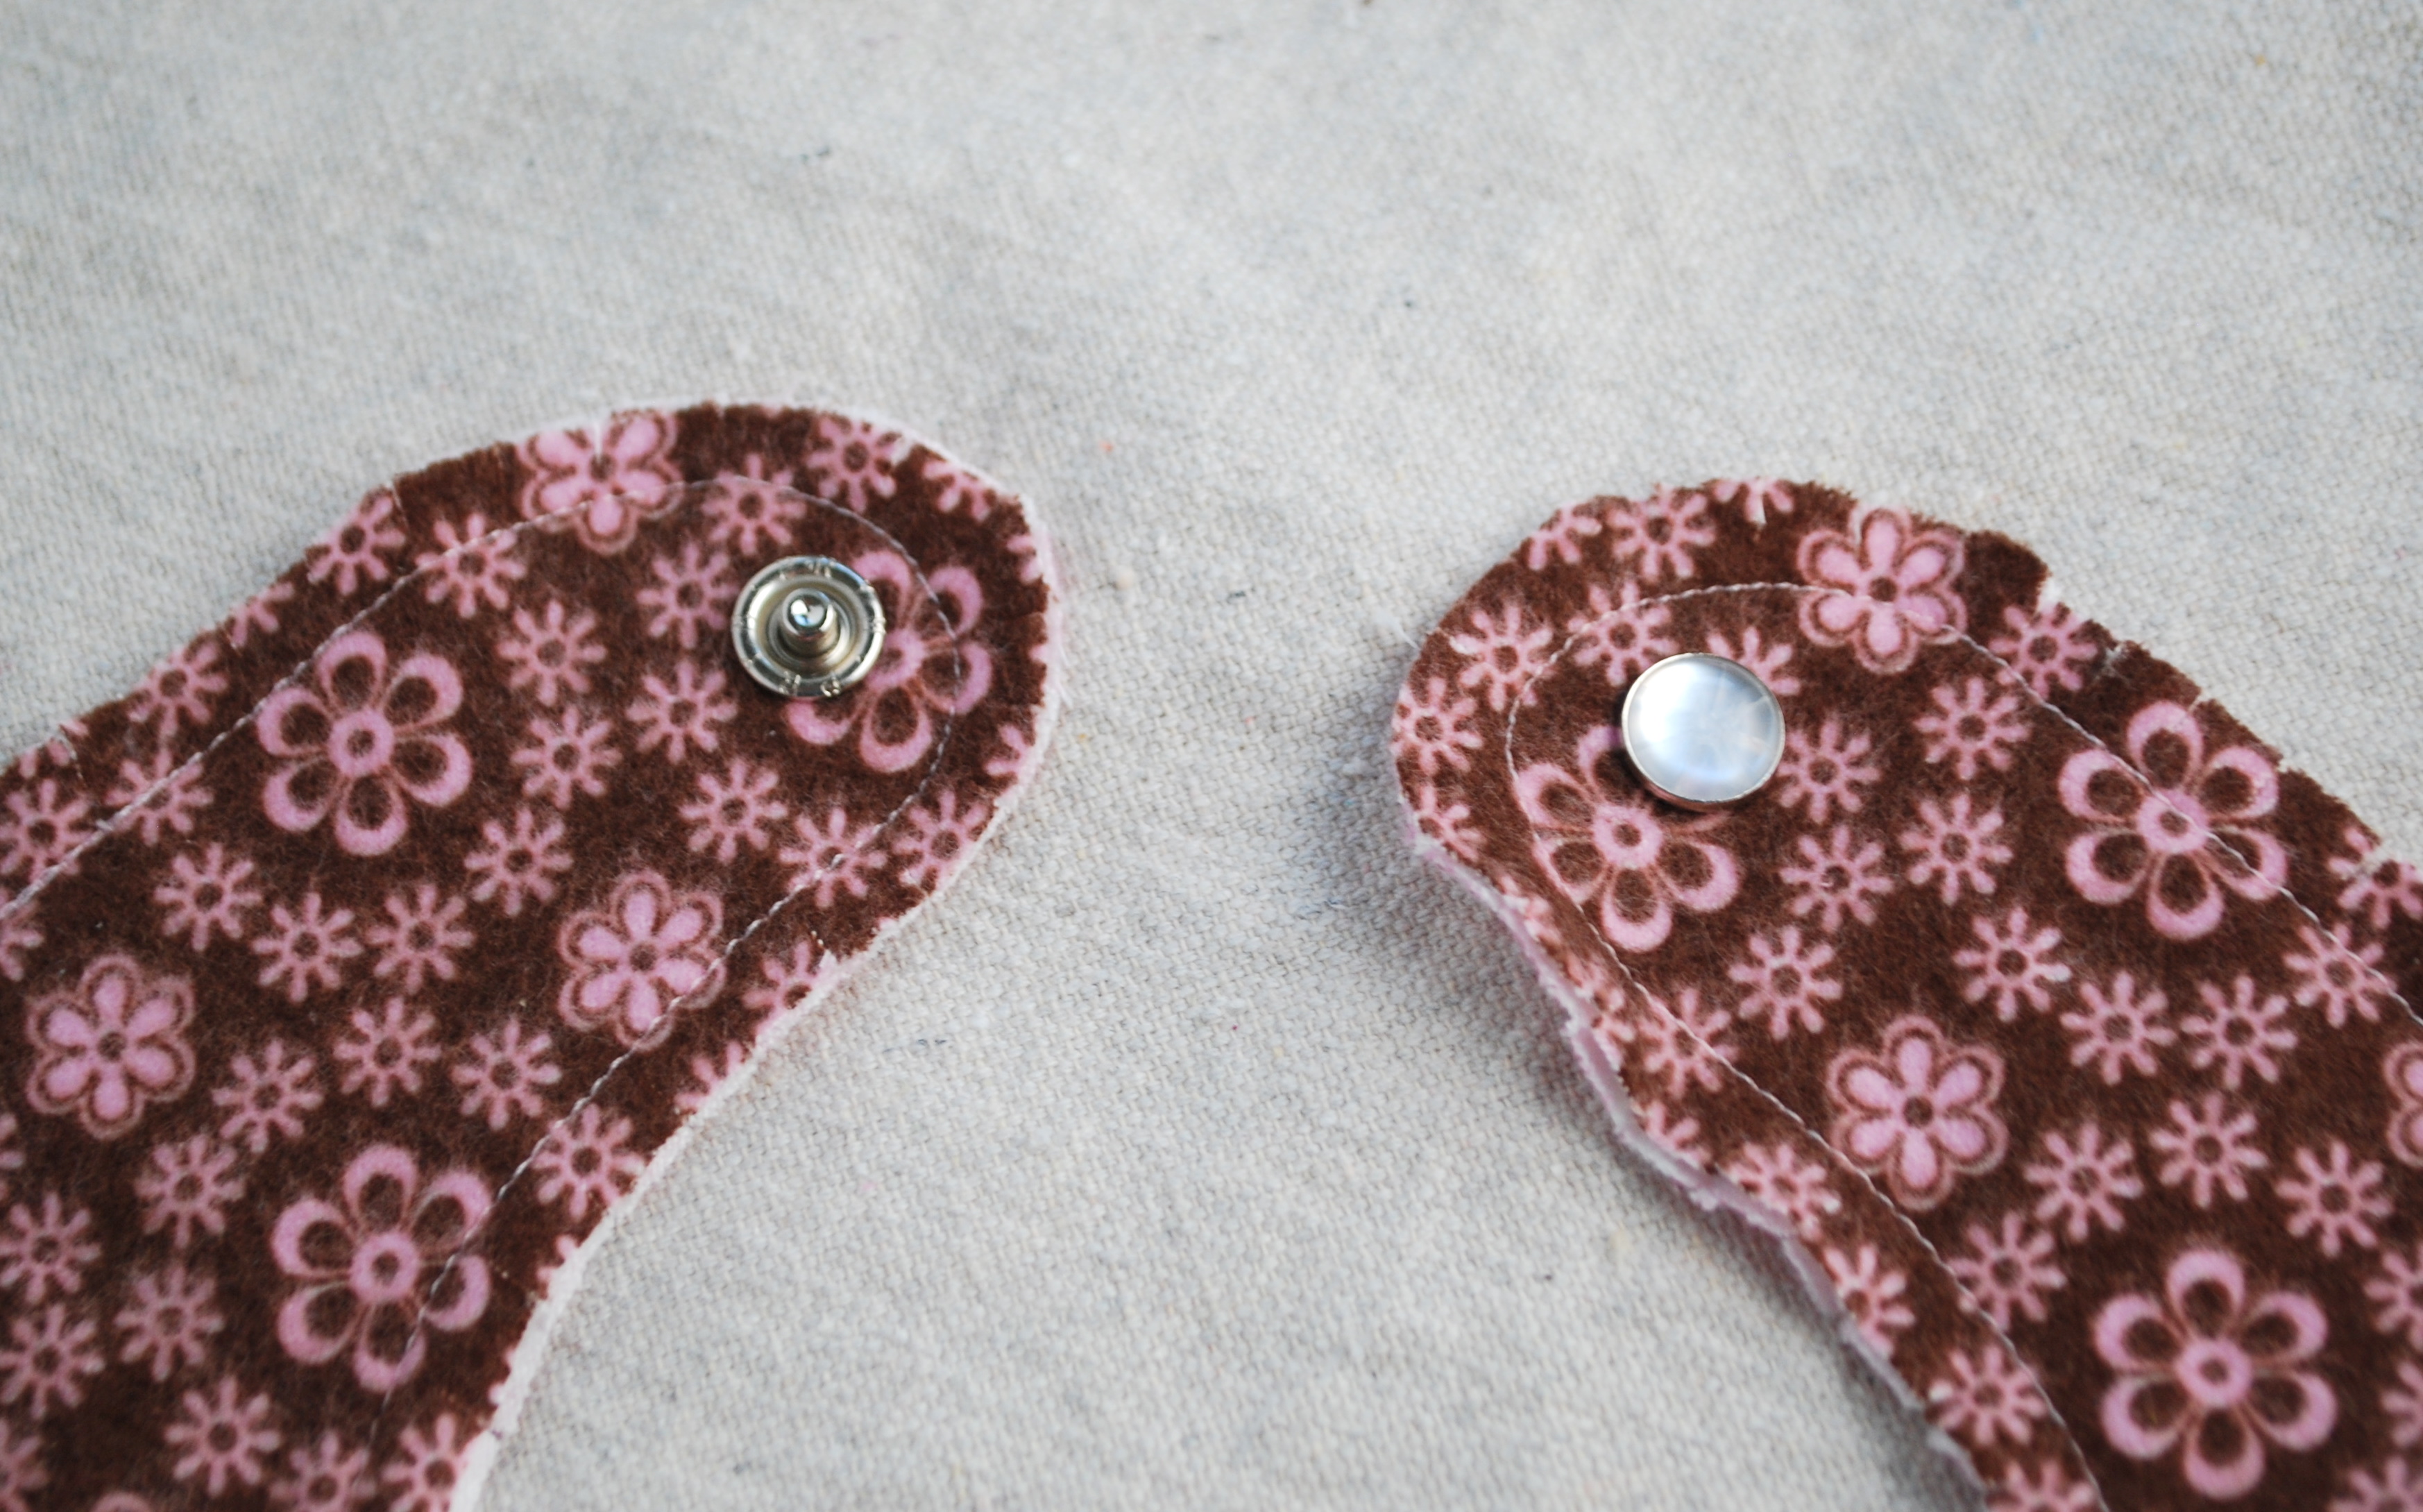
After you’ve finished snipping, it’s time to attach the snap. I just used a packet I bought at Walmart and followed the instructions on the package. Mine involved the use of a hammer, but there are several different varieties. You could also use velcro instead if you want.
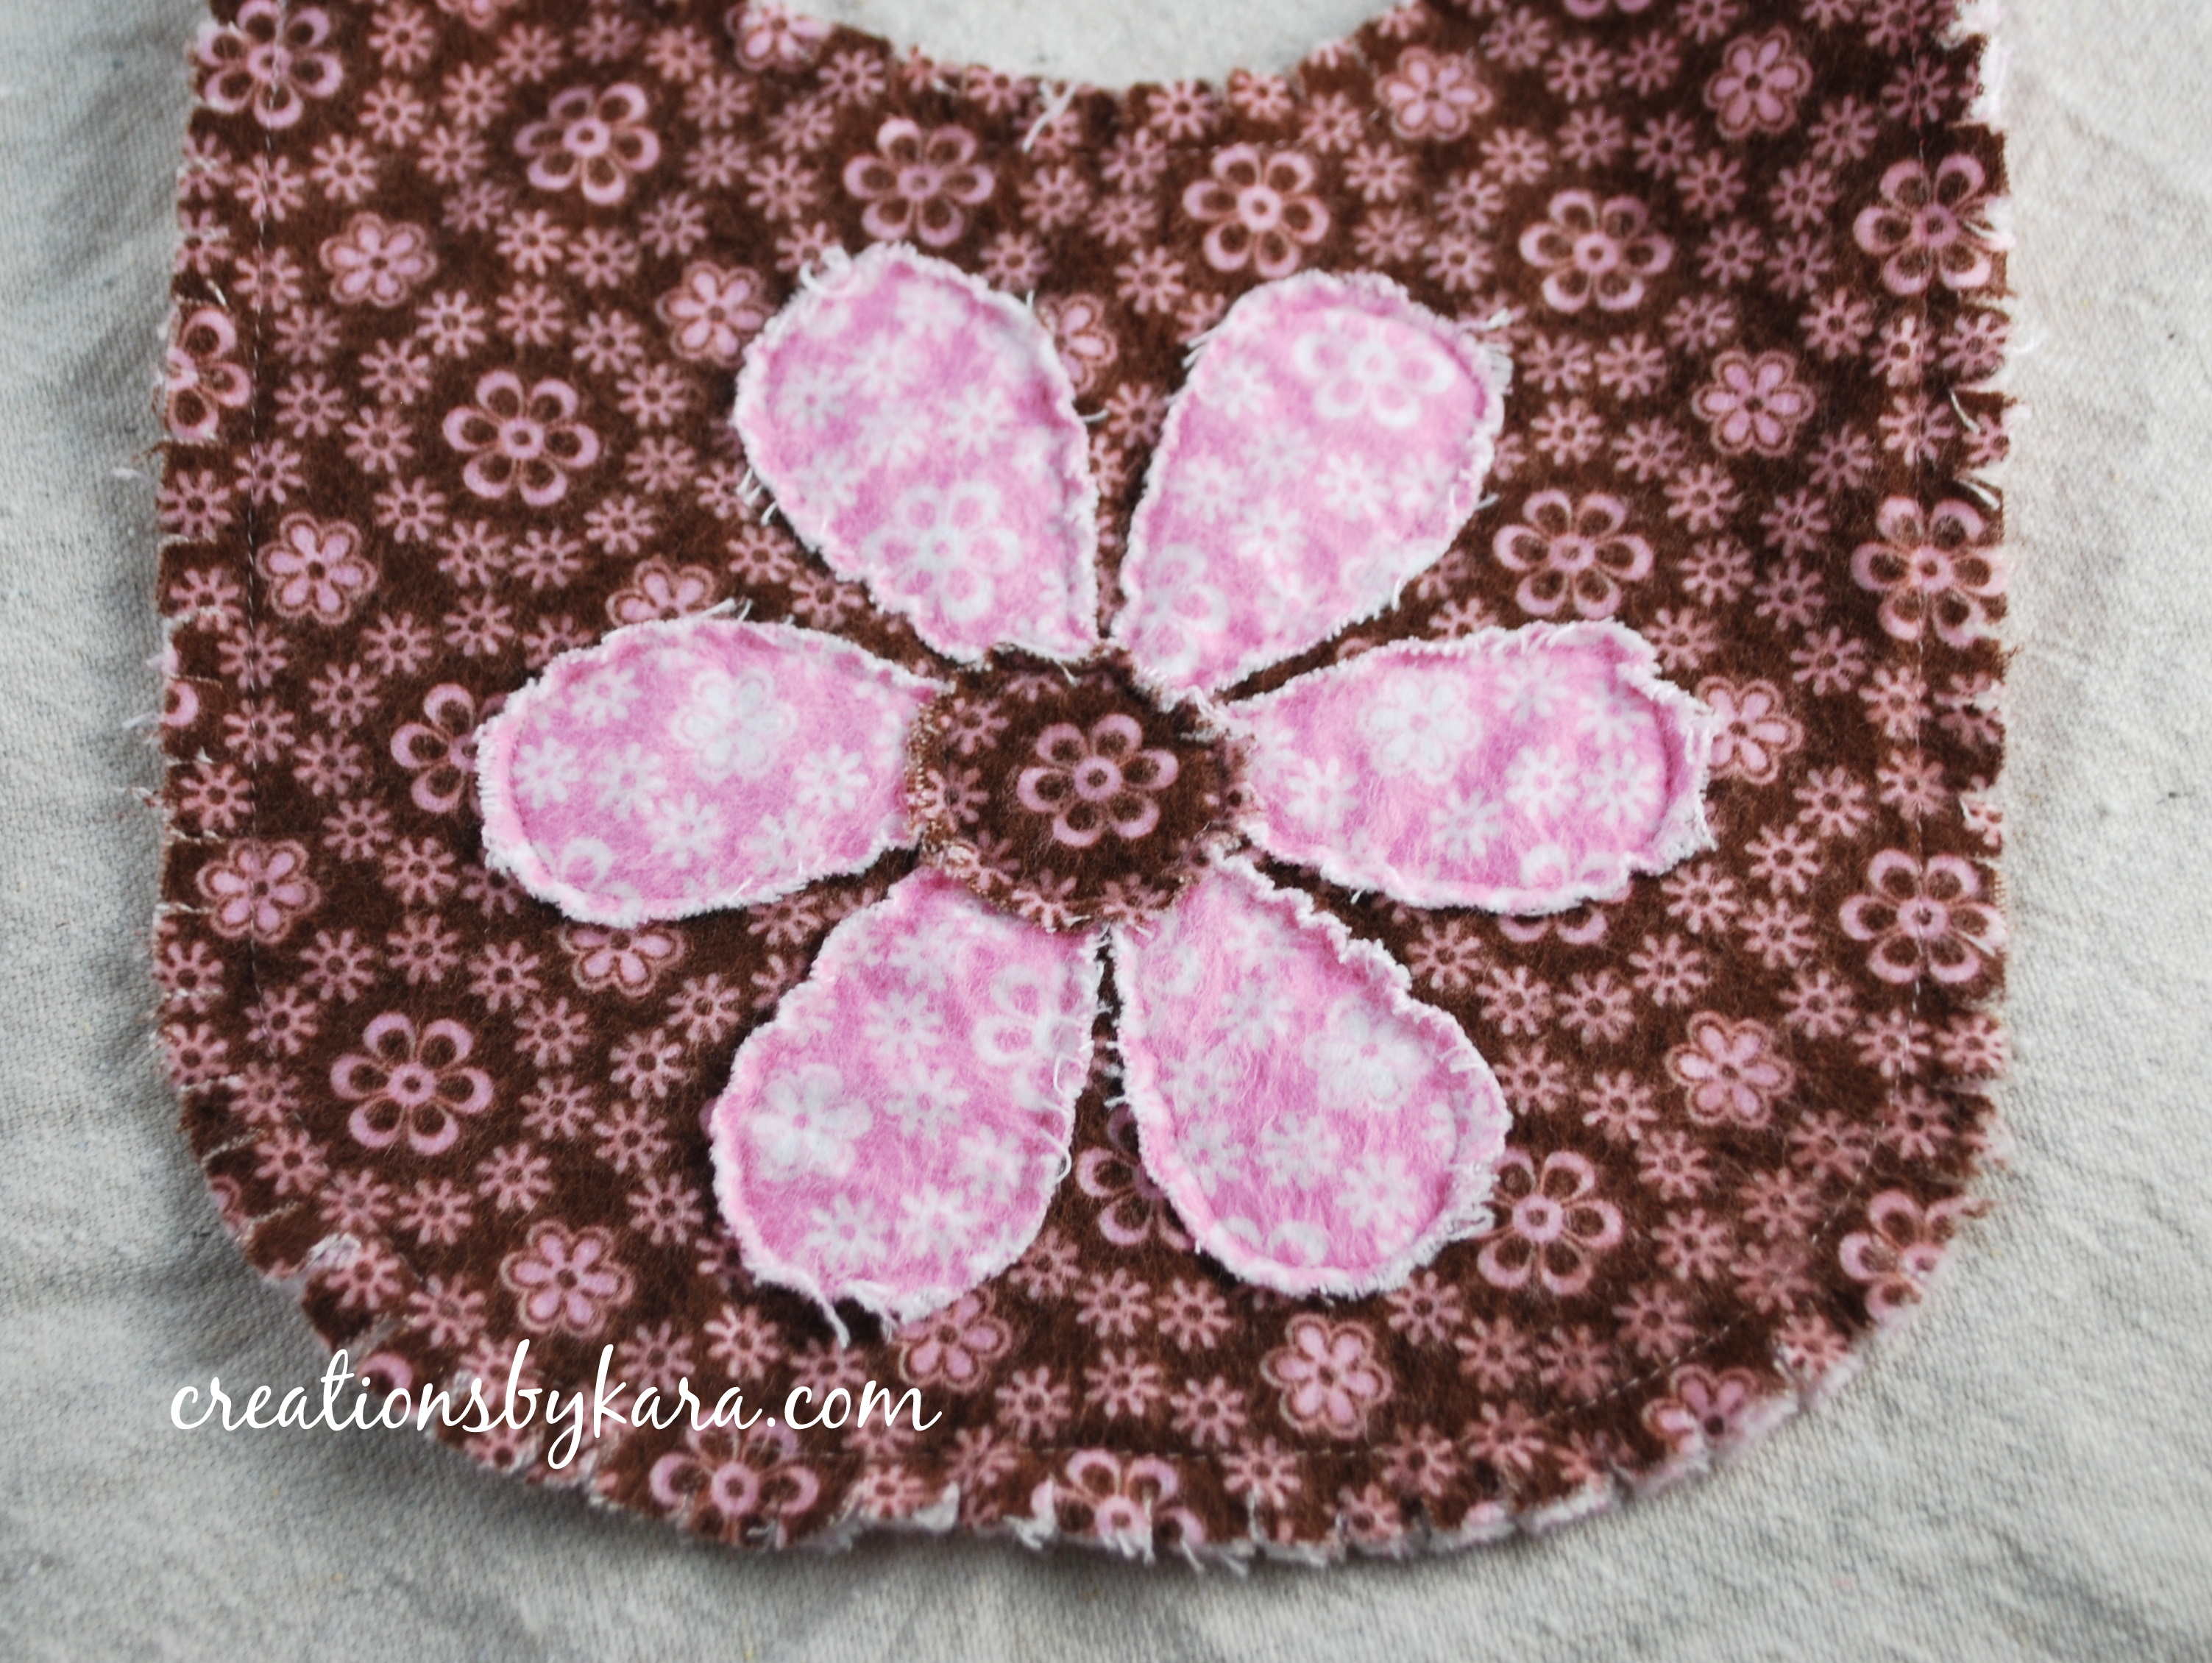
All the hard parts are done. Woohoo! The final step is to wash and dry your bib. It will get more soft, fluffy, and frayed with each washing. Here is mine after one cycle through the washer and dryer:
If you don’t have a baby of your own, these would make awesome baby gifts. I know I used tons of bibs when my boys were little. I wish I woulda thought of this back then! 😉


Cute! I need to make a bib for a gift, and this one is so cute!
I love this! What blend of fabric did you use for this?
Jackie,
I used flannel. Other fabrics will work too, but I think it frays the best.
Kara
What an awesome tutorial!!! Thanks for sharing!
This is darling! I love browns and pinks and daisies so this is right up my ally! I need to get busy making a few! Great Tute!
Thanks for posting this. I made one up right after I saw this post and love it! Can’t wait to make more for baby shower gifts.
This will make a great baby shower gift. I love it! Thanks for the tutorial!
Jenifer
Cantaloupe Corner
http://www.CantaloupeCorner.com
Just a quick note to let you know that a link to this post will be placed on CraftCrave today [16 Jul 12:00pm GMT]. Thanks, Maria
Aww, these are darling! I love giftable projects like this. Thanks so much, I’ll be linking.