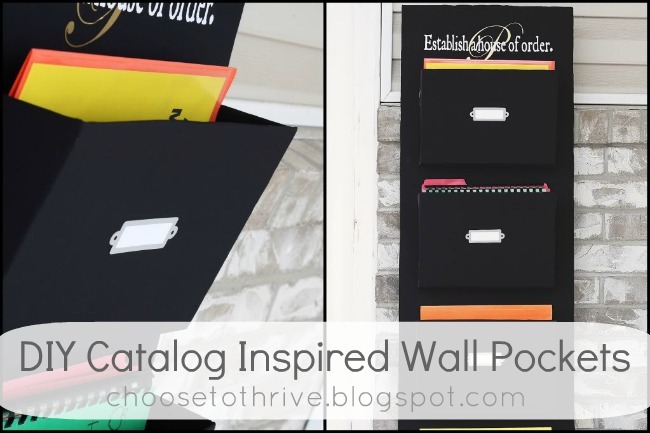
I’m Nike. That’s Neekah and the lady behind Choose To Thrive and stay-at-home-mom of six kids age nine and younger. I wear flip flops rain or shine, put my makeup on in the car and survive on caffeine-free Diet Pepsi from the drive-thru at the corner gas station. AND…I love to make things like these DIY Wall Pockets.
My crafting adventures have taken a hard left the last few years since the Layoff Fairy visited our house–twice. Not fun. Yet despite all of the financial difficulties that come with an unwelcomed experience like this, I’ve come to believe that a Rock What Ya Got approach to crafting and DIYing without spending a dime can still yield great results.
Case in point:
Recognize these beauties from the Ballard Designs catalog?
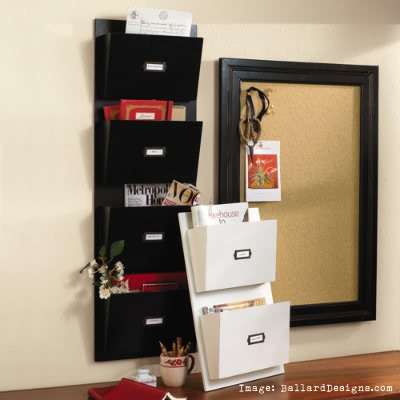
I adore them. I need them. I cannot afford them.
So I made my own.
Cardboard + Fabric = Catalog awesomeness for $0!
*Swoon*
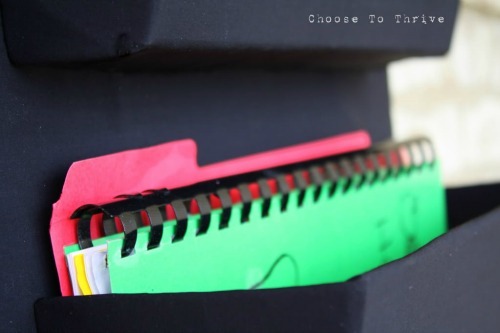
And making a sleek, customized organizer for all those homework folders/workbooks/mail/bills/receipts without spending any money makes me feel like Superwoman, even if I’m a week behind on laundry.
Want to make your own?
For the base and pockets you’ll need:
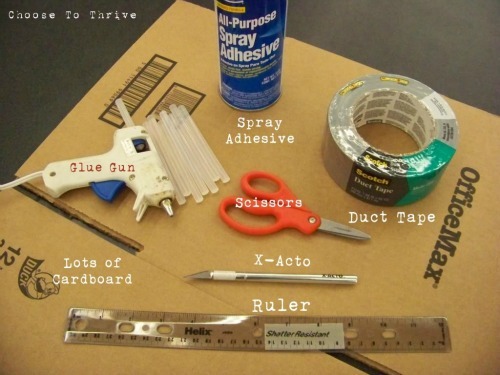
For the covering, you’ll need either paint or fabric. I originally planned on going the paint route, but my cardboard had been manhandled by my kids enough that it ended up looking like a painted, hacked apart diaper box instead of a catalog knock off.
So I went with the fabric.
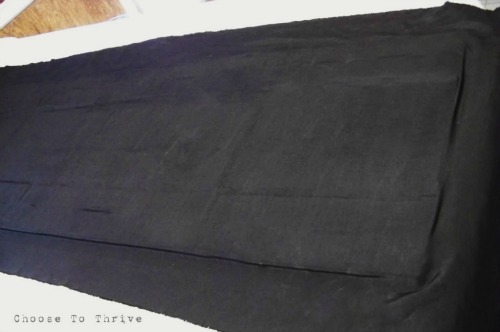
I didn’t have any plain black fabric in my stash, but I did have this left over $1/yd. Walmart clearance fabric from seven years ago.
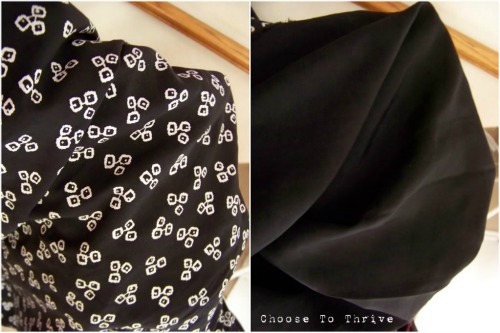
No biggie. I just flipped the fabric over and used the back.
Making the Base
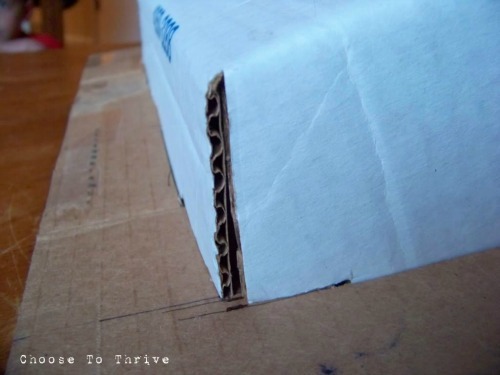
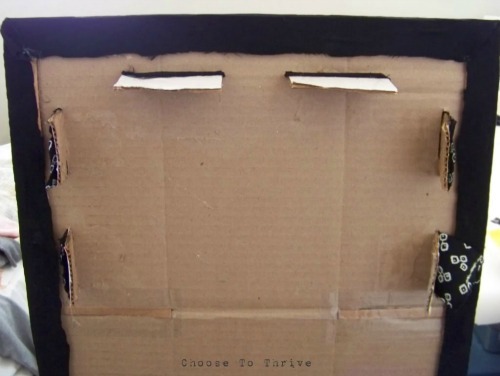
Open up two medium sized cardboard boxes and glue them together with a heavy coat of spray adhesive. Make sure the folds are facing out and offset, otherwise the base will be more likely to bend and fold along those lines. Trim to 15 3/4” x 49 1/2”.
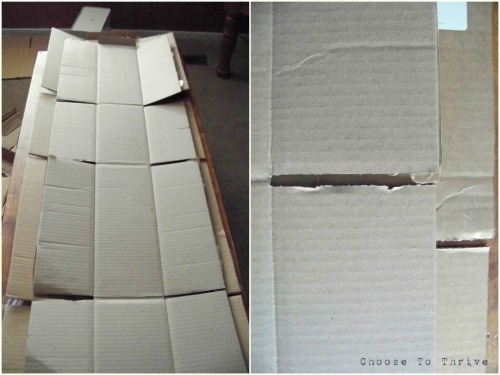
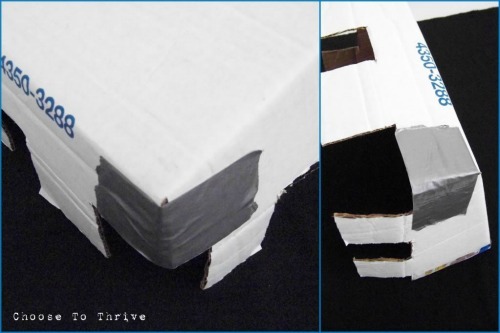
Fill any gaps along the folds with scrap cardboard and tape in place. Secure the corners and sides with a few pieces of packing or duct tape to make sure the whole piece is solid.
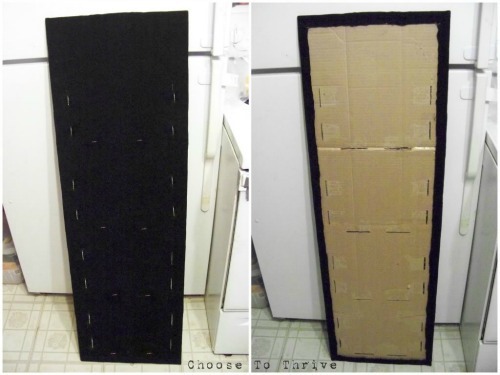
Cut slits on the base for the pockets to slide into using the dimensions from the pattern. (Download link at end of tutorial).
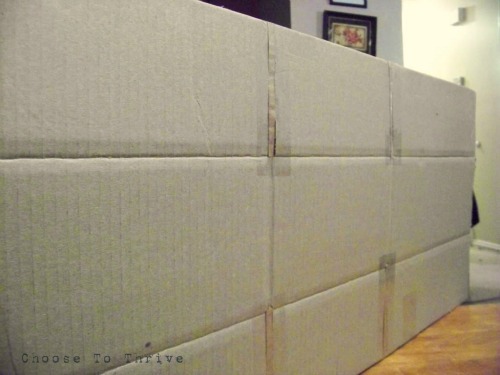
Mark 1” strips on a few box flaps … cut out …
… and glue along the back edge making a frame all around the base.

Making the Pockets
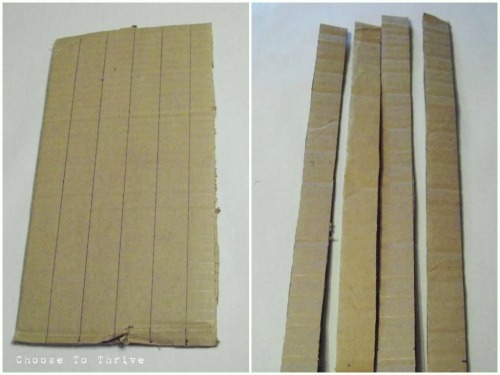
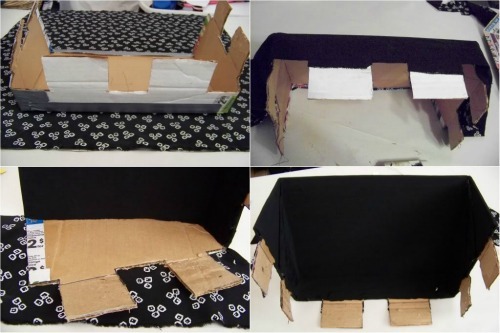
Trace four pockets pieces on good, thick cardboard …
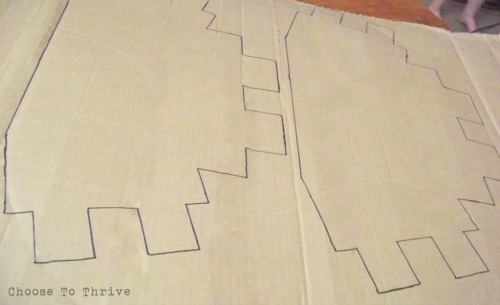
… then cut out and fold into pockets.
Slide the pockets into the base to make sure the fit is nice and tight.
Once everything looks good, carefully remove the pockets and secure the bottom corners of each one with duct tape. Set aside.
Covering With Fabric
Coat the front of the base generously with spray adhesive and cover with fabric, smoothing out bubbles and wrinkles until its all smooth.
Flip base over and glue fabric to the back frame using hot glue, making sure fabric is pulled nice and tight for a smooth edge. Trim away the excess fabric.
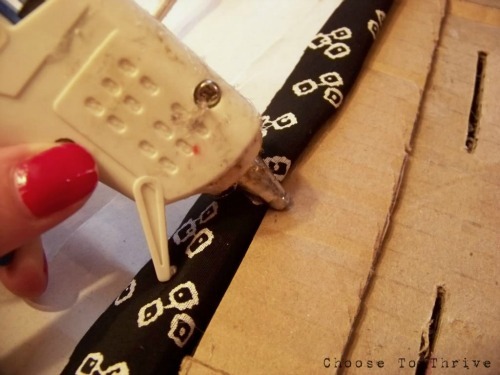
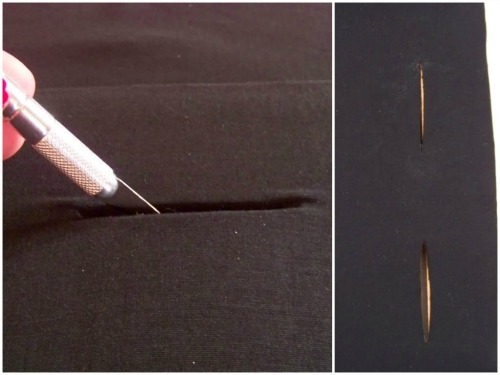
Feel along the front of the base for the pocket tab slots and cut a single slit down the middle with an x-acto knife ( kind of like cutting a button hole.)
Your base should look like this on the front and back.
To cover the pockets, spray them liberally with spray adhesive–inside and out–and carefully smooth fabric into place, trimming away the excess material and hot gluing down seems as needed.
Assembling & Decorating ~ The Fun Part!
Insert pockets through the precut slots …
… and glue the tabs towards the middle and top of the base with hot glue.

Touch up any gaps with marker, paint, whatever.

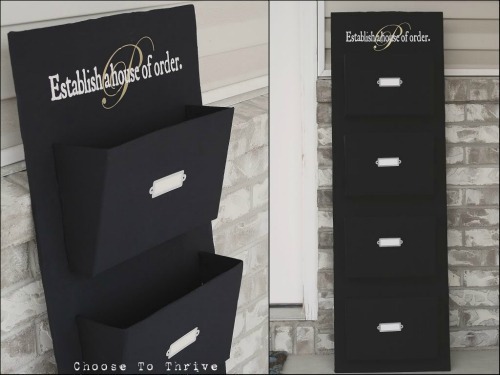
To personalize this design, I purposely left extra room above the top pocket so that I could add a monogram and family motto that were cut on my Silhouette.


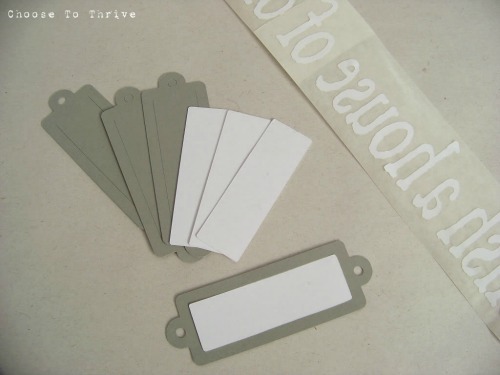
The pockets were dressed up with simple cardstock labels cut from scraps using my Silhouette (label_1031).
To hang, I just rested the wall pockets on two existing screws that were left behind from an family chore chart. Worked great, sort of like an impromptu french cleat.
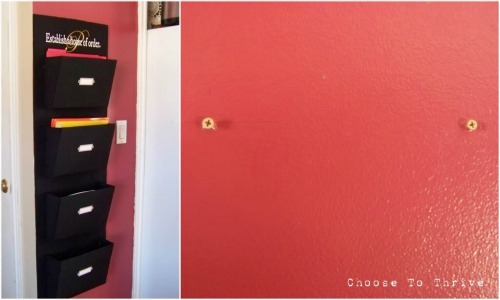
Ahhhh.
No more piles of clutter on the TV/coffee table/counter/shelf/floor/desk. Love it.
Hope you’ll stop by Thrive and check out the rest of my Rock What Ya Got projects, including the challenge this year to see how much no-money remodeling I can do with repurposing, trading, bartering and some mad crafting skills.
Thanks again U Create for letting me spend the weekend chatting on the Ucreate-Oprah couch with you and the amazing crafters who read and contribute to this site. You guys rock and inspire me daily!
 (Download the pocket pattern with additional information HERE.)

AWESOME! You totally rock Nike!
See… you can do anything when you put your mind to it! This is beautiful, better than some I’ve seen in the stores, and didn’t cost a dime!
Congratulations! (and I hope the Job Fairy pays a visit to your house real soon)
Susan
gaw-gee-ous! ‘necessity is the mother of invention’…luv!
Awesome project! Well done Nike – it’s amazing what you can do with cardboard, fabric and glue! I LOVE the quote and monogram you did with your Silhouette – very professional looking project!
LOOOOVE it!!!! i will so make this some day…
Girl you did it again! You have mad skills, I am so impressed! It looks fabulous. I love your attention to detail too. I wish I had the stay-with-it-ness to create something so awesome and so well done! keep rocking!
Hey! Nike is my husbands cousin! Hi Nike – cute project 🙂 I just might have to try this!
I love love love the idea of your blog! I have SO SO SO much fabric and craft supplies laying around from projects I planed and never started etc. I need a bit of Thrive in my life!
Also – I LOVE this project, I already have fabric in mind (from my stash) and know where I’d hang it. Now I just need to go pilfer the garage and find some cardboard!
Thanks so much.
Great project. You are amazing. BTW, I am still so loving the Christmas stars I won. Just awesome.
Super ti je post.
Eto kako se i za male novce može napraviti nešto lijepo i funkcionalno.Hvala na tutorijalu.
Pozdrav.
absolutely amazing.
Wow!! You could have fooled me! Looks like the original! Way to go…
What a great idea! I have so much desk clutter and so little money–this is the perfect solution.
Love it!
Oh my husband would just love if I made this and hung it in the hall.
Nike is a amazing woman! Love her rockstar thrift skills.
another great project!
Nike seriously never ceases to amaze me. Such an awesome, detailed and thrifty project! You have seriously raised the bar with this one! And a download too? Girl you rock what you got and you rock it well!
I have been searching and searching for something like this!!! Cheap and light weight to hang on the wall!! So excited to get my diaper boxes apart!! Thanks so much!
That is amazing! Thanks for the great tutorial.
http://www.beautifulwithabow.blogspot.com
So glad you introduced us to Nike!! What a great DIY and cheap project!!
Thank you, thank you Nike. I have been looking for something EXACTLY like this for all our homework, paper crap laying around. I will be making this ASAP.
thanks
Now that’s awesome!
AMAZING! I was just thinking that I needed to search some blogs to find something like this and boom! here it is. It’s perfect!
That looks terrific! I can’t believe it is just made with cardboard! – Karen
Ummm…yes please! That is amazing!
I am totally impressed with your cardboard and hot glue skills!
WOW! I had no idea they were cardboard until I scrolled down! AWESOME! book marking this project for my dorm room!
amazing! I love it. love it.
I made one of these using old record sleeves, following your tutorial roughly for guidance.
http://dl.dropbox.com/u/6470695/mail%20organizer.JPG
thanks!
Wow that is amazing! Every time you walk past it you should pat yourself on the back !! Great job!!
How much fabric did you use for this?
Well I finally made them but I made 2 pockets for mail. And instead of fabric I used magic cover (Dollar Tree)that I had left over from lining shelfs. Feel free check it out on pininterest. My dimensions are different will post everything when I get on house computer. http://pinterest.com/pin/334673816029699570/
You’re so creative!
Nike, or anyone else who has used the template for the pockets, is there a way to download the template for free? Scribd wants me to subscribe to them in order to download it. Thanks!!!
sell them please! im too lazy to make it lol
Love this idea!!
Does anyone have the pocket pattern? The download link seems to be disabled.
Thanks! X