
I am so unbelievably excited to be a creative guest here at UCreate today! Wow- seriously, can’t even contain my excitement!!
So let me try and share a little about myself with you first. My name is Genevieve. I have been married to my best friend for 4 1/2 years now and I am a stay-at-home mom to our darling (almost) 22 month old daughter Miss M. And I run the blog Creative Spaces. It started out a few years ago as a place for me to post about digital scrapbooking and Photoshop and what I was learning with it. Well that soon fizzled out! It then kind of just became dormant for quite sometime with the occasional random post as I hadn’t really sewn much since my mom had taught me when I was little and then I was pregnant with Miss M and was just too sick to even think about being creative! But once Miss M was a few months old, I pulled out my old sewing machine and started sewing just small little projects here and there for her. 2 little quilt tops for her. A diaper clutch. Baby leggings. Her first Easter outfit. I then started sewing a little more and pushing myself a little farther. I now love sewing and I think I sew almost every single day! If I don’t- I’m kind of cranky to be around. 🙂 I couldn’t even stand to be away from my sewing machines as we were moving across country (and living the gypsy lifestyle as we didn’t have a place of our own for almost 3 months!) and being able to sew some projects here and there- that really helped me keep my sanity!
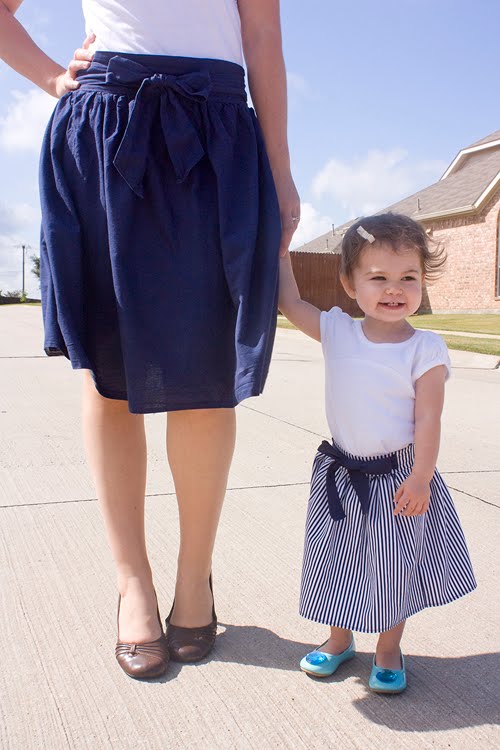
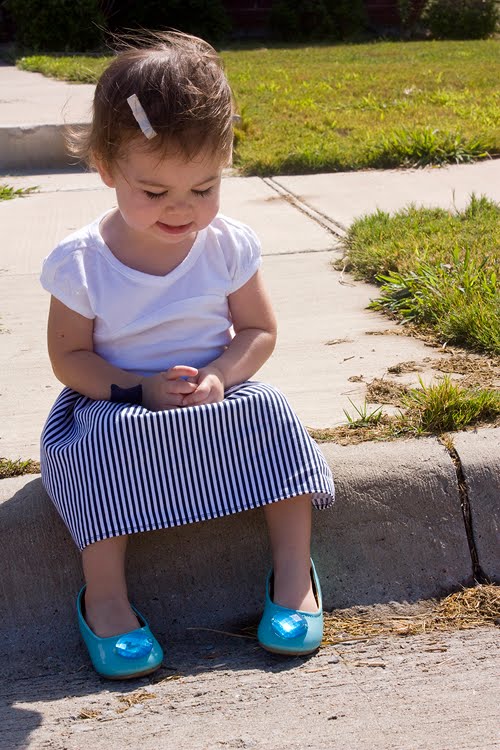
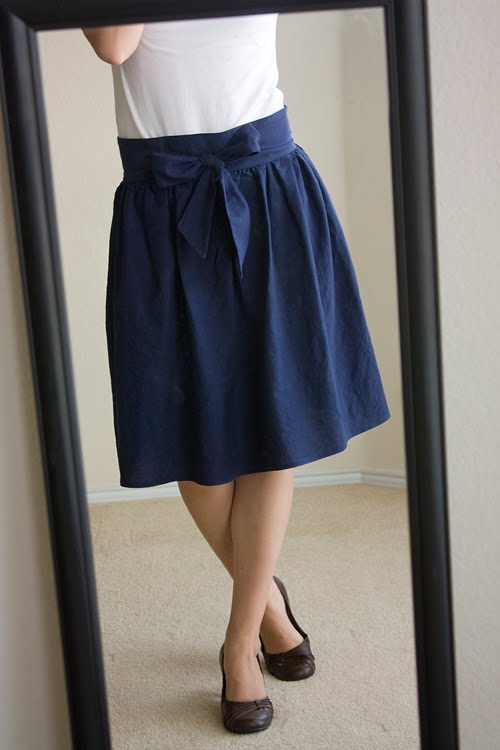
And like I said, I really am so excited to be guesting here today and can’t wait to share with you my latest projects! I had originally envisioned a skirt for me but after making my Party Skirt, I knew that I had to have one for Miss M but pint sized. So that is what I’m here to share with you today- a tutorial for a mini sized Party Skirt…
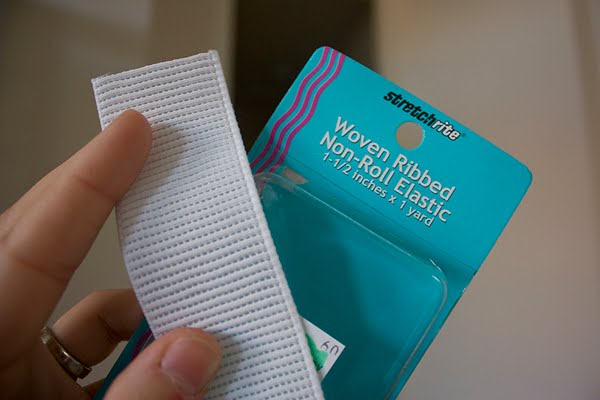
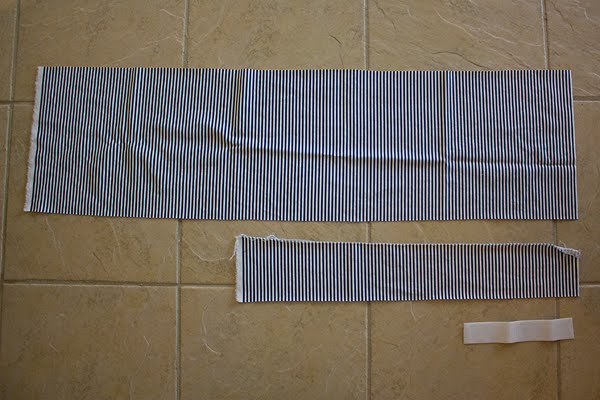
This is what I used for the elastic. I prefer the non-roll in a nice wide width
Alright so lets going!
This is what you should have:
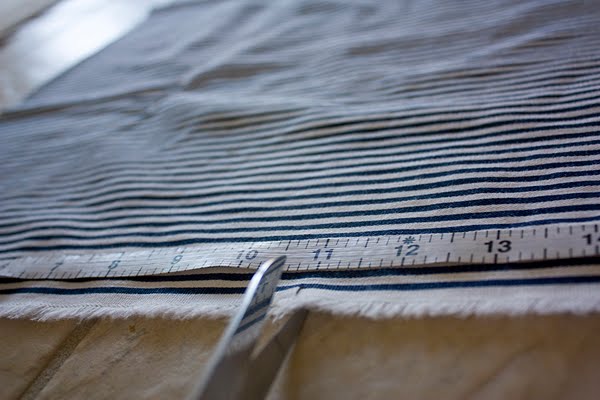
This is your skirt and all of the material you’ll need.
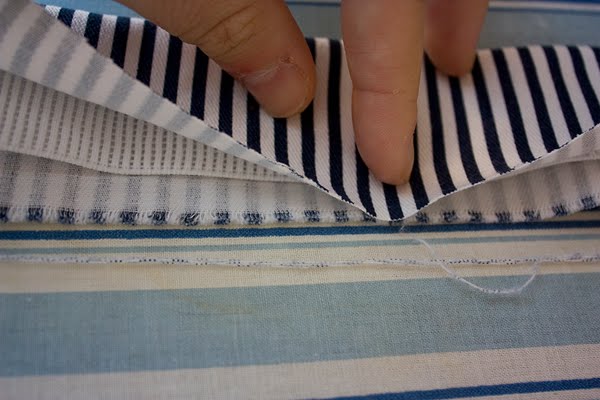
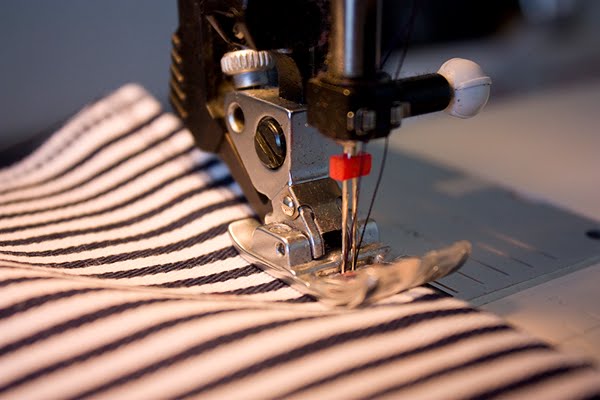
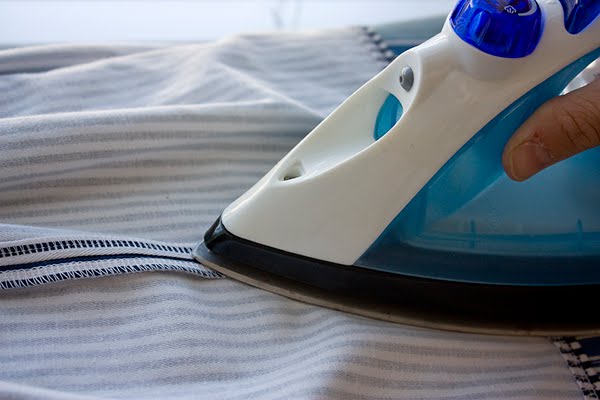
So we’ll start by making the waistband first. It is the most time consuming part! First serge your long edges. It is easier to do this now instead of later I found out! Then we’re gong to fold it in half and iron a crease. To do this, I tucked the elastic inside the fold and then if you’re sewing a striped material, carefully match those stripes up so that they will be straight once finished.
After ironing a small area, go ahead and just slip that elastic out and iron a nice solid crease in the whole waistband.
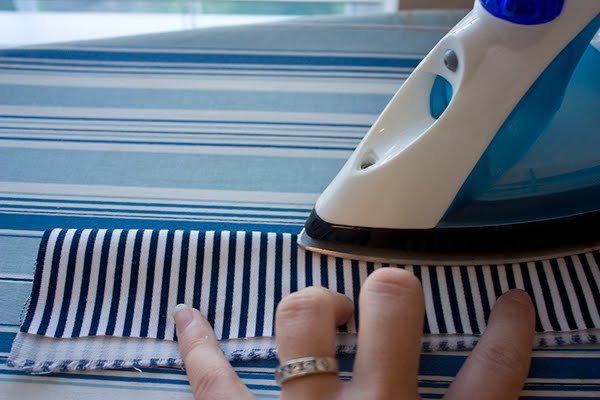
We’re now going to topstitch just as close to the edge as possible down the length of the whole piece to keep that crease there.
Now measure down half of your original waist measurement, add about 1/2 inch for the side seam, and pin.
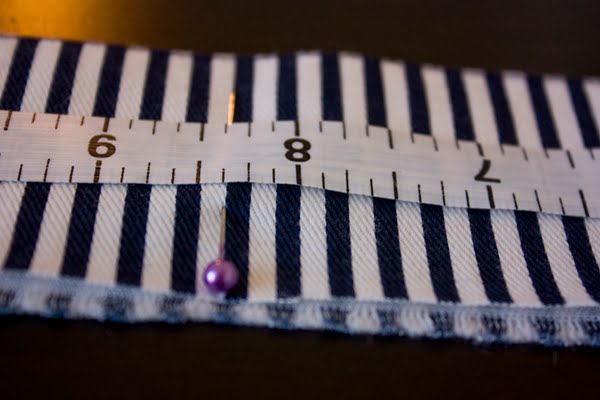
You’re now just going to sew straight seams that length. (so from the end to your pin) This will be the front of the skirts waistband. I wanted it to lay flat and the seams will help with it keeping its shape when washed.
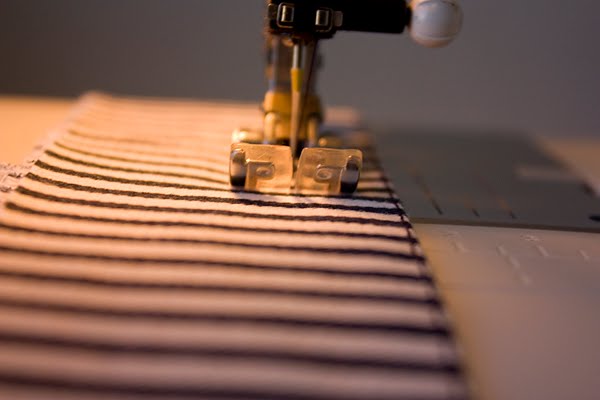
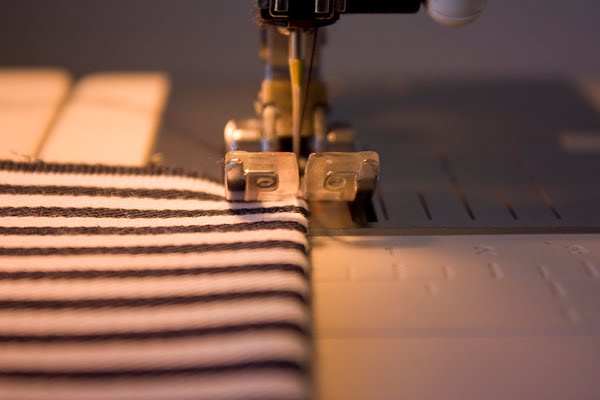
Once you’ve finished, we’re going to sew in the elastic! Tuck it right up snug in that crease/top stitching and push it as close to the seam ends as possible. Sew it horizontal now. I sewed 3 seams on the blue stripes to help keep it in place and strong against being pulled at.
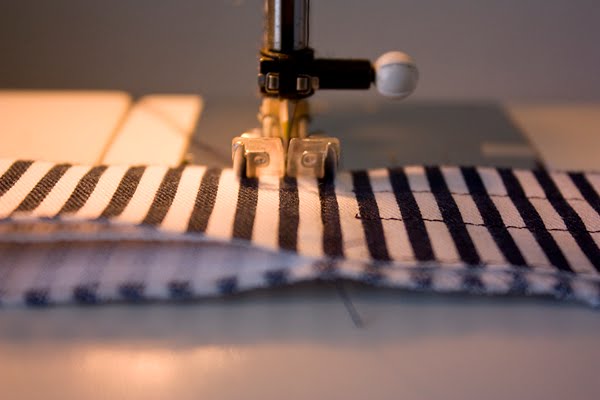
Now with your elastic inside, sew a casing down the rest of the material staying pretty close to the edge of the elastic.

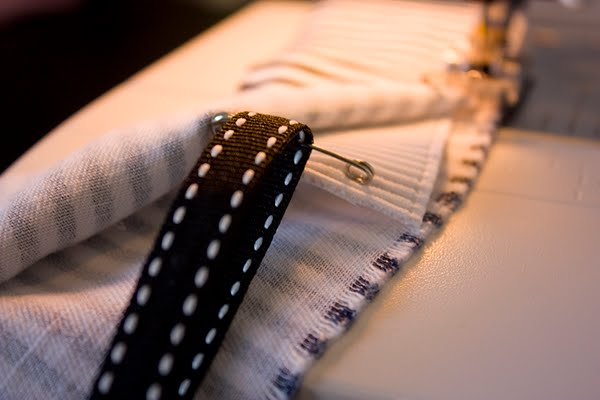
Oh but wait! Before you sew your whole casing, attach a safety pin through the end of the elastic and hook a ribbon (this just happened to be right nearby) through the pin. This will help you in the next step.
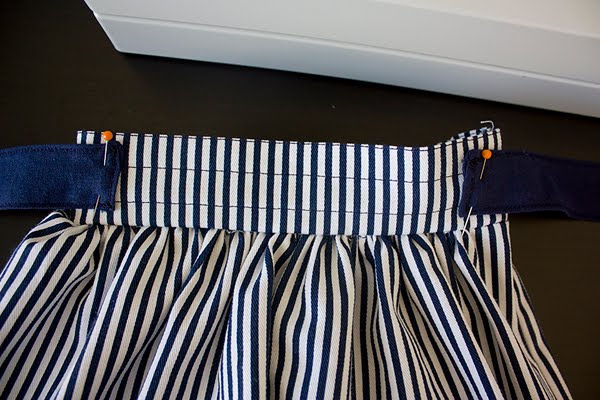
So after sewing the casing all the way down, we’re gonna pull that elastic through. This is where the ribbon comes in handy! Now don’t just try and pull that ribbon because trust me I learned, the safety pin will pop off. 🙂 It will still work, it is just trickier threading that elastic through the casing. So instead, use it like a handle and just gently pull the material back on the elastic, pushing it back. Once you’ve reached the end of your elastic, sew it in place again as you did on the other end. But leave about a 1/2 inch or so for the side seam. Your waistband should look like this:

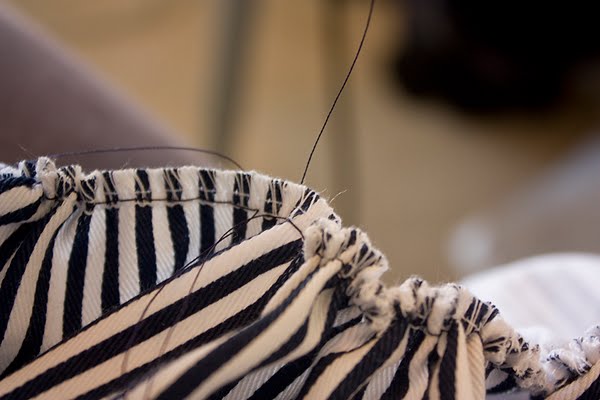
Gather the top. If you haven’t ruffled before, it’s easy! Lengthen your stitch to the longest setting. Loosen your bobbin. And don’t backstitch! Now you’re just going to sew along the top edge and then pull just one side of the strings (either your top thread or the bobbin- not both!) to gather it into a nice ruffle. One tip- break your skirt up into portions. That way if a thread breaks, it’s not the whole skirt that has to be redone. You can see this in the picture below:
Now sew those two pieces together where you have just pinned.
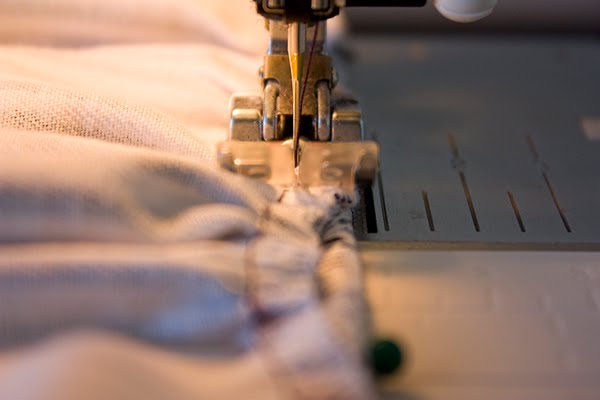
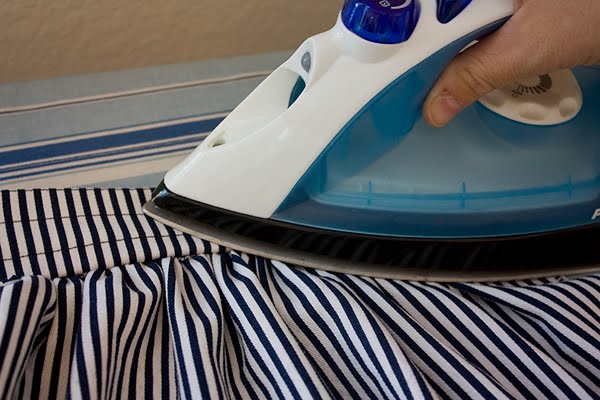
Now just iron that seam flat and iron in those ruffles a bit. Not much, just a little to help it lay nicely.
This is a great time now to check for your ruffling thread. If you see some, no biggie! Just carefully unpick it.

You’re almost done!! All we have left is to sew your side seam, press that open, and then hem the skirt bottom. Yay- you have just made an adorable party skirt!
But if you want to add on the cute bow in front, don’t leave me just yet. When I made my party skirt, I made a detachable sash. But that would be tricky to keep in place on a crazy little runner and dancer! So instead, I made a half of sash and attached it. We’re going to first make 2 sashes. You’ll want to cut these double the width of your waist band and as long as the entire waist measurement. So my two pieces: they were each about 3 inches side and 16 inches long.
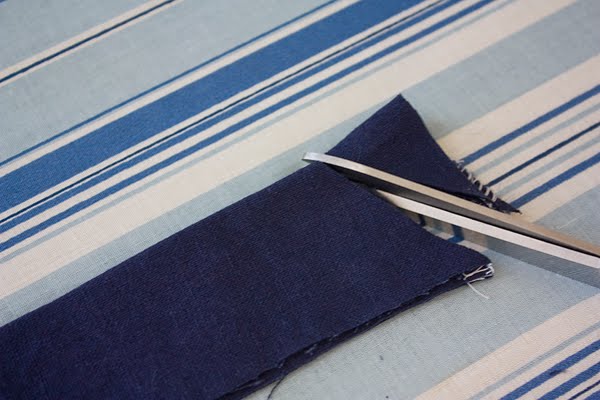
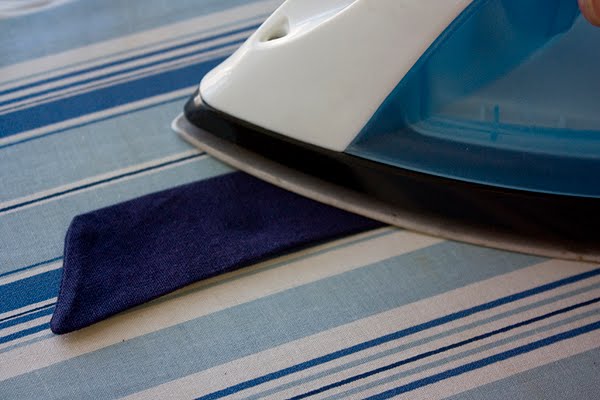
Sew around three of the sides creating a long tube. Snip your corners and flip it right side out.
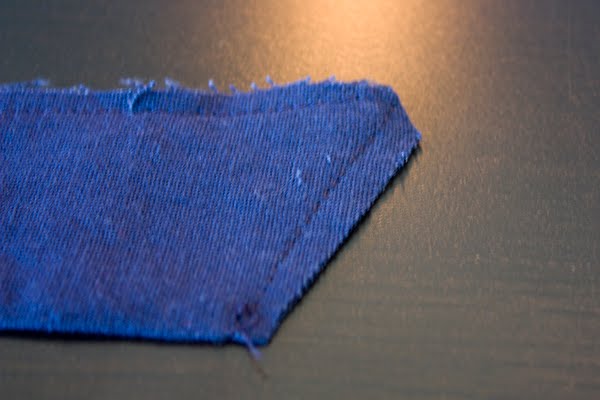
Iron these again keeping those seams nice and flat.
Now just tuck in the one end to close it off and topstitch around the entire sash. I chose to finish these off with my double needle but that was just for style. Any regular topstitch would work great!

Now you should have 2 little sashes (and check your angles at this point to make sure they are laying correctly). Lay these wrong side out and pin just inside or in front of the sides. Sew back and forth a few different times on each side.
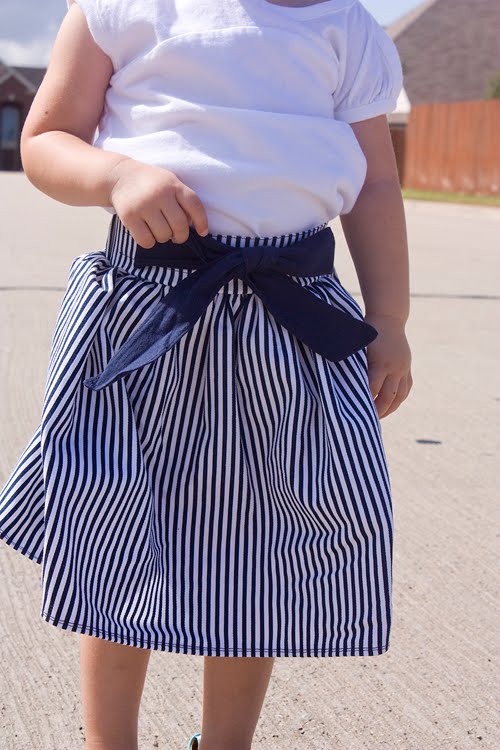
Now tie into a bow and voila! You know have a mini Party Skirt- complete with a big bow!

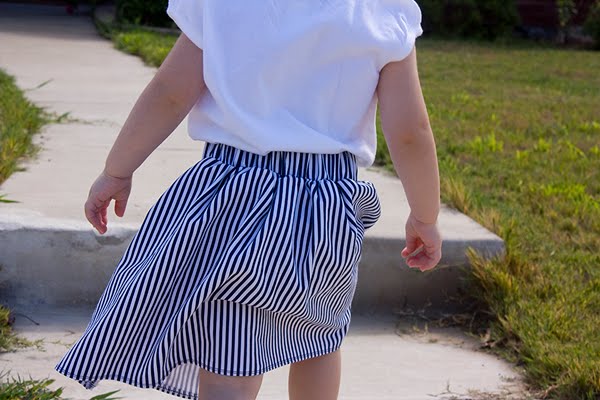
I love the finished look!! And with that elastic back, it’ll be sure to last for quite sometime!

Front: Flat fitted look with a gorgeous big bow!
Back: nice and stretchy for easy on and off and to adjust for growth!
It is the perfect little complimentary skirt to the fitted (with a zipper) adult Party Skirt! You can check out that tutorial over at Creative Spaces. And if you have any questions at all about this tutorial, please don’t hesitate to email me. I would love to hear from you and help you out the best I can! creativespacesblog@gmail.com
I hope that you each love making your own Party Skirts- whether big or small!
Thank you so much again Kari for inviting me to guest here today. It was so much fun! And if you’re interested, come stop by and say hello at Creative Spaces– I’d love to have ya pop in and visit anytime- my blog is always clean and ready for visitors! Have a great day UCreate fans!


Oh I just love it! I’m a terrible sewer but for this I’ll give it my best. Thanks for the great instructions.
That’s so pretty!! I linked you up over at Craft Gossip Sewing.
–Anne
sewing.craftgossip.com
Look at you, Vieve!!! You’re big time!! So so cute. You’re just so talented. Great job!
love it! thanks for sharing your amazing sewing skills. 🙂
That is so cute! And seems so easy. girls love skirts, and you can never have too many. Gonna try this. Thanks for sharing!
This is so awesome Genevieve! Its so fun to see you on here! Love the little mini skirt. Im adding it to my things to sew list for when I have a girl!
I love the fabric you used and the big and little versions. Great tutorial!
Loving that skirt. Hop on over to our site if you ever need new recipes
Love this! What a cute idea! Thanks for sharing it with us. Might have to share this tomorrow on my blog since I am running out of ideas right now. lol
Hellow!
I love your site, It is a pleasure to visit.
I have added your site to my site.
Please link my site to your site.
Thank you!
http://japanese-clothing10.blogspot.com/
Cute and easy, I love that! Thanks so much for this, I’ll be linking.
Very nice! I’m not so much good at sewing, but I want try!