Hi! I’m Jen from Tatertots and Jello. I am SO thrilled to be here at U Create – sharing a DIY Tree Topper! I wanted to make a Sunburst Mirror Tree Topper and I loved the one at Ballard Designs. So I set out to make one for my tree! 
 Here’s how to make it (all materials from Michael’s): Assemble the materials:
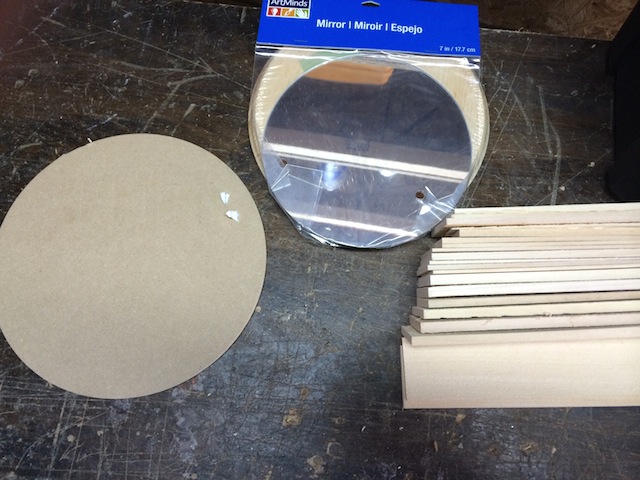 Note that there are two different thicknesses of craft wood. I used the thicker pieces for the longer pieces and the thinner ones for the shorter pieces. I laid out the wood (below, left) after cutting each piece into 24-inch sections (below, center).

As a router reminder, remember to cut the grooves by pushing the wood in the direction indicated on the router — if you do it in the opposite direction it won’t cut evenly. Fun With The Router Since I wanted a rustic, fluted look — like the fluted molding you might see in an old house — I broke out my router. Theoretically, you could do this by hand, since we wanted a rustic look, but I found that was pretty hard to do. To achieve the rustic look, I instead used the router but didn’t try to make the fluting perfect!
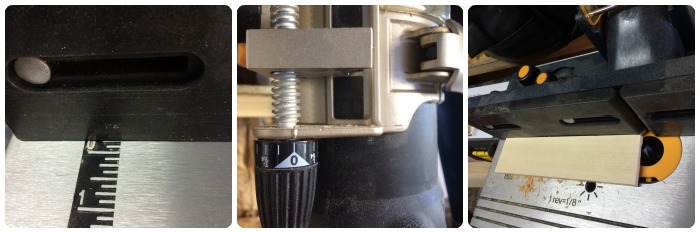
I can’t give you exact settings, since your router and lumber will be slightly different than mine. However, you can see that I planned five grooves on each side. The first picture above shows where I set my router guide (see picture 3) for the cuts on each end. I then set it a bit farther in to do the second two grooves, and then one final groove down the middle. I cut all of the grooves in one wood thickness at once, then readjusted the router bit depth (how deep it cuts in the wood) using the adjustment screw in the center picture above for the second, thinner pieces. Cutting the Wood This will go pretty quickly with a miter saw (chop saw), particularly with an adjustable one.
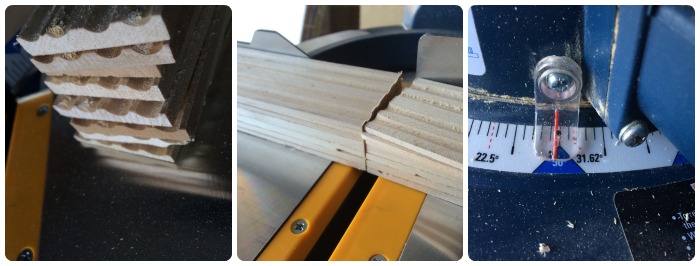
Line up your craft boards (look how fun they look stacked up on the left), and then sort them by thickness. Cut the thick ones to six-inch lengths and the thin ones to four-inch lengths. Of course, if you want a different look you can adjust them however you like! I overlapped the long, thick ones on the circle by about 1.5 inches. Now, adjust your miter saw to 30 degrees (see the picture on the right above). We’re going to trim the “pointy” ends.
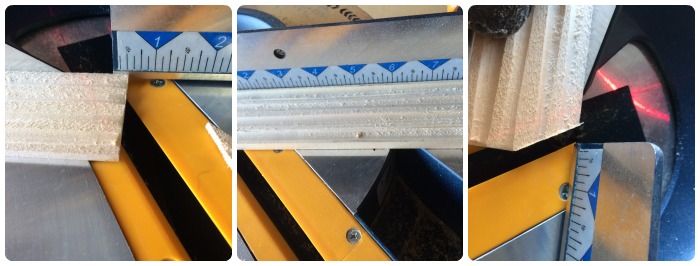
I set the board overlap at about half an inch (see the left image above), then flipped it and cut the other end. When I was done, the ends looked like the board on the right. Now, you can place the thicker pieces on the circle if you like just to make sure you like how they fit:

In order for the smaller pieces to fit between the larger ones, you’ll need to trim the ends you left square. Set your miter saw to 45 degrees and repeat the same kind of cut you did above on each (see middle picture). The smaller pieces should then fit between the larger ones. (You may want to break out the mouse sander and smooth over any rough cuts or edges, but don’t make it too perfect, since it’s supposed to look a little rustic!) 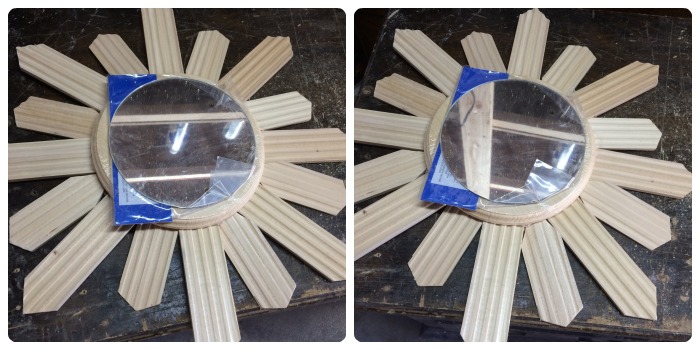
Glue and Heavy Objects Now, you’ll need to get out the wood glue. Put a bit behind each piece you’ve laid down and adjust them so you like them. Then, put some glue on top of each straight piece and place the top circle board on top. Place heavy objects like books, a fairly full paint can, an overweight spaniel, or anything that won’t move much while the glue dries.

Thanks for letting me stop by! And in case you are interested, here is the tutorial on how to make the Sunburst Mirror Ornaments out of popsicle sticks:


POST BY:


beautiful tree
Jen your tree is gorgeous!! Thank you so much for showing us how to make this fun tree topper and for being our guest today!
beautiful…. tell me about golden leaves