Graduation season is coming so soon…too soon for some of us, right? In honor of the graduate, I thought I would show you a spin on the typical graduation cap; a graduation cap headband. These headbands are adorable for any age.

My teenage cousin tried it on and looked dang cute! I made these little hats for a graduation party, but you can make these accessories for any graduation event and any age.
Supply List:
- tiny silver cording
- 12 x 12 black glitter paper
- thin black headband
- black button
- adhesive
Instructions: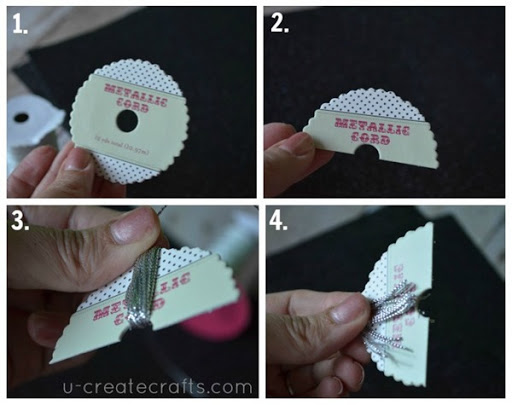 1. I ripped the cardboard top off a ribbon spool because it was the perfect size to make a tiny tassel.
2. Cut the cardboard in half.
3. Wrap tiny silver cording around it until you have the desired thickness. I wrapped it about 15 times.
4. Slide some scissors through one end and cut the ribbon. Don’t let go of the ribbon…it will not be fun to put it all together.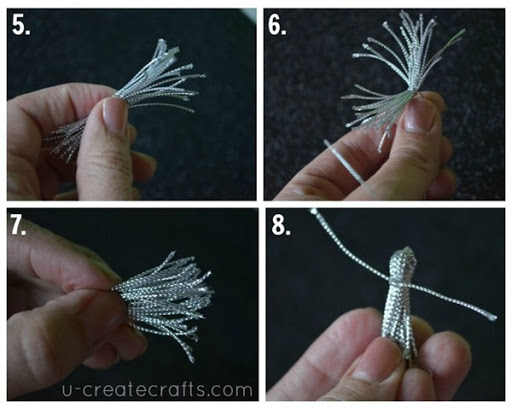 5. Hold the middle tight and with the help of child labor, cut a piece of long piece silver ribbon. This will be what hangs the tassel.
6. Take the long piece you just cut and tie the middle of the tassel together…tight.
7. Now you need to tie a small piece of ribbon around the tassel {otherwise, it looks like a spidery mess. :)}
8. Tie a tight knot…a couple times if you want. Clip the ends short and your tassel is done.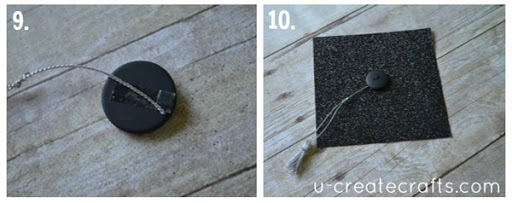 9. I glued the end of the tassel string to my button.
10. Stitch or glue the button in the middle of a 5” x 5” piece of glitter cardstock.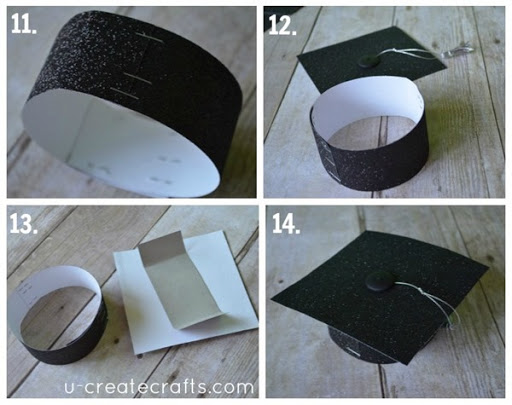 11. Create the base of the cap. Mine is two 5” x 1.5” pieces stapled together.
12. Time to put the whole thing together.
13. Use chipboard { or a cereal box} and cut a 2” strip. Glue the middle of the chipboard to middle of the hat top. Fold sides down so that you can glue the sides to the inside of the cap base.
14. Glue chipboard sides to the base and you have a graduation cap.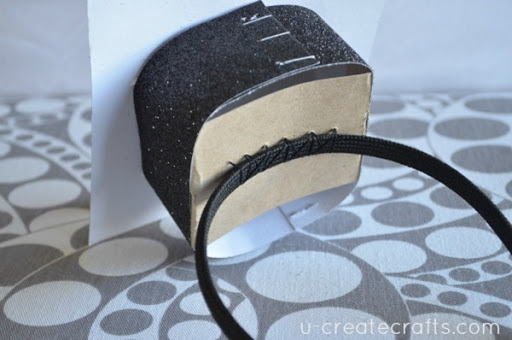 To add the headband, I cut another piece of chipboard to go underneath the base. Before gluing the chipboard to the base however, I glued it to the headband then stitched it in place. Glue the chipboard with attached headband to the base of the graduation cap.
Check out that adorable graduate!
Post By –


These are so cute! Thanks for posting.
So dang cute!!!