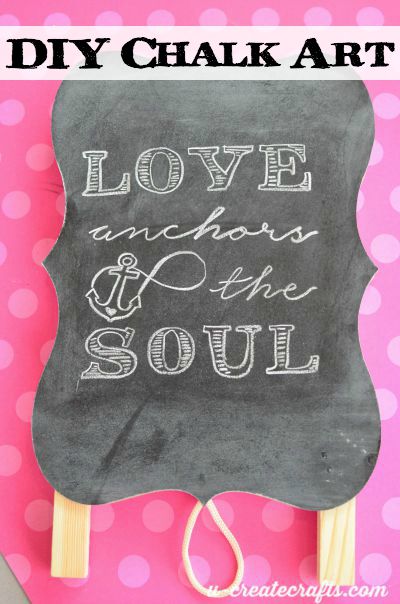
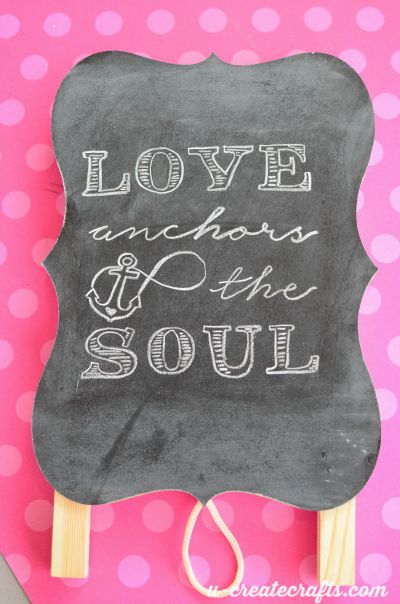
 Last month I was asked if I could help make some really cool chalkboard art for my cousin’s wedding. I had never done anything like that before, but figured it couldn’t be too hard to draw art on chalkboard…I mean, I do it on paper all the time. WRONG! It was tougher than I thought to just sit down and free-hand some cutesy wedding saying. So I took to my computer and created a graphic that I could somehow copy on the chalkboard. It totally worked. Here’s the tutorial to DIY Chalk Art!
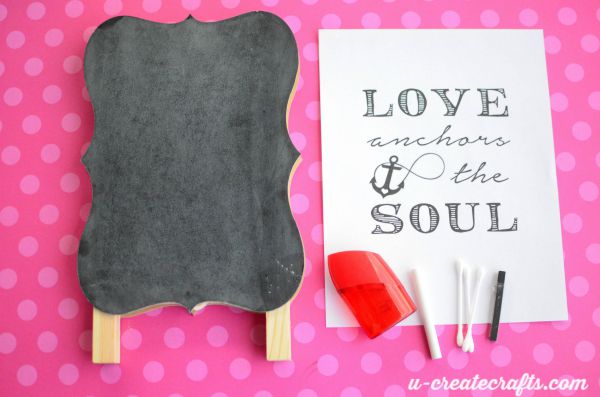 Supplies Needed:
- Chalkboard (these easel ones are at Hobby Lobby)
- Designed Printable —>Love Anchors the Soul
- Charcoal/Granite Pencil
- Sharp Pencil
- Chalk
- Pencil Sharpener
- Q-tips to fix tiny mistakes
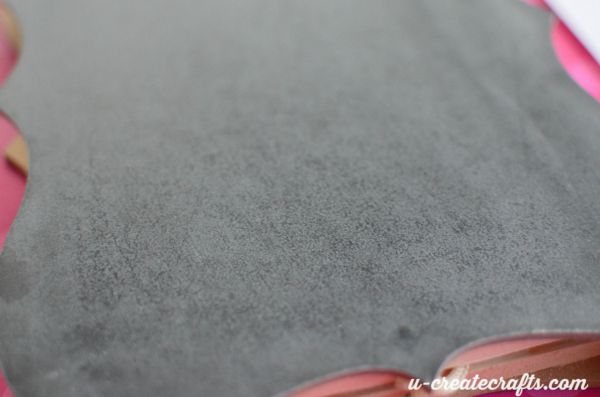 Step #1: “Season” the chalkboard.
First you have to season the chalkboard (if you’d like to use it again). If you don’t season it, then the first thing you write upon it will be there forever in the background. To season the board, lay a piece of chalk sideways and rub it all over the board. Then take a paper towel and wipe it off really good.
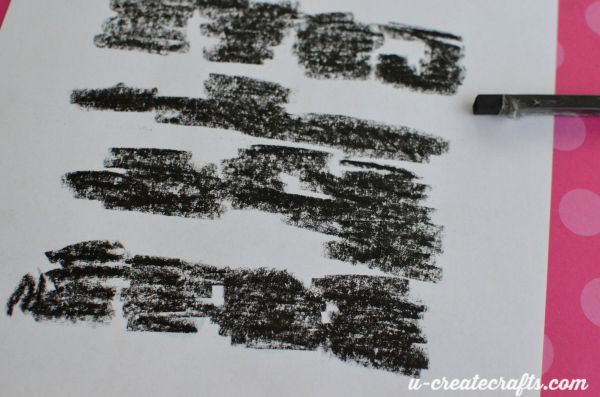
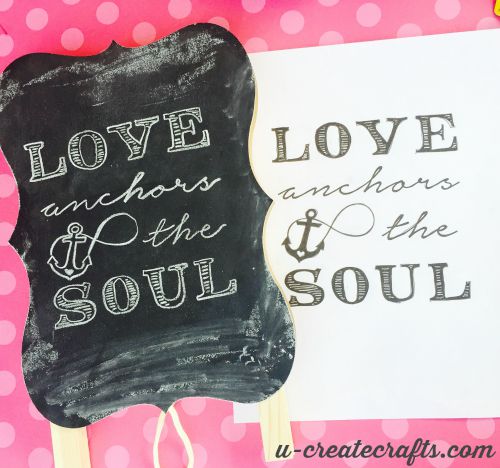
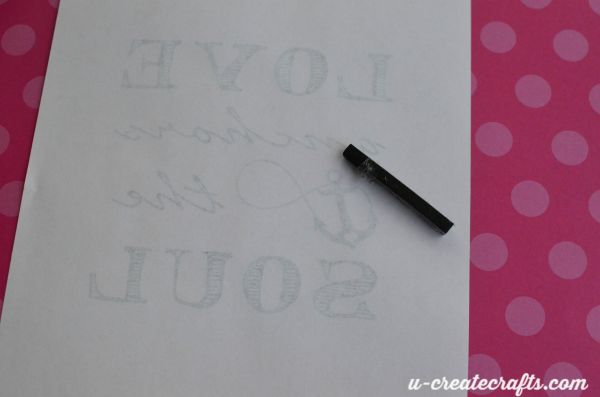 Step #2: Scribble on the back of the printable.
Using the charcoal stick or just a granite pencil, scribble all over the words showing through the back of the printable…the darker the better.
 Step #3: Transfer the printable image to the chalkboard.
Carefully lay the printable charcoal side down. Once you have it where you want it, use the sharp pencil and trace around the words. You can make the image transfer as detailed or plain as you want.
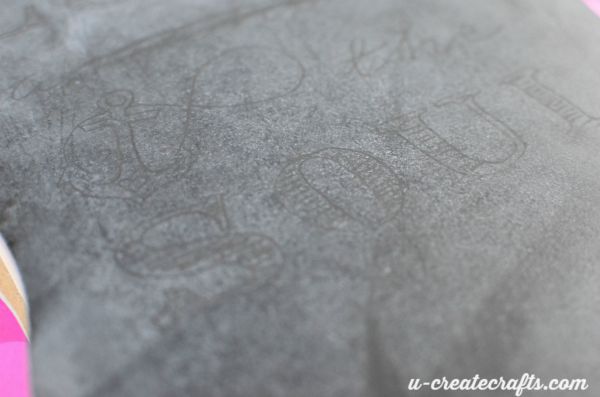 Lift the paper off the chalkboard and using the Q-tip and water fix any mistakes.
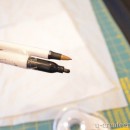
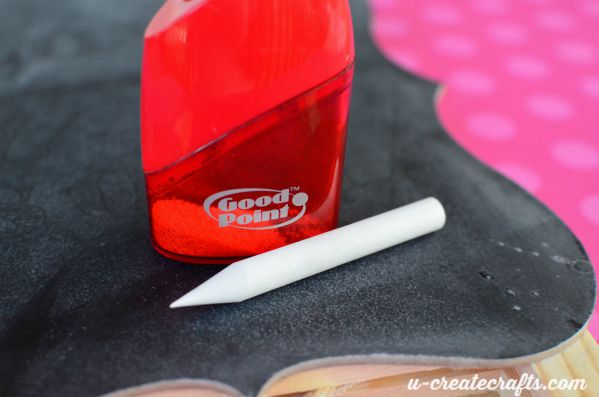 Step #4: Sharpen the chalk.
The sharper the chalk the more clear your lines will be. I had to sharpen my chalk about 4 times during the entire tracing process.
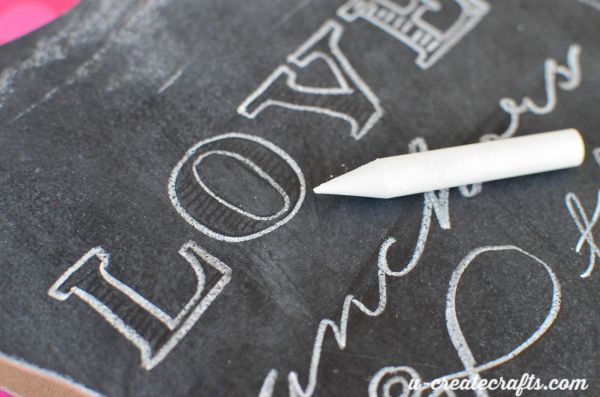 Step #5: Trace on top of the transferred image/words.
With your sharp chalk and starting at the top, trace on top of the charcoal letters. At first I thought this would make the chalk look gray, but it didn’t really change much.
 Step #6: Clean up chalky mistakes with Q-tip & water.
Here are some tips and tricks I learned from making 4 of these pretty chalkboard centerpieces:
- The chalk will come off with the slightest touch. If you want the chalk to stay on better, use the American Crafts Permanent Chalk Marker. Seriously, it’s the only chalk marker that actually stays white…some of the other brands I used turned yellow.
- If you don’t want the chalk permanent, I suggest dipping the tip of the chalk in a little water. This makes the chalk look darker and last longer. It won’t come off as easily.
- DO NOT use hairspray as a finishing spray to secure the chalk. You’ll notice the picture below looks a bit different from the finished picture above…that’s because I tried the hairspray technique and the entire chalkboard was dripping wet and the art was gone. Super sad face, right? At that point the only thing you can do is snap a picture and send it to your sister with #craftfail.
 Despite the craft fails (and there were many), I finally figured out the best way to make chalkboard art! I made 4 more chalkboard easels and some tiny little chalkboard food labels.
 If you make some fun chalkboard art using this tutorial, we would love to see it. Post a picture on our Facebook page or tag us on instagram (@ucreateblog)…we love to see what you create!
Post by Becky

I’ve never tried sharpening chalk! I made a batch of chalkboard fridge magnets and it took so many craft fails until I was happy with them! I love the lettering x
Thanks for commenting. I only recently learned that I could sharpen chalk with a pencil sharpener…it has made chalk art super easy!