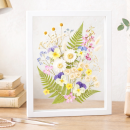
Learning how to make paper flowers is so much fun and the creative aspects are endless! These homemade flowers are easy and are perfect for cheap wedding decorations, easy homemade gift ideas, or just a fun afternoon of creative energy.
…don’t forget, you can buy 250 coffee filters for $1.38 so you can go crazy with this!
 Materials Needed:
- Several coffee filters, each flower will take 6.
- Food coloring and a few shallow bowls for dying.
- Green pipe cleaners
- Scissors
- Hot glue gun
- Floral tape (or masking tape)
- Stapler
Dying coffee filters is easy. I just made a few bowls of water and added food coloring…one drop at a time. I also used tea and added some colors to that. Experimenting with the colors is a blast!
Simply dunk several coffee filters into the colored water and soak them. Make sure the pile is thoroughly soaked, even the filters in the middle of the pile. Then I just squeezed them out and separated onto cooling racks. If you’re in a hurry, you can put them into the microwave or low oven to dry them faster.

This is what I came up with….I love the peach tones. I started with 2 cups of water and 1 drop of red food coloring. Then I added a yellow…then another pink…and from there it was pure experiment!
Mixing the pinks with the soft peaches and white coffee filters made some great natural beauty. Choose 6 coffee filters of various (if desired) colors to make your custom coffee filter flowers.

Step 1: Take 3 coffee filters and fold them into quarters. Now cut scallops. You don’t have to be precise, we’re just adding some dimension! Do this with 3 more coffee filters-each flower will use 6 total.
Step 2: Stack all 6 of the coffee filters in the order that you want the colors to show. Now scrunch the bottom up as shown in the top, left photo.
Step 3: Now take the pipe cleaner and staple it, as shown, with about 1 1/2 inches above the stapler.
Step 4: Wrap the pipe cleaner around the bottom of your flower to help stabilize it.
Step 5: Open up your flower as much as you can. It won’t lay flat but you’ll need to know where the center is.
Step 6: Take the top layer and scrunch it up tight, squeezing the bottom of your flower. (Shown below)
Step 7: Continue scrunching each layer, one at a time.
Step 8: As shown in the bottom right photo, start wrapping the bottom of the flower with about 18 inches of floral tape. I was new to floral tape so it took me awhile to get the hang of it. Just hold tight and pull tight. Tack with a little bit of hot glue if you need to.
Step 9: I wrapped the pipe cleaner about 2 inches down with the floral tape. Just enough for stability.

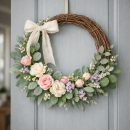
Step 10: Choose your favorite flowers for your bouquet and bundle them together.
Step 11: Take one of the pipe cleaners and wrap tightly going UP the stems to hold the top of your bouquet tight.
Step 12: Now take another pipe cleaner and continue wrapping until you get to the bottom of your stems.
Voila! You just learned how to make paper flowers and have a wonderful bouquet of coffee filter flowers.


Stop by Easy-Home-Made.com for endless tutorials and inspiration like these DIY Lush Bath Products and Bath & Body DIY Kits!
![]()


Gorgeous!
These are so pretty!
Pinned this for FIESTA next year !
Thanks for featuring my webpage! I hope everyone enjoys!
Wow, these are so pretty and look like lots of fun!
Blessings,
Susie
I’ve seen lots of different instructions for coffee filter flowers, and yours are by far the prettiest and easiest! Thanks for posting this! Love your flower colors–couldn’t believe they weren’t real from your photo! Wow!
I just make one except I put it together then dyed it.. was VERY simple and they came out GREAT!!!!
How exactly did u get the peach tones?
The yellow color tested my patience?. So I steeped a tea bag to get more neutrals. Thanks for the tutorial!
like the look of these.
We made these flowers for our wedding and I’d recommend making them to anyone in need of simple elegant flowers. Our turned out gorgeously. One thing I wanna add is you can also dry the filters in a clothes dryer after dyeing them. That works fantastic!