
I am so thrilled to be a creative guest here on UCreate.
I love this site and feel like so much of my inspiration is found here.
Thanks Kari, for this opportunity!
My name is Kristyn, and I’ve been married to my smokin’ hot hubby for almost 5 years!! I have 2 kids and one on the way, and LOVE that they bring me so much happiness. I started my blog called Lil’ Luna to archive all the ideas and crafts I have made or found, and have now turned it into a place where ANYONE can find fun, easy, and inexpensive crafts, tips, recipes, home decor items and everything else you can think of. Come on over and check it out! 😀
TODAY, I will be showing you how to make aCUTE, INEXPENSIVE & FUN
MAGNETIC CHORE CHART
For under 10 BUCKS!
SUPPLIES:
-Wood (10×15 inches)
-Wood Block (Approx. 1.75×6 inches)
-Chipboard piece (11×17 inches)
-2 pieces of scrapbook paper PER chart
-Mod Podge
-Foam Brush
-Vinyl (optional)
-Sheet Metal (Found mine at Home Depot for .99 – in Roofing section)
-Accent/Plant Gems ($1 at Dollar Tree)
-Magnets
-Chore pics (clipart included)
-Hot Glue Gun
-Tacks (optional – at Lowe’s – 24 pk. for $1)

1. Begin by spray painting your piece of sheet metal with spray enamel (or you can leave it unpainted cuz it looks cute both ways!) Let dry.
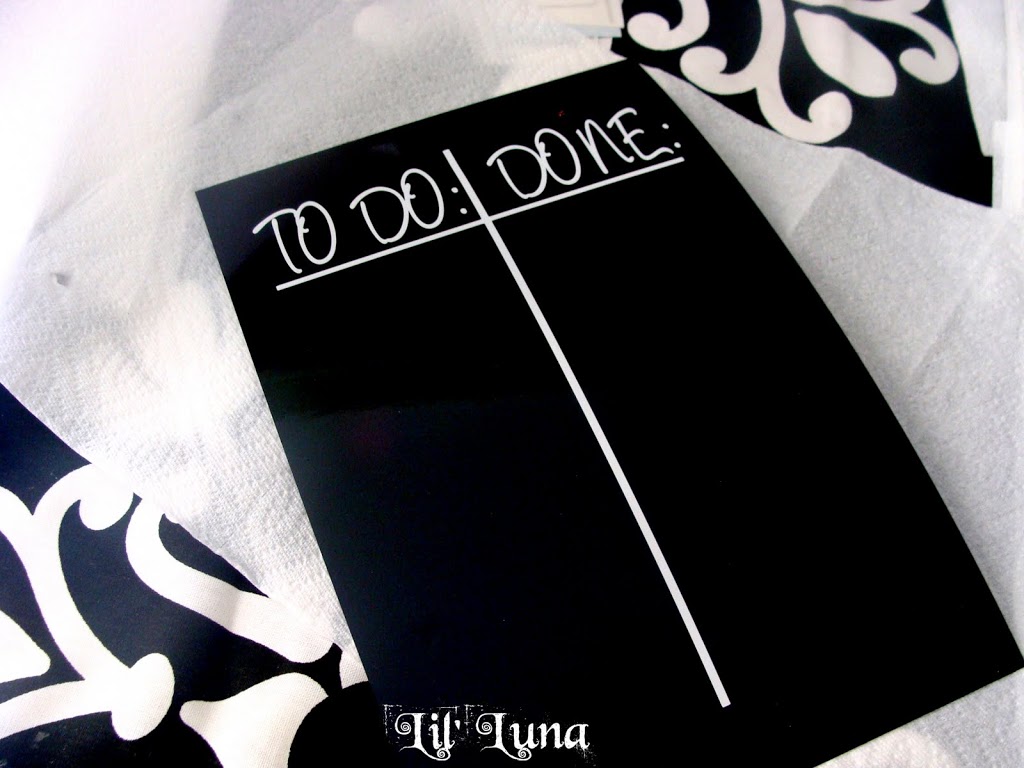
2. When sheet metal is dry, add your vinyl to the sheet metal or you can paint/stencil or use marker to add the T chart on yourself. Spray with 2 coats of Polyurethane to make sure paint won’t chip off of the sheet metal. Let dry.
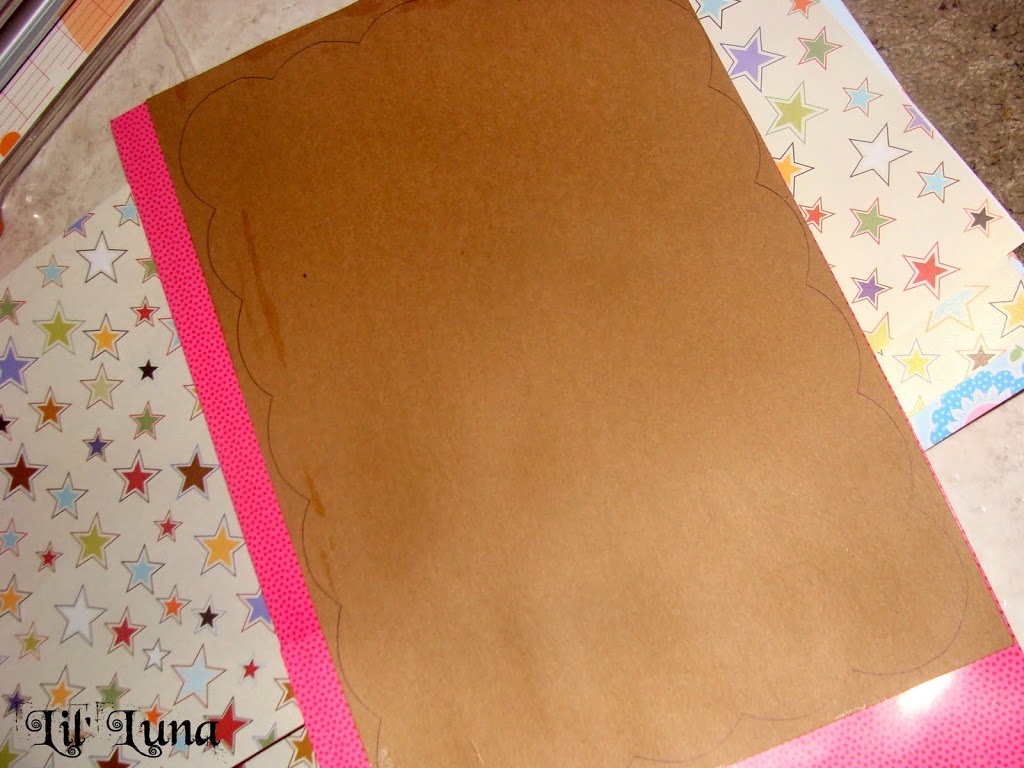
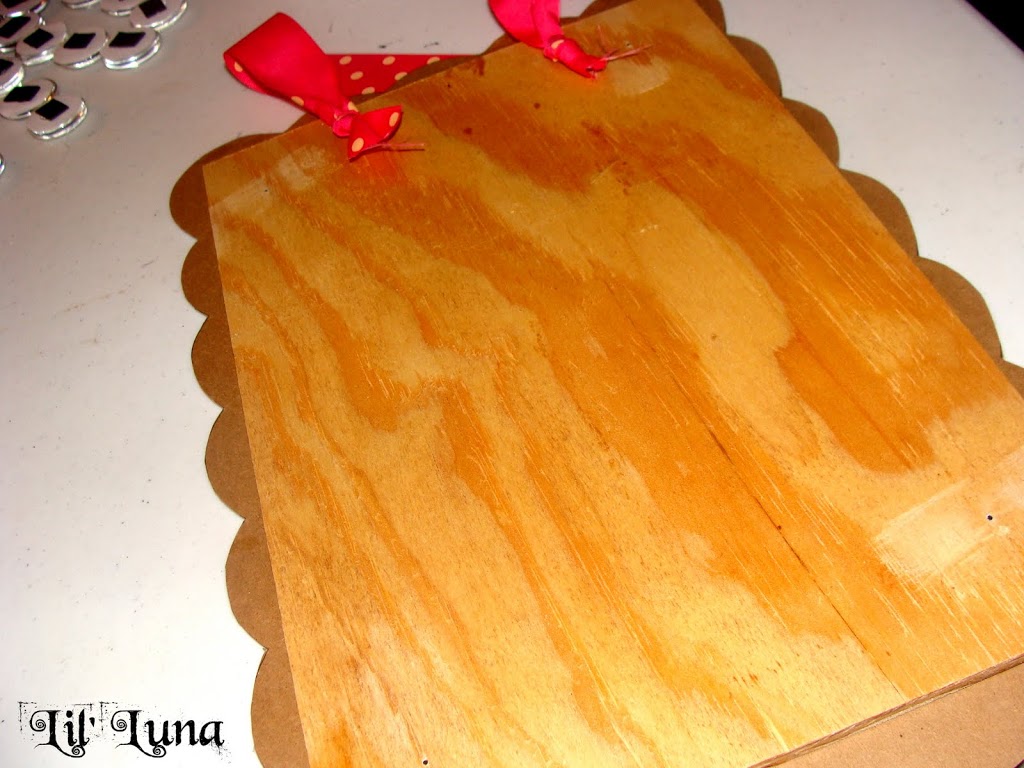
3. Trace onto the BACK of your chipboard the design you want it to have. I made mine have scalloped edges for my daughter’s, and just a simple straight edge for my son’s.
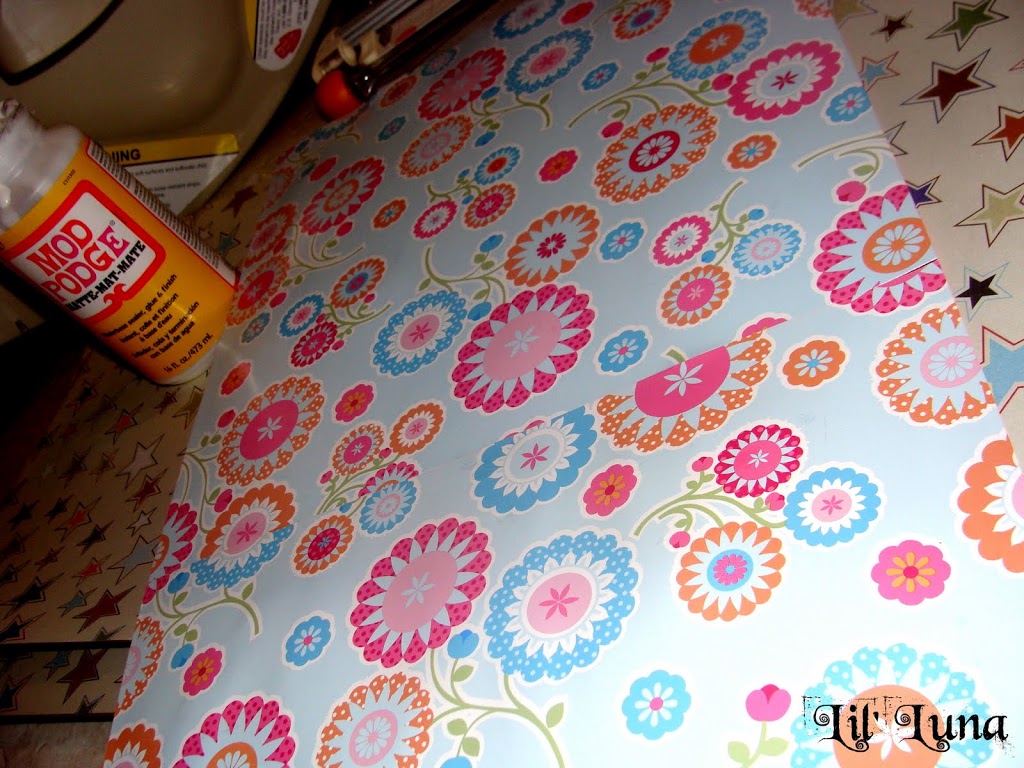
4. Mod Podge scrapbook paper to the FRONT of your chipboard paper. You will need two pieces to cover the whole piece. Let dry.
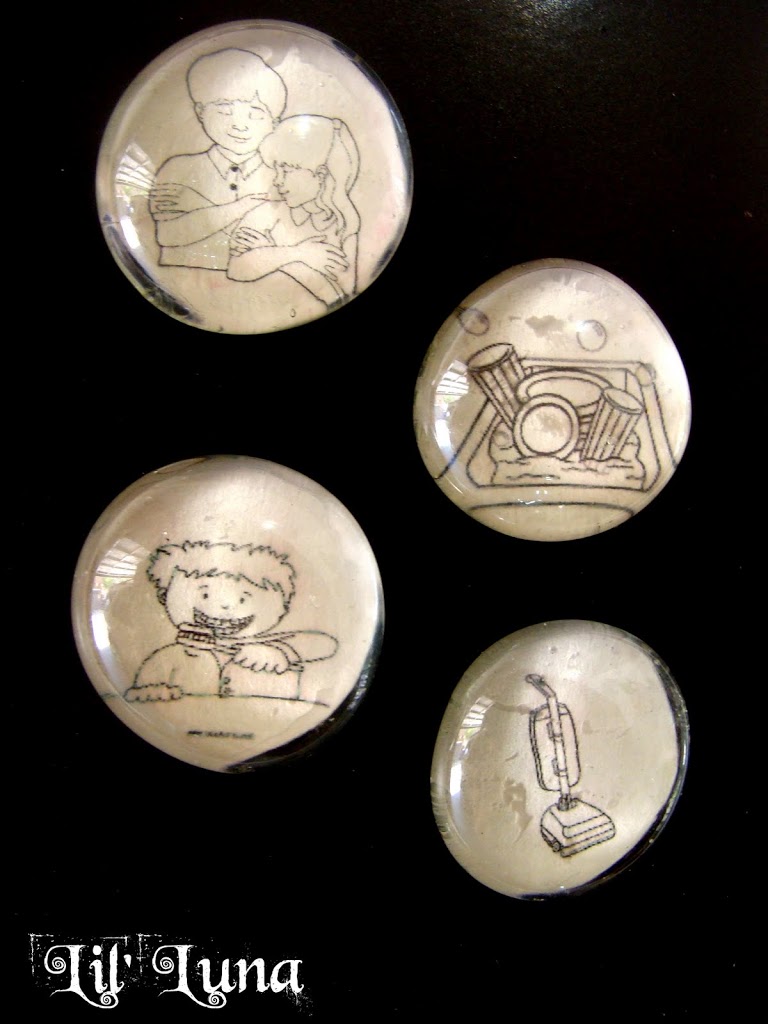
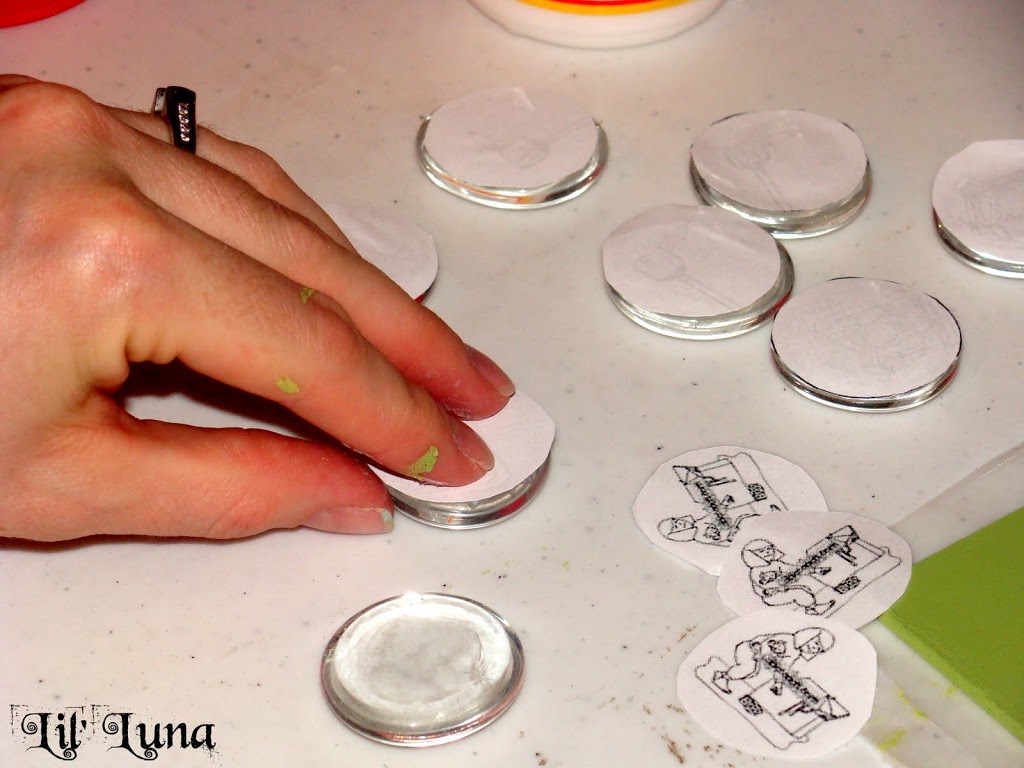
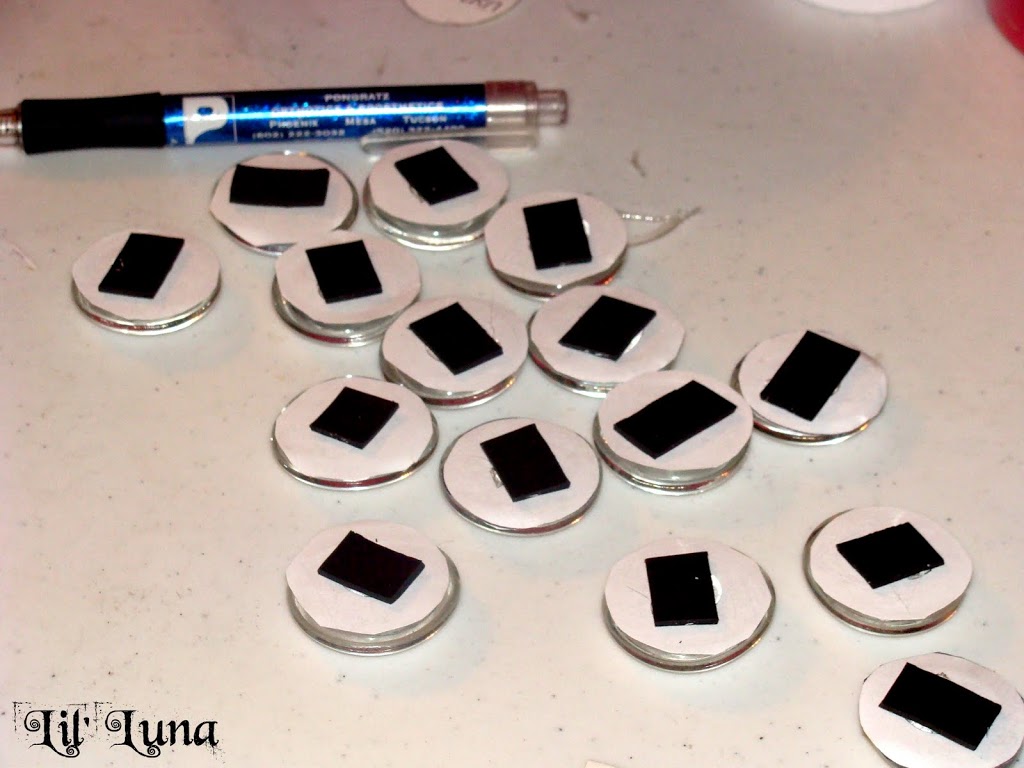
5. To make magnets you will need to cut circles around your chore clip art, and then mod podge them to the flat backs of the accent gems. Let dry. Once dry add magnet strip or small magnet to back.
6. When chipboard is dry, cut out your pattern from the back. You will then hot glue this to your piece of wood, making sure it is center. Also be sure to add hot glue to the chipboard piece and not the sheet metal because it will dry too fast to stick.
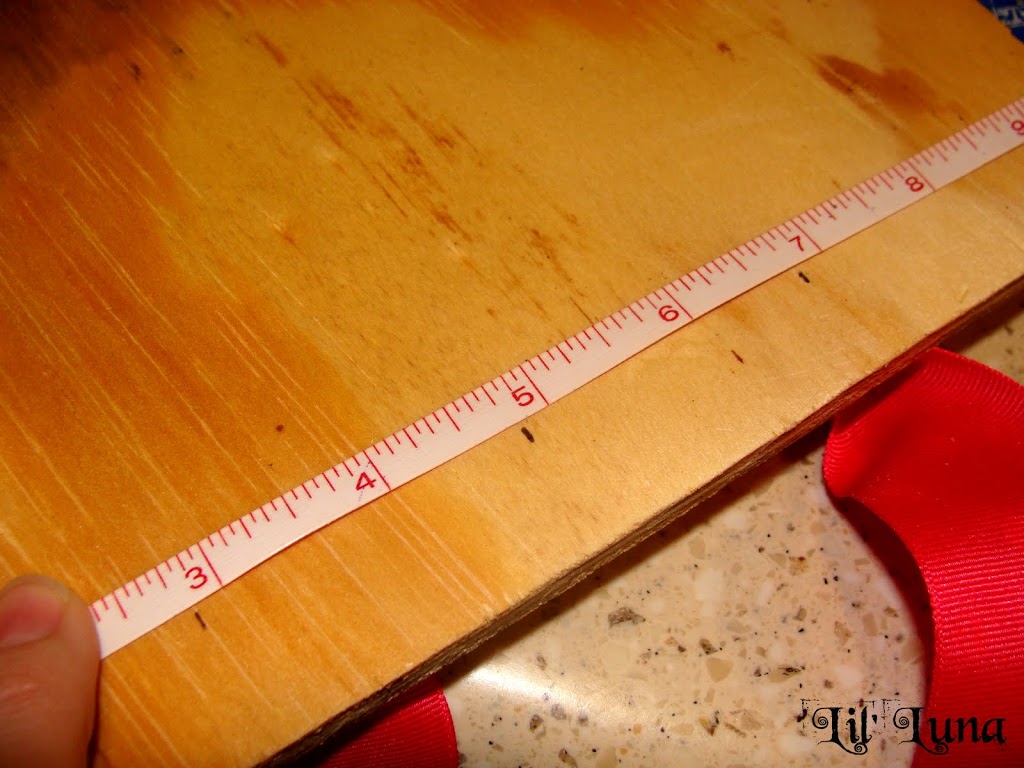

7. Add your ribbon to the back of your wood. I do this by turning the board over, marking the very center top, and then measure two inches on each side. Staple the ribbon on the 2 inch marks and tie a square knot (right over left, left over right).
8. When sheet metal is dry, hot glue this to your scrapbook paper/chipboard in the center. Be sure to hot glue the paper and not the back of the metal or the hot glue will dry before you can put them together.
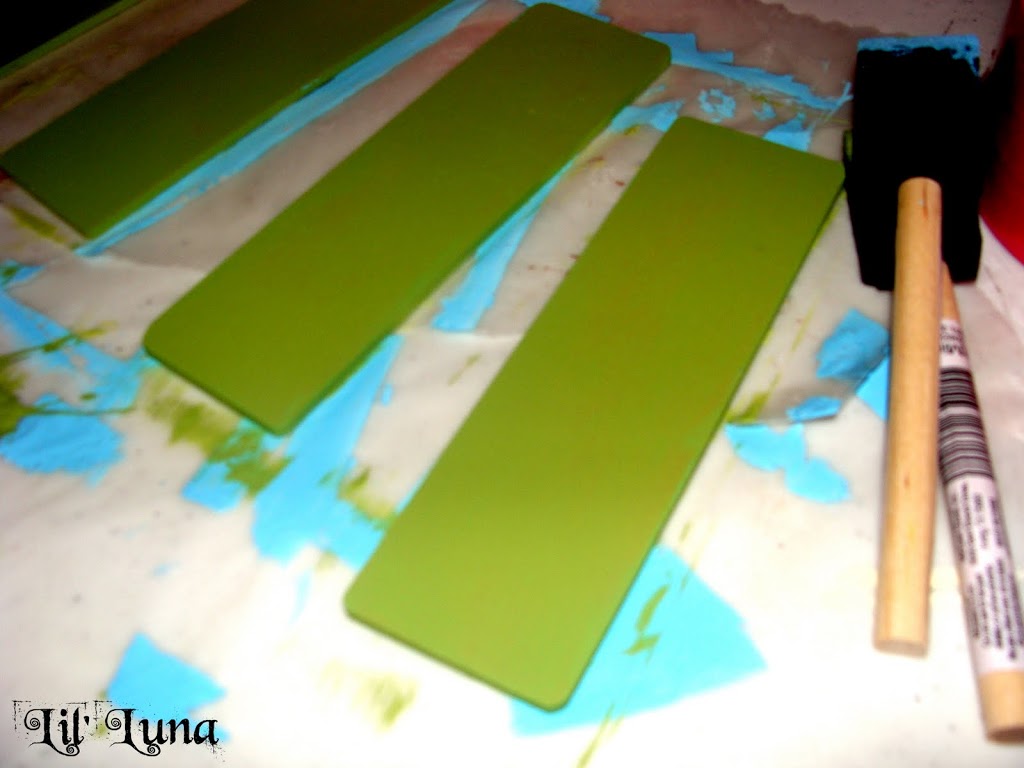
9. Paint wood blocks or wood rectangle where your child’s name will be. Let dry. Once dry add name to the blocks with vinyl or you can paint or stencil it on.
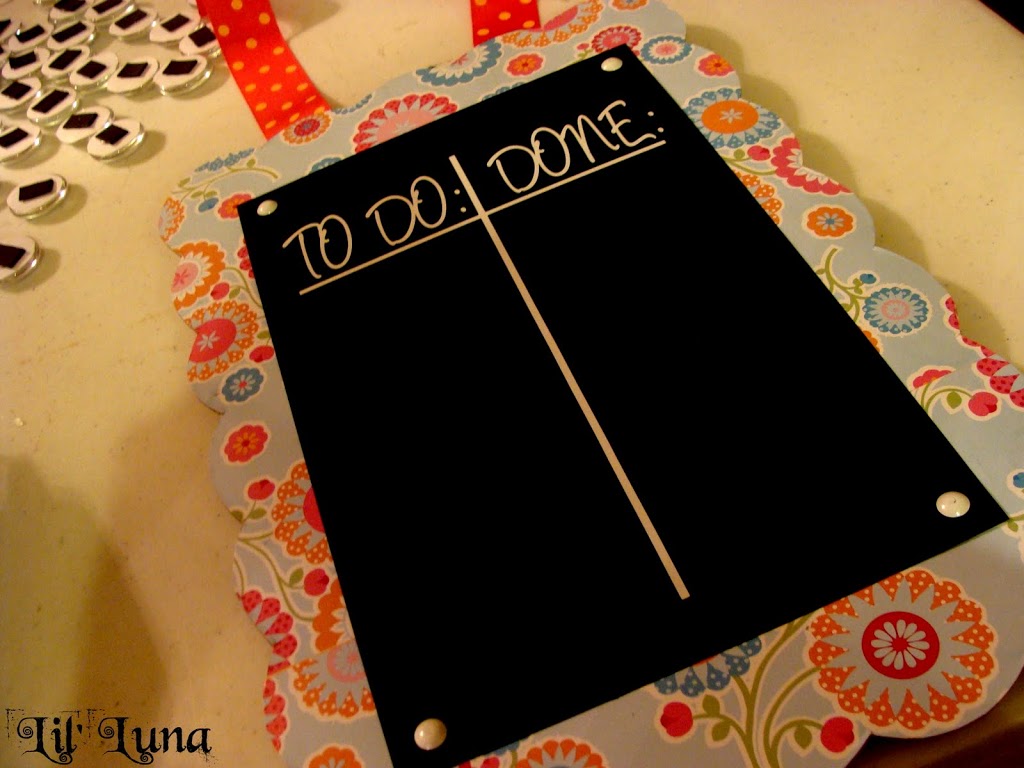
10. To make sure the sheet metal sticks well, add tacks to the four corners of the sheet metal.
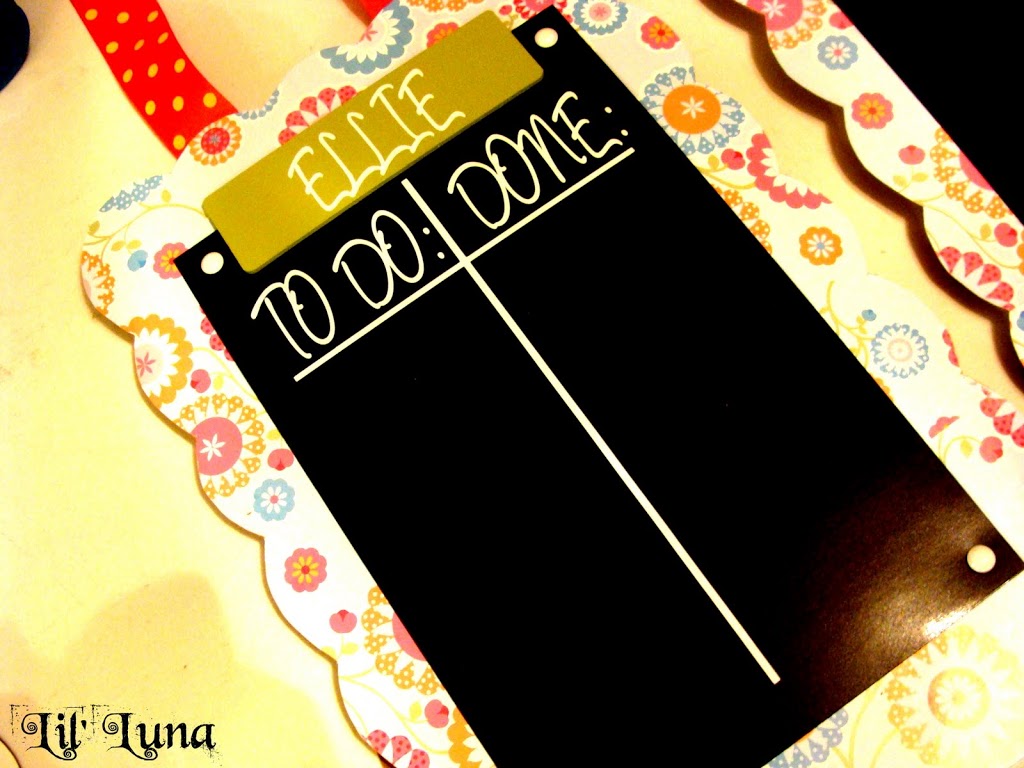
11. Hot glue name block(s) to the top center of your board.
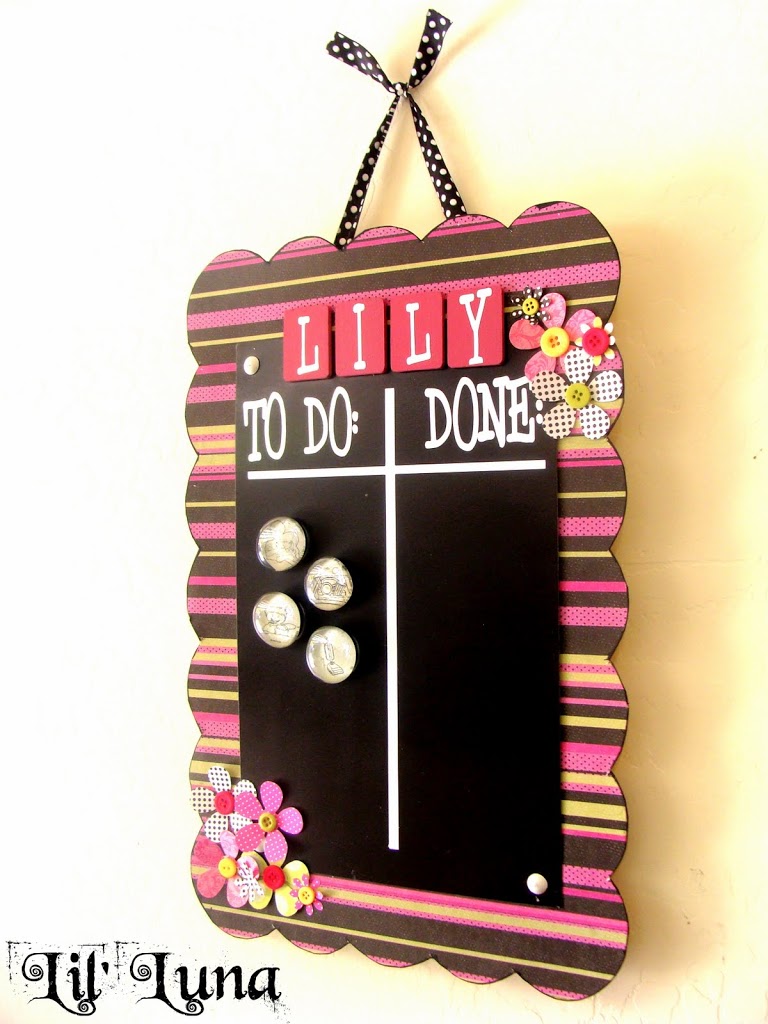
12. Add embellishments and magnets to your board. I added flowers using a flower punch and buttons. You can add anything you’d like from punches to scrapbook items, and you’re done. 🙂
What’s great is not only is it cute and inexpensive, but your child will love doing his chores when they know they can help move the magnets/pics to the other side of the chart!
AND it’s even cheaper if you make them in bulk or if you get your girlfriend’s together to make them. Gotta love it!!
ENJOY!


Very, very cute project!!!
XOXO
jen
That is fabulous! I love it.
So cute! Is it a special kind of tack you use with the metal? How do you get the tack through the metal?
That is a great idea! So cute!!
me encanto! esta genial!!!!
besos desde cordoba argentina!
rocio
I was just searching blogs for a chore chart idea for my son. I don’t know why I didn’t think to look here first! Thanks a lot!
Oh my gosh- this is the cutest chore chart! I love it! Thanks so much, I’ll be linking.
Just wanted to let you know this post was featured on babysmama.blogspot.com
Thanks!
What a cute project!!! I can use my magnets for that too!
So cute, and since I am just about to enter the world of kids old enough for chores, it should come in handy!
Great job Kristyn!
This is SO cute! Love this idea! Thanks for the tutorial!
-Jamielyn
http://iheartnaptime.blogspot.com/
This is so adorable! Love it!
What a great idea…I will be trying this with my 2 and a half yr. old. He won’t help with anything! Thanks for having it up!
I would love for you to check out my blog if you get a chance. I’m pretty new at this and would love so input!
What a fun idea- thanks for including the graphics!
This is a great way to not only get your child organized, but yourself as well! Instead of using pictures for yourself, you can use simple words like TRASH to take the garbage out or DISHES. You could even set priority levels to tasks by using different color gems!
YAY! I’m so glad I stopped by! I’ve been racking my brain for almost a YEAR thinking of a good chore chart.
THIS. IS. PERFECT.
This is really cute! What in the world is chipboard? Thanks!
I really like this! My daughter and I were trying to come up with ways to help her stay organized and I think this will do it!
What is expected daily will work great with this!
Perfect for any age! I think I should make one for me to help keep up with projects. LOL!
Thanks!
I hope I am not double commenting! I lost what I was trying to post earlier but, I want to say that this is great for any age. I will make my daughter one and me, too!
Thank you so much for sharing! Love it!
How do you cut chipboard?