U Create

It's a good day to create!

  • pinterest
  • facebook
  • instagram
  • twitter
  • rss
  • crafts
    • crochet/knit
    • jewelry
    • kids crafts
    • paper crafts
    • sewing
      • bags
      • boys-clothing
      • girls-clothing
      • women-clothing
      • pillows
      • quilts
  • home decor
    • bathroom
    • build it
    • frames
    • kids
    • kitchen
    • office
  • recipes
    • desserts
    • dinner
    • snacks
    • soups
  • parties
    • baby shower
    • birthday
    • games
    • gift wrapping
    • party decor
    • party favors
  • printables
  • holidays
    • Christmas
    • Easter
    • Father’s Day
    • Halloween
    • July 4th
    • Mother’s Day
    • New Years
    • St. Patrick’s Day
    • Thanksgiving
    • Valentine’s Day
  • gifts
    • baby
    • electronics
    • graduation
    • teacher gifts
  • About
  • Be My Guest
  • Advertise
  • Contact
  • pinterest
  • facebook
  • instagram
  • twitter
  • rss

6 Aug

Quilting Made Simple

How to Make a Quilt - from beginning to end!
 Hi friends! I’m Amy from Diary of a Quilter and I feel so honored to be hanging out at Ucreate today.
I started really sewing about 10 years ago after the birth of my first baby. I needed a creative outlet, as well as something that stayed done after I’d worked on it, as opposed to the dishes and laundry that managed to constantly need to be re-done.  Three more kids later, quilting is still that outlet for me. I used to feel like a bit of granny – okay I kind-of still do – and worried about people finding out about the fact that enjoy cutting up fabric and sewing it back together again. Thank heaven for the blog world – it has been so much fun to find many other young, hip quilters and sewers out in the world!
As you can already guess, this post is going to be about making a quilt!. I’ve recently talked to various people who want to try quilting but are feeling slightly overwhelmed about where to start, or how to even choose fabric.  So this project today is going to help you get over that fear.
This is an easy-peasy beginner quilt.  I made only 16 blocks for a baby quilt. It would be super easy to just make more blocks and make it into a throw or bed-size quilt.  I made this quilt with cute, big-print fabrics in mind.  In the past 5 or so years really big, graphic prints have become so popular and readily available.  Using those kind of prints, you can make a simple quilt and really let the fabric do all the design work.
Fabric Selection

So let’s start by talking about fabric selection.  For this quilt I knew there would be 16 blocks so I chose 16 different fabrics (because I’m kind of a fabric obsessed person.) But you could use as few as 6 or 7 different fabrics and have the design just as scrappy.  Most of the fabrics I used are from at new collection by Free Spirit called Nest by Valori Wells.
I chose 5 different colors for my quilt: Orange, pink, gray, green and white.  Make sure you get a balanced number of fabrics per color.  Notice that all my oranges aren’t the same shade, nor my greens. Having different shades of the same color will give your quilt a lot of depth. Fabrics colors that are too matchy-matchy (i.e. all the greens are the same shade) will make your quilt feel flat. [This isn’t necessarily bad – just depends on the look you are going for.]
Now let’s talk about pattern.  I mentioned earlier about all the wonderful big, graphic prints that are available right now. They are so fun to work with and make a really interesting quilt. But (and here’s the big but) if every print you use is all the same scale (size), your quilt will look out of control. There will be no place for your eye to rest and the beautiful big prints will just get lost.  What we need is contrast. Not only in color, but in scale.  So again, I divide my fabrics into groups by scale: Large, medium, and small. Above are my large scale prints.  Even though that scalloped stripe isn’t a large design motif on its own, the width between the stripes makes it a large scale print.
These are my ‘medium’ size prints. They are still busy and colorful like the large graphic prints, but the design repeats are closer together.

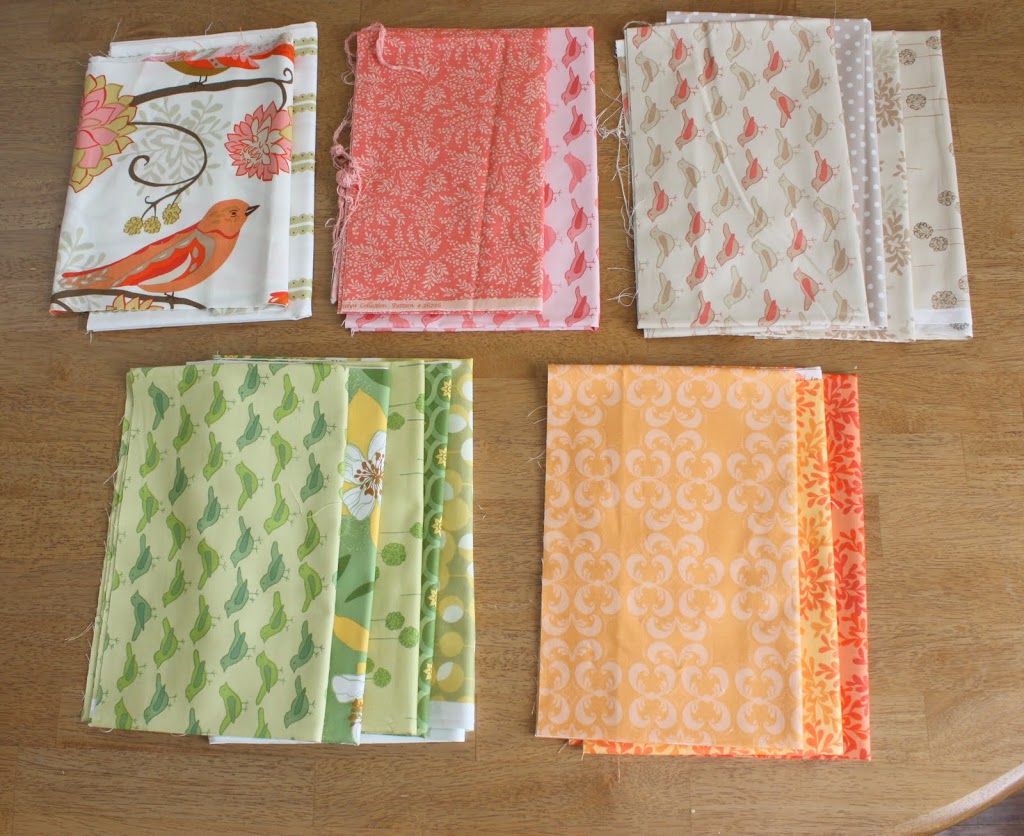
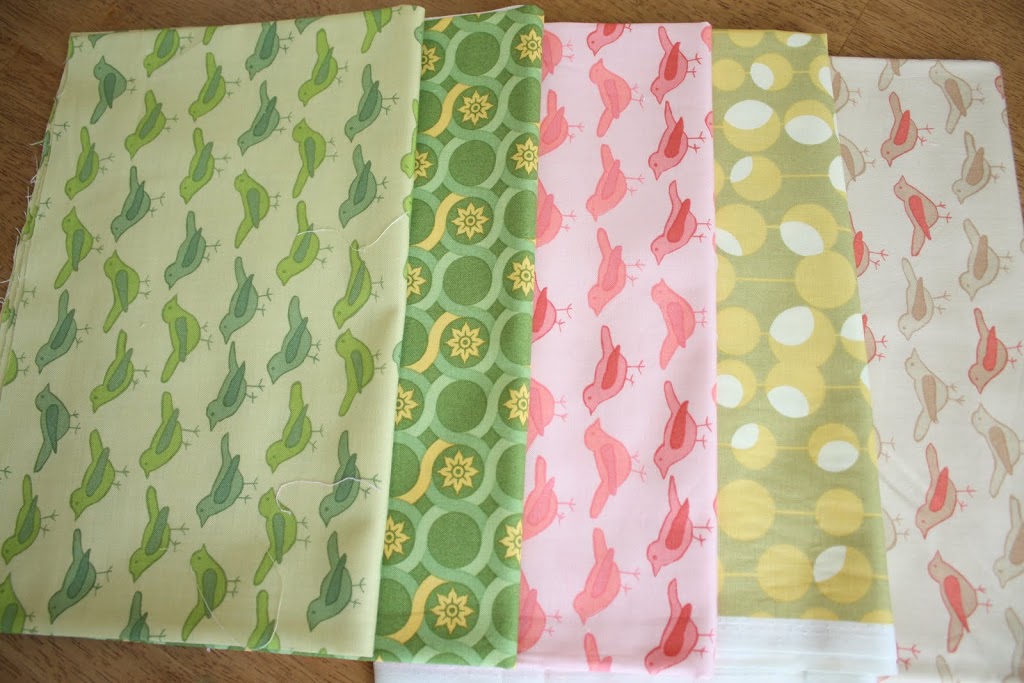
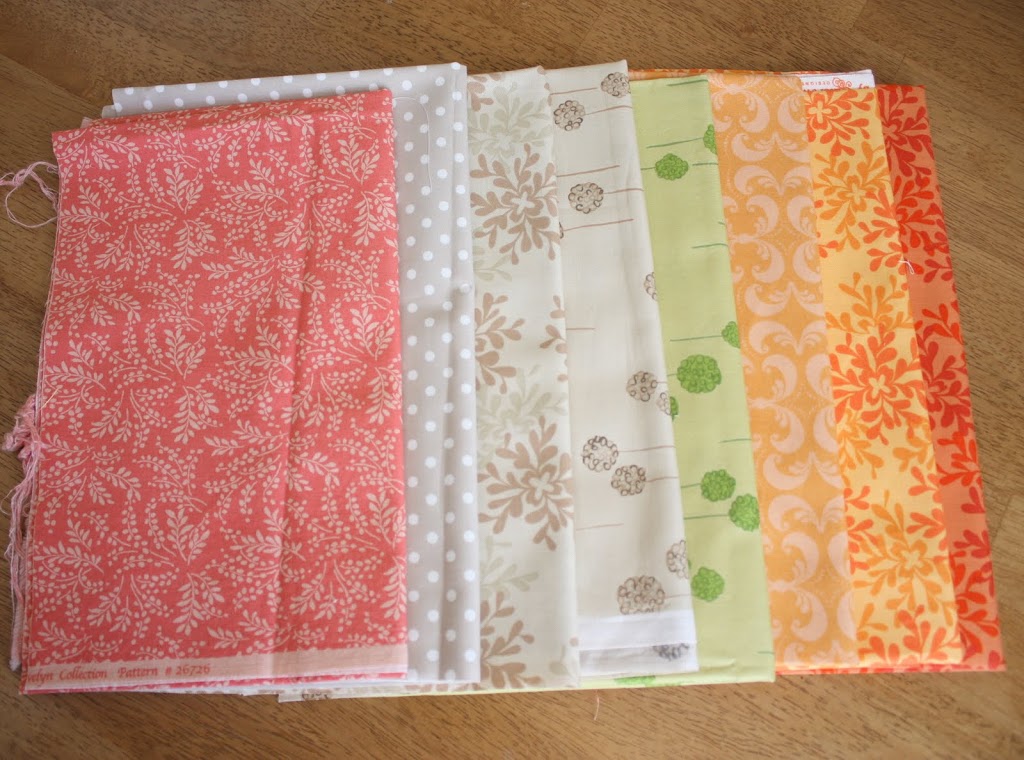
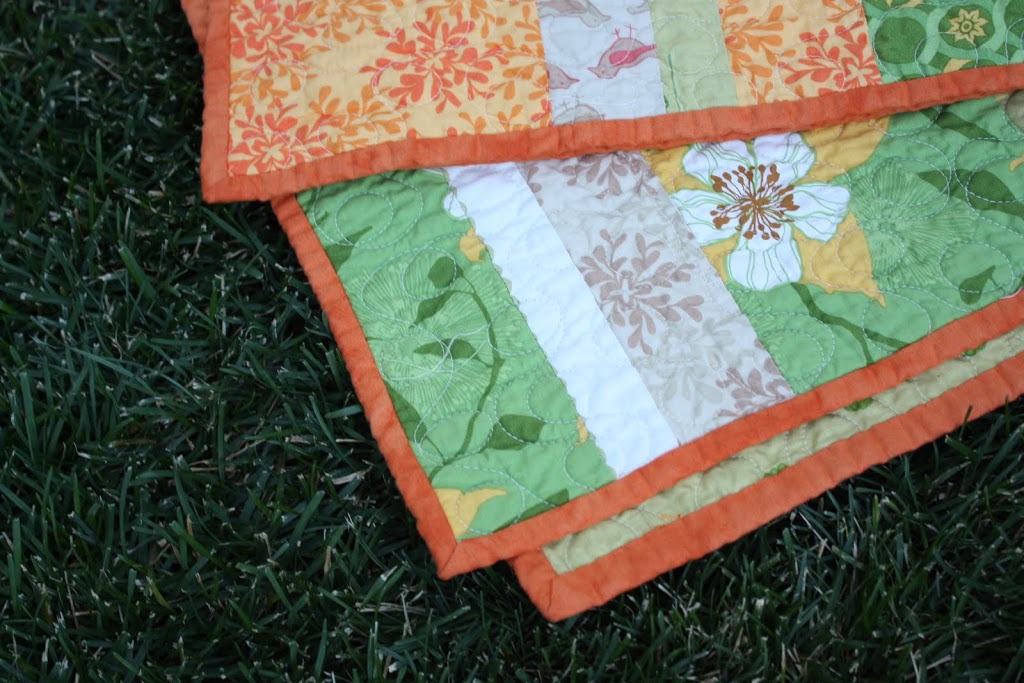
Here are my small prints.  These prints almost read solid.  They aren’t solid, but if you step back and squint your eyes they look like a solid color.  These prints provide the contrast of the busier large and medium size prints to really show them off.  They provide a place for your eye to rest.  You can use actual solids – which I sometimes like – but again, the design becomes more flat. With a small print ‘solid’ you get more ‘texture’ or interest to the quilt.

Making the Quilt
 Okay, now that we’ve discussed fabric, let’s make the quilt top!
For this quilt top you will need:
 Sixteen 11+” x 13″ rectangles
1 ¼ yard for backing
Four 21/2″ strips (x width of fabric) for binding 
(I say 11+” – like 11 ¼” – because if you cut your fabric slightly wider than 11″ you will have more room to ‘square-up’ at the end. But if you can still get by with 11″ if you’re careful.) Now, cut each block in the same way. Starting at the left, cut off a 3″ strip, a 1½” strip, a 2 ¼ ” strip and then leave the fat strip at the end.
You can easily stack and cut at least four blocks at a time and you’ll be done cutting everything for this quilt in no time.
Now, lay out all of your blocks, mixing and matching the 1 ½” and 2 ¼” strips. Stack each group together and  take them to your sewing machine.
Begin with your 3″ strip and put the 1½” strip on top, right-sides together. Sew the strips together using a consistent ¼” seam – usually the right side of the presser foot will work.  Here is one of the keys to quilting: Always use a consistent seam allowance. Makes everything match-up nicely.  You may have to go slow at first – and that’s okay. The more you do it, the faster and more naturally it will come.
Now sew the 2¼” strip and then the remaining large strip that is the same fabric as the first. Repeat for all 16 blocks.
Take all your blocks to the ironing board and press the seams all to one side. Then press from the top to make sure all seams are flat and clean.  (This is the second tip for neat looking quilts – don’t skip the pressing!)
Now take your nicely pressed blocks back to the cutting mat and trim the edges to create 11″ square blocks.
Lay out your blocks, rotating the stripe, until you get a design that is pleasing.
Pick up each row and sew the blocks together 4 across for each of the 4 rows.
When the rows are sewn together, you are going to press the new seams together, with the seams going in opposite directions for alternating rows. (This is going to make it easier to sew those rows together and those corners to match-up nicely.)
When you get ready to sew the rows together, pin the seams at the intersecting corners. Make sure the pressed-seams going in opposite directions but up against each other. This will help the corner to match perfectly and not be too bulky.  Sew rows together (again using that consistent ¼” seam allowance).  Press the finished quilt top from the top.
Voila! You have a simple quilt top finished that fast and easy.  You are free to quilt however you choose.  For some good machine quilting tutorials check Crazy Mom Quilts or A Quilt is Nice. I love how the quilting finishes a quilt – making it softer and giving it way more personality. AND I love how the quilting hides a lot of the flaws – of which I usually have many!
Binding the Quilt
When you are ready to bind your quilt (the fabric folded over the end of the quilt to cover your raw edges), I can help you with this Quilt Binding Tutorial.
Once again, it’s SO much easier than it looks. Your friends will be so impressed.

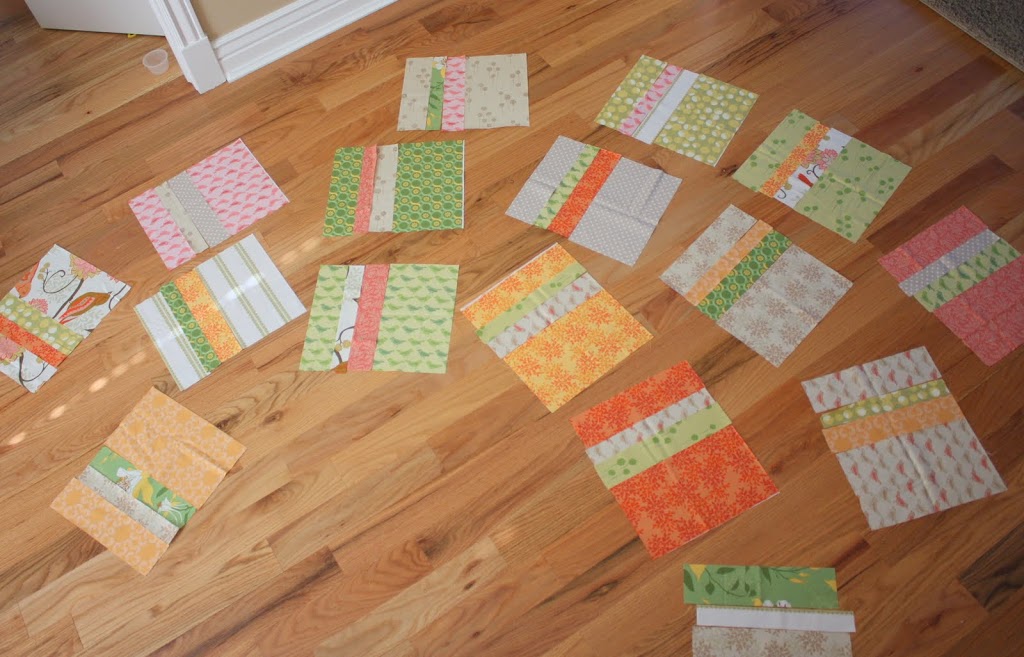
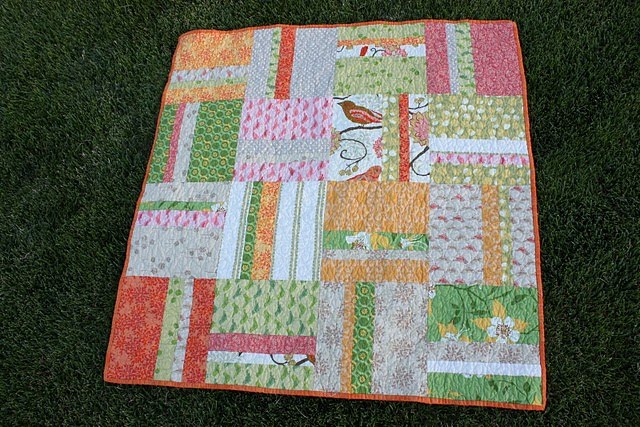
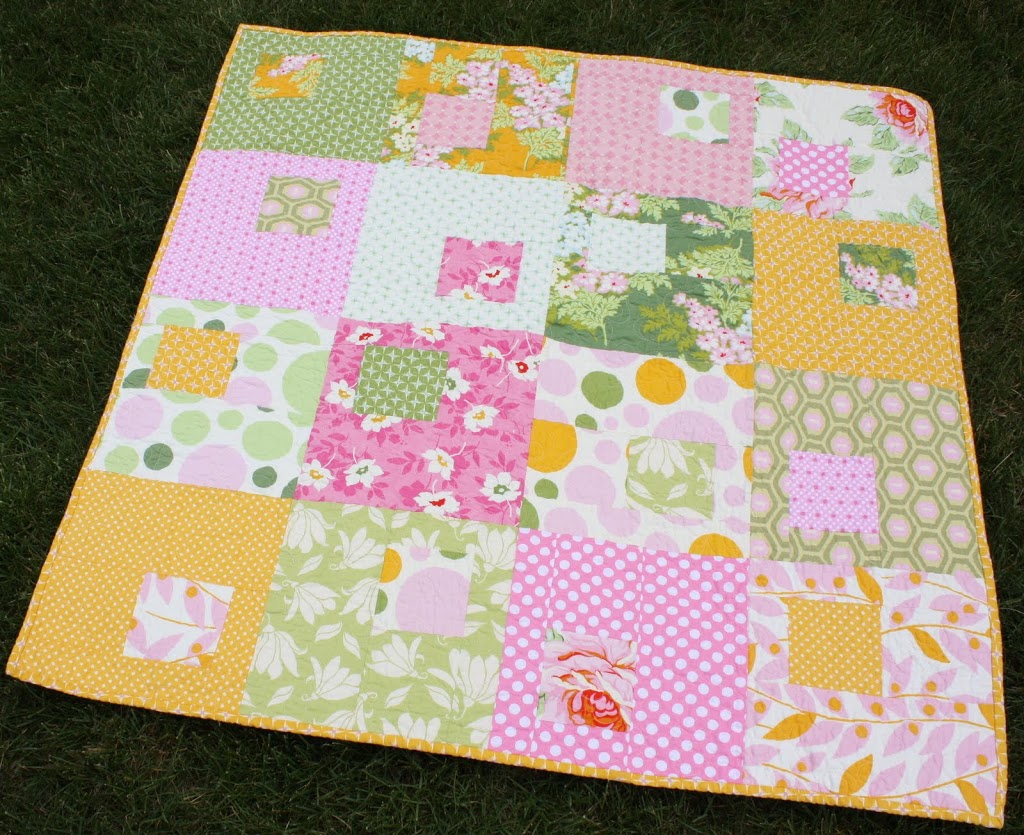
Here is another example of a quilt made with a very similar technique.  This quilt was made mostly from Heather Bailey’s Nicey Jane collection.  Notice the variation of print sizes: small, medium, and large as well as the color variation – i.e. not all the pinks are the same shade. This quilt comes from this Off-set Square Pattern tutorial.  Here is a picture of a quilt this style for boys.

I hope that some of this helps and gives you the courage to try making a quilt if it’s something that’s been too scary before. And don’t be afraid to finish with something less than perfect. That’s what gives quilts personality. 🙂
Thanks again, Kari, for inviting me to come hang out today. It has been a blast.

You may also like these

Sewing Sheets for Kids – PART TWO!One Hour Bindless Baby Blanket Tutorial1-Hour Bindless Baby Quilt10 Comfortable Mask TutorialsSewing Sheets for KidsMessenger Bag TutorialMessenger Bag Tutorial
Previous Post: The Pinwheel Skirt Tutorial
Next Post: Magnetic Chore Chart Tutorial

Comments

  1. Anna says

    August 6, 2010 at 3:23 PM

    this is great Amy! and thanks Kari for having her. I love that she talks about scale and contrast, it’s great especially for beginning quilters like me. 🙂

    reply to this comment >
  2. amy smart says

    August 6, 2010 at 5:49 PM

    How do you know I didn’t freak out? I totally freaked out. You just weren’t there to witness it. 🙂

    Thanks again, Kari. (And you other nice people.) You are all very kind.

    reply to this comment >
  3. Kara@ Creations by Kara says

    August 6, 2010 at 3:29 PM

    This is a great tutorial! Picking the fabric is always the hardest part for me. Love these tips!

    reply to this comment >
  4. Char @ Crap I've Made says

    August 6, 2010 at 3:43 PM

    Amy’s got some serious skillz!

    And, she didn’t even freak out when I told her that you and I wanted to come to her house and sew with her, Kari. He he he.

    reply to this comment >
  5. P. says

    August 6, 2010 at 6:05 PM

    This is awesome! Your instructions are great, Amy, and your quilt is just beautiful.

    reply to this comment >
  6. Jessica says

    August 6, 2010 at 7:25 PM

    I love quilting, it is such a great way to use up scraps of fabric from other crafting projects! Your designs are simple to follow and look lovely, thank you for inspiring me!

    reply to this comment >
  7. Tales From My Empty Nest says

    August 6, 2010 at 7:40 PM

    I love to quilt. Your fabrics are beautiful and the pattern is so pretty. Love & blessings from NC!

    reply to this comment >
  8. Anneliese says

    August 6, 2010 at 8:40 PM

    Such a great post! Thanks for sharing it. I just picked out fabrics for a baby-sized patchwork quilt and it was so much more difficult than I expected. I probably would have relaxed a bit about it if I’d read this first! Next time it will be easier.

    reply to this comment >
  9. Kim Walus says

    August 6, 2010 at 10:50 PM

    Congrats Amy on another wonderful tutorial. What a fun and simple quilt for those just starting out.

    reply to this comment >
  10. barneyn says

    August 7, 2010 at 3:03 AM

    beautiful!! thanks for sharing!!

    reply to this comment >
  11. Sena Çeyiz says

    August 7, 2010 at 7:54 AM

    Hi! very impressive. I really liked.
    Thank you for your detailed explanation.

    reply to this comment >
  12. CraftCrave says

    August 7, 2010 at 1:37 PM

    Just a quick note to let you know that a link to this post will be placed on CraftCrave today [07 Aug 11:00am GMT]. Thanks, Maria

    reply to this comment >
  13. Wendy says

    August 8, 2010 at 1:16 PM

    THIS is when I wish I knew how to thread my machine!

    reply to this comment >
  14. Rachel@oneprettything.com says

    August 9, 2010 at 4:30 PM

    Ooh this is great! Thanks for the detailed tutorial. I’ll be linking.

    reply to this comment >
  15. Jessica says

    August 22, 2010 at 2:17 AM

    Thank you for the help! I would love to see something about quilt binding! I’m working on completing my first quilt now and very afraid of the tears that will fall with binding and putting the batting in. 🙂

    reply to this comment >
  16. Amber says

    January 28, 2011 at 12:51 AM

    Hi! I am new to the sewing world and am going to attempt to make this quilt. Would it be okay if I used a serger instead of a sewing machine? I have both, I just find it easier to use the serger. Thanks!

    -Amber

    reply to this comment >
  17. My name is Julie and I am a paper addict. says

    February 11, 2011 at 3:41 PM

    Fabulous! I’m not much of a seamstress – can really only sew a straight line in an emergency situation – but this really is tempting to try.

    reply to this comment >
  18. Jen Allyson says

    August 20, 2011 at 9:12 PM

    Just started mine!!
    http://www.theprojectgirl.com/2011/08/20/adventures-in-quilting/

    reply to this comment >
  19. Juline says

    September 20, 2011 at 11:46 PM

    I just finished mine. Thanks for such a great tutorial!

    http://www.flickr.com/photos/julineb/6167296665/in/photostream

    reply to this comment >
  20. Anonymous says

    February 16, 2012 at 1:06 AM

    Wonderful. Where do you buy your fabrics? Especially the big, graphic prints? thanks!

    reply to this comment >
  21. Becky says

    April 21, 2012 at 12:40 PM

    What a wonderful quilt and great tutorial. I will put this on my to-do list. I also totally agree with your comments about quilting being an outlet… it keeps me sane when work and life events try to drive me crazy!!!!

    reply to this comment >
  22. ambercsnow says

    April 6, 2013 at 8:13 PM

    Just finished making this quilt out of the men and boys in our family’s dress shirts. It was the design I had been trying to create in my head. When I saw this it quickly came together. It is for our due any day grandson. There r shirts from great grandpa, grandpa , dad and uncles aunts and grandma.and even one if our grandsons baby quilt fabrics is included. I wish I could post a picture so u could see what u inspired. Thx so much for sharing your creative idea!!!!

    reply to this comment >
  23. Diane Wilcox says

    July 18, 2013 at 12:41 PM

    Love your design and will have to make it. The colors you picked are beautiful. That is my downfall…being able to pick colors. Trying to think out of the box but at times I do struggle. Glad I found your site, you will be able to help me. Thanks!!!!

    reply to this comment >
  24. Diane Wilcox says

    July 18, 2013 at 12:46 PM

    Love your design and will have to make it. The colors you picked are beautiful. That is my downfall…being able to pick colors. Trying to think out of the box but at times I do struggle. Glad I found your site, you will be able to help me. Thanks!!!!

    reply to this comment >
  25. Simple Simon and Company says

    October 25, 2013 at 4:04 PM

    Lovely Amy!

    reply to this comment >
  26. Jen says

    June 20, 2015 at 10:57 PM

    How much fabric would I need to make this quilt? Half yardages? Fat quarters? It’s a beautiful quilt!

    reply to this comment >
  27. Mattie says

    June 29, 2019 at 7:55 PM

    I going. To. Try it, this is my first quilt for my grandbaby. Think you so much.

    reply to this comment >

Leave a Comment Cancel reply

Your email address will not be published. Required fields are marked *

Recipe Rating


Popular Posts

New Year's Eve Minute to Win It games by U Create

New Year’s Eve Minute To Win It Games

Free Printable "Color Your Own" Christmas Banner

Merry Christmas Coloring Banner

Free Pattern: Fall Turkey by U Create

Fall Turkey Printable

Free Printable Pumpkin Games

Halloween Printable: Bugs and Kisses

Halloween Minute To Win It Games

  • pinterest
  • facebook
  • instagram
  • twitter
  • rss
 
Privacy Policy
Back to Top

Copyright © 2023 U-Create • All Rights Reserved • Site Design by Emily White Designs